


其实以前学过,不过过了很久没用突然要用到有点忘记了,所以写个博客再熟悉一下
官网
https://swagger.io/
使用流程
1.在项目的pom文件引入依赖
swagger2和swaggerui
以最新版为例
        <!-- https://mvnrepository.com/artifact/io.springfox/springfox-swagger-ui -->
        <dependency>
            <groupId>io.springfox</groupId>
            <artifactId>springfox-swagger-ui</artifactId>
            <version>3.0.0</version>
        </dependency>


        <!-- https://mvnrepository.com/artifact/io.springfox/springfox-swagger2 -->
        <dependency>
            <groupId>io.springfox</groupId>
            <artifactId>springfox-swagger2</artifactId>
            <version>3.0.0</version>
        </dependency>
		//没这个运行不了的
        <dependency>
            <groupId>io.springfox</groupId>
            <artifactId>springfox-boot-starter</artifactId>
            <version>3.0.0</version>
        </dependency>
2.创建一个config来配置且添加两个注解
@Configuration
//开启swagger
@EnableSwagger2
3.在启动类上添加注解
@EnableOpenApi
4.运行
http://localhost:8080/swagger-ui/index.html

这时候只是说你能用swagger了,现在要进行一些配置
@Configuration
//开启swagger
@EnableSwagger2
public class SwaggerConfig {

    //配置swagger的Docket的类实例
    @Bean
    public Docket docket(){
        return new Docket(DocumentationType.SWAGGER_2)
                .apiInfo(apiInfo());
    }

    //配置swagger信息=apiInfo
    private ApiInfo apiInfo(){

        //作者信息
        Contact contact = new Contact("Andrew","https://blog.csdn.net/Andrew0219","1052600676@qq.com");

        return new ApiInfo(
                "Andrew的swaggerAPI文档",
                "这只是个描述",
                "版本1.0",
                "https://blog.csdn.net/Andrew0219",
                contact,
                "Apache 2.0",
                "http://www.apache.org/licenses/LICENSE-2.0",
                new ArrayList());
    }

}
这时候主页已经被我们修改了

配置swagger运行在特定环境
可以多创建几个application,配置一下然后在SwaggerConfig里
//设置要显示的Swagger环境
Profiles profiles = Profiles.of( "dev" , "test" );
//通过environment.acceptsProfiles判断是否处在自己设定的环境当中boolean flag = environment.acceptsProfiles(profiles) ;
最后设置enable
return new Docket (DocumentationType.SWAGGER_2)
.apiInfo( apiInfo())
.enable(flag)//enable是否启动Swagge
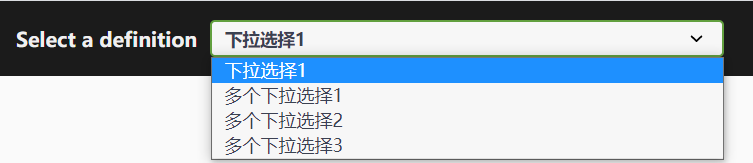
配置多个Docket实现多个选择实例
    //配置swagger的Docket的类实例
    @Bean
    public Docket docket2(){
        return new Docket(DocumentationType.SWAGGER_2)
                .groupName("多个下拉选择1");
    }
    //配置swagger的Docket的类实例
    @Bean
    public Docket docket3(){
        return new Docket(DocumentationType.SWAGGER_2)
                .groupName("多个下拉选择2");
    }
    //配置swagger的Docket的类实例
    @Bean
    public Docket docket4(){
        return new Docket(DocumentationType.SWAGGER_2)
                .groupName("多个下拉选择3");
    }
这时候就可以不同人做不同模块了
一些参数注释
实体类
@ApiModel("User实体类")
public class User {

    @ApiModelProperty("用户名")
    public String username;
    @ApiModelProperty("密码")
    public String password;
}
Controller
    @ApiOperation("这是加在方法上的注释")
    @PostMapping(value = "/hello2")
    public String hello2(@ApiParam("这是加在参数的注释--用户名")String username){
        return "hello2"+username;
    }


 1万+
1万+


 被折叠的 条评论
为什么被折叠?
被折叠的 条评论
为什么被折叠?
 到【灌水乐园】发言


