


前言
对于 Android 应用程序开发人员来说,用户界面是关键。
您的应用程序可能具有最先进的功能,但如果它包含在一个不吸引人的 UI 中,用户不太可能会停留足够长的时间来发现您的应用程序到底有多棒。
在这个项目中,我们将介绍以下内容:
- 线性布局
- 多屏设计
- 添加图片资源
- 应用程序可访问性
- 自定义 XML 样式
- 制作按钮
- 吐司通知
首先创建一个名为“QuizApp”的 Android 项目,并为空活动创建一个新活动。
定义一个线性布局
LinearLayout 是一种灵活的布局,它允许您组织 UI 元素之间的关系。此功能对于需要控制其 UI 组件的精确定位的开发人员特别有用。
<?xml version=”1.0” encoding=”utf-8”?>
<LinearLayout xmlns:android=”http://schmas.android.com/apk/res/android”
xmlns:app=”http://schemas.android.com/apk/res-auto”
xmlns:app=”http://schemas.android.com/tools”
android:layout_width=”match_parent”
android:layout_height=”match_parent”
多屏幕设计:背景图片:
在此处打开“res”文件夹,您可以添加要在应用屏幕中显示为背景的图像。

通过在您的测验应用程序中添加您想要的背景图像的 ID 来修改您的布局代码。
<?xml version=”1.0” encoding=”utf-8”?>
<LinearLayout xmlns:android=”http://schmas.android.com/apk/res/android”
xmlns:app=”http://schemas.android.com/apk/res-auto”
xmlns:app=”http://schemas.android.com/tools”
android:layout_width=”match_parent”
android:layout_height=”match_parent”
android:gravity=”center”
android:background=”@drawable/ic_bg”
android:orientation=”vertical”
Tools:context=”.MainActivity”
创建按钮:
在主活动文件中,您可以创建自己的按钮并为其指定一个 ID,以便您可以在项目中的任何位置访问它。
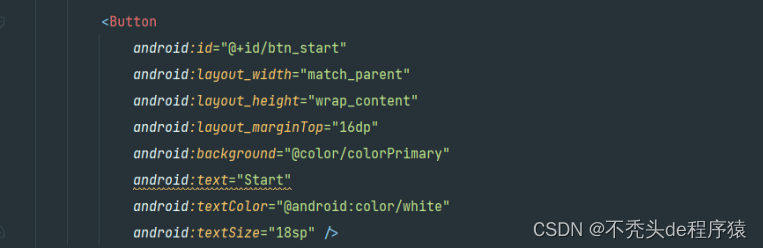
这是我正在使用的完整主布局代码:
<?xml version="1.0" encoding="utf-8"?>
<LinearLayout xmlns:android="http://schemas.android.com/apk/res/android"
    xmlns:app="http://schemas.android.com/apk/res-auto"
    xmlns:tools="http://schemas.android.com/tools"
    android:layout_width="match_parent"
    android:layout_height="match_parent"
    android:gravity="center"
    android:background="@drawable/ic_bg"
    android:orientation="vertical"
    tools:context=".MainActivity">

    <TextView
        android:id="@+id/tv_app_name"
        android:layout_width="match_parent"
        android:layout_height="wrap_content"
        android:layout_marginBottom="30dp"
        android:text="@string/app_name"
        android:gravity="center"
        android:textColor="@android:color/white"
        android:textSize="25sp"
        android:textStyle="bold" />

    <androidx.cardview.widget.CardView
        android:id="@+id/cv_main"
        android:layout_width="match_parent"
        android:layout_height="wrap_content"
        android:layout_marginStart="20dp"
        android:layout_marginEnd="20dp"
        android:background="@android:color/white"
        app:cardCornerRadius="8dp"
        app:cardElevation="5dp">

        <LinearLayout
            android:layout_width="match_parent"
            android:layout_height="wrap_content"
            android:orientation="vertical"
            android:padding="16dp">

            <TextView
                android:id="@+id/tv_title"
                android:layout_width="match_parent"
                android:layout_height="wrap_content"
                android:gravity="center"
                android:text="Welcome"
                android:textColor="#363A43"
                android:textSize="30sp"
                android:textStyle="bold" />

            <TextView
                android:id="@+id/tv_description"
                android:layout_width="match_parent"
                android:layout_height="wrap_content"
                android:gravity="center"
                android:layout_marginTop="16dp"
                android:text="Please enter your name."
                android:textColor="#7A8089"
                android:textSize="16sp" />

            <com.google.android.material.textfield.TextInputLayout
                android:id="@+id/til_name"
                style="@style/Widget.MaterialComponents.TextInputLayout.OutlinedBox"
                android:layout_width="match_parent"
                android:layout_height="wrap_content"
                android:layout_marginTop="20dp">

                <androidx.appcompat.widget.AppCompatEditText
                    android:id="@+id/et_name"
                    android:layout_width="match_parent"
                    android:layout_height="wrap_content"
                    android:imeOptions="actionGo"
                    android:hint="Name"
                    android:inputType="textCapWords"
                    android:textColor="#363A43"
                    android:textColorHint="#7A8089" />
            </com.google.android.material.textfield.TextInputLayout>

            <Button
                android:id="@+id/btn_start"
                android:layout_width="match_parent"
                android:layout_height="wrap_content"
                android:layout_marginTop="16dp"
                android:background="@color/colorPrimary"
                android:text="Start"
                android:textColor="@android:color/white"
                android:textSize="18sp" />
        </LinearLayout>
    </androidx.cardview.widget.CardView>
</LinearLayout>
向您的测验应用程序添加问题:
在布局选项卡下添加另一个.xml文件,以将带有问题的页面添加到您的测验中,并为它们提供相应的 ID,以便它们易于访问。

上面的图像代码状态为测验中显示的图片提供 id。
给出图片后,您现在必须继续并给出答案的选项数量。另外,创建提交按钮。
<TextView
android:id="@+id/tv_option_one"
android:layout_width="match_parent"
android:layout_height="wrap_content"
android:layout_margin="10dp"
android:background="@drawable/default_option_border_bg",
android:gravity="center"
android:padding="15 dp"
android:textcolor="#7A8089"
android:textSize="18sp"
tools:text="Apple"
重复上面的代码以获得尽可能多的选项。
在测验结束时制作一个最终提交按钮,然后转到 kotlin 文件以处理应用程序的功能。
编码 Kotlin 文件:
在此文件中,将 On Click Listener 设置为测验的开始按钮。
Kotlin 在点击监听器上
为您的 QuizApp 中显示的所有内容创建变量
package com.quizapp
data class Questions(
    val id: Int,
    val question: String,
    val image: Int,
    val optionOne: String,
    val option Two: String,
    val optionThree: String,
    val optionFour: String,
    val correctAnswer: Int
)
将 On Click Listener 设置为所有选项和最终提交按钮:
tv_option_one.setOnClickListener(this)
tv_option_two.setOnClickListener(this)
tv_option_three.setOnClickListener(this)
tv_option_four.setOnClickListener(this)
btn_submit.setOnClickListener(this)
最后使用 Android Studio 提供的模拟器运行应用程序。繁荣!你刚刚制作了你的第一个应用程序 😃
最后
通过这篇文章,您了解了 Android UI 设计的基本要素,并创建了一个简单而有效的 UI,并具有一些工作功能。尝试将其中一些技术应用到您自己的 Android 项目中,以确保您的 UI 不会让您的应用程序失望。


 2406
2406


 被折叠的 条评论
为什么被折叠?
被折叠的 条评论
为什么被折叠?
 到【灌水乐园】发言


