


项目代码地址
前端: https://gitee.com/chenfenbgin/vuedemo
后端和数据库建表sql: https://gitee.com/chenfenbgin/vuespringbootdemo
一、vue
1、概述: 前后端分离就是将一个单体应用拆分成两个独立的应用,前端应用和后端应用以JSON格式进行数据交互。

2、创建一个vue项目,只有vue3.0后才有图形界面
0 1. 使用 vue ui 命令 进入Vue项目管理器,创建一个vue工程,步骤如下图:


项目创建完用vscode打开就行了。vue就是一个单页面应用,
<template>
<div id="app">
<router-link to="/">Home</router-link>
<router-link to="/about">About</router-link>
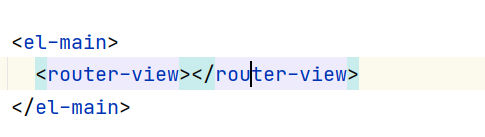
<router-view></router-view>
// <router-view>相当于一个窗口,我们在这个窗口中替换页面.就比如我们点击Home或者About都是在这个窗口中进行替换,而不是去加载了新的页面。
</div>
</template>
如何切换呢,通过to="/" 或者to="/about",然后怎么通过映射到真正的资源的呢。就是通过router/index.js进行设置的。代码如下:
import Vue from 'vue'
import VueRouter from 'vue-router'
import Home from '../views/Home.vue'
import About from '../views/About.vue'

Vue.use(VueRouter)

const routes = [
  {
    path: '/',
    name: 'Home',
    component: Home
  },
  {
    path: '/about',
    name: 'About',
    // route level code-splitting
    // this generates a separate chunk (about.[hash].js) for this route
    // which is lazy-loaded when the route is visited.
    component: () => import(/* webpackChunkName: "about" */ '../views/About.vue')
  },
]

const router = new VueRouter({
  mode: 'history',
  base: process.env.BASE_URL,
  routes
})

export default router
启动前端: npm run serve
二、创建后端工程
1.使用脚手架创建,,勾选如下依赖

创建完目录,
2.配置application.yml
spring:
  datasource:
    url: jdbc:mysql://localhost:3306/test?useUnicode=true&characterEncoding=UTF-8&serverTimezone=Asia/Shanghai
    username: root
    password: 123456
    driver-class-name: com.mysql.cj.jdbc.Driver
  # 如果把这个配置去掉,控制台是看不到sql语句的
  jpa:
    show-sql: true        # 打印sql
    properties:
      hibernate:
        format_sql: true # 格式化sql
server:
  port: 8181
三、前端vue页面
1.Book.vue
<template>
  <div>
    <table>
      <tr>
        <td>编号</td>
        <td>图书名称</td>
        <td>作者</td>
      </tr>
    <!--      <tr> 应该采用v-for循环去写-->
    <!--        <td>{{books[0].id}}</td>-->
    <!--        <td>{{books[0].name}}</td>-->
    <!--        <td>{{books[0].author}}</td>-->
    <!--      </tr>-->
      <tr v-for="book in books">
        <td>{{book.id}}</td>
        <td>{{book.name}}</td>
        <td>{{book.author}}</td>
      </tr>
    </table>
    {{msg}}
  </div>
</template>

<script>
  export default {
    name: "Book",
    // 前端不需要依赖于后端,可以造一些假数据,data(){return{}}是固定写法
    data(){
      return{
          msg: 'Hello Vue', //直接使用{{msg}}就可以展示
          books:[
            {
              id: 1,
              name: 'java成神之路',
              author: '程浩'
            },
            {
              id: 2,
              name: 'vue精通到放弃',
              author:'二狗'
            },
            {
              id: 3,
              name: 'python入门基础',
              author: '车封闭'
            }
          ]
      }
    },
    created() {
      const _this = this
      axios.get('http://localhost:8181/book/findAll').then(function(resp){
        // console.log(resp)
        _this.books = resp.data    //这里使用的this是回调函数里的
      })
    }
  }
</script>

<style scoped>

</style>
2.编写好Book.vue,我们要访问它,需要先配置路由
//   router/index.js下面引入Book.vue, 在配置映射
import Book from "../views/Book.vue";
  {
    path: '/book',
    name: "Book",
    component: Book
  }
路由完整代码如下:
import Vue from 'vue'
import VueRouter from 'vue-router'
import Home from '../views/Home.vue'
import About from '../views/About.vue'
import Book from "../views/Book.vue";

Vue.use(VueRouter)

const routes = [
  {
    path: '/',
    name: 'Home',
    component: Home
  },
  {
    path: '/about',
    name: 'About',
    component: () => import(/* webpackChunkName: "about" */ '../views/About.vue')
  },
  {
    path: '/book',
    name: "Book",
    component: Book
  }

]

const router = new VueRouter({
  mode: 'history',
  base: process.env.BASE_URL,
  routes
})

export default router
3.在data中添加假数据, 创建一个books:[{},{},]
data(){
  return{
      msg: 'Hello Vue',
      books:[
        {
          id: 1,
          name: 'java成神之路',
          author: '程浩'
        },
        {
          id: 2,
          name: 'vue精通到放弃',
          author:'二狗'
        },
        {
          id: 3,
          name: 'python入门基础',
          author: '车封闭'
        }
      ]
  }
},
4.然后我们需要将数据绑定到table,并且自动生成一个tr
<template>
  <div>
    <table>
      <tr>
        <td>编号</td>
        <td>图书名称</td>
        <td>作者</td>
      </tr>
    <!--      <tr> 应该采用v-for循环去写-->
    <!--        <td>{{books[0].id}}</td>-->
    <!--        <td>{{books[0].name}}</td>-->
    <!--        <td>{{books[0].author}}</td>-->
    <!--      </tr>-->
      <tr v-for ="book in books" :key="book.id">
        <td>{{book.id}}</td>
        <td>{{book.name}}</td>
        <td>{{book.author}}</td>
      </tr>
    </table>
    {{msg}}
  </div>
</template>
四、后端提供真实数据
1.我们访问数据库中的book表,怎么去访问,通过spring data jpa进行访问
2.创建实体类Book.java
package com.fengbin.vuespringbootdemo.entity;

import lombok.Data;

import javax.persistence.Entity;
import javax.persistence.GeneratedValue;
import javax.persistence.GenerationType;
import javax.persistence.Id;

@Entity     //通过这个注解将实体类和表名绑定在一起
@Data
public class Book {

    @Id
    @GeneratedValue(strategy = GenerationType.IDENTITY)
    private Integer id;
    private String name;
    private String author;
}
3.创建BookRepository接口
public interface BookRepository extends JpaRepository<Book,Integer> {
}
4.写完BookRepository,我们使用单元测试去测试接口

测试类如下:
package com.fengbin.vuespringbootdemo.repository;

import com.fengbin.vuespringbootdemo.entity.Book;
import org.junit.jupiter.api.Test;
import org.springframework.beans.factory.annotation.Autowired;
import org.springframework.boot.test.context.SpringBootTest;

import java.util.Optional;

@SpringBootTest // 测试类需要加上一个SpringbootTest注解
class BookRepositoryTest {

    @Autowired
    private BookRepository bookRepository;

    @Test
    void findAll(){
        System.out.println(bookRepository.findAll());
    }

    @Test
    void save(){
        Book book = new Book();
        book.setName("springboot入门");
        book.setAuthor("张三");
        Book save = bookRepository.save(book);
        System.out.println("save = " + save);
    }

    @Test
    void findById(){
        Optional<Book> optional = bookRepository.findById(1);
        if (optional.isPresent()){
            Book book = optional.get();
            System.out.println("book = " + book);
        }
    }

    @Test
    void update(){
        Book book = new Book();
        book.setId(111);
        book.setName("Vue成神之路");
        book.setAuthor("chenfengbin");
        Book save = bookRepository.save(book);
        System.out.println("save = " + save);
    }

    @Test
    void delete(){
        bookRepository.deleteById(121);
    }
}
5.测试通过,我们直接编写BookController
package com.fengbin.vuespringbootdemo.controller;

import com.fengbin.vuespringbootdemo.entity.Book;
import com.fengbin.vuespringbootdemo.repository.BookRepository;
import org.springframework.beans.factory.annotation.Autowired;
import org.springframework.data.domain.Page;
import org.springframework.data.domain.PageRequest;
import org.springframework.data.domain.Pageable;
import org.springframework.web.bind.annotation.*;


@RestController
@RequestMapping("/book")
public class BookController {

    @Autowired
    private BookRepository bookRepository;

    @GetMapping("/findAll/{page}/{size}")
    public Page<Book> findAll(@PathVariable("page") Integer page,@PathVariable("size") Integer size){
        Pageable pageable = PageRequest.of(page-1,size);
        return bookRepository.findAll(pageable);
    }
}
6.编写完成,直接启动springboot工程,然后再浏览器访问
http://localhost:8181/book/findAll/1/6,访问结果如下:

4、element使用
安装element插件,也可以使用命令行的方式。
当首页出现elemtent按钮,说明elment UI插件安装成功。


01、vue集成ElementUI, element UI后台管理系统主要的标签:
- el-container: 构建整个页面框架
- el-aside: 构建左侧菜单
- el-menu: 左侧菜单内容,常用属性:
:default-openeds: 默认展开的菜单,通过菜单的index值来关联
:default-active: 默认选中的菜单,通过菜单的index值来关联 - el-submenu: 可展开的菜单,常用属性:
index:菜单的下标,文本类型,不能是数值类型。 - template: 对应el-submenu 的菜单名。
- i: 设置菜单图标,通过class属性实则。
el-icon-messae
el-icon-menu
el-icon-setting - el-menu-item: 菜单的子节点,不可再展开,常用属性:
index:菜单的下标,文本类型,不能是数值类型。
02、Vue router 来动态构建左侧菜单
我们通过$router.options.routes动态读取出路由,代码如下:
$router.options.routes, $router.options取的其实是配置文件,然后我就在去里面的routes数组
<el-menu标签 遍历的是导航1和导航2; <el-menu-item标签遍历的是childrens里面的对象

<el-menu>
  <el-submenu v-for="item in $router.options.routes">
    <template slot="title"><i class="el-icon-message"></i>{{item.name}}</template>
    <el-menu-item v-for="item2 in item.children">
      <template slot="title"><i class="el-icon-message"></i>{{item2.name}}</template>
    </el-menu-item>
  </el-submenu>
</el-menu>

菜单menu与router的绑定
-
<el-menu 标签添加router属性,不需要等于谁,直接写router就行了。

-
在页面中添加<router-view标签,它是一个容器,动态渲染你选择的router。
-
<el-menu-item 标签的index值就是要跳转的router。就是有index值来决定的,index的值就是path了,即path: "/pageOne"
 ’
’ -
当我们初始化的时候,应该默认加载一个页面,比如页面1 呀。

-
设置浏览器值与页面相对应;我们之前是写死的,现在需要动态获取;我们可以用 $route.path 获取浏览器地址栏的值,等于这个值的时候,我们给它加上is-active的就行。


-
分页,检测拿到了第几页

页面初始化的时候,去请求后台的数据,在create(){}方法里面定义。
7.后端接口拿到了真实数据,我们只需要将它加载到前端页面就行了。它们使用的是axios对接。发送axios去请求8181端口把数据替换就行了 。
01、我们使用命令在控制台运行 vue-cli-plugin-axios 安装axios,会在plugins下出现一个axios.js目录

02、我们先在create()方法中写个alert()进行测试。
    created() {
      // alert(123)  页面一加载,就弹出123
      const _this = this
      axios.get('http://localhost:8181/book/findAll').then(function(resp){
        console.log(resp)
        _this.books = resp.data    //这里使用的this是回调函数里的
      })
    }
我们发送请求,会出现跨域问题,我们是在8080中去请求8181的数据。
03、跨域问题可以前端解决,也可以后端解决,我们后端解决,创建一个config包
  package com.fengbin.vuespringbootdemo.config;

import org.springframework.context.annotation.Configuration;
import org.springframework.web.servlet.config.annotation.CorsRegistry;
import org.springframework.web.servlet.config.annotation.WebMvcConfigurer;

/**
 * 跨域问题解决类,我们重写它的addCorsMappings方法\
 * 代码是固定的,使用复制就行了
 */

@Configuration
public class CrosConfig implements WebMvcConfigurer {

    @Override
    public void addCorsMappings(CorsRegistry registry) {
        registry.addMapping("/**")
                .allowedOriginPatterns("*")
                .allowedMethods("GET", "HEAD", "POST", "PUT", "DELETE", "OPTIONS")
                .allowCredentials(true)
                .maxAge(3600)
                .allowedHeaders("*");
    }
}
前端我们先打印到控制台,代码如下
  created() {
      axios.get('http://localhost:8181/book/findAll').then(function(resp){
        console.log(resp)
      })
    }
打印截图:
现在我只需要将data数据赋值给books就可以了
elemennt UI表单校验
定义rules对象,在rules对象中设置表单各个选项的选项的校验规则
rules: {
	name: [
	  { required: true, message: '图书名称不能为空', trigger: 'blur' }
	],
	author:[
	  { required: true, message: '作者不能为空', trigger: 'blur' }
	]
}
required: true, 是否为必填项
message:‘error’, 提示信息
trigger: ‘blur’, 触发事件
如下代码:首先数据绑定用的是:model,跟表单绑定;具体选项中用v-model绑定。绑完之后使用rules绑定表单,定义具体的规则,跟选项绑定是使用prop属性。
<template>
  <el-form style="width: 60%" :model="ruleForm" :rules="rules" ref="ruleForm" label-width="100px" class="demo-ruleForm">

    <el-form-item label="书籍名称" prop="name">
      <el-input v-model="ruleForm.name"></el-input>
    </el-form-item>

    <el-form-item label="作者" prop="author">
      <el-input v-model="ruleForm.author"></el-input>
    </el-form-item>

    <el-form-item>
      <el-button type="primary" @click="submitForm('ruleForm')">提交</el-button>
      <el-button @click="resetForm('ruleForm')">重置</el-button>
    </el-form-item>

  </el-form>
</template>

<script>
export default {
  data() {
    return {
      ruleForm: {
        name: '',
        author: ''
      },
      rules: {
        name: [
          { required: true, message: '图书名称不能为空', trigger: 'blur' }
        ],
        author:[
          { required: true, message: '作者不能为空', trigger: 'blur' }
        ]
      }
    };
  },
  methods: {
    submitForm(formName) {
      const _this = this
      this.$refs[formName].validate((valid) => {
      //这一句是特定的语法,判断每一项是否符合校验规则。如果valid=true,表示当前表单里面的数据全部通过校验了。也就是说,通过校验,我们将业务逻辑代码写在if后面就行了,然后else不执行任何逻辑代码也是可以的。
        if (valid) {
          axios.post('http://localhost:8181/book/save',this.ruleForm).then(function(resp){
            if(resp.data == 'success'){
              _this.$alert('《'+_this.ruleForm.name+'》添加成功!', '消息', {
                confirmButtonText: '确定',
                callback: action => {
                  _this.$router.push('/BookManage')
                }
              })
            }
          })
        } else {
          return false;
        }
      });
    },
    resetForm(formName) {
      this.$refs[formName].resetFields();
    }
  }
}
</script>
前端传json过来,我们需要加上@RequestBody才可以将json映射为Java对象。


 9万+
9万+


 被折叠的 条评论
为什么被折叠?
被折叠的 条评论
为什么被折叠?
 到【灌水乐园】发言


