


数据的格式化
-
步骤
-
1.在springmvc.xml中配置
<mvc:annotation-driven conversion-service="conversionService"></mvc:annotation-driven> -
2.在相应需要格式化的数据前加上格式化注解
//格式化
	@DateTimeFormat(pattern="yyyy-MM-dd")
	private Date birth;

	@NumberFormat(pattern="#,###,###.#")
	private Float salary;
-
-
原理
-
如果数据类型转化出错误,可以使用BindingResult来显示出错误信息
*

-
如果既想用 自定义类型转换器 又想用 注解形式的数据格式化 就要改变ConversionService的class属性


JSR303数据校验 指输入的数据需满足要求才行
-

-

-
步骤
-

-
1). 如何校验 ? 注解 ?
-
①. 使用 JSR 303 验证标准
-
②. 加入 hibernate validator 验证框架的 jar 包
- hibernate-validator-5.0.0.CR2.jar hibernate-validator-annotation-processor-5.0.0.CR2.jar
-
③. 在 SpringMVC 配置文件中添加 <mvc:annotation-driven />
-
④. 需要在 bean 的属性上添加对应的注解
-
@NotEmpty //不能为空 private String lastName; @Email //email格式 private String email; @Past //标识 输入的数据只能是之前的时间 @DateTimeFormat(pattern="yyyy-MM-dd")//格式化 private Date birth; -
还需要一步,找到apache下lib目录的el-api.jar并删除,并添加上hibernate validator 下的三个jar包
-
-
⑤. 在目标方法 bean 类型的前面添加 @Valid 注解
-
@RequestMapping(value="/emp", method=RequestMethod.POST)
	public String save(@Valid Employee employee, Errors result,
			Map<String, Object> map){
		System.out.println("save: " + employee);

		if(result.getErrorCount() > 0){
			System.out.println("出错了!");

			for(FieldError error:result.getFieldErrors()){
				System.out.println(error.getField() + ":" + error.getDefaultMessage());
			}

			//若验证出错, 则转向定制的页面
			map.put("departments", departmentDao.getDepartments());
			return "input";
		}

		employeeDao.save(employee);
		return "redirect:/emps";
	}
-
-
-
2). 验证出错转向到哪一个页面 ?
- 注意: 需校验的 Bean 对象和其绑定结果对象或错误对象时成对出现的,它们之间不允许声明其他的入参
需要注意
-


-
3). 错误消息 ? 如何显示,
-
错误消息显示到对应字段的后面
-
LastName:<form:input path="lastName"/>
<form:errors path="lastName"></form:errors>

Email: <form:input path="email"/>
<form:errors path="email"></form:errors>

Birth:<form:input path="birth"/>
<form:errors path="birth"></form:errors>
-
-
错误消息全部显示在一个位置,只需加上
<form:errors path="*"></form:errors>即可
-
-
4)如何把错误消息进行国际化
*

-

-
在src下新建一个i18n.properties文件,输入键值对
-
NotEmpty.employee.lastName=^^LastName\u4E0D\u80FD\u4E3A\u7A7A.
Email.employee.email=Email\u5730\u5740\u4E0D\u5408\u6CD5
Past.employee.birth=Birth\u4E0D\u80FD\u662F\u4E00\u4E2A\u5C06\u6765\u7684\u65F6\u95F4

typeMismatch.employee.birth=Birth\u4E0D\u662F\u4E00\u4E2A\u65E5\u671F\u3001
-
-
在springmvc.xml文件中进行配置
-
<!-- 配置国际化资源文件 -->
	<bean id="messageSource"
		class="org.springframework.context.support.ResourceBundleMessageSource">
		<property name="basename" value="i18n"></property>
	</bean>
-
-
显示效果
*

-

返回JSON
-
步骤
-
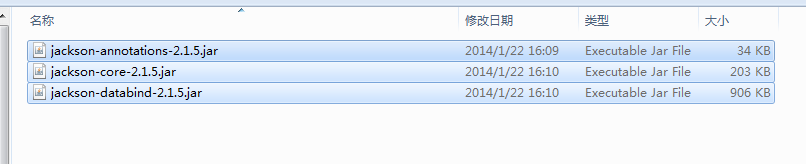
1.加入三个jar包
-
2.创建目标方法并加入@ResponseBody注解 在SpringMVCTest中加入方法
-
@ResponseBody
	@RequestMapping("/testJson")
	public Collection<Employee> testJson(){
		return employeeDao.getAll();
	}
-
-

-
-
测试 创建index.jsp并用jQuery来输出json字符串的employee对象
-
<script type="text/javascript"> $(function () { $('#testJson').click(function () { var url=this.href; var args={}; $.post(url,args,function(fata){ for(var i = 0; i < data.length; i++){ var id = data[i].id; var lastName = data[i].lastName; alert(id + ": " + lastName); } }); return false; }); }) </script> </head> <body> <a href="testJson">Test Json</a> </body> -

-
HttpMessageConverter原理

*
-

-

-
使用@RequestBody
-
在SpringMVCTest.java下新建一个方法
-
@ResponseBody
	@RequestMapping("/testHttpMessageConverter")
	public String testHttpMessageConverter(@RequestBody String body){
		System.out.println(body);
		return "helloworld! " + new Date();
	}
-
-
在index.jsp中 建一个表单
-
<form action="testHttpMessageConverter" method="POST" enctype="multipart/form-data">
		File: <input type="file" name="file"/>
		Desc: <input type="text" name="desc"/>
		<input type="submit" value="Submit"/>
</form>
-
-
读取文件 并在页面打印时间
-
-
使用ResponseEntity 在SpringMVCTest.java下新建一个方法 这个方法可以用来下载文件
-
@RequestMapping("/testResponseEntity")
	public ResponseEntity<byte[]> testResponseEntity(HttpSession session) throws IOException{
		byte [] body = null;
		ServletContext servletContext = session.getServletContext();
		InputStream in = servletContext.getResourceAsStream("/files/abc.txt");
		body = new byte[in.available()];
		in.read(body);

		HttpHeaders headers = new HttpHeaders();
		headers.add("Content-Disposition", "attachment;filename=abc.txt");

		HttpStatus statusCode = HttpStatus.OK;

		ResponseEntity<byte[]> response = new ResponseEntity<byte[]>(body, headers, statusCode);
		return response;
	}
-
-
在index.jsp下新建一个超链接 可以下载超链接指定的文件abc.txt
<a href="testResponseEntity">Test ResponseEntity</a>
-


*


 458
458


 被折叠的 条评论
为什么被折叠?
被折叠的 条评论
为什么被折叠?
 到【灌水乐园】发言


