


文章目录
前言
这里通过一个简单的Web界面模拟用户登录注册功能,对Mybatis和Servlet进行一个综合的练习。
- 使用Maven搭建项目
- 使用HTML编写简单的前端界面
- 使用Mybatis连接MySQL数据库并进行操作
- 通过Servlet对登录注册的请求做出响应
1、需求分析
1、环境准备
1.1、项目搭建
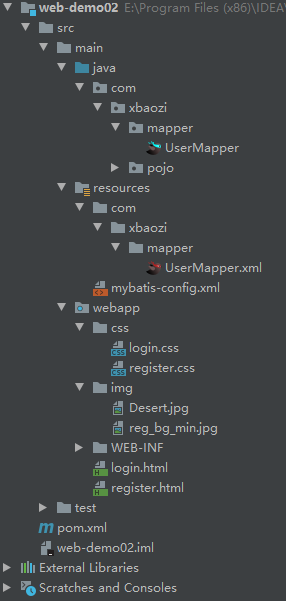
- 创建Web项目,这里是不使用骨架进行创建,具体步骤参考往期博客JavaWeb-IDEA利用Tomcat发布网站中的“不使用骨架搭建Web项目”

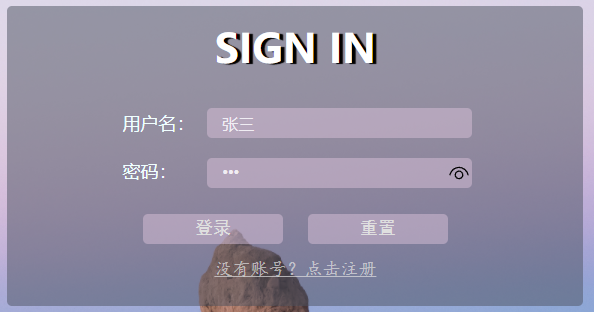
1.2、界面编写
- 在webapp下创建
login.html和register.html文件,并分别在其中编写登录界面和注册界面的代码
<!DOCTYPE html>
<html lang="en">
<head>
    <meta charset="UTF-8">
    <meta http-equiv="X-UA-Compatible" content="IE=edge">
    <meta name="viewport" content="width=device-width, initial-scale=1.0">
    <title>欢迎登录</title>
    <link rel="stylesheet" href="css/login.css">
</head>
<body>
    <div id="loginDiv">
        <form action="#" method="post" id="loginForm">
            <h1 id="loginMsg">SIGN IN</h1>
            <label for="username">
                <span>用户名:</span>
                <input type="text" name="username" id="username" placeholder="请输入用户名">
            </label>
            <br/>
            <label for="password">
                <span>密码:</span>
                <input type="password" name="password" id="password" placeholder="请输入密码">
            </label>
            <div id="subDiv">
                <input type="submit" class="button" value="登录">
                <input type="reset" class="button" value="重置">
                <br>
                <a href="register.html">没有账号?点击注册</a>
            </div>
        </form>
    </div>
</body>
</html>
<!DOCTYPE html>
<html lang="en">
<head>
    <meta charset="UTF-8">
    <meta http-equiv="X-UA-Compatible" content="IE=edge">
    <meta name="viewport" content="width=device-width, initial-scale=1.0">
    <title>欢迎注册</title>
    <link rel="stylesheet" href="css/register.css">
</head>
<body>
    <div id="registerDiv">
        <form action="#" method="post" id="registerForm">
            <h1 id="registerMsg">SIGN UP</h1>
            <span class="login">已有账号,去<a href="login.html">登录</a></span>
            <label for="username">
                <span>用户名:</span>
                <input type="text" name="username" id="username" placeholder="请输入用户名">
            </label>
            <br/>
            <label for="password">
                <span>密码:</span>
                <input type="password" name="password" id="password" placeholder="请输入密码">
            </label>
            <div id="subDiv">
                <input type="submit" class="button" value="注册">
            </div>
        </form>
    </div>
</body>
</html>
- 在webapp下的css文件夹下新建
login.css和register.css样式文件,并分别编写登陆和注册界面的样式
* {
    margin: 0;
    padding: 0;
    border: 0;
}
body,html{
    width: 100%;
    height: 100%;
}
body{
    margin: 0;
    padding: 0;
    background: url(../img/Desert.jpg) no-repeat center;
    background-size: cover;
}

#loginDiv {
    width: 30%;
    height: 300px;
    align-items: center;
    justify-content: center;
    position: absolute;
    top: 32%;
    left: 37%;
    background-color: rgba(75, 81, 95, 0.5);
    box-shadow: rgba(52, 56, 66, 0.5);
    border-radius: 5px;
}

#loginMsg {
    text-align: center;
    margin: 15px auto;
    font-size: 40px;
    color: #fff;
    padding-bottom: 10px;
    text-shadow: 4px 1px 1px #000;
}

label {
    margin-top: 30px;
    margin-left: 20%;
    color: azure;
}

span {
    font-size: large;
    display: inline-block;
    min-width: 80px;
}

input {
    height: 30px;
    width: 140px;
    border-radius: 5px;
    border-style: hidden;
    outline: none;
    color: #f0edf3;
    background-color: rgba(216, 191, 216, 0.5);
}

label>input {
    width: 250px;
    font-size: 16px;
    margin: 10px auto;
    padding-left: 15px;
}

#subDiv {
    text-align: center;
    margin: 10px auto;
    line-height: 40px;
}

#subDiv>input {
    font-size: large;
    color: rgb(223, 223, 223);
    font-family: "黑体", serif;
    margin: 5px 10px;
}

#subDiv>a {
    /* text-decoration: none; */
    margin-top: 10px;
    font-size: 18px;
    font-family: "楷体", serif;
    color: rgba(223, 223, 223, 0.7);
}
* {
    margin: 0;
    padding: 0;
    border: 0;
}
body,html{
    width: 100%;
    height: 100%;
}
body{
    margin: 0;
    padding: 0;
    background: url(../img/reg_bg_min.jpg) no-repeat center;
    background-size: cover;
}

#registerDiv {
    width: 25%;
    height: 400px;
    align-items: center;
    justify-content: center;
    position: absolute;
    top: 25%;
    left: 37%;
    background-color: rgba(75, 81, 95, 0.5);
    box-shadow: rgba(52, 56, 66, 0.5);
    border-radius: 5px;
}

#registerMsg {
    margin: 40px auto;
    margin-left: 10%;
    font-size: 40px;
    color: #fff;
    padding-bottom: 10px;
    text-shadow: 4px 1px 1px #000;
}

label {
    margin-left: 15%;
    color: azure;
    top: 50px;
}

span {
    font-size: large;
    display: inline-block;
    min-width: 80px;
    font-size: 19px;
    font-family: "楷体" serif;
}

input {
    height: 38px;
    width: 140px;
    border-radius: 5px;
    border-style: hidden;
    outline: none;
    color: #f0edf3;
    background-color: rgba(216, 191, 216, 0.5);
}

label>input {
    width: 250px;
    font-size: 16px;
    margin: 20px auto;
    padding-left: 15px;
}

#subDiv {
    text-align: center;
    margin: 10px auto;
}

#subDiv>input {
    font-size: large;
    color: rgb(223, 223, 223);
    font-family: "黑体", serif;
    margin: 5px 10px;
}

#subDiv>a {
    /* text-decoration: none; */
    margin-top: 10px;
    font-size: 18px;
    font-family: "楷体", serif;
    color: rgba(223, 223, 223, 0.7);
}

.login {
    position: absolute;
    display: inline-block;
    top: 95px;
    margin-left: 10%;
    color: rgba(223, 223, 223, 0.7);
    font-size: 18px;
    font-family: "楷体", serif;
}
.login>a {
    color: rgba(223, 223, 223, 0.7);
}

input::placeholder {
    color: rgb(227, 222, 231, 0.7);
}

1.3、数据库搭建
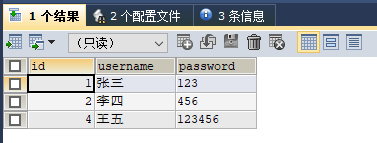
打开MySQL服务,创建db1数据库,并在该数据库下创建tb_user表,同时插入两条测试数据
CREATE DATABASE db1 DEFAULT CHARACTER SET utf8 COLLATE utf8_general_ci;

USE db1;

CREATE TABLE tb_user (
	id INT PRIMARY KEY AUTO_INCREMENT,
	username VARCHAR(20) UNIQUE,
	`password` VARCHAR(20)
);

INSERT tb_user(username, `password`)
VALUES('张三', '123');

INSERT tb_user(username, `password`)
VALUES('李四', '456');

SELECT * FROM tb_user;
1.4、实体类创建
在java.com.xbaozi.pojo目录下创建与数据库对应的实体类User
private Integer id;
private String username;
private String password;

// 忽略了get/set和toString方法
1.5、导入依赖并编写配置文件
在项目的pom.xml导入对应的驱动坐标和Tomcat插件,并且创建mybatis-config.xml核心配置文件、UserMapper.xml映射文件
<dependencies>
    <!-- mybatis依赖 -->
    <dependency>
        <groupId>org.mybatis</groupId>
        <artifactId>mybatis</artifactId>
        <version>3.5.5</version>
    </dependency>
    <!-- mysql依赖 -->
    <dependency>
        <groupId>mysql</groupId>
        <artifactId>mysql-connector-java</artifactId>
        <version>5.1.47</version>
    </dependency>
    <!-- 导入servlet依赖 -->
    <dependency>
        <groupId>javax.servlet</groupId>
        <artifactId>javax.servlet-api</artifactId>
        <version>3.1.0</version>
        <scope>provided</scope>
    </dependency>
    <dependency>
        <groupId>commons-io</groupId>
        <artifactId>commons-io</artifactId>
        <version>2.6</version>
    </dependency>
</dependencies>
<build>
    <plugins>
        <plugin>
            <groupId>org.apache.tomcat.maven</groupId>
            <artifactId>tomcat7-maven-plugin</artifactId>
            <version>2.2</version>
        </plugin>
    </plugins>
</build>
<?xml version="1.0" encoding="UTF-8" ?>
<!DOCTYPE configuration
PUBLIC "-//mybatis.org//DTD Config 3.0//EN"
"http://mybatis.org/dtd/mybatis-3-config.dtd">
<configuration>
<!-- 为pojo包起别名 -->
<typeAliases>
<package name="com.xbaozi.pojo"/>
</typeAliases>
<!-- 环境配置 -->
<environments default="development">
<environment id="development">
<transactionManager type="JDBC"/>
<dataSource type="POOLED">
<!--数据库连接信息-->
<property name="driver" value="com.mysql.jdbc.Driver"/>
<property name="url"
value="jdbc:mysql:///db1?useSSL=false&useUnicode=true&characterEncoding=utf8&useServerPrepStmts=true"/>
<property name="username" value="root"/>
<property name="password" value="123456"/>
</dataSource>
</environment>
</environments>
<mappers>
<!-- Mapper代理方式 -->
<package name="com.xbaozi.mapper"/>
</mappers>
</configuration>
<?xml version="1.0" encoding="UTF-8" ?>
<!DOCTYPE mapper PUBLIC "-//mybatis.org//DTD Mapper 3.0//EN" "http://mybatis.org/dtd/mybatis-3-mapper.dtd">
<mapper namespace="com.xbaozi.mapper.BrandMapper">

</mapper>
2、登录实现
2.1、需求分析
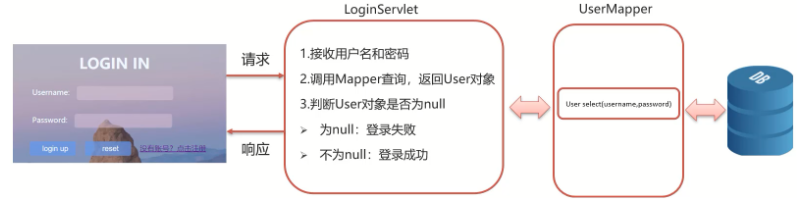
- 用户在登录页面输入用户名和密码,提交请求给LoginServlet
- 在LoginServlet中接收请求和数据[用户名和密码]
- 在LoginServlt中通过Mybatis实现调用UserMapper来根据用户名和密码查询数据库表
- 将查询的结果封装到User对象中进行返回
- 在LoginServlet中判断返回的User对象是否为null
- 如果为nul,说明根据用户名和密码没有查询到用户,则登录失败,返回"登录失败"数据给前端
- 如果不为null,则说明用户存在并且密码正确,则登录成功,返回"登录成功"数据给前端
2.2、代码实现
- 在UserMapper接口中提供一个根据用户名和密码查询用户对象的方法。@Param注解的作用:用于传递参数,是方法的参数可以与SQL中的字段名相对应。
 /**
  * 通过用户名和密码实现用户登录
  * @param username 用户名
  * @param password 密码
  * @return 返回一个用户类型的参数。若返回是空则用户名或密码错误,否则登录成功
  * @description 通过用户名和密码实现用户登录
  * @author xBaozi
  * @date 19:35 2022/1/27
  **/
 @Select("select * from tb_user where username = #{username} and password = #{password}")
 User select(@Param("username") String username, @Param("password") String password);
- 编写LoginServlet
/**
* 登录的Servlet类
* @author xBaozi
* @version 1.0
* @className LoginServlet
* @description 登录的Servlet类
* @date 2022/1/27 19:42
*/
@WebServlet(urlPatterns = "/loginServlet")
public class LoginServlet extends javax.servlet.http.HttpServlet {
@Override
protected void doPost(javax.servlet.http.HttpServletRequest request, javax.servlet.http.HttpServletResponse response) throws javax.servlet.ServletException, IOException {
// 1. 接受用户名和密码
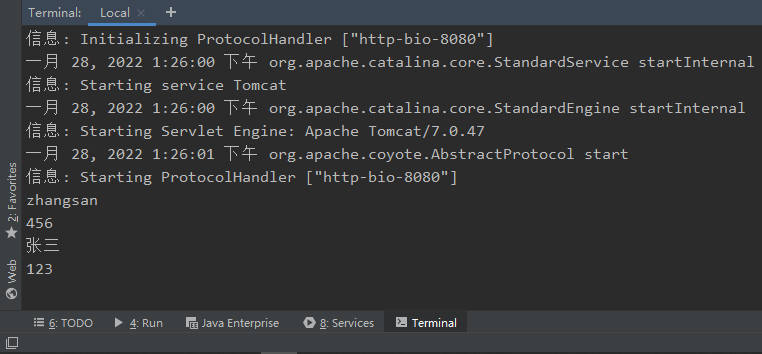
String username = request.getParameter("username");
String password = request.getParameter("password");
// 避免username存在中文出现乱码现象
username = new String(username.getBytes(StandardCharsets.ISO_8859_1), StandardCharsets.UTF_8);
// 2. 加载mybatis的核心配置文件,获取SqlSessionFactory对象
String resource = "mybatis-config.xml";
InputStream inputStream = Resources.getResourceAsStream(resource);
SqlSessionFactory sqlSessionFactory = new SqlSessionFactoryBuilder().build(inputStream);
// 3. 获取SqlSession对象
SqlSession sqlSession = sqlSessionFactory.openSession();
// 4. 获取Mapper
UserMapper mapper = sqlSession.getMapper(UserMapper.class);
// 5. 调用方法
User user = mapper.select(username, password);
// 6. 释放资源
sqlSession.close();
// 7. 获取字符输出流并设置content type
response.setContentType("text/html;charset=utf-8");
PrintWriter writer = response.getWriter();
// 8. 判断是否登录成功
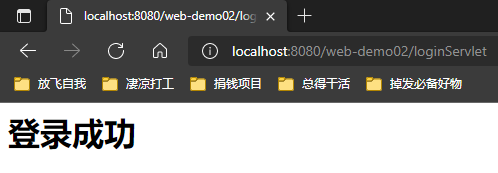
if (user != null) {
writer.write("<h1>登录成功</h1>");
} else {
writer.write("<h1>登录失败</h1>");
}
}
@Override
protected void doGet(javax.servlet.http.HttpServletRequest request, javax.servlet.http.HttpServletResponse response) throws javax.servlet.ServletException, IOException {
this.doPost(request, response);
}
}
- 修改
login.html中表单的action为/web-demo02/loginServlet
<form action="${pageContext.request.contextPath}/web-demo02/loginServlet" method="post" id="loginForm">
            <h1 id="loginMsg">SIGN IN</h1>
            <label for="username">
                <span>用户名:</span>
                <input type="text" name="username" id="username" placeholder="请输入用户名">
            </label>
            <br/>
            <label for="password">
                <span>密码:</span>
                <input type="password" name="password" id="password" placeholder="请输入密码">
            </label>
            <div id="subDiv">
                <input type="submit" class="button" value="登录">
                <input type="reset" class="button" value="重置">
                <br>
                <a href="register.html">没有账号?点击注册</a>
            </div>
        </form>
2.3、结果演示
- 账号密码错误情况
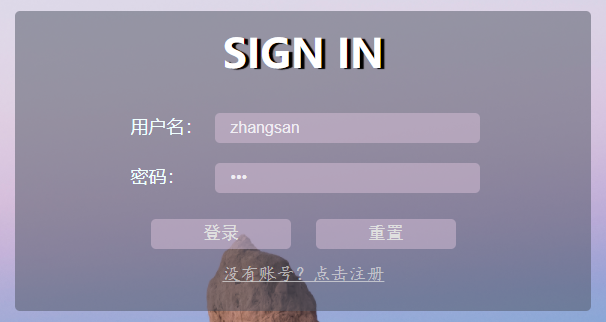

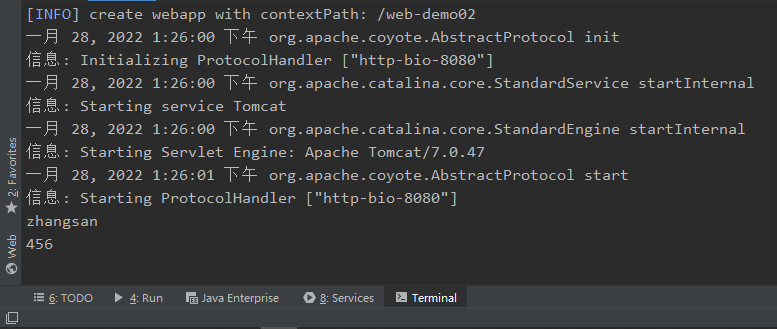
- 账号密码正确
3、注册实现
3.1、需求分析
- 用户在注册页面输入用户名和密码,提交请求给RegisterServlet
- 在RegisterServlet中接收请求和数据,即用户名和密码
- 在RegisterServlet中通过Mybatis实现调用UserMapper来根据用户名查询数据库表
- 将查询的结果封装到User对象中进行返回
- 在RegisterServlet中判断返回的User对象是否为null
- 如果为null,说明根据用户名可用,则调用UserMapper来实现添加用户
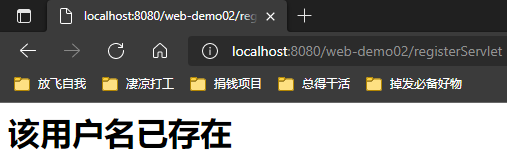
- 如果不为null,则说明用户不可以,返回"用户名已存在"数据给前端
3.2、代码实现
- 编写UserMapper提供根据用户名查询用户数据方法和添加用户方法
/**
 * 通过用户名实现用户的查询
 * @description 通过用户名实现用户的查询
 * @author xBaozi
 * @date 13:34 2022/1/28
 * @param username  需要查询的用户名
 * @return          返回一个用户类型的参数。若返回是空则用户名可以注册创建,否则用户名已存在
 **/
@Select("select * from tb_user where username = #{username}")
User selectByUsername(String username);

/**
 * 往数据库中插入数据
 * @description 往数据库中插入数据
 * @author xBaozi
 * @date 13:40 2022/1/28
 * @param user  需要插入的user对象
 **/
@Insert("insert tb_user(`username`, `password`) values(#{username}, #{password})")
void add(User user);
- 编写RegisterServlet类
@WebServlet(urlPatterns = "/registerServlet")
public class RegisterServlet extends HttpServlet {
@Override
protected void doPost(HttpServletRequest request, HttpServletResponse response) throws ServletException, IOException {
// 1. 获取用户名和密码
String username = request.getParameter("username");
String password = request.getParameter("password");
username = new String(username.getBytes(StandardCharsets.ISO_8859_1), StandardCharsets.UTF_8);
// 2. 加载mybatis的核心配置文件,获取SqlSessionFactory对象
String resource = "mybatis-config.xml";
InputStream is = Resources.getResourceAsStream(resource);
SqlSessionFactory sqlSessionFactory = new SqlSessionFactoryBuilder().build(is);
// 3. 获取SqlSession对象
SqlSession sqlSession = sqlSessionFactory.openSession();
// 4. 获取Mapper对象
UserMapper mapper = sqlSession.getMapper(UserMapper.class);
// 5. 调用方法
User user = mapper.selectByUsername(username);
// 6. 获取字符输出流并设置content type
response.setContentType("text/html;charset=utf-8");
PrintWriter writer = response.getWriter();
// 7. 判断该用户名是否符合注册条件
if (user == null) {
mapper.add(new User(null, username, password));
sqlSession.commit();
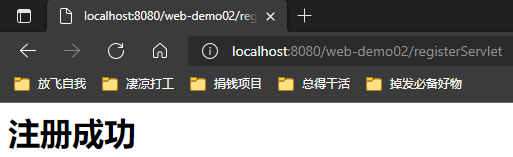
writer.write("<h1>注册成功</h1>");
} else {
writer.write("<h1>该用户名已存在</h1>");
}
// 8. 关闭资源
sqlSession.close();
}
@Override
protected void doGet(HttpServletRequest request, HttpServletResponse response) throws ServletException, IOException {
this.doPost(request, response);
}
}
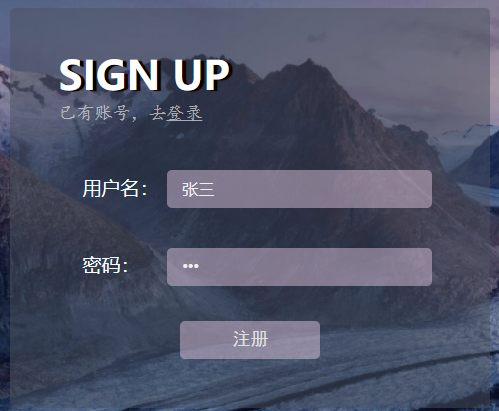
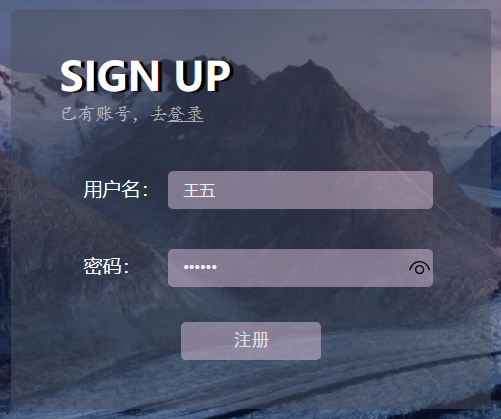
- 修改
register.html中表单的action为/web-demo02/registerServlet
<form action="${pageContext.request.contextPath}/web-demo02/registerServlet" method="post" id="registerForm">
    <h1 id="registerMsg">SIGN UP</h1>
    <span class="login">已有账号,去<a href="login.html">登录</a></span>
    <label for="username">
        <span>用户名:</span>
        <input type="text" name="username" id="username" placeholder="请输入用户名">
    </label>
    <br/>
    <label for="password">
        <span>密码:</span>
        <input type="password" name="password" id="password" placeholder="请输入密码">
    </label>
    <div id="subDiv">
        <input type="submit" class="button" value="注册">
    </div>
</form>
3.3、结果演示
- 用户已存在情况
- 注册成功情况
4、代码优化
在实现上述代码的时候会发现,在写Servlet的时候,因为需要使用Mybatis来完成数据库的操作,所以对于Mybatis的基础操作就出现如下的重复代码
String resource = "mybatis-config.xml";
InputStream is = Resources.getResourceAsStream(resource);
SqlSessionFactory sqlSessionFactory = new SqlSessionFactoryBuilder().build(is);
这就会以下的一些问题:
- 重复代码不利于后期的维护
- SqlSessionFactory工厂类进行重复创建。相当于每次买手机都需要重新创建一个手机生产工厂来给你制造一个手机一样,资源消耗非常大但性能却非常低。
那如何来优化呢?
- 代码重复可以抽取工具类
- 对指定代码只需要执行一次可以使用静态代码块
public class SqlSessionFactoryUtils {
    private static SqlSessionFactory sqlSessionFactory;

    static {
        try {
            String resource = "mybatis-config.xml";
            InputStream inputStream = Resources.getResourceAsStream(resource);
            sqlSessionFactory = new SqlSessionFactoryBuilder().build(inputStream);
        } catch (IOException e) {
            e.printStackTrace();
        }
    }

    public static SqlSessionFactory getSqlSessionFactory(){
        return sqlSessionFactory;
    }
}
工具类抽取以后,以后在对Mybatis的SqlSession进行操作的时候,就可以直接使用,这样就可以很好的解决上面所说的代码重复和重复创建工厂导致性能低的问题了。
SqlSessionFactory sqlSessionFactory = SqlSessionFactoryUtils.getSqlSessionFactory();
这里存在一个小坑,就是获取SqlSession对象的代码也是重复的,那到底要不要也封装到工具类里面去呢?
答案是不需要,也不能要。
对SqlSessionFactory对象进行封装是从性能角度出发,这个工厂不需要每制造一个SqlSession就同步生成一个从而造成资源浪费。而SqlSession是对数据库进行操作的对象,其可能会对不同的数据库和表进行操作,如果混为一谈则可能会出现数据错乱的情况。
这就如同家中的毛巾,毛巾同样都是擦东西的功能,但我们不可能用打扫卫生的毛巾来擦身子。


 245
245


 被折叠的 条评论
为什么被折叠?
被折叠的 条评论
为什么被折叠?
 到【灌水乐园】发言


