


前言
java定时任务的框架可真是多啊,XXL-JOB也是一个分布式任务调度平台,其核心设计目标是开发迅速、学习简单、轻量级、易扩展,还是开源的,Mars酱只好下载下来看看了。
架构图

从架构图上可以看出,xxl-job并没依赖第三方的调度服务,而是自研的。那么我们看怎么使用,再研究它内部的原理吧。
任务的分类
启动xxl-job-admin,进入管理控制台,新建一个任务的时候可以看到任务的运行模式有几种,除了第一种BEAN模式,其他的都是GLUE开头的模式

GLUE类型的都能在xxl-job中通过提供的在线编辑器直接编写源码,编写完成之后的任务信息会保存在xxl-job的xxl_job_info表的glue_source字段中,能够在线编译任务,然后直接调试,确实方便了不少。
跟踪GLUE模式的实现逻辑
新建好一个java的GLUE运行模式后,在页面上选择执行,会发送一个http请求给管理控制台

跟踪/trigger这个请求地址,会到JobTriggerPoolHelper中的addTrigger函数:
    /**
     * add trigger
     */
    public void addTrigger(final int jobId,
                           final TriggerTypeEnum triggerType,
                           final int failRetryCount,
                           final String executorShardingParam,
                           final String executorParam,
                           final String addressList) {

        // choose thread pool
        ThreadPoolExecutor triggerPool_ = fastTriggerPool;
        AtomicInteger jobTimeoutCount = jobTimeoutCountMap.get(jobId);
        if (jobTimeoutCount!=null && jobTimeoutCount.get() > 10) {      // job-timeout 10 times in 1 min
            triggerPool_ = slowTriggerPool;
        }

        // trigger
        triggerPool_.execute(new Runnable() {
            @Override
            public void run() {

                long start = System.currentTimeMillis();

                try {
                    // do trigger
                    XxlJobTrigger.trigger(jobId, triggerType, failRetryCount, executorShardingParam, executorParam, addressList);
                } catch (Exception e) {
                    logger.error(e.getMessage(), e);
                } finally {

                    // check timeout-count-map
                    long minTim_now = System.currentTimeMillis()/60000;
                    if (minTim != minTim_now) {
                        minTim = minTim_now;
                        jobTimeoutCountMap.clear();
                    }

                    // incr timeout-count-map
                    long cost = System.currentTimeMillis()-start;
                    if (cost > 500) {       // ob-timeout threshold 500ms
                        AtomicInteger timeoutCount = jobTimeoutCountMap.putIfAbsent(jobId, new AtomicInteger(1));
                        if (timeoutCount != null) {
                            timeoutCount.incrementAndGet();
                        }
                    }

                }

            }
        });
    }
复制代码
这段代码大致流程就是:
- 选择线程池,分快池和慢池,通过计数器的次数判断应该选择哪个池;
- 在线程池中调用XxlJobTrigger的trigger方法;
- 执行完毕之后判断耗时时间,并在计数器中记录次数,方便下次判断使用快池还是慢池;
跟踪XxlJobTrigger的trigger方法,会到runExecutor方法:
    /**
     * run executor
     * @param triggerParam
     * @param address
     * @return
     */
    public static ReturnT<String> runExecutor(TriggerParam triggerParam, String address){
        ReturnT<String> runResult = null;
        try {
            ExecutorBiz executorBiz = XxlJobScheduler.getExecutorBiz(address);
            runResult = executorBiz.run(triggerParam);
        } catch (Exception e) {
            logger.error(">>>>>>>>>>> xxl-job trigger error, please check if the executor[{}] is running.", address, e);
            runResult = new ReturnT<String>(ReturnT.FAIL_CODE, ThrowableUtil.toString(e));
        }

        StringBuffer runResultSB = new StringBuffer(I18nUtil.getString("jobconf_trigger_run") + ":");
        runResultSB.append("<br>address:").append(address);
        runResultSB.append("<br>code:").append(runResult.getCode());
        runResultSB.append("<br>msg:").append(runResult.getMsg());

        runResult.setMsg(runResultSB.toString());
        return runResult;
    }
复制代码runExecutor的方法调用了ExecutorBiz的接口run函数,并返回结果给runExecutor,而ExecutorBiz有两个实现,一个是ExecutorBizImpl,另一个是ExecutorBizClient。后者简单,发送一个post请求,其目标就是下发任务;前者复杂,目的是执行任务,代码Mars酱要贴出来:
    @Override
    public ReturnT<String> run(TriggerParam triggerParam) {
        // load old:jobHandler + jobThread
        JobThread jobThread = XxlJobExecutor.loadJobThread(triggerParam.getJobId());
        IJobHandler jobHandler = jobThread!=null?jobThread.getHandler():null;
        String removeOldReason = null;

        // valid:jobHandler + jobThread
        GlueTypeEnum glueTypeEnum = GlueTypeEnum.match(triggerParam.getGlueType());
        if (GlueTypeEnum.BEAN == glueTypeEnum) {

            // new jobhandler
            IJobHandler newJobHandler = XxlJobExecutor.loadJobHandler(triggerParam.getExecutorHandler());

            // valid old jobThread
            if (jobThread!=null && jobHandler != newJobHandler) {
                // change handler, need kill old thread
                removeOldReason = "change jobhandler or glue type, and terminate the old job thread.";

                jobThread = null;
                jobHandler = null;
            }

            // valid handler
            if (jobHandler == null) {
                jobHandler = newJobHandler;
                if (jobHandler == null) {
                    return new ReturnT<String>(ReturnT.FAIL_CODE, "job handler [" + triggerParam.getExecutorHandler() + "] not found.");
                }
            }

        } else if (GlueTypeEnum.GLUE_GROOVY == glueTypeEnum) {

            // valid old jobThread
            if (jobThread != null &&
                    !(jobThread.getHandler() instanceof GlueJobHandler
                        && ((GlueJobHandler) jobThread.getHandler()).getGlueUpdatetime()==triggerParam.getGlueUpdatetime() )) {
                // change handler or gluesource updated, need kill old thread
                removeOldReason = "change job source or glue type, and terminate the old job thread.";

                jobThread = null;
                jobHandler = null;
            }

            // valid handler
            if (jobHandler == null) {
                try {
                    IJobHandler originJobHandler = GlueFactory.getInstance().loadNewInstance(triggerParam.getGlueSource());
                    jobHandler = new GlueJobHandler(originJobHandler, triggerParam.getGlueUpdatetime());
                } catch (Exception e) {
                    logger.error(e.getMessage(), e);
                    return new ReturnT<String>(ReturnT.FAIL_CODE, e.getMessage());
                }
            }
        } else if (glueTypeEnum!=null && glueTypeEnum.isScript()) {

            // valid old jobThread
            if (jobThread != null &&
                    !(jobThread.getHandler() instanceof ScriptJobHandler
                            && ((ScriptJobHandler) jobThread.getHandler()).getGlueUpdatetime()==triggerParam.getGlueUpdatetime() )) {
                // change script or gluesource updated, need kill old thread
                removeOldReason = "change job source or glue type, and terminate the old job thread.";

                jobThread = null;
                jobHandler = null;
            }

            // valid handler
            if (jobHandler == null) {
                jobHandler = new ScriptJobHandler(triggerParam.getJobId(), triggerParam.getGlueUpdatetime(), triggerParam.getGlueSource(), GlueTypeEnum.match(triggerParam.getGlueType()));
            }
        } else {
            return new ReturnT<String>(ReturnT.FAIL_CODE, "glueType[" + triggerParam.getGlueType() + "] is not valid.");
        }

        // executor block strategy
        if (jobThread != null) {
            ExecutorBlockStrategyEnum blockStrategy = ExecutorBlockStrategyEnum.match(triggerParam.getExecutorBlockStrategy(), null);
            if (ExecutorBlockStrategyEnum.DISCARD_LATER == blockStrategy) {
                // discard when running
                if (jobThread.isRunningOrHasQueue()) {
                    return new ReturnT<String>(ReturnT.FAIL_CODE, "block strategy effect:"+ExecutorBlockStrategyEnum.DISCARD_LATER.getTitle());
                }
            } else if (ExecutorBlockStrategyEnum.COVER_EARLY == blockStrategy) {
                // kill running jobThread
                if (jobThread.isRunningOrHasQueue()) {
                    removeOldReason = "block strategy effect:" + ExecutorBlockStrategyEnum.COVER_EARLY.getTitle();

                    jobThread = null;
                }
            } else {
                // just queue trigger
            }
        }

        // replace thread (new or exists invalid)
        if (jobThread == null) {
            jobThread = XxlJobExecutor.registJobThread(triggerParam.getJobId(), jobHandler, removeOldReason);
        }

        // push data to queue
        ReturnT<String> pushResult = jobThread.pushTriggerQueue(triggerParam);
        return pushResult;
    }
复制代码
是不是很长很复杂,我看了下,这段大概流程就是这样:
- 判断glue的模式;
- 读取模式下的source字段的内容;
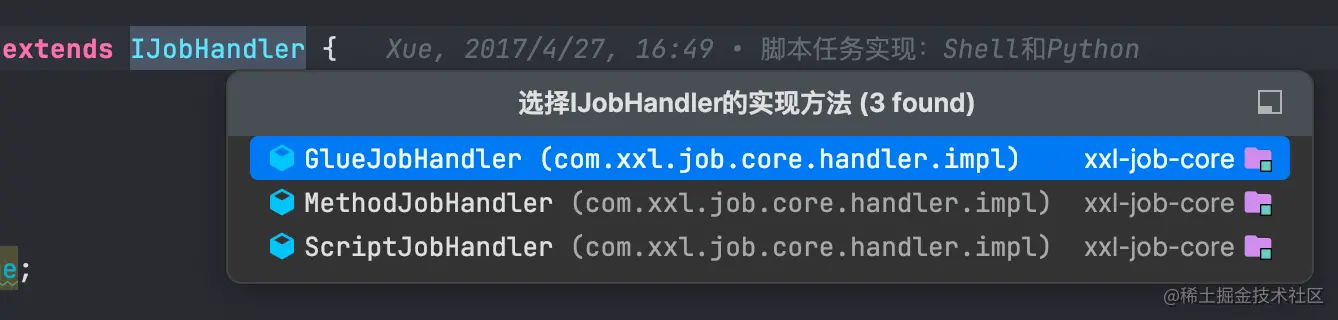
- 创建对应glue模式下的jobHandler对象。jobHandler模式的对象有以下三种:
- 判断执行策略。执行策略分三种:
SERIAL_EXECUTION、DISCARD_LATER、COVER_EARLY; - 注册任务线程,并调用线程的star方法;
- 任务线程放入trigger队列;
以上就是跟踪GLUE运行模式得到的流程,枯燥无味,是不是?
跟踪BEAN模式的实现逻辑
在跑起来admin服务之后,自带了一个例子,那就是一个BEAN模式的实现。跟踪这个例子得到的流程和上面的流程一样,最终都会进入到ExecutorBizImpl的run方法,在第一步判断glue模式的时候,直接会调用jobHandler的实现类MethodJobHandler去执行了。只是在直接执行之前已经把对象注册到了资源库中,注册的代码在XxlJobExecutor的registJobHandler中:
    protected void registJobHandler(XxlJob xxlJob, Object bean, Method executeMethod){
        if (xxlJob == null) {
            return;
        }

        String name = xxlJob.value();
        //make and simplify the variables since they'll be called several times later
        Class<?> clazz = bean.getClass();
        String methodName = executeMethod.getName();
        if (name.trim().length() == 0) {
            throw new RuntimeException("xxl-job method-jobhandler name invalid, for[" + clazz + "#" + methodName + "] .");
        }
        if (loadJobHandler(name) != null) {
            throw new RuntimeException("xxl-job jobhandler[" + name + "] naming conflicts.");
        }

        // execute method
        /*if (!(method.getParameterTypes().length == 1 && method.getParameterTypes()[0].isAssignableFrom(String.class))) {
            throw new RuntimeException("xxl-job method-jobhandler param-classtype invalid, for[" + bean.getClass() + "#" + method.getName() + "] , " +
                    "The correct method format like " public ReturnT<String> execute(String param) " .");
        }
        if (!method.getReturnType().isAssignableFrom(ReturnT.class)) {
            throw new RuntimeException("xxl-job method-jobhandler return-classtype invalid, for[" + bean.getClass() + "#" + method.getName() + "] , " +
                    "The correct method format like " public ReturnT<String> execute(String param) " .");
        }*/

        executeMethod.setAccessible(true);

        // init and destroy
        Method initMethod = null;
        Method destroyMethod = null;

        if (xxlJob.init().trim().length() > 0) {
            try {
                initMethod = clazz.getDeclaredMethod(xxlJob.init());
                initMethod.setAccessible(true);
            } catch (NoSuchMethodException e) {
                throw new RuntimeException("xxl-job method-jobhandler initMethod invalid, for[" + clazz + "#" + methodName + "] .");
            }
        }
        if (xxlJob.destroy().trim().length() > 0) {
            try {
                destroyMethod = clazz.getDeclaredMethod(xxlJob.destroy());
                destroyMethod.setAccessible(true);
            } catch (NoSuchMethodException e) {
                throw new RuntimeException("xxl-job method-jobhandler destroyMethod invalid, for[" + clazz + "#" + methodName + "] .");
            }
        }

        // registry jobhandler
        registJobHandler(name, new MethodJobHandler(bean, executeMethod, initMethod, destroyMethod));

    }
复制代码
流程这种就是通过反射去得到指定的对象和方法,最后的registJob就是往ConcurrentHashMap中put反射之后得到的对象。
大致的流程都是和GLUE运行模式重叠的,只是注册的方式有小小的差别:一个是根据指定的值去反射得到需要执行的方法,另一个是数据库存储源码,通过GroovyClassLoader反射之后得到对象并执行方法。底层虽然都是反射,但是方式就这么一点点区别。
如何路由?
在addTrigger中有一段XxlJobTrigger.trigger,这里会在调用runExecutor之前调用processTrigger方法去实现具体的路由策略:
private static void processTrigger(XxlJobGroup group, XxlJobInfo jobInfo, int finalFailRetryCount, TriggerTypeEnum triggerType, int index, int total){
	// ... 省略其他代码
    // 路由策略
    ExecutorRouteStrategyEnum executorRouteStrategyEnum = ExecutorRouteStrategyEnum.match(jobInfo.getExecutorRouteStrategy(), null);
	// ... 省略其他代码
}
复制代码
路由策略由ExecutorRoute接口定义,有不同的实现方式:

这些路由策略,大多根据名字就能知道,如果想知道具体的实现逻辑,进入指定的路由实现类查看就行了。创建好的路由策略会在processTrigger方法体中调用route方法,然后会被执行。
总结
xxl-job我省略了很多的其他的细节,比如分片流程。总的来说,xxl-job分两个部分,一个是调度中心,一个是执行器,调度中心就是admin服务,执行器需要自己写,官方提供了两个例子,一个基于springboot的,一个无框架的,任务整体的流转流程我还是补个网图:

步骤说明:
- 执行器往调度中心注册,并持久化;
- 执行的时候下发到指定的执行器;
- 执行器完成之后把结果丢给调度中心存储执行结果,并记录好执行的日志。
xxl-job大抵就这样了,有问题请告诉我,Mars酱会修正。
作者:Mars酱
链接:https://juejin.cn/post/7231184167736016954


 1350
1350


 被折叠的 条评论
为什么被折叠?
被折叠的 条评论
为什么被折叠?
 到【灌水乐园】发言


