


Openresty(nginx)配置文档
一、基础Linux指令
查看nginx进程是否启动:ps -ef | grep nginx
关闭防火墙:systemctl stop firewalld
开放80端口:firewall-cmd --zone=public --add-port=80/tcp --permanent
关闭80端口:firewall-cmd --permanent --remove-port=80/tcp
查看80端口是否开启:firewall-cmd --query-port=80/tcp
重载防火墙:firewall-cmd --reload //修改端口状态后需要执行
查看监听端口:netstat -tuln | grep 80
查看系统信息:
uname -a:显示系统内核版本、操作系统版本、主机名和系统架构等信息。
cat /etc/os-release:显示操作系统的名称、版本、ID和其他详细信息。
lsb_release -a:显示Linux发行版的版本和其他详细信息。
cat /etc/issue:显示操作系统版本和其他信息。
cat /proc/version:显示操作系统版本、编译日期和编译者等信息。
systemctl 指令合集:
[root@localhost sbin]# systemctl disable nginx //关闭开机自启动
[root@localhost sbin]# systemctl start nginx //启动nginx服务
[root@localhost sbin]# systemctl restart nginx //重启nginx服务
[root@localhost sbin]# systemctl enable nginx //开机自启动
[root@localhost sbin]# systemctl status nginx //查看nginx状态
二、安装配置步骤
安装前解释:OpenResty 的核心是扩展了 Nginx 的 nginx-core,通常通过添加各种第三方模块来实现更多的功能,OpenResty 具有Nginx的功能。
1.先安装OpenResty安装时所需要的依赖
nginx依赖:
链接:https://pan.baidu.com/s/1J56-OEyOxDGMtSjzt2ZViQ
提取码:blwy
linux连接工具XFtp+XShell:
链接:https://pan.baidu.com/s/1XPWaEFzaso6EVC-jIBxgag
提取码:blwy
(1)将OpenResty所需依赖的包进行安装:
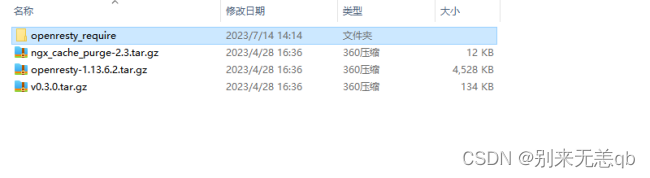
①找到文件夹(openresty_require)
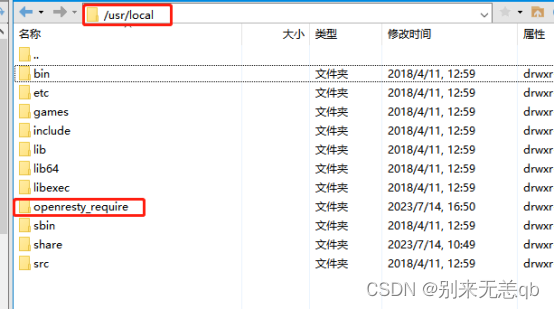
②使用文件连接工具XFtp工具或其他连接工具,将文件夹放到linux系统指定路径(/usr/local)
③使用linux远程连接工具Xshell或者其他工具将依赖安装包安装
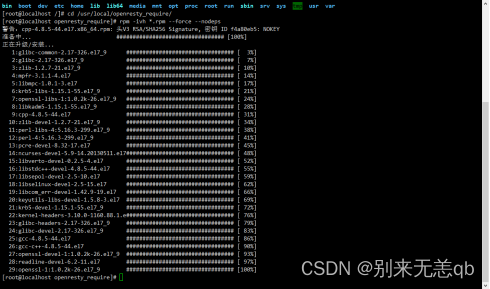
[root@localhost /]# cd /usr/local/openresty_require/

[root@localhost openresty_require]# rpm -ivh *.rpm --force --nodeps
(2)上传nginx_upstream_check_module模块,该模块用于ustream健康检查,上传ngx_cache_purge模块,该模块用于清理nginx缓存

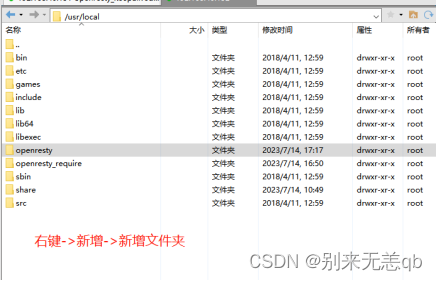
①使用文件连接工具XFtp工具,在(/usr/local)路径创建文件夹openresty
②将压缩包(v0.3.0.tar.gz)、(ngx_cache_purge-2.3.tar.gz)传到linux指定位置(/usr/local/openresty)
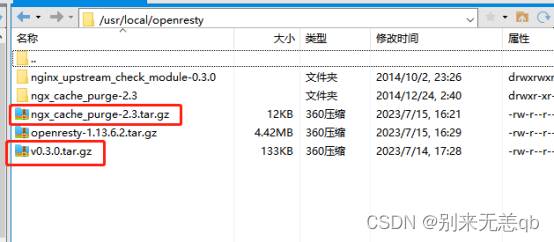
③使用linux远程连接工具Xshell或者其他工具将依赖v0.3.0.tar.gz文件进行解压
[root@localhost /]# cd /usr/local/openresty/

[root@localhost openresty]# ls

v0.3.0.tar.gz  ngx_cache_purge-2.3.tar.gz

[root@localhost openresty]# tar -zxvf v0.3.0.tar.gz

④将依赖文件ngx_cache_purge-2.3.tar.gz进行解压。
[root@localhost ~]# cd /usr/local/openresty

[root@localhost openresty]# ls

nginx_upstream_check_module-0.3.0  ngx_cache_purge-2.3.tar.gz  v0.3.0.tar.gz

[root@localhost openresty]# tar zxvf ngx_cache_purge-2.3.tar.gz
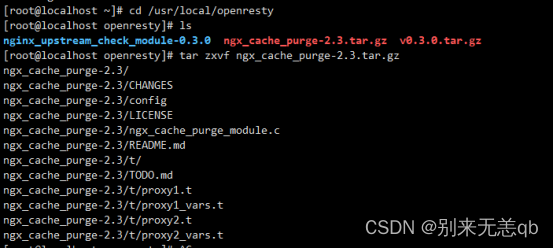
解压后:
2.编译安装OpenResty(nginx)

(1)使用文件连接工具XFtp工具或其它工具,将以上压缩包放在在(/usr/local/openresty)目录下
(2)解压安装
在这里插入图片描述
①解压
[root@localhost openresty]# cd /usr/local/openresty

[root@localhost openresty]# tar -zxvf openresty-1.13.6.2.tar.gz

[root@localhost openresty]# ls

nginx_upstream_check_module-0.3.0  ngx_cache_purge-2.3  ngx_cache_purge-2.3.tar.gz  openresty-1.13.6.2  openresty-1.13.6.2.tar.gz  v0.3.0.tar.gz

②编译
进入openresty-1.13.6.2文件夹
[root@localhost openresty]# cd /usr/local/openresty/openresty-1.13.6.2/

[root@localhost openresty]# ./configure --prefix=/usr/local/openresty  --with-luajit --without-http_redis2_module --with-http_iconv_module --with-http_realip_module --with-pcre --with-luajit --add-module=../ngx_cache_purge-2.3/ --add-module=../nginx_upstream_check_module-0.3.0/ --with-http_stub_status_module --with-http_ssl_module -j2
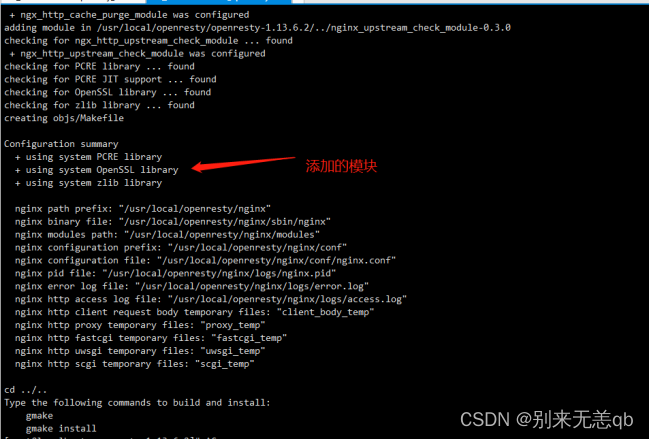
最终出现以上样式表示成功!
③安装
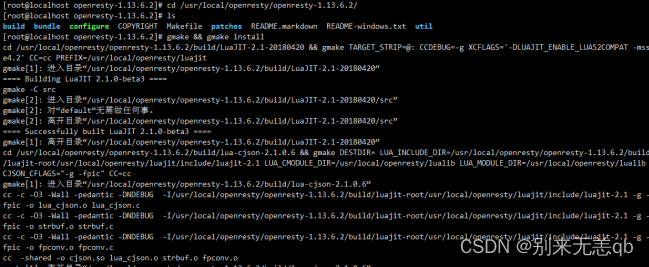
[root@localhost openresty-1.13.6.2]# cd /usr/local/openresty/openresty-1.13.6.2/

[root@localhost openresty-1.13.6.2]# ls

build  bundle  configure  COPYRIGHT  Makefile  patches  README.markdown  README-windows.txt  util

[root@localhost openresty-1.13.6.2]# gmake && gmake install
最终出现类似样式表示成功:
3.检查nginx是否安装成功
进入安装目录中,
命令: cd /usr/local/openresty/nginx/sbin
启动,关闭,重载,命令:
./nginx 启动
./nginx -s stop 关闭
./nginx -s reload 重载
查看nginx是否启动:ps -ef | grep nginx
在这里插入图片描述
4.安装成功,配置启动停用等指令
由于第3点中的命令无法开机自启动,并且启动比较麻烦,所以设置命令到systemctl中的系统命令去,比较方便。
(1)创建服务文件
[root@localhost sbin]# vim /lib/systemd/system/nginx.service
①将以下文档添加到页面中,先点击键盘I键进入输入模式
[Unit]
Description=nginx
After=network.target

[Service]
Type=forking
ExecStart=/usr/local/openresty/nginx/sbin/nginx
ExecReload=/usr/local/openresty/nginx/sbin/nginx restart
ExecStop=/usr/local/openresty/nginx/sbin/nginx stop
PrivateTmp=true

[Install]
WantedBy=multi-user.target
②按esc退出输入模式
③按 :wq 进行保存
(2)然后重新加载配置文档
[root@localhost sbin]# systemctl daemon-reload
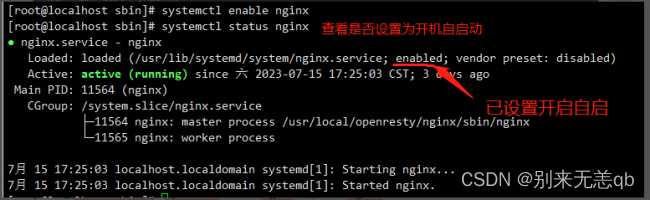
(3)将nginx设置为开机自启动
[root@localhost sbin]# systemctl enable nginx  //开机自启动

[root@localhost sbin]# systemctl status nginx //查看nginx状态
systemctl 指令合集:
[root@localhost sbin]# systemctl disable nginx  //关闭开机自启动

[root@localhost sbin]# systemctl start nginx //启动nginx服务

[root@localhost sbin]# systemctl restart nginx //重启nginx服务

[root@localhost sbin]# systemctl enable nginx  //开机自启动

[root@localhost sbin]# systemctl status nginx //查看nginx状态
注意:在后续修改配置后尽量不适用systemctl restart nginx,这个指令会重启nginx,如果配置有误导致nginx重启不成功,会影响客户使用。建议进入sbin目录使用./nginx -s reload进行重载配置,不会重启nginx。
5.打开端口,并测试能否通过浏览器访问nginx
(1)打开80端口
[root@localhost ~]# firewall-cmd --zone=public --add-port=80/tcp --permanent
(2)重载防火墙配置
[root@localhost ~]# firewall-cmd --reload
(3)检查80端口是否已打开
[root@localhost ~]# firewall-cmd --query-port=80/tcp
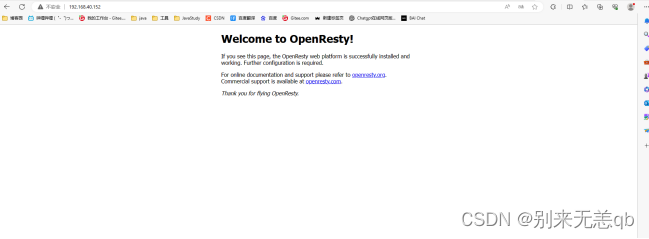
(4)使用浏览器访问:在同一网域内,输入安装了nginx的ip即可看到如下页面,即表示成功。


 435
435


 被折叠的 条评论
为什么被折叠?
被折叠的 条评论
为什么被折叠?
 到【灌水乐园】发言


