


Firebase 是一个后端服务,让开发者能快速部署应用程序。Firebase的一个最终要的功能是提供一个实时的数据库。随着现代web和移动端的程序转移到客户端,后端服务器习惯提供Model, View, and Controller 功能。这次的博客就讲解如何部署一个聊天应用程序。
步骤一:创建一个Google Cloud Project

步骤二:在firebase的页面加入刚刚创建好的Google Cloud Project
Firebase 的 console: 点击这里


添加好Google Cloud Project 之后,点击Continue:


步骤三:应用程序的建立
许多网页的应用程序都需要后台来支持。Firebase支持mobile platforms and web。但是,这次主要讲解网页的应用程序。


步骤四:创建授权登录:


出于安全考虑,Firebase将对其资源的访问限制在特定的域。会在Cloud Shell 测试这次的应用程序。为了能访问,需要将它添加到授权域列表中。

步骤五:数据库的建立


步骤六:storage 的建立
Firebase自动创建好storage。

步骤七:CLI的建立

在Cloud Shell 里写入以下的命令:
git clone https://github.com/firebase/codelab-friendlychat-web

# 使用npm来安装Firebase command-line interface
npm -g install firebase-tools

# 验证CLI是否安装正确
firebase --version

# 授权让你installation以至可以deploy resource on your project
# 重新授权
firebase logout

# 获取OAuth token
firebase login --no-localhost

cd codelab-friendlychat-web/web-start

firebase use --add


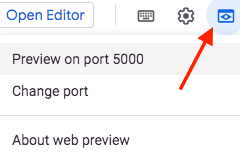
步骤八:测试应用程序
firebase serve --only hosting


步骤九:在代码里添加authentication
在main.js文件里添加这几段代码:
# Sign into Firebase using popup auth & Google as the identity provider.
var provider = new firebase.auth.GoogleAuthProvider();
firebase.auth().signInWithPopup(provider);
// Sign out of Firebase.
firebase.auth().signOut();
步骤十:更新UI
当用户改变authentication state,我们就得更新UI.
加上这段代码
  // Listen to auth state changes.
  firebase.auth().onAuthStateChanged(authStateObserver);
获取用户的头像:
return firebase.auth().currentUser.photoURL || '/images/profile_placeholder.png';
获取用户的名字:
return firebase.auth().currentUser.displayName;
用户没有登录就发送消息,程序返回错误信息
return !!firebase.auth().currentUser;
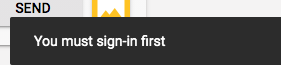
步骤十一:测试程序授权
运行命令:
firebase serve --only hosting
当用户没有授权登录,就发送消息,就会出现这个提示:


步骤十二:实现消息发送
  // Add a new message entry to the database.
  return firebase.firestore().collection('messages').add({
           name: getUserName(),
           text: messageText,
           profilePicUrl: getProfilePicUrl(),
           timestamp: firebase.firestore.FieldValue.serverTimestamp()
  }).catch(function(error) {
    console.error('Error writing new message to database', error);
  });
  // Create the query to load the last 12 messages and listen for new ones.
  var query = firebase.firestore()
                  .collection('messages')
                  .orderBy('timestamp', 'desc')
                  .limit(12);

  // Start listening to the query.
  query.onSnapshot(function(snapshot) {
    snapshot.docChanges().forEach(function(change) {
      if (change.type === 'removed') {
        deleteMessage(change.doc.id);
      } else {
        var message = change.doc.data();
        displayMessage(change.doc.id, message.timestamp, message.name,
                       message.text, message.profilePicUrl, message.imageUrl);
      }
    });
  });
步骤十三:测试发送信息
运行命令:
firebase serve --only hosting

回到Firebase, 就可以看到信息已经存到数据库里

步骤十四:手动添加信息
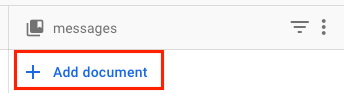


应用程序就能立即显示最新的信息:

步骤十五:添加图像信息
  firebase.firestore().collection('messages').add({
    name: getUserName(),
    imageUrl: LOADING_IMAGE_URL,
    profilePicUrl: getProfilePicUrl(),
    timestamp: firebase.firestore.FieldValue.serverTimestamp()
  }).then(function(messageRef) {
    var filePath = firebase.auth().currentUser.uid + '/' + messageRef.id + '/' + file.name;
    return firebase.storage().ref(filePath).put(file).then(function(fileSnapshot) {
      return fileSnapshot.ref.getDownloadURL().then((url) => {
        return messageRef.update({
          imageUrl: url,
          storageUri: fileSnapshot.metadata.fullPath
        });
      });
    });
  }).catch(function(error) {
    console.error('There was an error uploading a file to Cloud Storage:', error);
  });
步骤十六:测试图片信息

数据库里很快更新:

步骤十七:Deploy application
firebase deploy --except functions

点击URL, 进入程序:

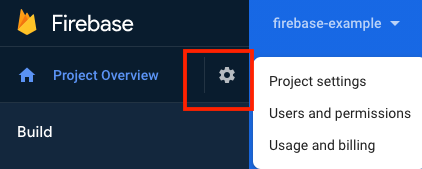
步骤十八:删除应用程序
点击“Project settings”


这样连在Google Cloud Console里的Project也都删除了。
既然已经看到这了,就麻烦点个赞或者关注或者留言再走呗~~
谢谢~ ~


 909
909


 被折叠的 条评论
为什么被折叠?
被折叠的 条评论
为什么被折叠?
 到【灌水乐园】发言


