


 本文详细介绍在CentOS系统中安装、配置MySQL数据库的过程,包括使用yum安装MySQL,初始化数据库,设置账号密码,以及理解主要配置文件的作用。
参考博文:
Linux学习之CentOS(十三)–CentOS6.4下Mysql数据库的安装与配置:https://www.cnblogs.com/xiaoluo501395377/archive/2013/04/07/3003278.html
centos6.5 mysql安装+远程访问+备份恢复+基本操作+卸载:
https://www.cnblogs.com/wuling129/p/4809547.html
一、安装
1、yum进行mysql的安装
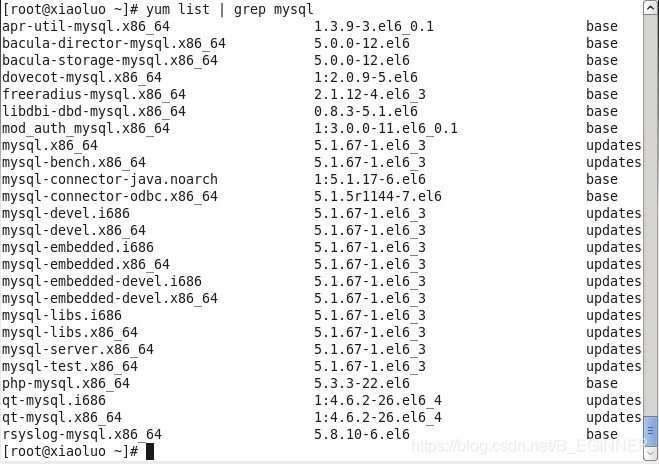
通过yum的方式来进行mysql的数据库安装,先输入 yum list | grep mysql 命令来查看yum上提供的mysql数据库可下载的版本:
[root@izbp12ujq5zpxyjm1g69dhz ~]# cat /etc/redhat-release
就可以得到yum服务器上mysql数据库的可下载版本信息:
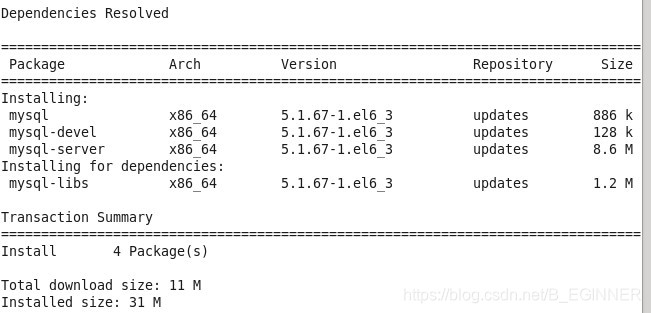
然后我们可以通过输入 yum install -y mysql-server mysql mysql-devel 命令将mysql mysql-server mysql-devel都安装好(注意:安装mysql时我们并不是安装了mysql客户端就相当于安装好了mysql数据库了,我们还需要安装mysql-server服务端才行)
[root@xiaoluo ~]# yum install -y mysql-server mysql mysql-deve
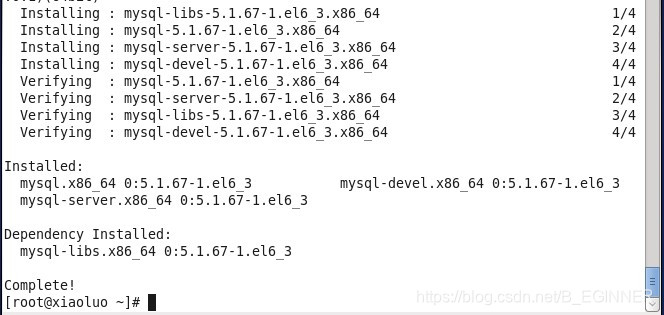
在等待了一番时间后,yum安装完mysql数据库所需要的软件以及其它附属的一些软件
当出现下列结果时,代表数据库安装完毕
二、配置
1、初始化
在安装完mysql数据库以后,会发现会多出一个mysqld的服务,这个就是数据库服务,通过输入 service mysqld start 命令就可以启动mysql服务。
注意:如果是第一次启动mysql服务,mysql服务器首先会进行初始化的配置,如:
[root@xiaoluo ~]# service mysqld start
初始化 MySQL 数据库: WARNING: The host ‘xiaoluo’ could not be looked up with resolveip.
This probably means that your libc libraries are not 100 % compatible
with this binary MySQL version. The MySQL daemon, mysqld, should work
normally with the exception that host name resolving will not work.
This means that you should use IP addresses instead of hostnames
when specifying MySQL privileges !
Installing MySQL system tables…
OK
Filling help tables…
OK
To start mysqld at boot time you have to copy
support-files/mysql.server to the right place for your system
PLEASE REMEMBER TO SET A PASSWORD FOR THE MySQL root USER !
To do so, start the server, then issue the following commands:
/usr/bin/mysqladmin -u root password ‘new-password’
/usr/bin/mysqladmin -u root -h xiaoluo password ‘new-password’
Alternatively you can run:
/usr/bin/mysql_secure_installation
which will also give you the option of removing the test
databases and anonymous user created by default. This is
strongly recommended for production servers.
See the manual for more instructions.
You can start the MySQL daemon with:
cd /usr ; /usr/bin/mysqld_safe &
You can test the MySQL daemon with mysql-test-run.pl
cd /usr/mysql-test ; perl mysql-test-run.pl
Please report any problems with the /usr/bin/mysqlbug script!
[确定]
正在启动 mysqld: [确定]
这时我们会看到第一次启动mysql服务器以后会提示非常多的信息,目的就是对mysql数据库进行初始化操作,当我们再次重新启动mysql服务时,就不会提示这么多信息了,如:
[root@xiaoluo ~]# service mysqld restart
停止 mysqld: [确定]
正在启动 mysqld: [确定]
我们在使用mysql数据库时,都得首先启动mysqld服务,我们可以 通过 chkconfig --list | grep mysqld 命令来查看mysql服务是不是开机自动启动,如:
[root@xiaoluo ~]# chkconfig --list | grep mysqld
mysqld 0:关闭 1:关闭 2:关闭 3:关闭 4:关闭 5:关闭 6:关闭
我们发现mysqld服务并没有开机自动启动,我们当然可以通过 chkconfig mysqld on 命令来将其设置成开机启动,这样就不用每次都去手动启动了
[root@xiaoluo ~]# chkconfig mysqld on
[root@xiaoluo ~]# chkconfig --list | grep mysql
mysqld 0:关闭 1:关闭 2:启用 3:启用 4:启用 5:启用 6:关闭
2、设置账号密码
mysql数据库安装完以后只会有一个root管理员账号,但是此时的root账号还并没有为其设置密码,在第一次启动mysql服务时,会进行数据库的一些初始化工作,在输出的一大串信息中,我们看到有这样一行信息 :
/usr/bin/mysqladmin -u root password ‘new-password’ // 为root账号设置密码
所以我们可以通过 该命令来给我们的root账号设置密码(注意:这个root账号是mysql的root账号,非Linux的root账号)
[root@xiaoluo ~]# mysqladmin -u root password ‘root’ // 通过该命令给root账号设置密码为 root
此时我们就可以通过 mysql -u root -p 命令来登录我们的mysql数据库了,如图:

3、主要配置文件
(1)./etc/my.cnf
mysql的主配置文件,使用该命令可以查看一下这个文件的一些信息
[root@xiaoluo etc]# ls my.cnf
my.cnf
[root@xiaoluo etc]# cat my.cnf
[mysqld]
datadir=/var/lib/mysql
socket=/var/lib/mysql/mysql.sock
user=mysql
Disabling symbolic-links is recommended to prevent assorted security risks
symbolic-links=0
[mysqld_safe]
log-error=/var/log/mysqld.log
pid-file=/var/run/mysqld/mysqld.pid
(2)./var/lib/mysql
mysql数据库的数据库文件存放位置,通常是存放在了/ver/lib/mysql这个目录下
[root@xiaoluo ~]# cd /var/lib/mysql/
[root@xiaoluo mysql]# ls -l
总用量 20488
-rw-rw----. 1 mysql mysql 10485760 4月 6 22:01 ibdata1
-rw-rw----. 1 mysql mysql 5242880 4月 6 22:01 ib_logfile0
-rw-rw----. 1 mysql mysql 5242880 4月 6 21:59 ib_logfile1
drwx------. 2 mysql mysql 4096 4月 6 21:59 mysql // 这两个是mysql数据库安装时默认的两个数据库文件
srwxrwxrwx. 1 mysql mysql 0 4月 6 22:01 mysql.sock
drwx------. 2 mysql mysql 4096 4月 6 21:59 test // 这两个是mysql数据库安装时默认的两个数据库文件
(3)./var/log mysql
数据库的日志输出存放位置
[root@xiaoluo xiaoluo]# cd
[root@xiaoluo ~]# cd /var/log
[root@xiaoluo log]# ls
amanda cron maillog-20130331 spice-vdagent.log
anaconda.ifcfg.log cron-20130331 mcelog spooler
anaconda.log cups messages spooler-20130331
anaconda.program.log dirsrv messages-20130331 sssd
anaconda.storage.log dmesg mysqld.log tallylog
anaconda.syslog dmesg.old ntpstats tomcat6
anaconda.xlog dracut.log piranha wpa_supplicant.log
anaconda.yum.log gdm pm-powersave.log wtmp
audit httpd ppp Xorg.0.log
boot.log ibacm.log prelink Xorg.0.log.old
btmp lastlog sa Xorg.1.log
btmp-20130401 libvirt samba Xorg.2.log
cluster luci secure Xorg.9.log
ConsoleKit maillog secure-20130331 yum.log
其中mysqld.log 这个文件就是我们存放我们跟mysql数据库进行操作而产生的一些日志信息,通过查看该日志文件,我们可以从中获得很多信息
这第一篇博客,也是第一次下载Mysql,还在摸索中。本次博客参考了一些前辈的资料,在此表示感谢。


 749
749

 被折叠的 条评论
为什么被折叠?
被折叠的 条评论
为什么被折叠?
 到【灌水乐园】发言


