


 本文介绍了WCF服务的创建和客户端调用过程。首先,通过新建WCFService工程,定义服务契约接口并实现。服务启动后,创建控制台应用作为客户端,使用Add Service Reference发现并添加服务引用。接着,展示了如何进行异步调用服务,确保UI线程不会被阻塞。通过这个简单的教程,读者可以快速上手WCF服务的使用。
最近学习了WCF服务的创建与使用,决定在这里记下来,方便以后学习,毕竟好记性不如烂笔头啊~~
创建服务
首先新建WCFService工程
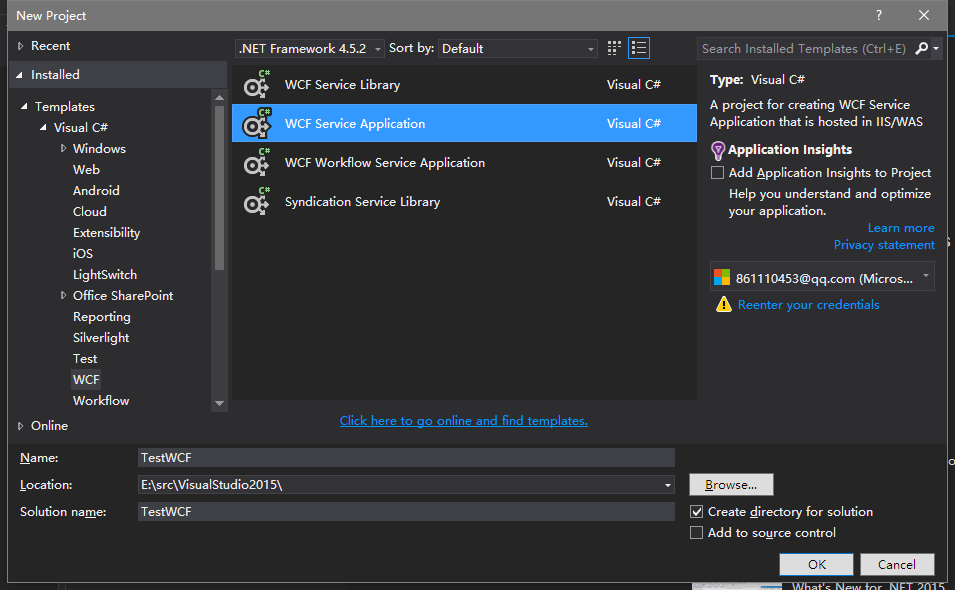
新建工程下有IService接口及其实现。其中IService接口定义了契约,
我们先定义几个简单的函数:
using System;
using System.Collections.Generic;
using System.Linq;
using System.Runtime.Serialization;
using System.ServiceModel;
using System.ServiceModel.Web;
using System.Text;

namespace TestWCF
{
    // NOTE: You can use the "Rename" command on the "Refactor" menu to change the interface name "IService1" in both code and config file together.
    [ServiceContract]
    public interface IService1
    {

        [OperationContract]
        string GetData(int value);

        [OperationContract]
        CompositeType GetDataUsingDataContract(CompositeType composite);

        // TODO: Add your service operations here

        [OperationContract]
        int GetSum(int a, int b); //在Service中实现
    }
然后编译生成即可。直接点击运行,我们的服务便会在本机上的iss上自动选择一个端口部署起来(关于ISS怎么打开,自己百度,以后我可能会再写一篇说这个)。这时我们的服务边创建起来了。可以创建客户端去调用啦,简单吧!
创建客户端
这里我以控制台为例啦,先创建一个控制台工程,Reference中选择 Add Service Reference,直接点击Discover,VS会帮你找到解决方案中的服务,给它取个名字,添加引用就可以啦。(也可以输入服务的地址)
然后就在客户端中调用。先添加引用using TestWCFClient.TestWCF;(你的控制台程序包名.服务名)
using System;
using System.Collections.Generic;
using System.Linq;
using System.Text;
using System.Threading.Tasks;
using TestWCFClient.TestWCF;

namespace TestWCFClient
{
    class Program
    {
        static void Main(string[] args)
        {
            Service1Client client = new Service1Client();
            int a = 10, b = 11;
            var sum = client.GetSum(a, b);
            System.Console.WriteLine(sum);
        }
    }
}
当然,通常我们的服务时需要异步调用的,你总不能让UI线程一直等着吧!Reference中选择 Add Service Reference,Advanced,Gener asynchronous operations,点击OK后生成即可。然后命名服务啊添加包名什么的,不赘述了。
异步调用如下:
using System;
using System.Collections.Generic;
using System.Linq;
using System.Text;
using System.Threading.Tasks;
using TestWCFClient.TestWCFAsyn;

namespace TestWCFClient
{
    class Program
    {
        private static Service1Client client = new Service1Client();
        static void Main(string[] args)
        {
            int a = 10, b = 11;
            //var sum = client.GetSum(a, b);
            //System.Console.WriteLine(sum);
            client.GetSumCompleted += Client_GetSumCompleted;
            client.GetSumAsync(a, b);
            System.Console.ReadLine();
        }

        private static void Client_GetSumCompleted(object sender, GetSumCompletedEventArgs e)
        {
            //throw new NotImplementedException();、
            client.GetSumCompleted -= Client_GetSumCompleted;
            var sum = e.Result;
            System.Console.WriteLine(sum);
        }
    }
}
其中main函数最后添加System.ConsSystem.Console.ReadLine();是为了引起主线程阻塞(不然的话,异步调用还没有调完,主线程结束,程序就退出了)。
OKO 以上


 620
620

 被折叠的 条评论
为什么被折叠?
被折叠的 条评论
为什么被折叠?
 到【灌水乐园】发言


