


树莓派python3.7语音助手开发笔记(5)
然后是聊天模块,也就是大佬帖子中的图灵机器人模块,具体改动很少
def Turing(text_words=""):
    req = {
	"reqType":0,
    "perception": {
        "inputText": {
            "text": text_words
        },
        "selfInfo": {
            "location": {
                "city": "武汉",
                "province": "湖北",
                "street": "洪山区"
            }
        }
    },
    "userInfo": {
        "apiKey": turing_api_key,
        "userId": "你的图灵ID"
        }
    }

    req["perception"]["inputText"]["text"] = text_words
    response = requests.request("post", api_url, json=req, headers=headers)
    response_dict = json.loads(response.text)
    result = response_dict["results"][0]["values"]["text"]
    print("AI Robot said:", result)
    return result
最后也跟大佬的一样就可以了。
但是我们做的是智能家居系统,我要做的是上位机,所以我要给下位机信号,下位机用的是esp8266的板子,中间通过信号转换达到串口通讯的目的(Arduino的内容可能得到下个暑假再写了,比赛的时间和学业的繁忙应该是没时间写)
先讲下滤波,这个我们要到enhance_speech里面的enhance_speech.py文件中,将里面所有代码打包成一个函数传参是我们的文件路径,将前面改为
def Filter(path):
    # 打开WAV文档
    f = wave.open(path)
    # 读取格式信息
    # (nchannels, sampwidth, framerate, nframes, comptype, compname)
    params = f.getparams()
    nchannels, sampwidth, framerate, nframes = params[:4]
然后保存,在进入我们的Xiaobai.py
from enhance_speach import enhance_speach as es  #树莓派和ubuntu不同,这么引用树莓派可能会出问题,请自行修改下

while True:
    record_voice()
    es.Filter("/voices/myvoices.wav")
    request = listen()
这样就能将我们的声音进行降噪处理了,并用变量来承载我们说的话。
因为我需要做的是通过串口输出高低电平所以我接了4个LED在外面,以二进制的方法进行控制灯泡。
为了减少主体的代码行数,通过树莓派官网给的示例,将开灯这个类封装在一个py文件中
#Light.py
import RPi.GPIO as GPIO
import time


class Light(object):
    def __init__(self, port):
        self.port = port
        GPIO.setmode(GPIO.BCM)
        GPIO.setup(self.port, GPIO.OUT)
        self.on_state = GPIO.HIGH
        self.off_state = not self.on_state

    def set_on(self):
        GPIO.output(self.port, self.on_state)

    def set_off(self):
        GPIO.output(self.port, self.off_state)

    def is_on(self):
        return GPIO.input(self.port) == self.on_state

    def is_off(self):
        return GPIO.input(self.port) == self.off_state

    def toggle(self):
        if self.is_on():
            self.set_off()
        else:
            self.set_on()

    def blink(self, t=0.3):
        self.set_off()
        self.set_on()
        time.sleep(t)
        self.set_off()
保存即可,这时候又出现了一个问题,python的代码是自上而下执行的,灯泡是会一个一个亮而不是同时,所以现在我们要加入一个库,多线程处理threading
#Bright.py
import threading
import Light


def bright(t):  #参数是str类型传入“1010”这样的字符串,“1”为亮“0”为灭
    threads = []  #线程池
    li = [17, 18, 22, 27]  #树莓派的串口编号,这些我插了灯
    o = []  #记录亮灯的串口编号

    def output(digital):  #定义线程任务,传参是串口号
        Light.Light(digital).blink(1)

    array = list(t)  #将字符串列表化,这个好像不列表化也可以。。。。
    counter = 0  #作为一个计数器
    for j in array:
        if j == "1":
            o.append(li[counter])
        counter += 1

    for num in o:
        th = threading.Thread(target=output, args=(num,))  #将任务加入线程池
        th.start()
        threads.append(th)

    for th in threads:
        th.join()
然后回到Xiaobai.py
while True:
    record_voice()
    es.Filter("/voices/myvoices.wav")
    request = listen()
    if "开" in request and "灯" in request:  #通过正则表达式也可以进行筛选
        t = "1010"
        Bright.bright(t)
        os.system("aplay /voices/Light_on.wav")  #因为网络缘故所以我尽可能的进行离线化,这里的文件都是合成好的了
        break
    #将大佬的图灵机器人加入聊天模块,用正则表达式就可以用switch选择了
    elif "聊" in request and "天" in request and "跟" in request and "我" in request:
        response = Turing(request)
        vo = voice(response)
        os.system("aplay " + vo)
        while True:
            record_voice()
            es.Filter("/voices/myvoices.wav")
            request = listen()
            if "不" in request and "聊" in request and "了" in request:
                os.system("aplay /voices/OK.wav")
                break
            else:
                response = Turing(request)
                vo = voice(response)
                os.system("aplay " + vo)
                engine.runAndWait()
        break
    else:
        os.system("aplay /voices/Error.wav")  #出错后的响应
        break
把这些进行组装就是我们的小白语音助手了,
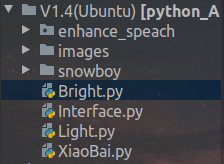
大致上就是这些文件,其中的Interface是我的界面,是产品需要,用的Tkinter库实现的。
Tk的安装方法
#apt install python3-tk
去官网在下载一样版本号的python,在官网download下的source code中下载
下载完成后
#tar zxvf 你的包
#cd 你的包
#./configure --prefix=/usr/local/python37
#make
#make install
然后重新弄下软连接
#unlink /usr/bin/python3
#ln -s /usr/bin/python3.7 /usr/bin/python3
这里要连接原来的那个,而不是安装在/usr/local的这个,编译新的只是为了重新配置Tkinter
再带下我的代码
import tkinter as tk
import tkinter.messagebox
import Bright


window = tk.Tk()
window.title("Command control center")
window.geometry(str(window.winfo_screenwidth()) + "x" + str(window.winfo_screenheight()))
print(window.winfo_screenheight())
print(window.winfo_screenwidth())

l = tk.Label(window,text="Control Center", width=window.winfo_screenwidth(), height=3, bg="green")
l.pack(side="top")


def Disinfect():
    Bright.bright("1010")
    tkinter.messagebox.showinfo(title="Success!", message="Success!")


def Cloth_disinfect():
    Bright.bright("1100")
    tkinter.messagebox.showinfo(title="Success!", message="Success!")


def Bed_preheat():
    Bright.bright("0011")
    tkinter.messagebox.showinfo(title="Success!", message="Success!")


Img1 = tk.PhotoImage(file="/root/python/V1.4(Ubuntu)/images/Disinfect.png")
b1 = tk.Button(window, font=("Arial", 12), image=Img1, width=100, height=100, command=Disinfect)
b1.place(x=100, y=100)

Img2 = tk.PhotoImage(file="/root/python/V1.4(Ubuntu)/images/Cloth_disinfect.png")
b2 = tk.Button(window, font=("Arial", 12), image=Img2, width=100, height=100, command=Cloth_disinfect)
b2.place(x=250, y=100)

Img3 = tk.PhotoImage(file="/root/python/V1.4(Ubuntu)/images/Bed_preheat.png")
b3 = tk.Button(window, font=("Arial", 12), image=Img3, width=100, height=100, command=Bed_preheat)
b3.place(x=400, y=100)

window.mainloop()
具体的tk学习(传送门)
那么小白开发就到这里了,过一阵子我上传到GitHub上进行分享


 6405
6405


 被折叠的 条评论
为什么被折叠?
被折叠的 条评论
为什么被折叠?
 到【灌水乐园】发言


