


今天搞个头部悬停玩一下,说到头部悬停,咱们要知道一般需要再什么样的页面去进行一个展示,才能够更好的利用头部悬停达到咱们想要的形式
下面例举一些头部悬停的示例:
-
长页面:当页面内容很长(如新闻文章、博客文章、产品列表)时,将顶部的导航栏或标题栏设置为悬停,可以使用户在滚动浏览页面时始终能够方便地回到页面的其他部分。
-
列表页面:当页面包含大量数据列表(如商品列表、联系人列表、论坛帖子列表)时,将列表的标题栏或筛选栏设置为悬停,可以让用户在浏览列表时保持筛选或排序功能的可见性。
-
多标签页面:当页面有多个标签页(如电子商务网站的商品分类、信息管理系统的多个模块)时,将标签栏设置为悬停,可以方便用户在不同标签间切换。
实现头部悬停只需要使用CoordinatorLayout+AppBarLayout+CollapsingToolbarLayout去实现,
下面小赵带各位拆解一下代码,以便于各位更好的理解:
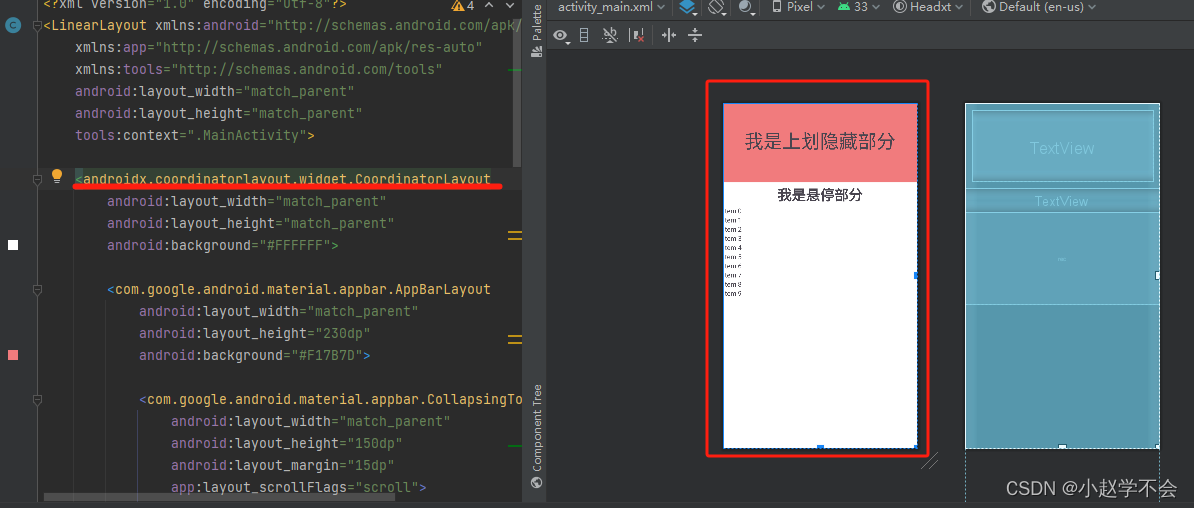
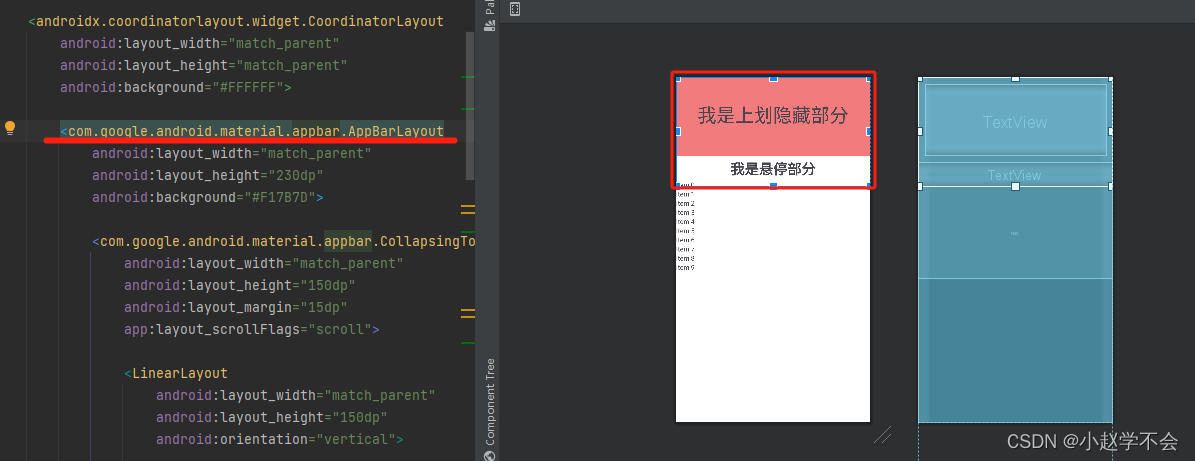
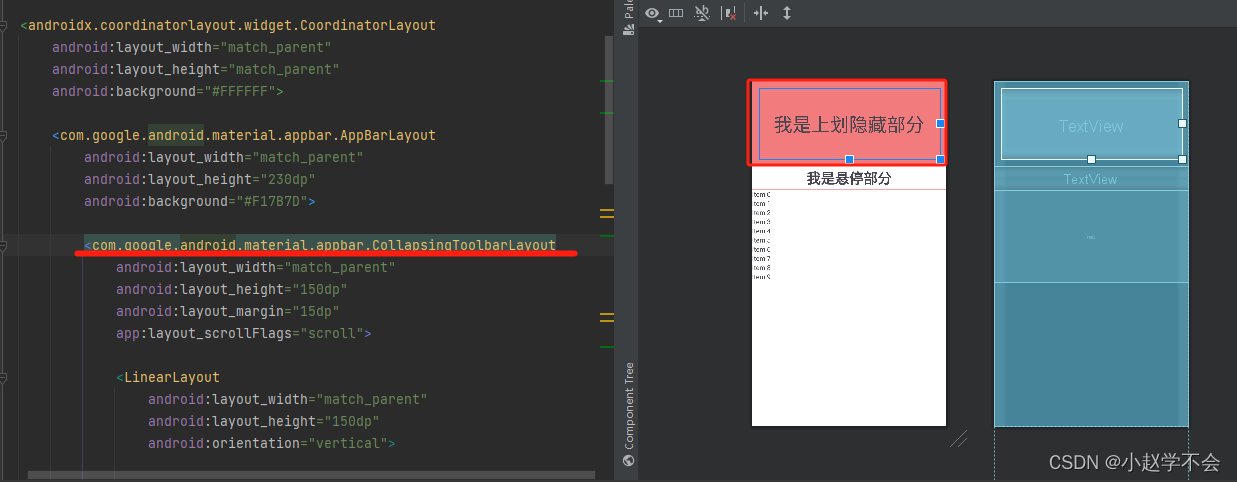
首先咱们看一下这三个控件的位置
<LinearLayout xmlns:android="http://schemas.android.com/apk/res/android"
    xmlns:app="http://schemas.android.com/apk/res-auto"
    xmlns:tools="http://schemas.android.com/tools"
    android:layout_width="match_parent"
    android:layout_height="match_parent"
    tools:context=".MainActivity">

    <androidx.coordinatorlayout.widget.CoordinatorLayout
        android:layout_width="match_parent"
        android:layout_height="match_parent"
        android:background="#FFFFFF">

        <com.google.android.material.appbar.AppBarLayout
            android:layout_width="match_parent"
            android:layout_height="230dp"
            android:background="#F17B7D">

            <com.google.android.material.appbar.CollapsingToolbarLayout
                android:layout_width="match_parent"
                android:layout_height="150dp"
                android:layout_margin="15dp"
                app:layout_scrollFlags="scroll">

                //在这个位置放需要上划隐藏的控件
            </com.google.android.material.appbar.CollapsingToolbarLayout>

            //在这个位置放需要悬停的部分
        </com.google.android.material.appbar.AppBarLayout>

        //在这个位置放主题内容
    </androidx.coordinatorlayout.widget.CoordinatorLayout>

</LinearLayout>
这样拆解开看是不是更好理解呢
完整代码:
<LinearLayout xmlns:android="http://schemas.android.com/apk/res/android"
    xmlns:app="http://schemas.android.com/apk/res-auto"
    xmlns:tools="http://schemas.android.com/tools"
    android:layout_width="match_parent"
    android:layout_height="match_parent"
    tools:context=".MainActivity">

    <androidx.coordinatorlayout.widget.CoordinatorLayout
        android:layout_width="match_parent"
        android:layout_height="match_parent"
        android:background="#FFFFFF">

        <com.google.android.material.appbar.AppBarLayout
            android:layout_width="match_parent"
            android:layout_height="230dp"
            android:background="#F17B7D">

            <com.google.android.material.appbar.CollapsingToolbarLayout
                android:layout_width="match_parent"
                android:layout_height="150dp"
                android:layout_margin="15dp"
                app:layout_scrollFlags="scroll">

                <LinearLayout
                    android:layout_width="match_parent"
                    android:layout_height="150dp"
                    android:orientation="vertical">

                    <TextView
                        android:layout_width="match_parent"
                        android:layout_height="match_parent"
                        android:gravity="center"
                        android:text="我是上划隐藏部分"
                        android:textSize="40dp" />

                </LinearLayout>
            </com.google.android.material.appbar.CollapsingToolbarLayout>

            <LinearLayout
                android:layout_width="match_parent"
                android:layout_height="50dp"
                android:background="#fff"
                android:orientation="vertical">

                <TextView
                    android:layout_width="match_parent"
                    android:layout_height="match_parent"
                    android:gravity="center"
                    android:text="我是悬停部分"
                    android:textSize="30dp"
                    android:textStyle="bold" />
            </LinearLayout>

        </com.google.android.material.appbar.AppBarLayout>

        <androidx.core.widget.NestedScrollView
            android:layout_width="match_parent"
            android:layout_height="match_parent"
            app:layout_behavior="@string/appbar_scrolling_view_behavior">

            <androidx.recyclerview.widget.RecyclerView
                android:id="@+id/rec"
                android:layout_width="match_parent"
                android:layout_height="match_parent" />
        </androidx.core.widget.NestedScrollView>
    </androidx.coordinatorlayout.widget.CoordinatorLayout>

</LinearLayout>
凑合看一下效果吧(不会录制gif,就截个图康康吧)
这样去上划
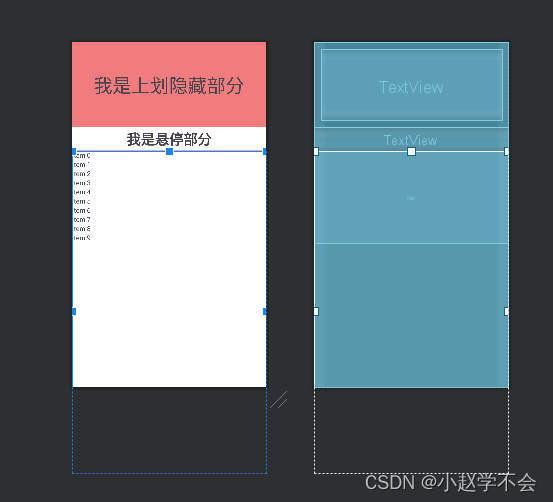
到这样


 1245
1245


 被折叠的 条评论
为什么被折叠?
被折叠的 条评论
为什么被折叠?
 到【灌水乐园】发言


