


文章目录
一、项目相关背景
boost的官网是没有搜索功能的,我们如果要根据一个关键字进行搜索,成本比较高。

所以我们想下载下来boost库的这些文档,实现一个站内搜索的搜索引擎。
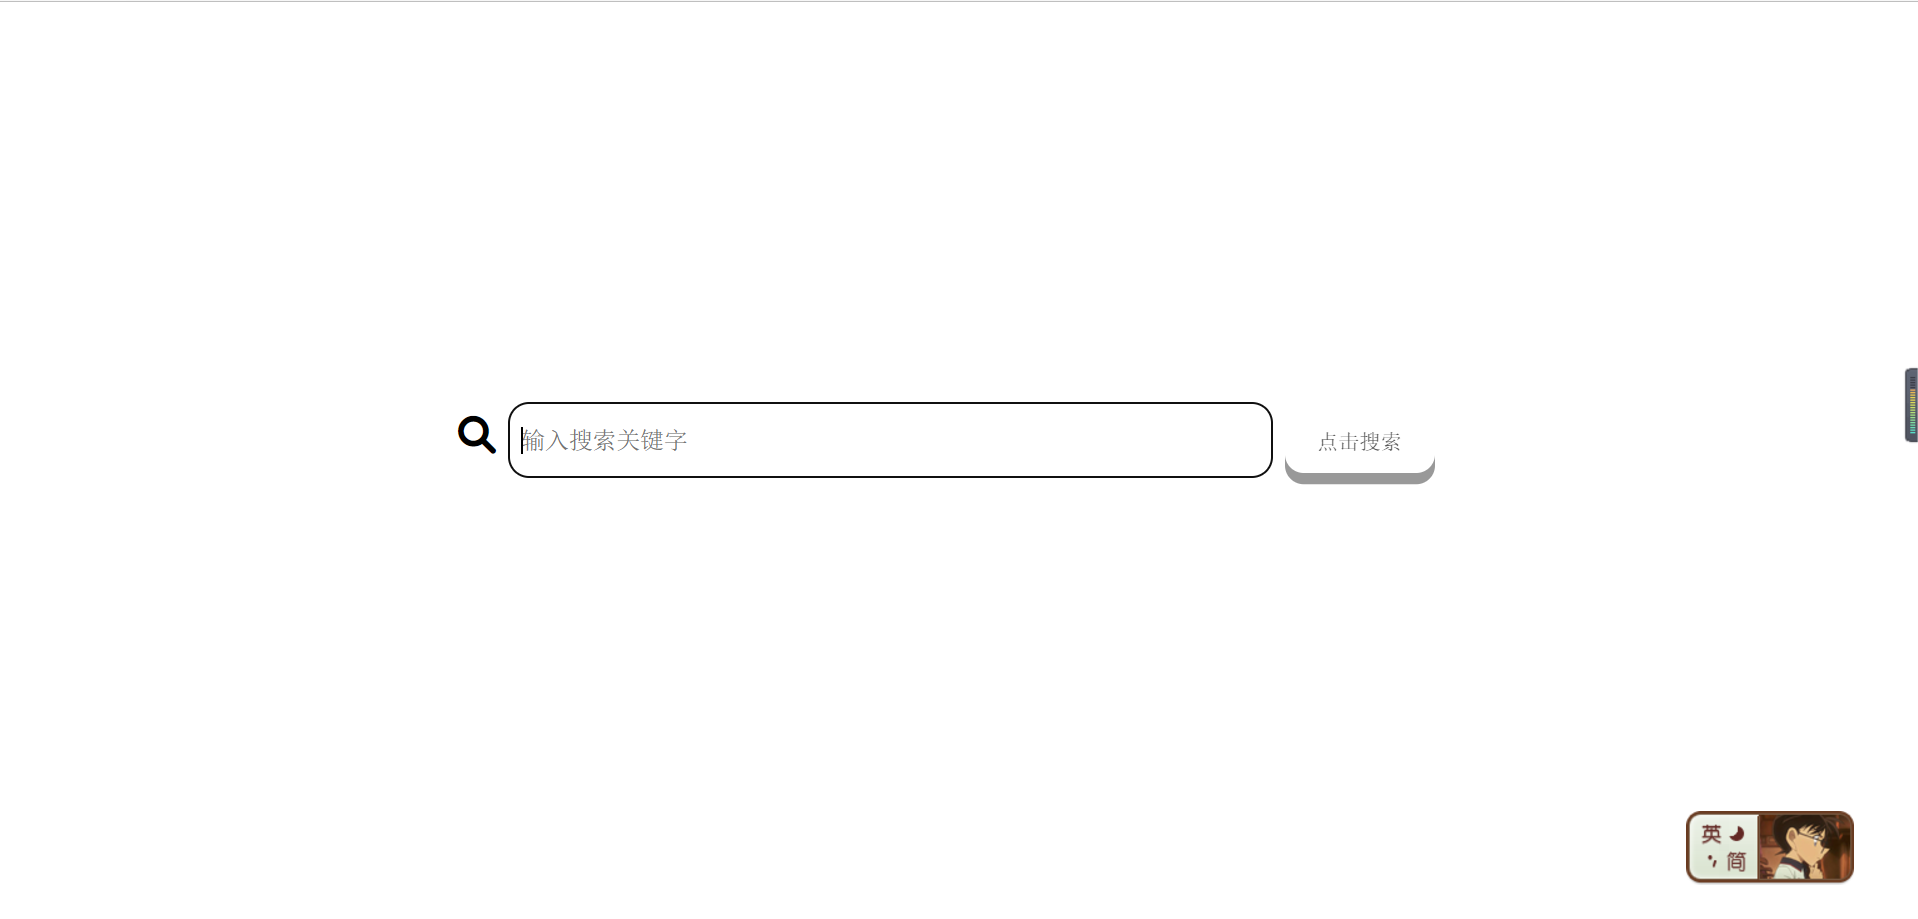
它的最终效果如下:
很多商业公司已经有了大型的搜索引擎,比如百度、360、搜狗、头条新闻的客户端搜索功能,不过它们都是一些非常大型的搜索引擎,单凭我们自己实现一个这样的搜索引擎难度是十分巨大的。
本项目并不是要实现上面类似的一个全网搜索的引擎,因为这样成本太高了,我们要实现一个站内搜索。
站内搜索搜出来的内容更垂直,数据量更小,也更容易做出来。
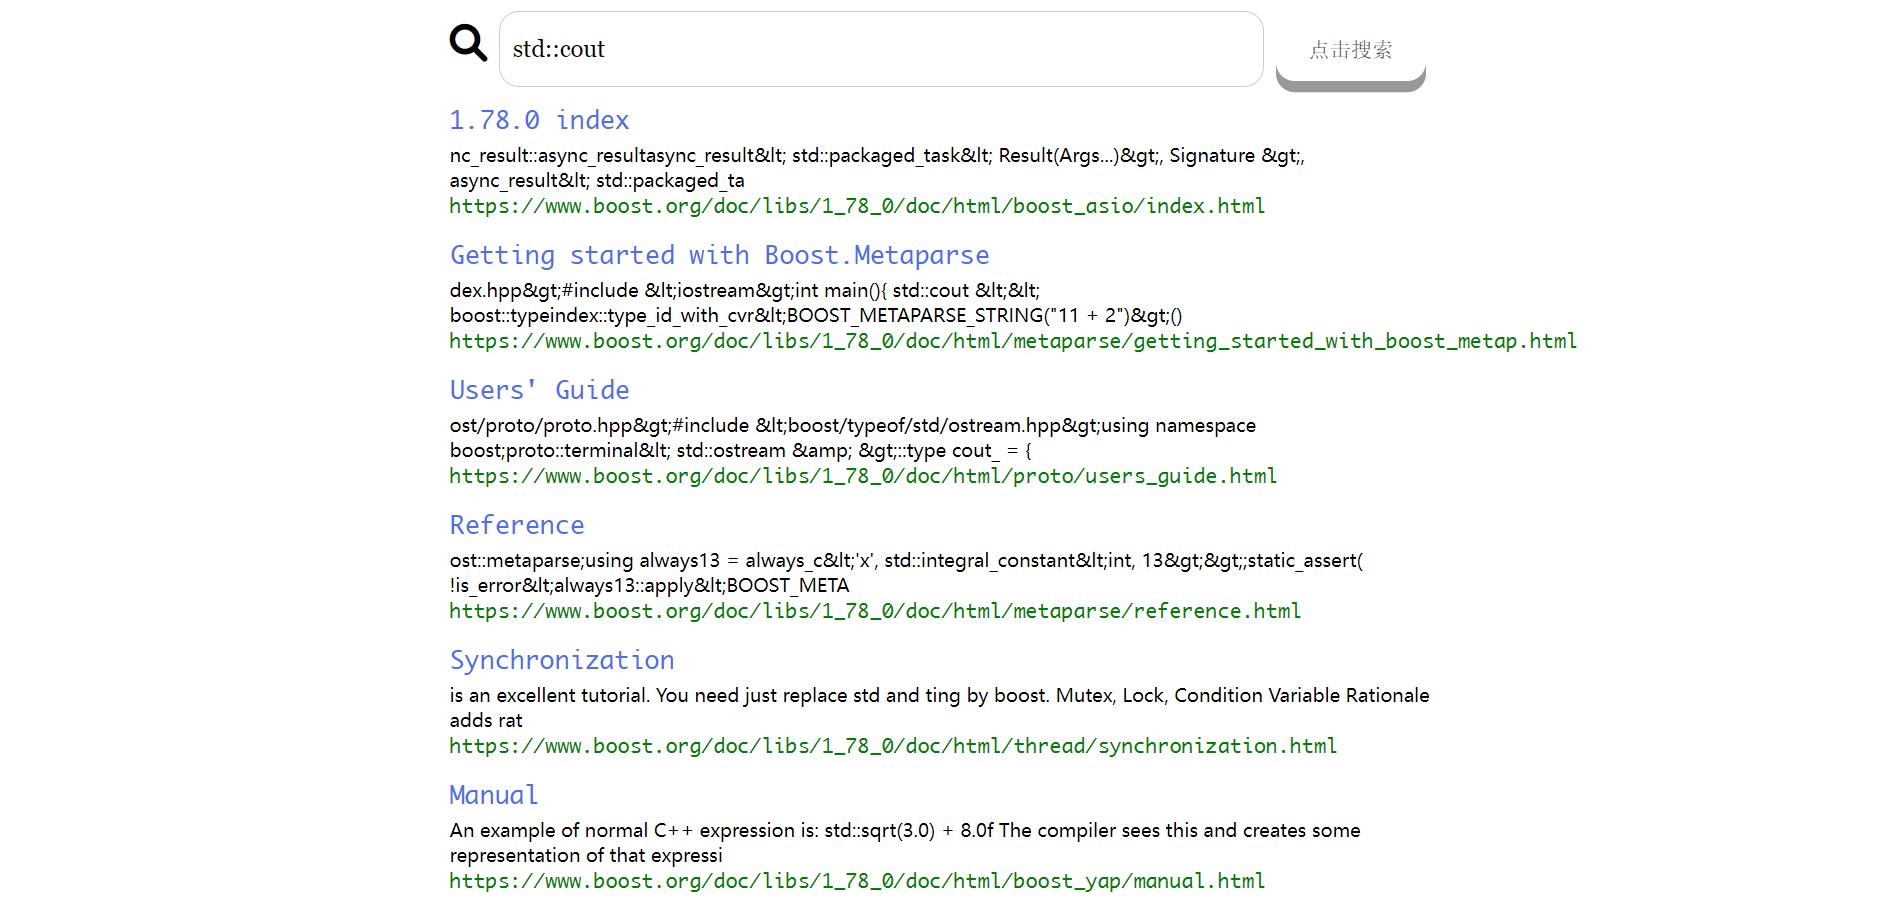
作为一个搜索引擎,它返回给我们的内容如下:

主要分为网页标题(点击后可以进入网页)、网页内容摘要、网址,我们目标要实现出的搜索引擎希望也能返回这三部分内容。
二、搜索引擎相关宏观原理
我们要实现的建议搜素引擎的宏观原理大致如下图:
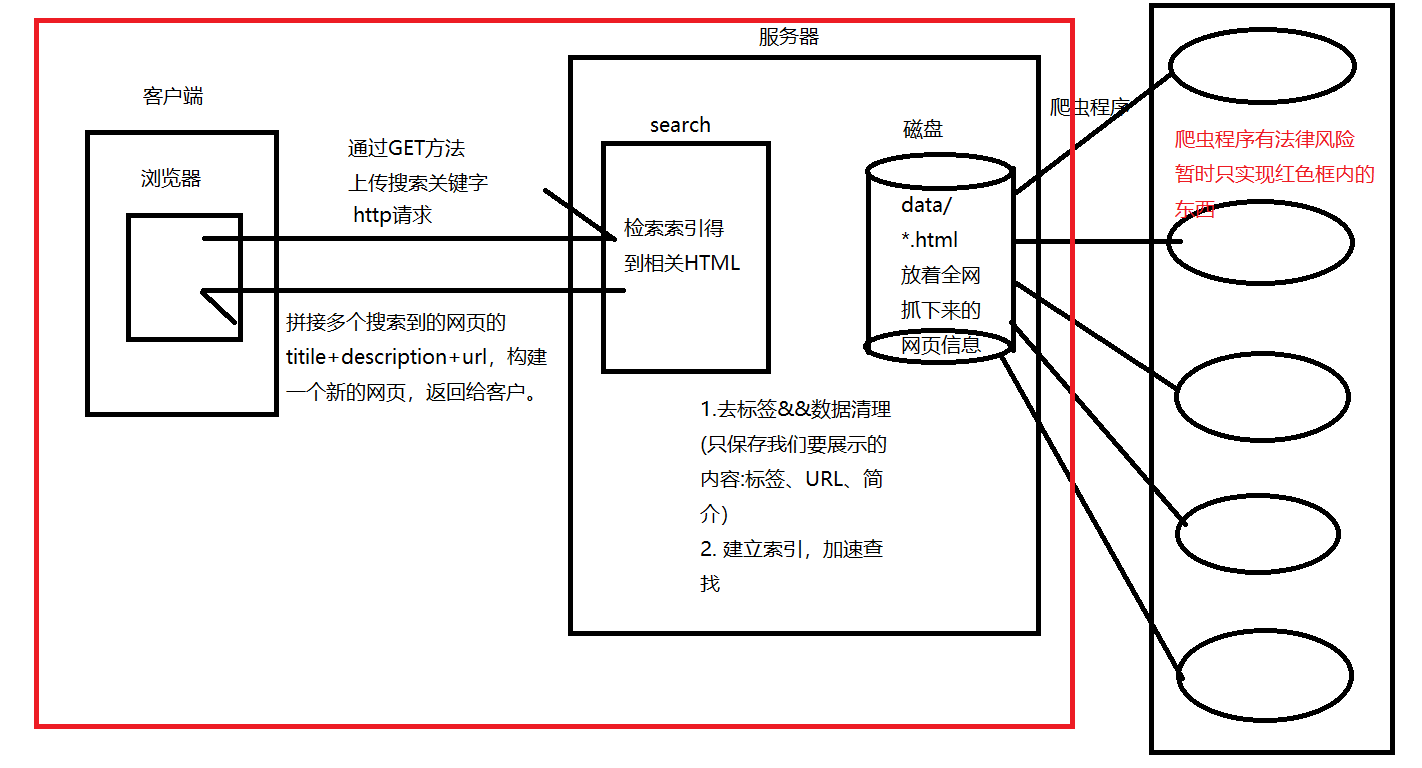
我们把本来是要给爬虫爬的内容提前用合法途径下载好放在服务器上即可。
三、搜索引擎技术栈和项目环境
- 技术栈:C/C++,C++11, STL, 准标准库Boost(主要是一些文件处理), Jsoncpp(序列化反序列化),cppjieba(搜索内容分词),cpphttp-lib(帮助我们写http),html5,css,js,jQuery,Ajax(前端有关)。
- 项目环境:centos7.6云服务器,vim/gcc(g++)/makefile/vscode
四、搜索引擎的具体原理(正排索引与倒排索引)
正排索引:从文档ID找到文档内容,比如我们有一个关键字,然后就去文档中搜索,搜到了就返回文档ID,就是一种正向思维。
| 文档ID | 文档内容 |
|---|---|
| 1 | DNF发布了110版本 |
| 2 | DNF国服在周年庆发布了110级版本 |
分词:目的是为了方便建立倒排索引与查找,比如上面的文档内容的例子:
- DNF发布了110版本:DNF/发布/110/110版本
- DNF国服在周年庆发布了110级版本内容:DNF/国服/DNF国服/周年庆/发布/110/110级/110级版本/
像这个“了”之类的语气词,几乎大部分语句都有,称为停止词(暂停词),一般在分词的时候可以不考虑。
倒排索引:根据关键字,找到文档ID的索引,它的实现是根据文档内容,分词,整理不重复的各个关键字,对应联系到文档ID的过程。
| 关键字 | 文档ID |
|---|---|
| DNF | 文档1、文档2 |
| 发布 | 文档1、文档2 |
| 110 | 文档1、文档2 |
| 110版本 | 文档1、文档2 |
| 发布 | 文档1、文档2 |
| 110级 | 文档2 |
| 国服 | 文档2 |
| DNF国服 | 文档2 |
| 周年庆 | 文档2 |
| 110级版本 | 文档2 |
有了这两个概念后,模拟一次查找的过程:用户输入DNF,我们使用DNF关键字在倒排索引中查找,然后提取出文档ID,然后根据正排索引可以找到文档内容,整合文档内容的titile + description + url文档结果进行摘要,然后构建响应结果。
那么展示的先后顺序呢,这和权值weight有关系
五、编写数据去标签与数据清洗的模块Parser
1 获取原始数据与数据清洗认识
boost url : https://www.boost.org/
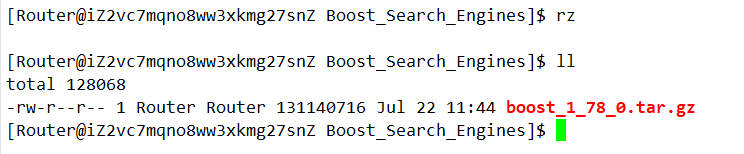
取官网找一个版本的boost库进行下载,我这里下载的是1.78.0,:
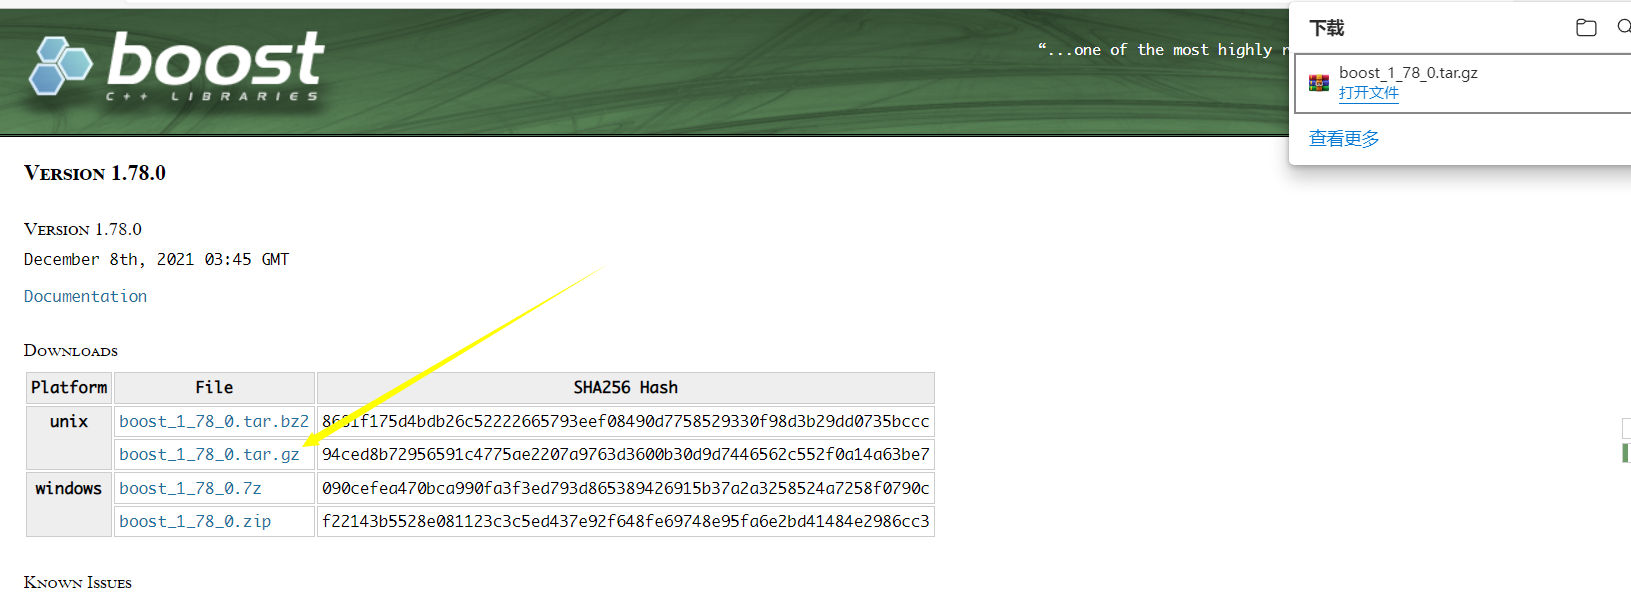
然后利用rz命令把下载下来的压缩文件上传到服务器上。
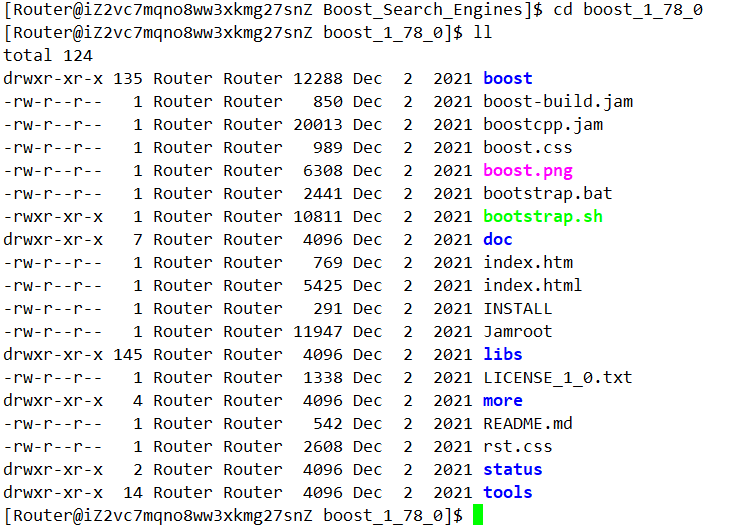
然后解压:
tar xzf boost_1_78_0.tar.gz

解压后文件夹中的内容就是boost官网里头的内容:
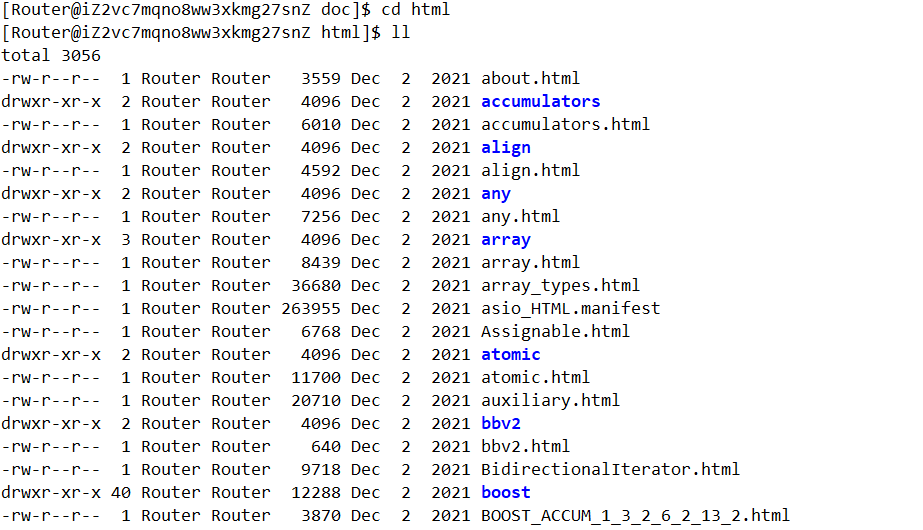
我们在网站中搜索内容时,发现都是这个目录下的html:

所以我们只需要展示doc/html下的文件内容,它就是boost组件的使用手册,这就可以做我们的数据源。
然后我们把要展示的内容放在项目根目录下的data/input中,表示它是数据源,用两条命令即可实现:
mkdir -p data/input
cp -rf boost_1_78_0/doc/html/* data/input/
然后我们就相当于把数据源下完了,把下下来的boost压缩文件和解压后的东西删了即可。
接下来我们编写 parser.cc,对网页信息进行去标签和清洗。
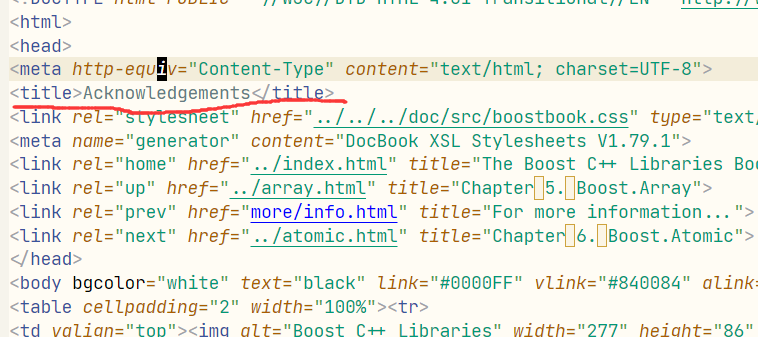
那么什么网页文件(html)的标签呢?我们随便截取一段html文件内容:
<!DOCTYPE html PUBLIC "-//W3C//DTD HTML 4.01 Transitional//EN" "http://www.w3.org/TR/html4/loose.dtd">
<html>
<head>
<meta http-equiv="Content-Type" content="text/html; charset=UTF-8">
<title>Acknowledgements</title>
<link rel="stylesheet" href="../../../doc/src/boostbook.css" type="text/css">
<meta name="generator" content="DocBook XSL Stylesheets V1.79.1">
<link rel="home" href="../index.html" title="The Boost C++ Libraries BoostBook Documentation Subset">
<link rel="up" href="../array.html" title="Chapter?5.?Boost.Array">
<link rel="prev" href="more/info.html" title="For more information...">
<link rel="next" href="../atomic.html" title="Chapter?6.?Boost.Atomic">
</head>
<body bgcolor="white" text="black" link="#0000FF" vlink="#840084" alink="#0000FF">
<table cellpadding="2" width="100%"><tr>
<td valign="top"><img alt="Boost C++ Libraries" width="277" height="86" src="../../../boost.png"></td>
<td align="center"><a href="../../../index.html">Home</a></td>
<td align="center"><a href="../../../libs/libraries.htm">Libraries</a></td>
<td align="center"><a href="http://www.boost.org/users/people.html">People</a></td>
<td align="center"><a href="http://www.boost.org/users/faq.html">FAQ</a></td>
<td align="center"><a href="../../../more/index.htm">More</a></td>
</tr></table>
<hr>
像这种用左右<>抱起来的就是html的标签,这些标签内容对我们的搜索其实是完全没有意义的,因为它是和html这个东西有关系的,我们要全部去掉,留下它有价值的内容。
有的标签有开始有结束,成对出现,有的标签是单独出现的,处理时要注意区分。
这样处理后的html内容我们放到一个文件夹去 data/out,我们html还挺多的,可以看到一共有8000多个:

目标是把每个html都去标签后都写入同一个文件中,每一个文档不需要换行,文档之间用’\3’区分。
用’\3’算是一种经验吧,它是不可显示的控制字符,不会显示,不会污染我们形成的新的文档。
我们都放在下面这个文件中:

2 编写parser.cc
I 大体框架
大体框架如下,这里编码的规范是我的习惯:const &作为输入型参数,&作为输出型参数,如果不涉及资源管理尽量不使用指针。
#include <iostream>
#include <string>
#include <vector>
#include <cerrno>

// 所有的源html文件路径
const std::string src_path = "data/input";
// 处理完放的地方
const std::string out = "data/output/out.txt";

typedef struct DocInfo
{
    std::string title;   // 标题
    std::string content; // 文件简要内容
    std::string url;     // 该文件官网的url
}DocInfo_t;


bool EnumFile(const std::string& src_path, std::vector<std::string>& file_list)
{

}

bool ParseHtml(const std::vector<std::string>& file_list, std::vector<DocInfo_t>& results)
{

}

bool SaveHtml(const std::vector<DocInfo_t>& results, const std::string& output)
{

}

int main()
{
    // 先把所有目标路径下的html网页路径都读到这个vector中
    std::vector<std::string> file_list;
    // 1.递归式的把每个html文件的文件名带路径放到file_list中 方便后续对文件进行读取
    if (!EnumFile(src_path, file_list))
    {
        // 如果失败
        std::cerr << "EnumFile failed, error code : " << errno << std::endl;
        return 1;
    }
    // 2.按照file_list读取文件内容,并进行解析
    std::vector<DocInfo_t> results;
    if (!ParseHtml(file_list, results))
    {
        std::cerr << "ParseHtml failed, error code : " << errno << std::endl;
        return 2;
    }
    // 3.把解析完毕的文件内容写入到out去 按照'\3'作为每个文档的分隔符
    if (!SaveHtml(results, out))
    {
        std::cerr << "SaveHtml failed, error code : " << errno << std::endl;
        return 3;
    }
    return 0;
}
II 使用boost库枚举文件名
首先使用一条命令安装boost库,这里装的是boost库的开发库,centos7.6下安装的是1.53。
sudo yum install boost-devel -y
我们这里要用的是boost库的文件操作,下面这个链接中有详细教程:FileSystem
用到的一些接口简单贴一下说明文档:

这个迭代器可以递归式的访问目录下的所有文件,构造这个迭代器需要path类对象。

这个可以判断是否是普通文件,筛掉像目录啊 管道这些乱起八糟的东西。
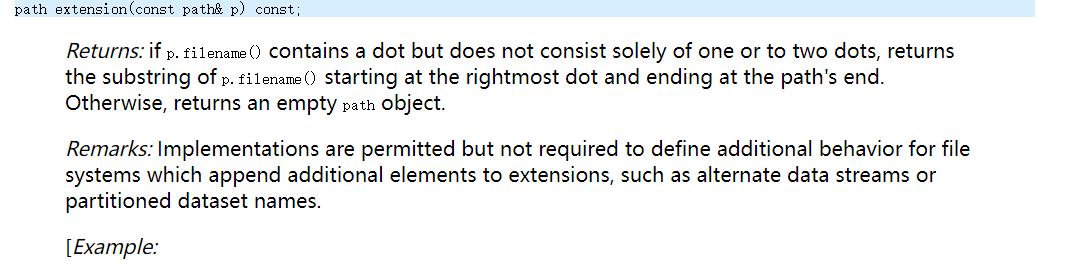
这个path类的extension成员函数可以返回文件的后缀,用于筛掉后缀不是html的普通文件:
bool EnumFile(const std::string& src_path, std::vector<std::string>& file_list)
{
namespace fs = boost::filesystem;
fs::path root_path(src_path);
// 如果路径不存在
if (!fs::exists(root_path))
{
std::cerr << src_path << " don't exist..." << std::endl;
return false;
}
// 定义一个空的递归迭代器 表示递归结束
fs::recursive_directory_iterator end;
// 开始递归遍历
for (fs::recursive_directory_iterator it(root_path); it != end; ++it)
{
// 首先得是普通文件 而非目录
if (!fs::is_regular_file(*it))
{
continue;
}
// 然后后缀得是.html 不是也给我删
else if (it->path().extension() != ".html")
{
continue;
}
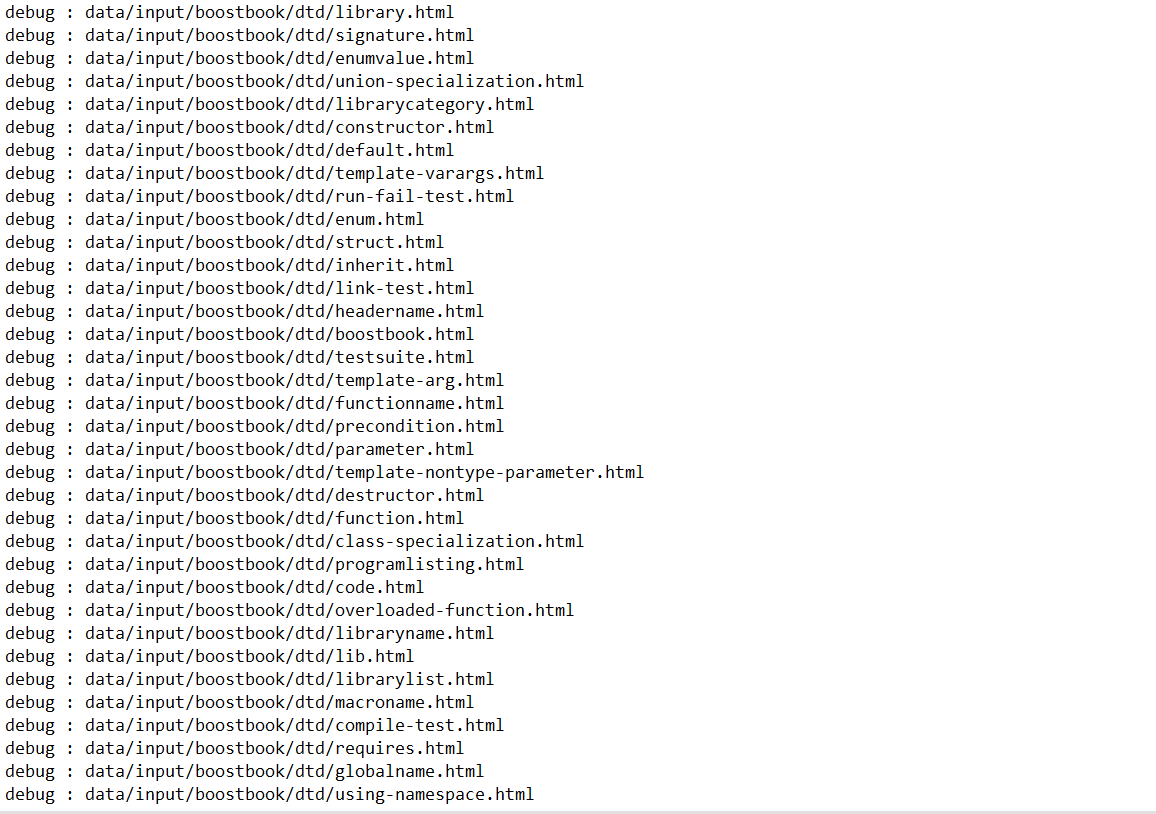
// 走到这里说名就是一个普通的.html文件
file_list.push_back(it->path().string());
std::cout << "debug : " << it->path().string() << std::endl;
}
return true;
}
编译测试一下,记得链接boost_system库和boost_filesystem库。
parser:parser.cc
	g++ -o $@ $^ -std=c++11 -lboost_system -lboost_filesystem
.PHONY:clean
clean:
	rm -rf parser
使用命令 ./parser | wc -l查看一下有多少个:

III 读取文件内容并解析
这一步主要是干这四个事情:
bool ParseHtml(const std::vector<std::string>& file_list, std::vector<DocInfo_t>& results)
{
    for (const auto& file : file_list)
    {
        //1.读取文件

        //2.解析指定的文件,提取title

        //3.解析指定的文件,提取content

        //4.解析指定的文件路径,构建url
    }

    return true;
}
我们去创建一个usetools.hpp,去专门放我们使用的工具。
先把读文件的框架弄好:
//1.读取文件
        std::string out;
        if (!ust::FileTools::Read(file, out))
        {
            // 出错信息后续再规划
            continue;
        }
// usetools.hpp
#include <iostream>
#include <string>
#include <fstream>

namespace ust
{
    class FileTools
    {
    public:
        static bool Read(const std::string& file_path, std::string& out)
        {

            return true;
        }
    };
}
html中,网页的title是一个特殊标签:
类似解析title的布局,我们先把下面大体的框架搭上:
bool ParseHtml(const std::vector<std::string>& file_list, std::vector<DocInfo_t>& results)
{
    for (const auto& file : file_list)
    {
        //1.读取文件
        std::string out;
        if (!ust::FileTools::Read(file, out))
        {
            // std::cout << "Read file " << file << "failed" << std::endl;
            continue;
        }
        DocInfo_t doc;
        //2.解析指定的文件,提取title 就是找<titile>标签
        if (!ParseTitle(out, doc.title))
        {
            continue;
        }
        //3.解析指定的文件,提取content 就是去标签
        if (!ParseContent(out, doc.content))
        {
            continue;
        }
        //4.解析指定的文件路径,构建url
        if (!ParseUrl())
        {
            continue;
        }
        // 走到这里就完成了解析任务 当前文档的信息已经在doc中
        // 用右值引用 效率更高
        results.push_back(std::move(doc));
    }

    return true;
}
所以我们现在的工作分为实现四个函数:ust::FileTools::Read读文件、ParseTitle构建title、ParseContent构建content、ParseUrl构建url。
ust::FileTools::Read
这个实现比较容易,利用 <fstream>中的 ifstream类与 getline即可。
#include <iostream>
#include <string>
#include <fstream>

namespace ust
{
    class FileTools
    {
    public:
        static bool Read(const std::string& file_path, std::string& out)
        {
            std::ifstream ifs(file_path, std::ios::in);
            if (!ifs.is_open())
            {
                std::cerr << "open file " << file_path << "failed" << std::endl;
                return false;
            }
            std::string line;
            // 利用operator bool
            while (std::getline(ifs, line))
            {
                out += line;
            }
            ifs.close();
            return true;
        }
    };
}
ParseTitle
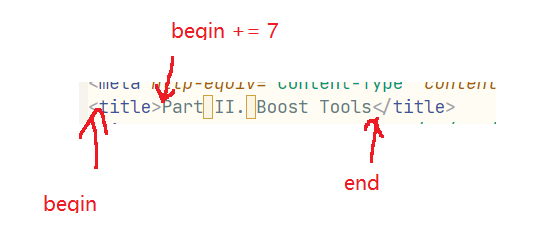
这个也比较简单,利用STL里头的string对象的find方法去搜索 <title>和 </title>的位置,然后中间部分就是标题。
bool ParseTitle(const std::string& str, std::string& out)
{
    size_t begin = str.find("<title>");
    if (begin == std::string::npos)
    {
        return false;
    }
    size_t end = str.find("</title>");
    if (end == std::string::npos)
    {
        return false;
    }
    begin += 7;
    // [begin, end)就是现在的要求的内容范围
    if (begin > end)
    {
        // 出错了
        return false;
    }
    out = str.substr(begin, end - begin);
    return true;
}
ParseContent
这一部就是要去标签,即我们不读 <标签>这种双 <>之内的东西,把除标签外的内容都读进来,考虑到我们在读这个html文件时,只有两种状态:要么是在标签内,要么是在正文也就是我们想要的东西,这里我们使用一个简单的状态机来处理。
在遍历的过程中,只要遇到了 >就说明当前标签被处理完毕了。在Content状态时,如果遇到 <说明正文读完了,下面又是一个标签,如果在CONTENT状态且没有遇到 '<',说明此时的内容是要构建的content内容。
static bool ParseContent(const std::string& str, std::string& out)
{
    // 就是去标签
    enum status
    {
        LABLE,
        CONTENT
    };
    enum status s = LABLE;// 一开始一定在标签内
    for (char c : str)
    {
        switch (s)
        {
        case LABLE:
            if (c == '>') s = CONTENT;// 标签结束了
            break;
        case CONTENT:
            if (c == '<') s = LABLE;// 新的标签开始了
            else
            {
                // 是内容状态且不是'<'
                // 不保留'\n'
                if (c == '\n') c = ' ';
                out.push_back(c);
            }
            break;
        default:
            break;
        }
    }
    return true;
}
ParseUrl
我们这些文件的路径和官网中的路径是有对应的,比如accumulators:

boost url:
https://www.boost.org/doc/libs/1_78_0/doc/html/accumulators.html
在我们的项目中的文档路径:
/data/input/accmumlators.html

因为我们把下载下来的doc/html/*拷贝到了data/input中。
所以URL head就是:https://www.boost.org/doc/libs/1_78_0/doc/html
URL tail应该就是 [data/input]/accumulators.hpp,并且删除前半部分。
URL tail = /accumulators.hpp
URL = URL head + URL tail,就形成了一个官网链接,删掉前部分我们可以通过传入src_path利用substr实现。
所以ParseUrl这个函数原型可以设计为:
static bool ParseUrl(const std::string& url_head, const std::string& file_path, std::string& url)
这块分析清楚了,直接写出代码
static bool ParseUrl(const std::string& url_head, const std::string& file_path, std::string& url)
{
    // file_path = src_path + url_tail
    url = url_head + file_path.substr(src_path.size());
    return true;
}
IV 部分功能测试
挑出来一个看看
ulr是有效的,
内容也是对应的:

个数也是对的上的:

其实一个网页能通过正常就说明了其他网页一般也都是可以的,因为他们都是网页,是等价类。
V 将解析内容写入文件
我们这里有两种思路,第二种思路是出于以后再读取文件方便的角度考虑的。
- version1:文件一内容\3文件二内容\3文件三\3;
- version2:
title \n content \n url\n \3 title\n...
但是verion2虽然分割了title和content和url,但是也有明显缺点,如果我直接用getline,没法直接读到一个文件的全部内容,所以我们可以考虑下面的版本:
title\3content\3url \n title\3content\3url \n
这样一个 getline可以拉起来一个文件title\3content\3url,所以我们采用这种方案。
那么代码就是简单利用 ofstream进行文件写即可:
bool SaveHtml(const std::vector<DocInfo_t>& results, const std::string& output)
{
    // 利用ofstream类进行二进制写入
    std::ofstream ofs(output, std::ios::out | std::ios::binary);
    if (!ofs.is_open())
    {
        std::cerr << "open file " << output << "failed" << std::endl;
        return false;
    }
    // 格式:title\3content\3url\n
    for (auto&& doc : results)
    {
        ofs << doc.title << '\3' << doc.content << '\3' << doc.url << '\n';
    }
    ofs.close();
    return true;
}
这就是我们解析后的文档:
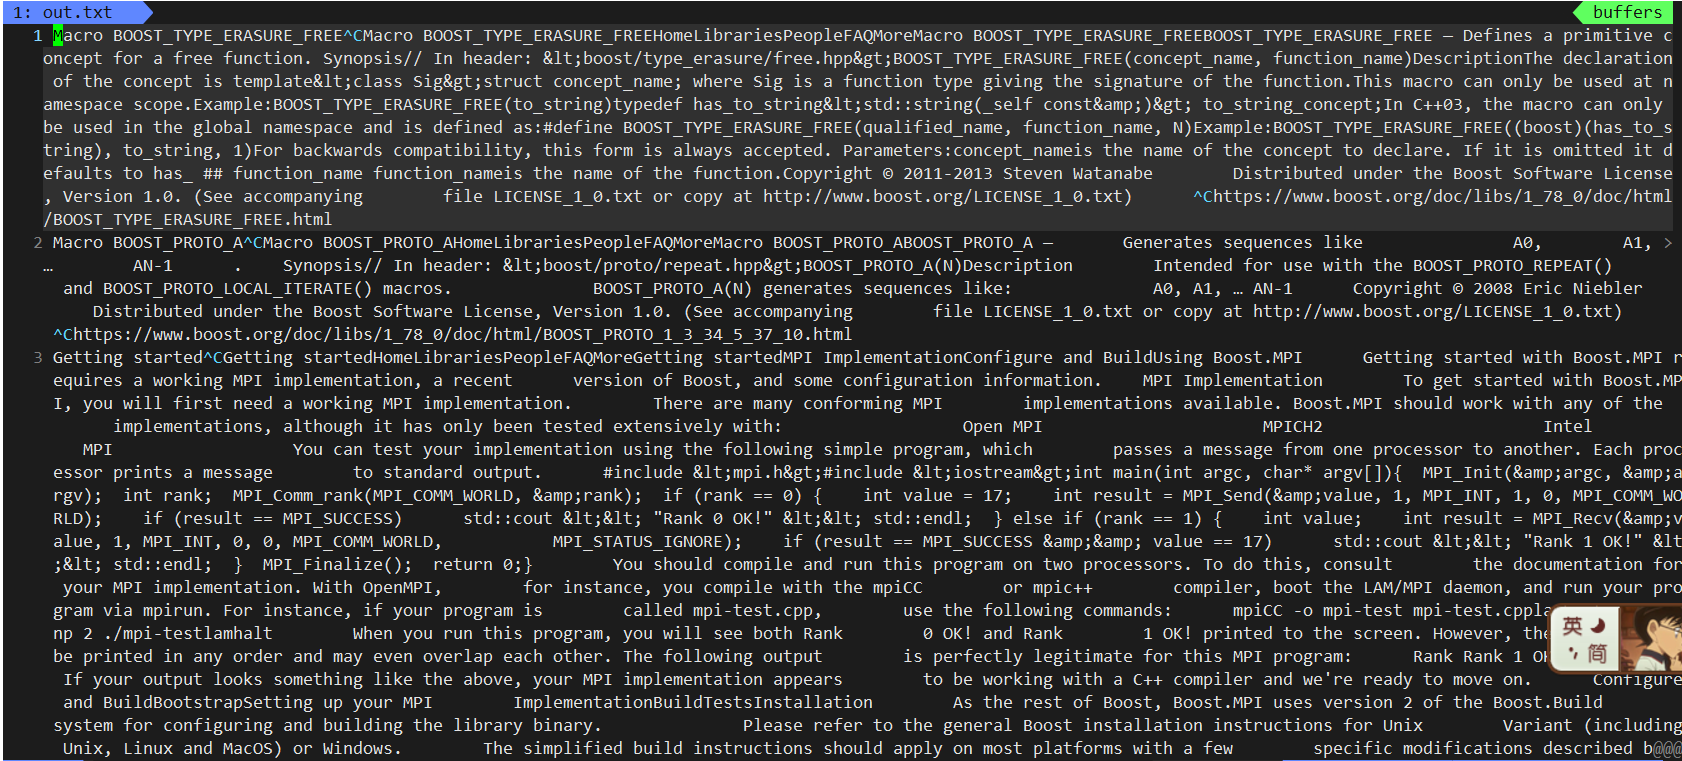
还是总共有8141行:

每一部分也都是正确的:
[Router@iZ2vc7mqno8ww3xkmg27snZ output]$ cat out.txt | tail -1
Chapter?11.?The Conversion Library 1.7Chapter?11.?The Conversion Library 1.7HomeLibrariesPeopleFAQMoreChapter?11.?The Conversion Library 1.7Bjarne StroustrupDave AbrahamsBoris RasinAntony PolukhinCopyright ? 2001 Beman DawesCopyright ? 2014-2021 Antony Polukhin        Distributed under the Boost Software License, Version 1.0. (See accompanying        file LICENSE_1_0.txt or copy at http://www.boost.org/LICENSE_1_0.txt)      Table of ContentsDescriptionPolymorphic castspolymorphic_downcastpolymorphic_castpolymorphic_pointer_castSynopsisHistoryDescription      The Conversion Library improves program safety and clarity by performing otherwise      messy conversions. It includes cast-style function templates designed to complement      the C++ Standard's built-in casts.          To reduce coupling, particularly to standard library IOStreams, the Boost Conversion      Library is supplied by several headers:              The boost/polymorphic_cast.hpp          header provides polymorphic_cast<> and polymorphic_downcast<>          to perform safe casting between polymorphic types.                  The boost/polymorphic_pointer_cast.hpp          header provides polymorphic_pointer_cast<>          and polymorphic_pointer_downcast<>                  The boost/implicit_cast.hpp          header provides implicit_cast<> to perform implicit casts only          (no down-cast, no void*->T*, no U->T if T has only explicit constructors          for U).                  The boost/lexical_cast.hpp          header provides lexical_cast<>          general literal text conversions, such as an int          represented as a string,          or vice-versa.        https://www.boost.org/doc/libs/1_78_0/doc/html/conversion.html
3 Parser代码汇总
// usetools.hpp
#pragma once
#include <iostream>
#include <string>
#include <fstream>

namespace ust
{
    class FileTools
    {
    public:
        static bool Read(const std::string& file_path, std::string& out)
        {
            std::ifstream ifs(file_path, std::ios::in);
            if (!ifs.is_open())
            {
                std::cerr << "open file " << file_path << "failed" << std::endl;
                return false;
            }
            std::string line;
            // 利用operator bool
            while (std::getline(ifs, line))
            {
                out += line;
            }
            ifs.close();
            return true;
        }
    };
}

// parser.cc

#include <iostream>
#include <string>
#include <vector>
#include <cerrno>
#include <boost/filesystem.hpp>
#include <cstring>
#include "usetools.hpp"

// 所有的源html文件路径
const std::string src_path = "data/input";
// 处理完放的地方
const std::string out = "data/output/out.txt";
// 官网链接前缀
const std::string url_head = "https://www.boost.org/doc/libs/1_78_0/doc/html";

typedef struct DocInfo
{
    std::string title;   // 标题
    std::string content; // 文件简要内容
    std::string url;     // 该文件官网的url
}DocInfo_t;


bool EnumFile(const std::string& src_path, std::vector<std::string>& file_list);

bool ParseHtml(const std::vector<std::string>& file_list, std::vector<DocInfo_t>& results);

static bool ParseTitle(const std::string& str, std::string& out);

static bool ParseContent(const std::string& str, std::string& out);

static bool ParseUrl(const std::string& url_head, const std::string& file_path, std::string& url);

bool SaveHtml(const std::vector<DocInfo_t>& results, const std::string& output);

int main()
{
    // 先把所有目标路径下的html网页路径都读到这个vector中
    std::vector<std::string> file_list;
    // 1.递归式的把每个html文件的文件名带路径放到file_list中 方便后续对文件进行读取
    if (!EnumFile(src_path, file_list))
    {
        // 如果失败
        std::cerr << "EnumFile failed, error code : " << errno << std::endl;
        return 1;
    }
    // 2.按照file_list读取文件内容,并进行解析
    std::vector<DocInfo_t> results;
    if (!ParseHtml(file_list, results))
    {
        std::cerr << "ParseHtml failed, error code : " << errno << std::endl;
        return 2;
    }
    // 3.把解析完毕的文件内容写入到out去 按照'\3'作为每个文档的分隔符
    if (!SaveHtml(results, out))
    {
        std::cerr << "SaveHtml failed, error code : " << errno << std::endl;
        return 3;
    }
    return 0;
}

bool EnumFile(const std::string& src_path, std::vector<std::string>& file_list)
{
    namespace fs = boost::filesystem;
    fs::path root_path(src_path);
    // 如果路径不存在
    if (!fs::exists(root_path))
    {
        std::cerr << src_path << " don't exist..." << std::endl;
        return false;
    }
    // 定义一个空的递归迭代器 表示递归结束
    fs::recursive_directory_iterator end;
    // 开始递归遍历
    for (fs::recursive_directory_iterator it(root_path); it != end; ++it)
    {
        // 首先得是普通文件 而非目录
        if (!fs::is_regular_file(*it))
        {
            continue;
        }
        // 然后后缀得是.html 不是也给我删
        else if (it->path().extension() != ".html")
        {
            continue;
        }
        // 走到这里说名就是一个普通的.html文件
        file_list.push_back(it->path().string());
        // std::cout << "debug : " << it->path().string() << std::endl;
    }
    return true;
}

// for debug
// static void showdoc(const DocInfo_t& doc)
// {
//     std::cout << "title : " << doc.title << std::endl;
//     std::cout << "content : " << doc.content << std::endl;
//     std::cout << "url : " << doc.url << std::endl;
// }

bool ParseHtml(const std::vector<std::string>& file_list, std::vector<DocInfo_t>& results)
{
    // int cnt = 0;
    // file就是每个html的路径
    for (const auto& file : file_list)
    {
        //1.读取文件
        std::string out;
        if (!ust::FileTools::Read(file, out))
        {
            // std::cout << "Read file " << file << "failed" << std::endl;
            continue;
        }
        // std::cout << "1" << std::endl;
        DocInfo_t doc;
        //2.解析指定的文件,提取title 就是找<titile>标签
        if (!ParseTitle(out, doc.title))
        {
            continue;
        }
        // std::cout << "2" << std::endl;
        //3.解析指定的文件,提取content 就是去标签
        if (!ParseContent(out, doc.content))
        {
            continue;
        }
        // std::cout << "3" << std::endl;
        //4.解析指定的文件路径,构建url
        if (!ParseUrl(url_head, file, doc.url))
        {
            continue;
        }
        // 走到这里就完成了解析任务 当前文档的信息已经在doc中
        // 用右值引用 效率更高
        // debug
        // showdoc(doc);
        // break;
        results.push_back(std::move(doc));
        // ++cnt;
    }
    // std::cout << cnt << std::endl;
    return true;
}

static bool ParseTitle(const std::string& str, std::string& out)
{
    size_t begin = str.find("<title>");
    if (begin == std::string::npos)
    {
        return false;
    }
    size_t end = str.find("</title>");
    if (end == std::string::npos)
    {
        return false;
    }
    begin += std::string("<title>").size();
    // [begin, end)就是现在的要求的内容范围
    if (begin > end)
    {
        // 出错了
        return false;
    }
    out = str.substr(begin, end - begin);
    return true;
}

static bool ParseContent(const std::string& str, std::string& out)
{
    // 就是去标签
    enum status
    {
        LABLE,
        CONTENT
    };
    enum status s = LABLE;// 一开始一定在标签内
    for (char c : str)
    {
        switch (s)
        {
        case LABLE:
            if (c == '>') s = CONTENT;// 标签结束了
            break;
        case CONTENT:
            if (c == '<') s = LABLE;// 新的标签开始了
            else
            {
                // 是内容状态且不是'<'
                // 不保留'\n'
                if (c == '\n') c = ' ';
                out.push_back(c);
            }
            break;
        default:
            break;
        }
    }
    return true;
}

static bool ParseUrl(const std::string& url_head, const std::string& file_path, std::string& url)
{
    // file_path = src_path + url_tail
    url = url_head + file_path.substr(src_path.size());
    return true;
}


bool SaveHtml(const std::vector<DocInfo_t>& results, const std::string& output)
{
    // 利用ofstream类进行二进制写入
    std::ofstream ofs(output, std::ios::out | std::ios::binary);
    if (!ofs.is_open())
    {
        std::cerr << "open file " << output << "failed" << std::endl;
        return false;
    }
    // 格式:title\3content\3url\n
    for (auto&& doc : results)
    {
        ofs << doc.title << '\3' << doc.content << '\3' << doc.url << '\n';
    }
    return true;
}
六、编写建立索引的模块index
1 大致框架
建一个 index.hpp来处理这一块,然后下面的Search.cc去调用这里头的函数去建立索引。
回忆正排索引与倒排索引的内容,我们首先拿着关键字在倒排索引中查找,找到文档id后去对应正排序索引得到文档内容,所以我们既要建立正排索引也要建立倒排索引。
正排索引是由文档ID映射到文档内容,我们的文档内容都放到一个结构体DocInfo中,所以我们选数组作为正排索引的数据结构。
    struct DocInfo
    {
        std::string title;  // 文档标题
        std::string content;// 去标签后的文档内容
        std::string url;    // 文档官网
        uint64_t doc_id;    // 文档id
    };
而一个倒排索引是由关键字映射到一堆文档,会显示文档id以及其他未来我们可能会增加的东西(比如显示权重),因此先定义一个结构体表示倒排映射到的东西:
// 存储倒排映射到的节点的结构体
    struct InvertNode
    {
        uint64_t doc_id;    // 文档id
        std::string keyword;// 关键字
        int32_t weight;     // 权重
    };
一个倒排索引显然是通过一个关键字映射到一堆倒排结点,存储一堆倒排结点我们选择数组,这个映射就变成了一个关机簪子映射到"倒排拉链",数据结构显然选择 unordered_map哈希表。
然后这个Index肯定要提供构造函数、析构函数正排索引工作的接口、倒排索引工作的接口,根据去标签化后的文件构建索引的函数,所以大致框架如下:
#pragma once
#include <iostream>
#include <string>
#include <vector>
#include <unordered_map>

namespace idx
{
    // 存储文档信息的结构体
    struct DocInfo
    {
        std::string title;  // 文档标题
        std::string content;// 去标签后的文档内容
        std::string url;    // 文档官网
        uint64_t doc_id;    // 文档id
    };
    // 存储倒排映射到的节点的结构体
    struct InvertNode
    {
        uint64_t doc_id;    // 文档id
        std::string keyword;// 关键字
        int32_t weight;     // 权重
    };
    // 倒排索引所引导的"拉链“
    typedef std::vector<InvertNode> InvertedList;
    // 索引类
    class Index
    {
    private:
        // 正排索引是用id找文档内容,所以我们选择数组作为它的数据结构
        // 可以直接从数组下标映射到文档内容
        std::vector<DocInfo> forward_index;
        // 一个关键字可能和多个文档关联 所以用哈希从字符串映射到一个数组(倒排拉链)
        std::unordered_map<std::string, InvertedList> inverted_index;
    public:
        // 构造和析构
        Index() {};
        ~Index() {};
    public:
        // 正排序索引提供根据文档id获得文档信息的结构体的地址(因为它太大了)
        DocInfo* GetForwardIndex(const uint64_t& doc_id)
        {
            if (doc_id >= forward_index.size())
                return nullptr;
            return &forward_index[doc_id];
        }
        // 根据关键字string返回倒排拉链
        InvertedList* GetInvertedIndex(const std::string& keyword)
        {
            if (inverted_index.count(keyword) != 0)
                return &(inverted_index[keyword]);
            return nullptr;
        }
        // 根据去标签格式化后的文档构建正排和倒排索引
        // data/output/out.txt
        bool BuildIndex(const std::string& ParseredFilePath)
        {

            return true;
        }
    };
}
2 BuildIndex框架
首先我们要把那个处理完的文件起码要先打开并读取把,所以首先引入文件操作 <fstream>。
由于我们前面写入 data/output/out.txt的逻辑规则,所以我们可以按行读取一个清洗后的网页,然后拿它去建立正排索引和倒排索引。
因为倒排索引后续要完成分词等和网页内容有关系的操作,为了防止资源被重复拷贝浪费,建立正排索引返回类型设为 DocInfo*。
大体框架设置如下:
// 根据去标签格式化后的文档构建正排和倒排索引
        // data/output/out.txt
        bool BuildIndex(const std::string& ParseredFilePath)
        {
            std::ifstream ifs(ParseredFilePath, std::ios::binary | std::ios::in);
            if (!ifs.is_open())
            {
                std::cerr << "sorry, " << ParseredFilePath << " open error." << std::endl;
                return false;
            }

            // 根据我们前面写入的规则 可以按行读
            std::string line;
            while (std::getline(ifs, line))
            {
                // 建立正排索引 直接读出来然后push到forward_index里头去就行了
                // 因为建立倒排索引需要文件的信息 所以返回值设为DocInfo*
                DocInfo* pdoc = BuildForwardIndex(line);
                if (pdoc == nullptr)
                {
                    std::cerr << "Build " << pdoc->title << " forward index error" << std::endl;
                    continue;
                }
                if (!BuildInvertedIndex(*pdoc))
                {
                    std::cerr << "Build " << pdoc->title << " inverted index error" << std::endl;
                }
            }

            return true;
        }
        // 建立正排索引
        DocInfo* BuildForwardIndex(const std::string& file)
        {

        }
        // 建立倒排索引
        bool BuildInvertedIndex(const DocInfo& doc)
        {

        }
3 编写正排索引
这个倒是简单,直接就用字符串操作把读取来的内容解析为DocInfo,然后插入forwardindex中,并且返回其地址即可。
// 建立正排索引
        DocInfo* BuildForwardIndex(const std::string& file)
        {
            // file:title\3content\3url
            // 1.分割字符串并填充doc
            size_t pos1 = file.find('\3');
            if (pos1 == std::string::npos)
                return nullptr;
            DocInfo doc;
            doc.title = file.substr(0, pos1);
            size_t pos2 = file.find('\3', pos1);
            if (pos2 == std::string::npos)
                return nullptr;
            doc.content = file.substr(pos1 + 1, pos2 - pos1 - 1);
            doc.url = file.substr(pos2 + 1);
            doc.doc_id = forward_index.size();
            //2.将doc插入forward_index中
            forward_index.push_back(std::move(doc));
            return &(forward_index.back());
        }
我这样写利用了右值引用,利用Doc类默认生成的移动赋值函数,把doc的资源给移动到了forward_index上,使得file这个串的资源只被我们拷贝了一次,相对提升了效率。
还有一种方法,我们去用boost库的split方法。
首先把分割字符串的方法加到 usetools.hpp中,方便以后调用,主逻辑如下:
// 建立正排索引
        DocInfo* BuildForwardIndex(const std::string& file)
        {
            // 利用boost库
            std::vector<std::string> results;
            const std::string sep = "\3";
            ust::StringTools::CutString(file, results, sep);
            if (results.size() != 3)
            {
                return nullptr;
            }
            DocInfo doc;
            doc.url = std::move(results.back());
            results.pop_back();
            doc.content = std::move(results.back());
            results.pop_back();
            doc.title = std::move(results.back());
            results.pop_back();
            doc.doc_id = forward_index.size();
            forward_index.push_back(std::move(doc));
            return &(forward_index.back());
        }
然后是在usetool.hpp中实现 ust::StringTools::CutString
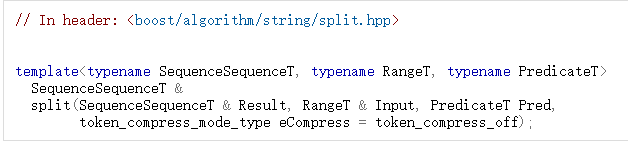
第一个参数是存放结果的地方,第二个参数是数据源,第三个参数是分割符,常用 boost::is_any_of(str)表示凡是str里头的任何一个字符都是分割符号,第四个参数表示是否需要对分隔符之间的空内容进行压缩,比如aaa\3\3\3\3bbbbb,这中间就有很多空字符,默认是不压缩的,加上参数 boost::token_compress_on就可以压缩了,压缩的含义是把分隔符压缩为1个。
    class StringTools
    {
    public:
        static void CutString(const std::string& str, std::vector<std::string>& results, const std::string& sep)
        {
            // boost库中的split函数
            boost::split(results, str, boost::is_any_of(sep), boost::token_compress_on);
        }
    };
这样正排索引就完成了。
4 编写倒排索引
I 原理
我们的目标是建立 word->std::vector<InvertedList>的映射,我们现在有的内容是:
    // 要建立的内容
    // 存储倒排映射到的节点的结构体
    struct InvertElem
    {
        uint64_t doc_id;    // 文档id
        std::string keyword;// 关键字
        int32_t weight;     // 权重
    };
    // 倒排索引所引导的"拉链“
    typedef std::vector<InvertNode> InvertedList;

    std::unordered_map<std::string, InvertedList> inverted_index;
    // 拿到的内容
    struct DocInfo
    {
        std::string title;  // 文档标题
        std::string content;// 去标签后的文档内容
        std::string url;    // 文档官网
        uint64_t doc_id;    // 文档id
    };
假设我们现在有个文档:
title:DNF110版本发布
content:DNF在周年庆发布了110版本
url:http://****
doc_id:711
最终目的:根据一个文档内容生成一个或多个InvertedElem。
因为我们现在是一个一个文档处理的,一个文档会包含多个"词",这个文档中解析出来的词都应该对应到当前的doc_id。
所以首先要对title和content都进行分词:
title:DNF110版本发布->DNF/110版本/发布
content:DNF在周年庆发布了110版本->DNF/周年庆/发布/110版本
第二步,分词完成后,为了统计这些词与文章的相关性以确定weight,需要进行词频统计,我们这里把词和文章的相关性用词频处理即可,一个次在文档中的出现次数越高,这个次与这个文档的相关性越高,另外,在标题中出现的词,我们认为相关性高一些,在内容中出现的词,我们认为相关性低一些,这个相关性就是weight。
然后词和这个词在文章中出现频率还要映射:
struct word_cnt
{
    uint32_t title_cnt;
    uint32_t content_cnt;
};

std::unordered_map<std::string, word_cnt> cntmp;

// 伪代码 遍历分词分出来的词
for (const auto& wd : title_words)
{
    cntmp[wd].title_cnt++;
    // DNF 1 110版本1 发布 1
}
for (auto&& wd : content_words)
{
    cntmp[wd].content_cnt++;
    // DNF 1 周年庆 1 发布 1 110版本 1
}
第三步,知道了在标题、内容中,每个词出现的次数,接下来就要自定义相关性。
for (auto&& wd : word_cnt)
{
    struct InvertedElem elem;
    elem.doc_id = 711;
    elem.word = wd.first;
    elem.weight = 10 * wd.second.title_cnt + wd.second.content_cnt;
    //相关性 知识水平与数据优先  启发性的随便写一写= =
    // 接下来插入倒排索引
    inverted_index[wd.first].push_back(std::move(elem));
}
上面是一个文档形成倒排索引的过程,多个文档循环形成即可,因为一个词可能在多个文档中都出现,所以这样就形成了一个词映射多个倒排拉链结点的结果。
总的来说,三件事:分词、统计词频、构建倒排拉链结点并插入到倒排索引中。
II cppjieba的安装与简单使用
去项目的GitHub网址,使用git clone即可:
// 项目源文档:
https://github.com/yanyiwu/cppjieba
// 安装命令
git clone https://github.com/yanyiwu/cppjieba.git
然后我们跑一下测试用例:
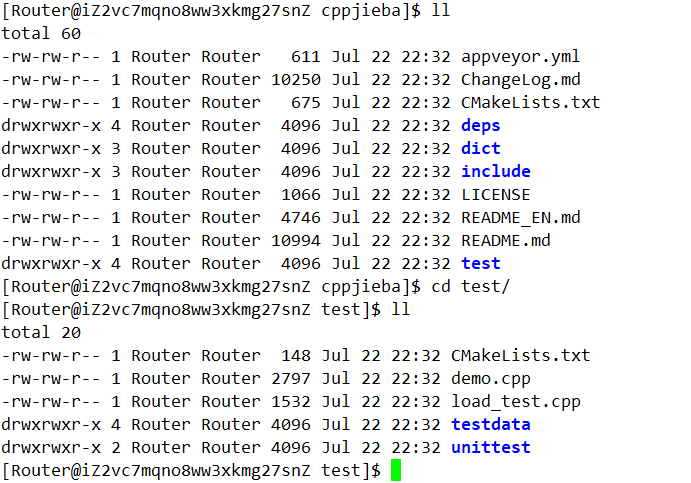
拷贝demo.cpp到上级目录的上级目录:
cp demo.cpp ../../
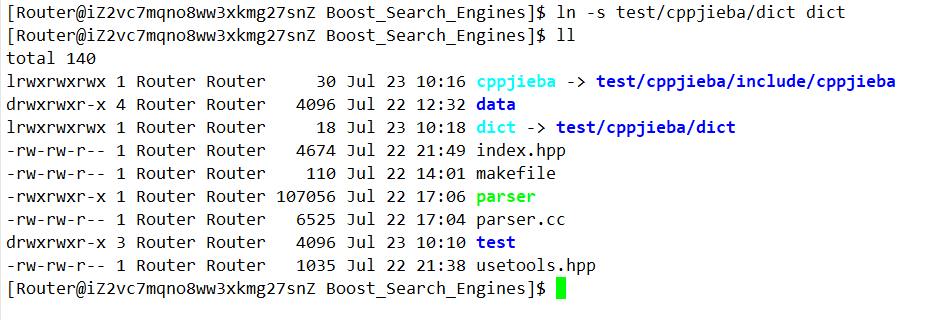
然后为dict建立一个软链接:
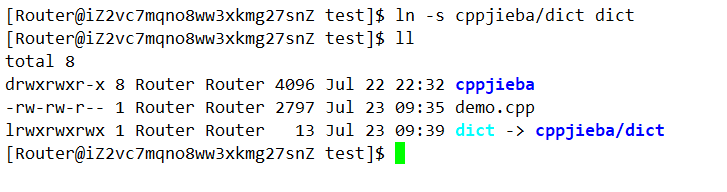
再为include建立一个软链接:
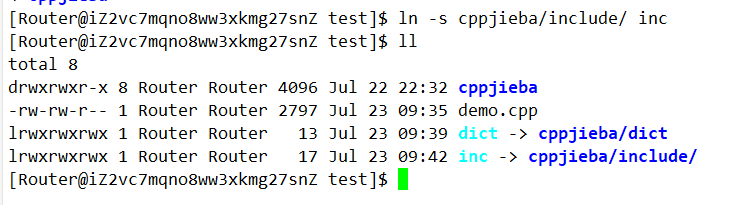
修改一些路径后它告诉我有个文件没有:

拷贝 deps/limonp到 include/cppjieba中去,然后就不报错了,直接用g++编译即可。

运行就可以看结果了:
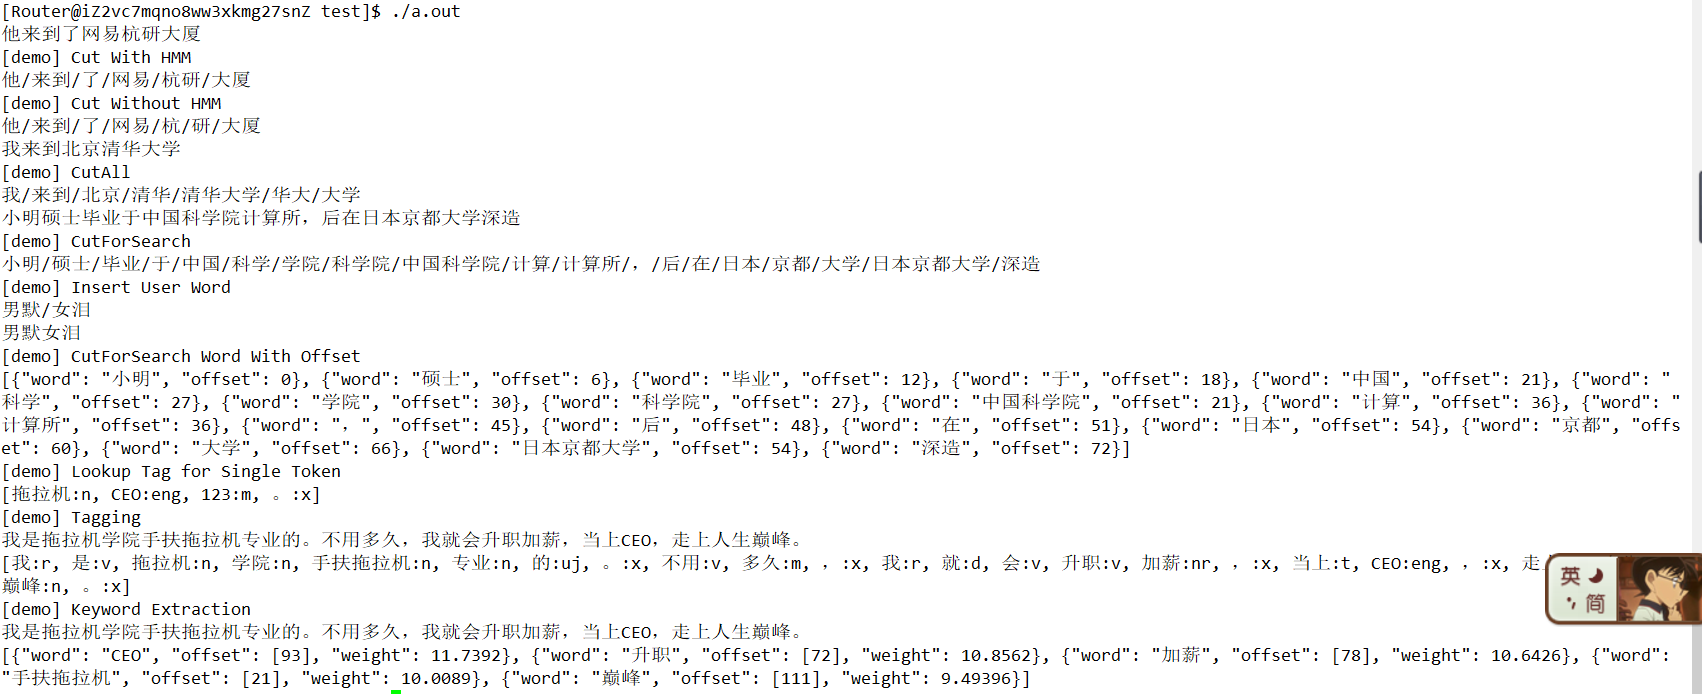
当然我们大部分分词方法都用不到,我们主要用的是 Jieba::CutforSearch
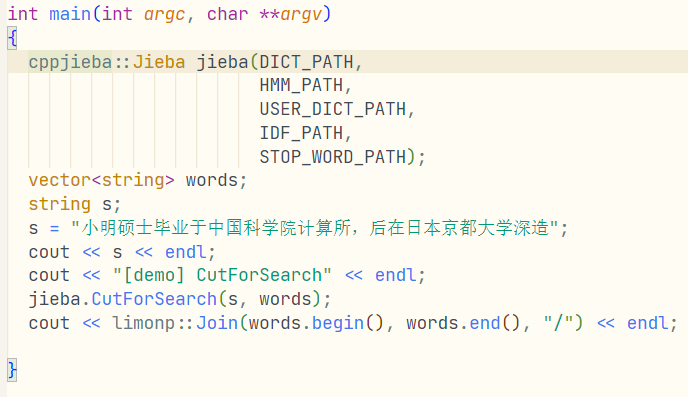
把要切的次通过第一个参数传进来,结果用 std::vector<std::string> jiebawords给我们返回,然后 limonp::Join()这函数能够帮我们链接并打印:

III 引入cppjieba到项目
不仅我们后端的建立倒排索引要用,后续处理用户的搜索输入也要用,所以我们把cppjieba设置为一个工具:
首先通过建立软链接把头文件搞过来:
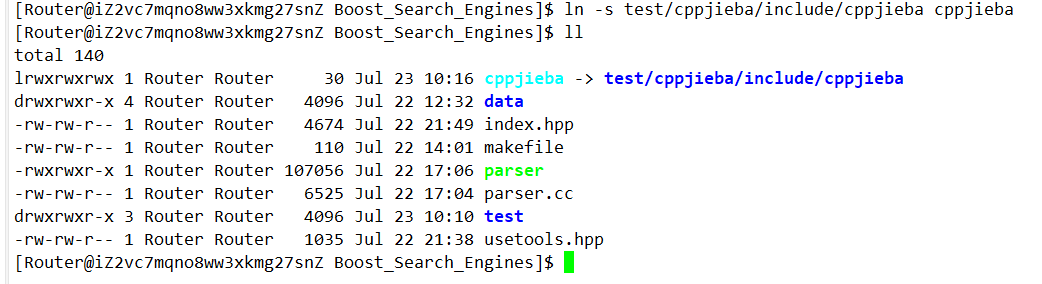
另外,还要把词库建立过来:
// 仿照demo.cpp 建立分词工具
    // 词库
    const char *const DICT_PATH = "./dict/jieba.dict.utf8";
    const char *const HMM_PATH = "./dict/hmm_model.utf8";
    const char *const USER_DICT_PATH = "./dict/user.dict.utf8";
    const char *const IDF_PATH = "./dict/idf.utf8";
    const char *const STOP_WORD_PATH = "./dict/stop_words.utf8";
    class JiebaTools
    {
    private:
        // 为了防止每次都要重复建立 搞成static
        static cppjieba::Jieba jieba;
    public:
        static void CutString(const std::string& src, std::vector<std::string>& out)
        {
            jieba.CutForSearch(src, out);
        }
    };
    cppjieba::Jieba JiebaTools::jieba(DICT_PATH, HMM_PATH, USER_DICT_PATH, IDF_PATH, STOP_WORD_PATH);
IV 编写倒排索引
工具都齐全了,很快就能写出来:
// 建立倒排索引
        bool BuildInvertedIndex(const DocInfo& doc)
        {
            // DocInfo {title content url doc_id}
            // 最终是要建立word->倒排拉链的映射
            // 1. 分词
            std::vector<std::string> title_words;
            ust::JiebaTools::CutString(doc.title, title_words);
            std::vector<std::string> content_words;
            ust::JiebaTools::CutString(doc.content, content_words);
            //2. 词频统计
            struct word_cnt
            {
                int32_t title_cnt;
                int32_t content_cnt;
                word_cnt() : title_cnt(0), content_cnt(0) {}
            };
            std::unordered_map<std::string, word_cnt> cntmp;
            for (auto&& wd : title_words)
            {
                ++cntmp[wd].title_cnt;
            }
            for (auto&& wd : content_words)
            {
                ++cntmp[wd].content_cnt;
            }
            //3.定义相关性并构造倒排索引
            // InvertElem { doc_id keyword weight }
            uint64_t docid = doc.doc_id;
            for (auto&& wd_cnt : cntmp)
            {
                InvertElem elem;
                elem.doc_id = docid;
                elem.keyword = wd_cnt.first;
                elem.weight = vtitle * wd_cnt.second.title_cnt + vcontent * wd_cnt.second.content_cnt;
                inverted_index[wd_cnt.first].push_back(std::move(elem));
            }
        }
但是这样还是缺少了一些细节:搜索时关键词应该大小写同一,不要区分大写字母和小写字母,hello、HELLO、Hello这三种文档不应该做区分,利用boost库的to_lower函数与右值引用写出效率更高一点的代码:
// 建立倒排索引
        bool BuildInvertedIndex(const DocInfo& doc)
        {
            // DocInfo {title content url doc_id}
            // 最终是要建立word->倒排拉链的映射
            // 1. 分词
            std::vector<std::string> title_words;
            ust::JiebaTools::CutString(doc.title, title_words);
            std::vector<std::string> content_words;
            ust::JiebaTools::CutString(doc.content, content_words);
            //2. 词频统计
            struct word_cnt
            {
                int32_t title_cnt;
                int32_t content_cnt;
                word_cnt() : title_cnt(0), content_cnt(0) {}
            };
            std::unordered_map<std::string, word_cnt> cntmp;
            for (auto wd : title_words)
            {
                boost::to_lower(wd);
                ++cntmp[std::move(wd)].title_cnt;
            }
            for (auto wd : content_words)
            {
                boost::to_lower(wd);
                ++cntmp[std::move(wd)].content_cnt;
            }
            //3.定义相关性并构造倒排索引
            // InvertElem { doc_id keyword weight }
            uint64_t docid = doc.doc_id;
            for (auto&& wd_cnt : cntmp)
            {
                InvertElem elem;
                elem.doc_id = docid;
                elem.keyword = wd_cnt.first;
                elem.weight = vtitle * wd_cnt.second.title_cnt + vcontent * wd_cnt.second.content_cnt;
                inverted_index[wd_cnt.first].push_back(std::move(elem));
            }
        }
未来用户搜索时,我们同样把用户的搜索全部转小写,然后再分词即可。
七、编写项目搜索引擎模块Searcher
1 大致框架
首先Search也不是一个单独运行的程序,肯定是把Searcher弄成一个类去给http_server那里使用,所以我们创建一个 searcher.hpp,search.hpp的结构如下:
#include "index.hpp"

namespace ns_searcher
{
    class Searcher
    {
    public:
        Searcher() {}
        ~Searcher() {}
    private:
        ns_index::Index* index;// 供我们进行查找
    private:
        void InitSearch(const std::string& input)
        {
            //1.获取或创建index对象
            //2.根据index对象建立索引
        }
        // 提供搜索功能
        // 第一个参数表示搜索关键字 json_string是返回给用户的搜索结果。
        void Search(const std::string& query, std::string& json_string)
        {
            //1.分词:用户的搜索内容首先进行分词
            //2.触发:根据分词的各个词进行index查找
            //3.合并排序:汇总查找结果,按照相关性(weight)进行降序排序
            //4.构建:根据查找出来的结果,构建json串(jsoncpp)
        }
    };
}
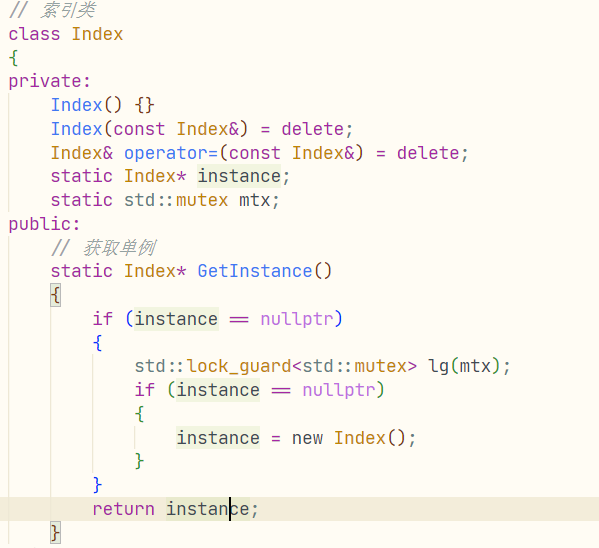
首先,我们发现index这个东西就是把去标签话后的网页内容弄成的一个索引,会很大,并且全程只需要建立一次索引,因此我们可以把它设计为单例。
2 把Index类改成单例
首先,删除它的拷贝构造和赋值,并且把构造放成私有,增加一个静态成员 Index* instance,然后按照常规流程把我们的Index改造成单例,这里用的知识可以去看我的博客Linux多线程2.
3 InitSearcher
根据前面的规划,这一步主要是要获取索引单例并且构建索引:
        void InitSearch(const std::string& input)
        {
            //1.获取或创建index对象
            index = ns_index::Index::GetInstance();
            //2.根据index对象建立索引
            index->BuildIndex(input);
        }
4 查找功能的实现
I 查找内容分词
根据上面的规划,我们首先需要进行分词:
std::vector<std::string> keywords;
//1.分词:用户的搜索内容首先进行分词
ust::JiebaTools::CutString(query, keywords);
II 进行倒排查找并利用哈希容器去掉重复页面
然后是利用倒排索引进行搜索,注意:这里有一个问题:我们可能倒排搜索出来的倒排拉链,里头会有重复的界面,这是因为多个关键词可能都和同一个页面建立了倒排索引,如果直接把倒排搜索完的结果放到待展示的结果中,这样会有重复的界面出现。
比如文档1是"吃葡萄真爽",文档2是"草莓真的吃起来很爽",假设后续我们搜索的关键字是吃和很爽,那么吃会倒排查找到1和2,很爽也会倒排查找到1和2,然后这俩都不处理,直接放到了倒排查找结束的结果数组里头,那不就会显示两次文档1和文档2吗?
所以我们可以设计一个结构,表示我们处理后的待展示的倒排索引结点,为了同样的文档不重复出现,我们设计一个哈希映射,由唯一标识网页的文档id映射到这个待展示的倒排索引结点,这样每次处理时,保证页面不会重复出现。
我们先想想这个结构怎么设计把,首先为了后面再使用正排序索引得到文章其他内容,doc_id是必须的,然后权重也是必须的,因为后续我们要按权重排序,然后把这次搜索出来的关键词也放到这个结构里,用一个 std::vector<std::string>存储。
    // 倒排查找后处理完的节点
    // 保证一个结点只映射一个网页
    struct InvertedNode
    {
        uint64_t doc_id;
        int32_t weight;
        std::vector<std::string> keywords;
        InvertedNode() : doc_id(0), weight(0) {}
    }
然后利用哈希容器同一个文档id会映射到同一个节点去,处理完后,遍历哈希表来完成我们把倒排索引出来的东西去重并放到一个 std::vector里头的任务。
   	    //2.触发:根据分词的各个词进行index查找
            // 设计一个结构 把这次倒排搜索的处理结果都存起来
            std::vector<InvertedNode> InvertedNodeVec;
            std::unordered_map<uint64_t, InvertedNode> processmp;
            for (auto wd : keywords)
            {
                // 建立索引时是忽略大小写的,搜索时也要
                boost::to_lower(wd);
                // 怎么查呢? 先查倒排获得一个倒排拉链
                auto* inverted_list = index->GetInvertedIndex(wd);
                if (inverted_list == nullptr)
                {
                    // 如果关键字在倒排索引中没有 那说明我们加载的文档里头都没有 那只能看下一个词了
                    continue;
                }
                // 遍历搜索出来的倒排索引
                for (auto&& elem : *inverted_list)
                {
                    auto& item = processmp[elem.doc_id];
                    item.doc_id = elem.doc_id;
                    item.keywords.push_back(elem.keyword);
                    item.weight += elem.weight;
                }
            }
            // 在遍历这个processmp 把结点都正道InvertedNodeVec里头
            for (auto& pi : processmp)
            {
                InvertedNodeVec.push_back(std::move(pi.second));
            }
III 根据权重排序
利用std::sort和lambda表达式即可:
	    //3.合并排序:汇总查找结果,按照相关性(weight)进行降序排序
            std::sort(InvertedNodeVec.begin(), InvertedNodeVec.end()
            [](const InvertedNode& e1, const InvertedNode& e2)
            {
                return e1.weight > e2.weight;
            });
IV 利用jsoncpp构建json串
首先根据倒排结点找到真行正排序搜索找到对应的文档内容结点
 	    //4.构建,构建json串(jsoncpp)
            for (auto&& item : :根据查找出来的结果InvertedNodeVec)
            {
                ns_index::DocInfo* docinfo = index->GetForwardIndex(item.doc_id);
                if (docinfo == nullptr) continue;

            }
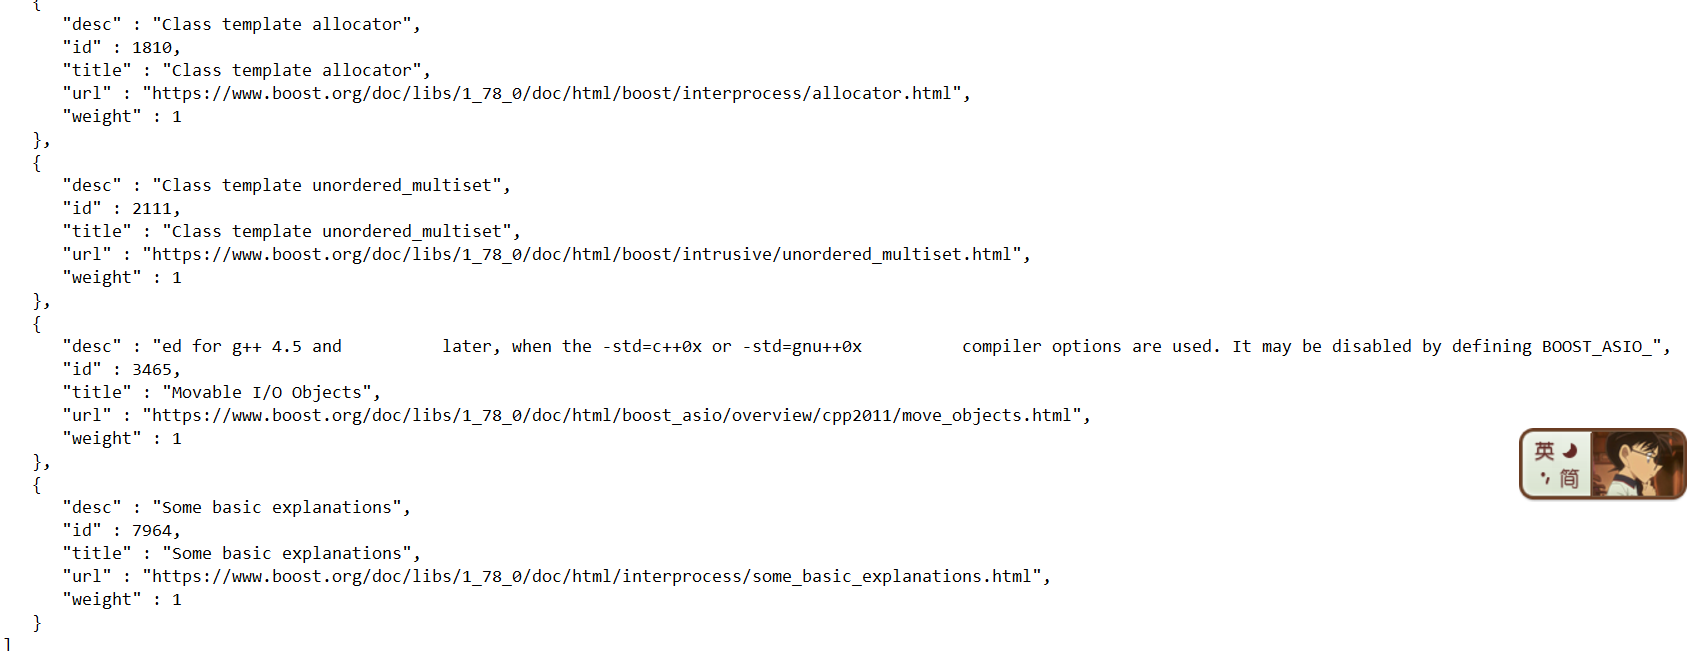
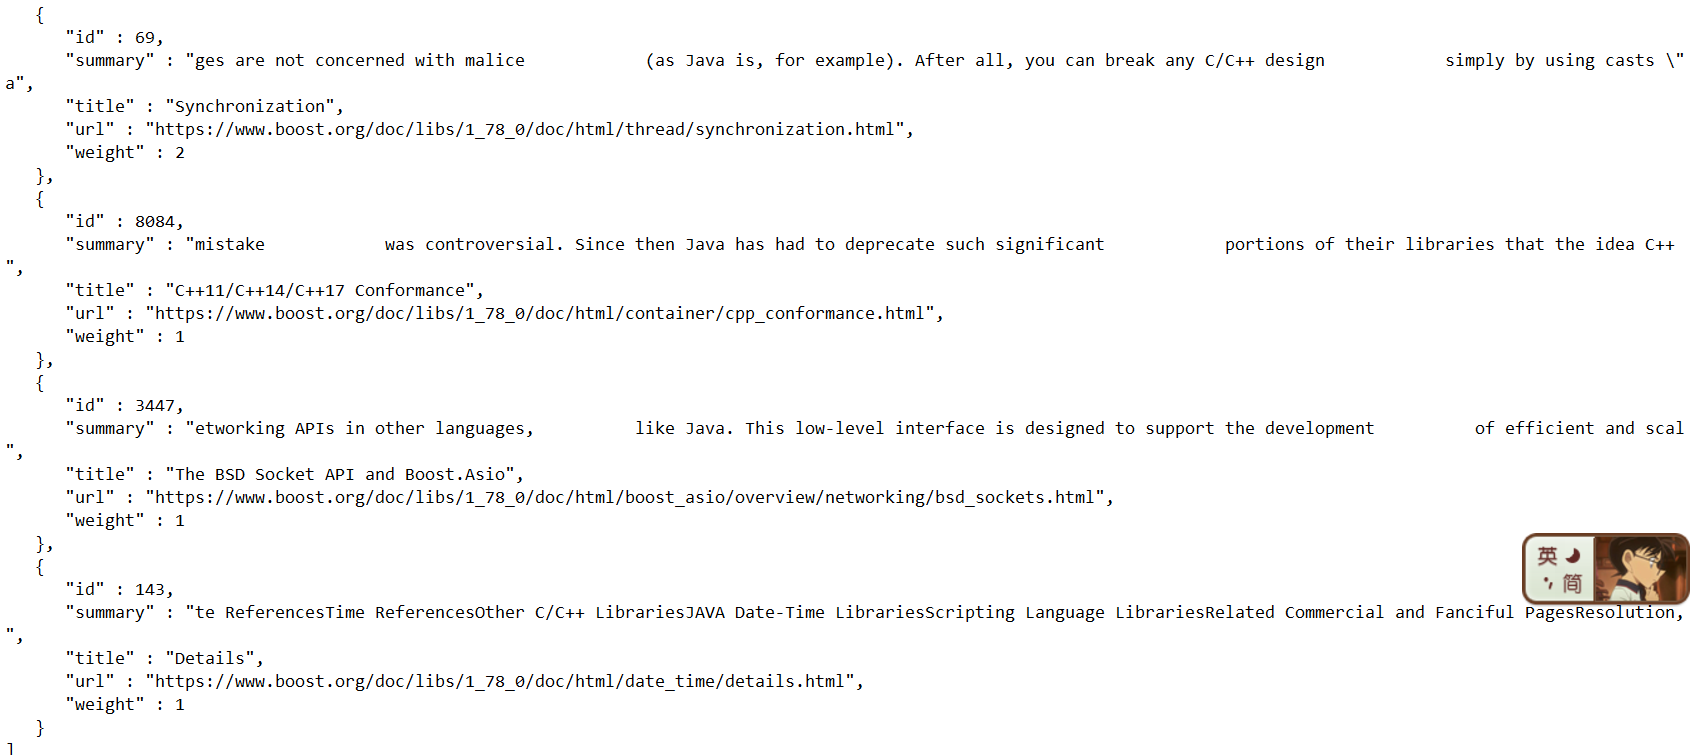
我们都知道,网络中传输数据必须要对数据进行序列化和反序列化,这样以一个字符串的方式在网络中发数据而不是以结构体的方式发数据,所以我们这里利用jsoncpp来完成序列化,首先安装:
sudo yum install -y jsoncpp-devel
Json是一种kv式的序列化工具,它序列化出来的内容类似:

使用它,首先构建一个Json::Value root对象,然后把你的内容希望序列化成的名字用[“name”]这样弄好,然后调用Json::FastWriter序列化即可,Writer类用来实现序列化,Reader类用来实现反序列化,Json::Value是一个中间kv式结构。
但是这里我们还有一个问题,正文内容 docinfo->content我们不希望全部显示出来啊,正常搜索引擎也不会把全部内容一次都给我们显示出来,所以,这里我们加一个函数GetSummary表示获得摘要,我们在写一个小节在实现它。
            //4.构建,构建json串(jsoncpp)
            Json::Value root;
            for (auto&& item : InvertedNodeVec)
            {
                ns_index::DocInfo* docinfo = index->GetForwardIndex(item.doc_id);
                if (docinfo == nullptr) continue;
                // jsoncpp是用来完成序列化和反序列化的
                Json::Value cur;
                cur["title"] = docinfo->title;
                cur["id"] = (int)docinfo->doc_id;
                cur["url"] = docinfo->url;
                cur["weight"] = item.weight;
                // GetDesc
                //找到word在html_content中的首次出现,
                // 然后往前找50字节(如果没有,从begin开始),往后找100字节(如果没有,到end就可以的)
                //截取出这部分内容
                cur["desc"] = GetSummary(doc->content, item.keywords[0]);
                root.append(cur);
            }
            Json::FastWriter writer;
            json_string = writer.write(root);
这个函数的完整内容为:
	// 提供搜索功能
        // 第一个参数表示搜索关键字 json_string是返回给用户的搜索结果。
        void Search(const std::string& query, std::string& json_string)
        {
            std::vector<std::string> keywords;
            //1.分词:用户的搜索内容首先进行分词
            ust::JiebaTools::CutString(query, keywords);
            //2.触发:根据分词的各个词进行index查找
            // 设计一个结构 把这次倒排搜索的处理结果都存起来
            std::vector<InvertedNode> InvertedNodeVec;
            std::unordered_map<uint64_t, InvertedNode> processmp;
            for (auto wd : keywords)
            {
                // 建立索引时是忽略大小写的,搜索时也要
                boost::to_lower(wd);
                // 怎么查呢? 先查倒排获得一个倒排拉链
                auto* inverted_list = index->GetInvertedIndex(wd);
                if (inverted_list == nullptr)
                {
                    // 如果关键字在倒排索引中没有 那说明我们加载的文档里头都没有 那只能看下一个词了
                    continue;
                }
                // 遍历搜索出来的倒排索引
                for (auto&& elem : *inverted_list)
                {
                    auto& item = processmp[elem.doc_id];
                    item.doc_id = elem.doc_id;
                    item.keywords.push_back(elem.keyword);
                    item.weight += item.weight;
                }
            }
            // 在遍历这个processmp 把结点都正道InvertedNodeVec里头
            for (auto& pi : processmp)
            {
                InvertedNodeVec.push_back(std::move(pi.second));
            }
            //3.合并排序:汇总查找结果,按照相关性(weight)进行降序排序
            std::sort(InvertedNodeVec.begin(), InvertedNodeVec.end()
            [](const InvertedNode& e1, const InvertedNode& e2)
            {
                return e1.weight > e2.weight;
            });
            //4.构建,构建json串(jsoncpp)
            Json::Value root;
            for (auto&& item : InvertedNodeVec)
            {
                ns_index::DocInfo* docinfo = index->GetForwardIndex(item.doc_id);
                if (docinfo == nullptr) continue;
                // jsoncpp是用来完成序列化和反序列化的
                Json::Value cur;
                cur["title"] = docinfo->title;
                cur["id"] = (int)docinfo->doc_id;
                cur["url"] = docinfo->url;
                cur["weight"] = item.weight;
                // GetDesc
                //找到word在html_content中的首次出现,
                // 然后往前找50字节(如果没有,从begin开始),往后找100字节(如果没有,到end就可以的)
                //截取出这部分内容
                cur["desc"] = GetSummary(doc->content, item.keywords[0]);
                root.append(cur);
            }
            Json::FastWriter writer;
            json_string = writer.write(root);
        }
V GetSummary找到关键词出现的部分内容并显示它
我们找到word在html_content中首次出现的位置,然后往前找50个字节(如果不够就从开头开始),往后找100个字节(如果没有 到end即可),作为摘要,截取出这部分内容,用字符串算法即可实现。
	std::string GetSummary(const ns_index::DocInfo& doc, const std::string& word)
        {
            //1. 找到首次出现的位置
            size_t pos = doc.content.find(word);
            if (pos == std::string::npos)
            {
                return doc.title;
            }
            //2. 获取start位置和end位置
            const size_t prev_steps = 50;
            const size_t next_steps = 100;
            size_t start = 0;
            size_t end = doc.content.size() - 1;
            if (pos - start + 1 > prev_steps) start = pos + 1 - prev_steps;
            if (end - pos + 1 > next_steps) end = pos + next_steps - 1;
            //3. 截取子串
            if (start > end) return "None";
            return doc.content.substr(start, end - start + 1);
        }
5 编写测试
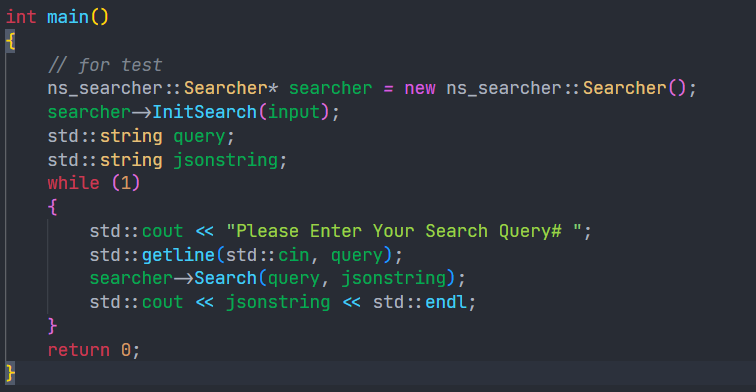
我们创建一个sever.cc,进行一个命令行测试。
#include "searcher.hpp"

const std::string input = "/home/Router/Boost_Search_Engines/data/output/out.txt";

int main()
{
    // for test
    ns_searcher::Searcher* searcher = new ns_searcher::Searcher();
    searcher->InitSearch(input);
    std::string query;
    std::string jsonstring;
    while (1)
    {
        std::cout << "Please Enter Your Search Query# ";
        std::cin >>query;
        searcher->Search(query, jsonstring);
        std::cout << jsonstring << std::endl;
    }
    return 0;
}
修改一下makefile:
all:parser sever
parser:parser.cc
	g++ -o $@ $^ -std=c++11 -lboost_system -lboost_filesystem
sever:sever.cc
	g++ -o $@ $^ -std=c++11 -ljsoncpp
.PHONY:clean
clean:
	rm -rf parser sever
最终修了几个bug以后,可以正常运行了:
首先这里我们测试读入最好就不要用std::cin,因为这个东西是按空格读取的,如果我们输入的东西有空格呢?
所以这里我们用getline读取。
另外,这里很可能有无符号数的bug:
	std::string GetSummary(const ns_index::DocInfo& doc, const std::string& word)
        {
            //1. 找到首次出现的位置
            size_t pos = doc.content.find(word);
            if (pos == std::string::npos)
            {
                return doc.title;
            }
            //2. 获取start位置和end位置
            const size_t prev_steps = 50;
            const size_t next_steps = 100;
            size_t start = 0;
            size_t end = doc.content.size() - 1;
            if (pos - start + 1 > prev_steps) start = pos + 1 - prev_steps;
            if (end - pos + 1 > next_steps) end = pos + next_steps - 1;
            //3. 截取子串
            if (start > end) return "None";
            return doc.content.substr(start, end - start + 1);
        }
我们转成加法而放弃减法,因为无符号数没有负数情况,防止溢出啥的:
	std::string GetSummary(const ns_index::DocInfo& doc, const std::string& word)
        {
            //1. 找到首次出现的位置
            size_t pos = doc.content.find(word);
            if (pos == std::string::npos)
            {
                return doc.title;
            }
            //2. 获取start位置和end位置
            const size_t prev_steps = 50;
            const size_t next_steps = 100;
            size_t start = 0;
            size_t end = doc.content.size() - 1;
            if (pos + 1 > prev_steps + start) start = pos + 1 - prev_steps;
            if (end + 1 > next_steps + pos) end = pos + next_steps - 1;
            //3. 截取子串
            if (start > end) return "None";
            return doc.content.substr(start, end - start + 1);
        }
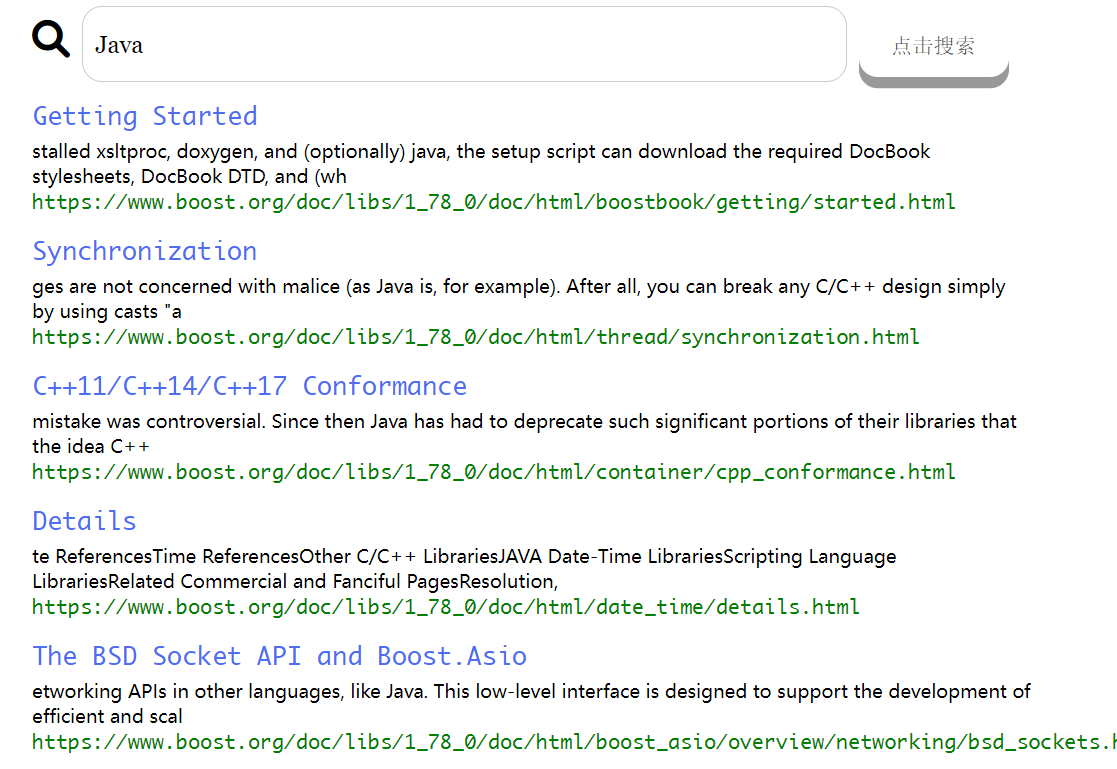
这里还有一个问题,比如我们搜索Java,明明有却不显示的问题:

这是因为搜索内容我们都把它搞成了小写,但是doc.content中的内容该是大写还是大写,所以Java在内容中但是照耀不显示,我们可以考虑用 std::search
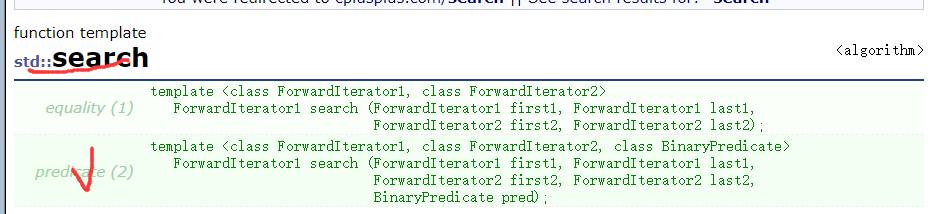
第一个迭代器区间是待查找的迭代器范围,第二个迭代器区间是目标值的迭代器范围,最后一个参数表示我们我们可以指明怎样算相等的方法,我们这样改写:
        std::string GetSummary(const ns_index::DocInfo& doc, const std::string& word)
        {
            //1. 找到首次出现的位置
            auto iter = std::search(doc.content.begin(), doc.content.end(), word.begin(), word.end(),
            [](char x, char y){
                return tolower(x) == tolower(y);
            });
            if (iter == doc.content.end())
            {
                return doc.title;
            }
            size_t pos = iter - doc.content.begin();
            //2. 获取start位置和end位置
            const size_t prev_steps = 50;
            const size_t next_steps = 100;
            size_t start = 0;
            size_t end = doc.content.size() - 1;
            if (pos + 1 > prev_steps + start) start = pos + 1 - prev_steps;
            if (end + 1 > next_steps + pos) end = pos + next_steps - 1;
            //3. 截取子串
            if (start > end) return "None";
            return doc.content.substr(start, end - start + 1);
        }
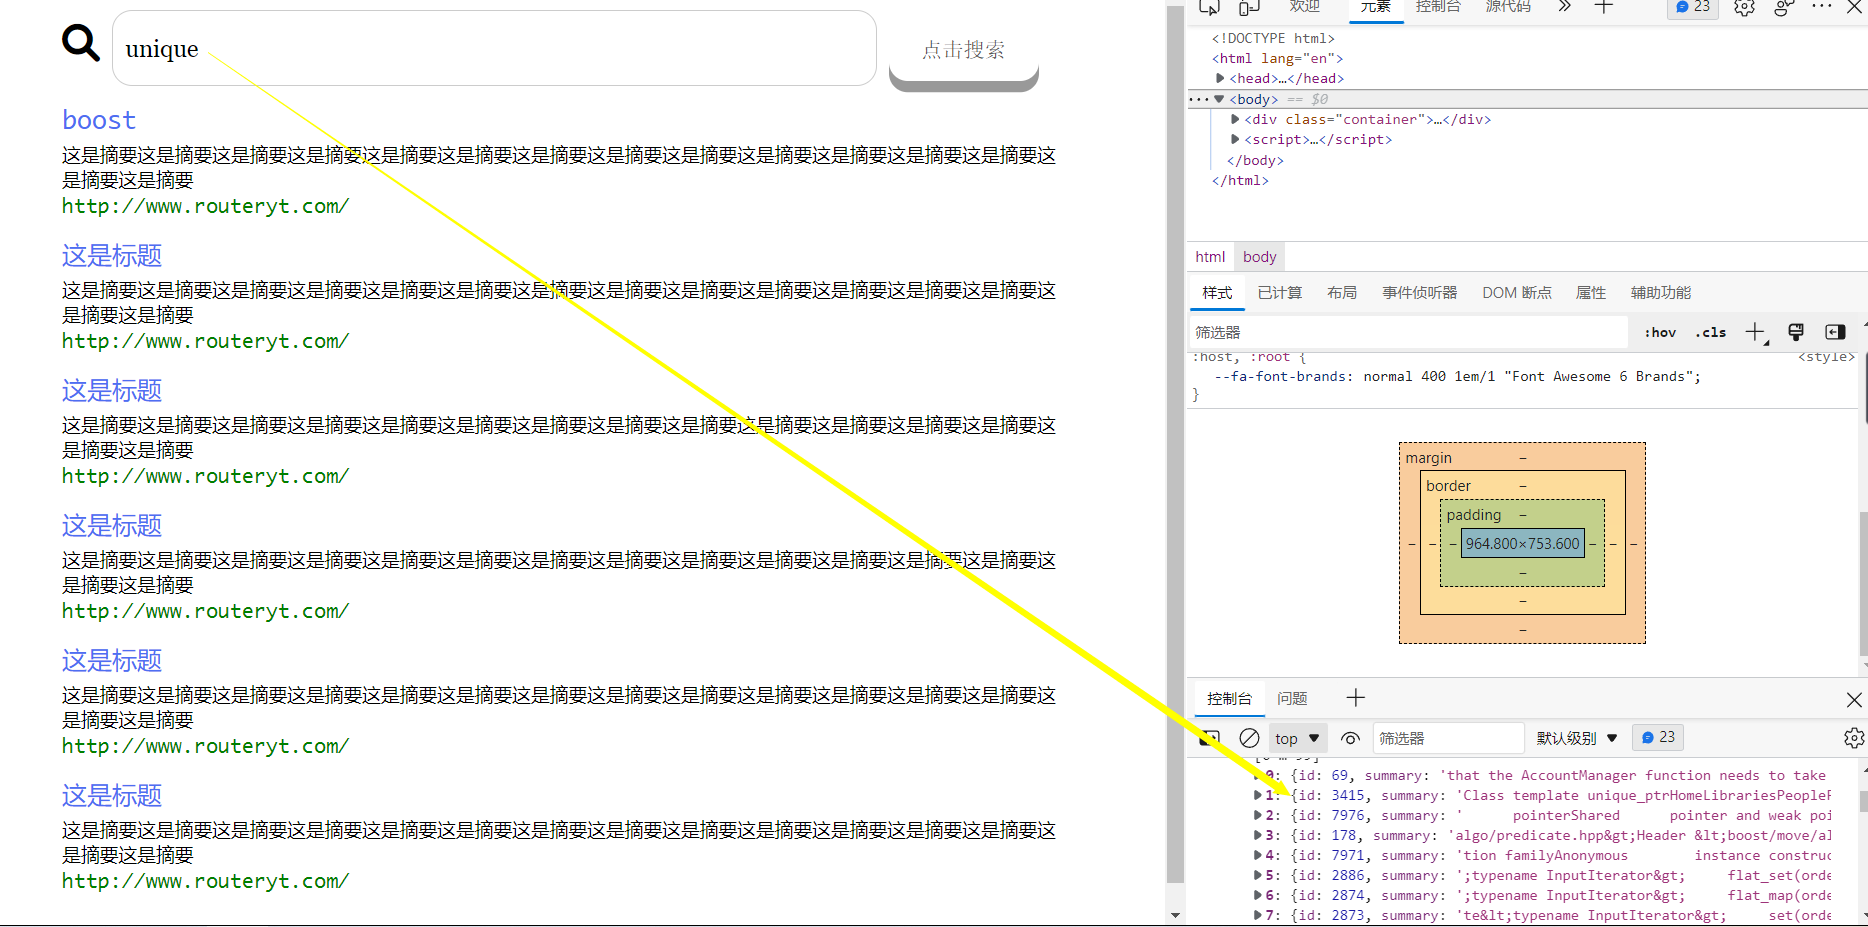
可以发现问题就解决了:
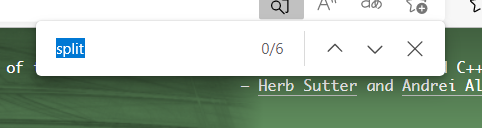
另外测试中,我们又发现了一个bug:利用浏览器的页面搜索功能,我们可以验证权值:搜索split,发现有的会多计算一个,有的会少计算一个:
例如这个,页面是由25个,标题里也有一个,按理说是35权值,然而:
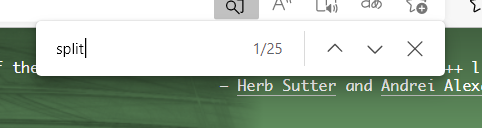

这个页面搜索有6个,标题有一个,结果居然是17

我们猜测是少1的原因因为jieba分词得到的结果和网页里头直接按词搜索得到的结果不同导致的。
多1的原因可以解释,我们前面的Parser,是通过找标签 <title>找到的标题,它也在文件内容中,也就是说,如果一个词出现在了title中,它会被作为标题(10weight)和内容(1weight)统计两次。
所以我们把701的分词结果打印出来看看:
Class template split _ iterator Class template split _ iteratorHomeLibrariesPeopleFAQMoreClass template split _ iteratorboost : : algorithm : : split _ iterator — split _ iteratorSynopsis / / In header : & lt ; boost / algorithm / string / find _ iterator . hpp & gt ; template & lt ; typename IteratorT & gt ; class split _ iterator : public iterator _ facade & lt ; split _ iterator & lt ; IteratorT & gt ; , const iterator _ range & lt ; IteratorT & gt ; , forward _ traversal _ tag & gt ; { public : / / construct / copy / destruct split _ iterator ( ) ; split _ iterator ( const split _ iterator & amp ; ) ; template & lt ; typename FinderT & gt ; split _ iterator ( IteratorT , IteratorT , FinderT ) ; template & lt ; typename FinderT , typename RangeT & gt ; split _ iterator ( RangeT & amp ; , FinderT ) ; / / public member functions bool eof ( ) const ; / / private member functions const match _ type & amp ; dereference ( ) const ; void increment ( ) ; bool equal ( const split _ iterator & amp ; ) const ; } ; DescriptionSplit iterator encapsulates a Finder and allows for incremental searching in a string . Unlike the find iterator , split iterator iterates through gaps between matches . Find iterator is a readable forward traversal iterator . Dereferencing the iterator yields an iterator _ range delimiting the current match . split _ iterator public construct / copy / destructsplit _ iterator ( ) ; Default constructor . Construct null iterator . All null iterators are equal . Postconditions : eof ( ) = = true split _ iterator ( const split _ iterator & amp ; Other ) ; Copy constructor . Construct a copy of the split _ iterator template & lt ; typename FinderT & gt ; split _ iterator ( IteratorT Begin , IteratorT End , FinderT Finder ) ; Constructor . Construct new split _ iterator for a given finder and a range . template & lt ; typename FinderT , typename RangeT & gt ; split _ iterator ( RangeT & amp ; Col , FinderT Finder ) ; Constructor . Construct new split _ iterator for a given finder and a collection . split _ iterator public member functionsbool eof ( ) const ; Eof check . Check the eof condition . Eof condition means that there is nothing more to be searched i . e . find _ iterator is after the last match . split _ iterator private member functionsconst match _ type & amp ; dereference ( ) const ; void increment ( ) ; bool equal ( const split _ iterator & amp ; Other ) const ; Copyright ? 2002 - 2004 Pavol DrobaUse , modification and distribution is subject to the Boost Software License , Version 1.0. ( See accompanying file LICENSE _ 1 _ 0. txt or copy at http : / / www . boost . org / LICENSE _ 1 _ 0. txt )
看不清楚,没关系,再把cnt都打印出来:
[外链图片转存失败,源站可能有防盗链机制,建议将图片保存下来直接上传(img-H6FR1USA-1658673441623)(image/项目说明文档/1658585524330.png)]
说明是因为分词工具导致实际查看个数会有时候少1,我们的代码应该是没问题的(大概)。
为了命名方便,这个就叫debug.cc把,改下名字。
6 index.cc与searcher.cc代码汇总
// index.hpp
#pragma once
#include <iostream>
#include <string>
#include <vector>
#include <unordered_map>
#include <fstream>
#include <mutex>
#include "usetools.hpp"
namespace ns_index
{
// 存储文档信息的结构体
struct DocInfo
{
std::string title; // 文档标题
std::string content;// 去标签后的文档内容
std::string url; // 文档官网
uint64_t doc_id; // 文档id
};
// 存储倒排映射到的节点的结构体
struct InvertElem
{
uint64_t doc_id; // 文档id
std::string keyword;// 关键字
int32_t weight; // 权重
};
// 倒排索引所引导的"拉链“
typedef std::vector<InvertElem> InvertedList;
// 索引类
class Index
{
private:
Index() {}
Index(const Index&) = delete;
Index& operator=(const Index&) = delete;
static Index* instance;
static std::mutex mtx;
public:
// 获取单例
static Index* GetInstance()
{
if (instance == nullptr)
{
std::lock_guard<std::mutex> lg(mtx);
if (instance == nullptr)
{
instance = new Index();
}
}
return instance;
}
private:
// 正排索引是用id找文档内容,所以我们选择数组作为它的数据结构
// 可以直接从数组下标映射到文档内容
std::vector<DocInfo> forward_index;
// 一个关键字可能和多个文档关联 所以用哈希从字符串映射到一个数组(倒排拉链)
std::unordered_map<std::string, InvertedList> inverted_index;
public:
// 构造和析构
~Index() {};
public:
// 正排序索引提供根据文档id获得文档信息的结构体的地址(因为它太大了)
DocInfo* GetForwardIndex(const uint64_t& doc_id)
{
if (doc_id >= forward_index.size())
{
std::cerr << "doc_id out of range." << std::endl;
return nullptr;
}
return &forward_index[doc_id];
}
// 根据关键字string返回倒排拉链
InvertedList* GetInvertedIndex(const std::string& keyword)
{
if (inverted_index.count(keyword) != 0)
return &(inverted_index[keyword]);
std::cerr << keyword << " has no InvertedList" << std::endl;
return nullptr;
}
// 根据去标签格式化后的文档构建正排和倒排索引
// data/output/out.txt
public:
bool BuildIndex(const std::string& ParseredFilePath)
{
std::ifstream ifs(ParseredFilePath, std::ios::in | std::ios::binary);
if (!ifs.is_open())
{
std::cerr << "sorry, " << ParseredFilePath << " open error." << std::endl;
return false;
}
// 根据我们前面写入的规则 可以按行读
std::string line;
int count = 0;
while (std::getline(ifs, line))
{
// 建立正排索引 直接读出来然后push到forward_index里头去就行了
// 因为建立倒排索引需要文件的信息 所以返回值设为DocInfo*
// std::cout << line << std::endl;
DocInfo* pdoc = BuildForwardIndex(line);
if (pdoc == nullptr)
{
std::cerr << "Build forward index error" << std::endl;
continue;
}
if (!BuildInvertedIndex(*pdoc))
{
std::cerr << "Build " << pdoc->title << " inverted index error" << std::endl;
continue;
}
++count;
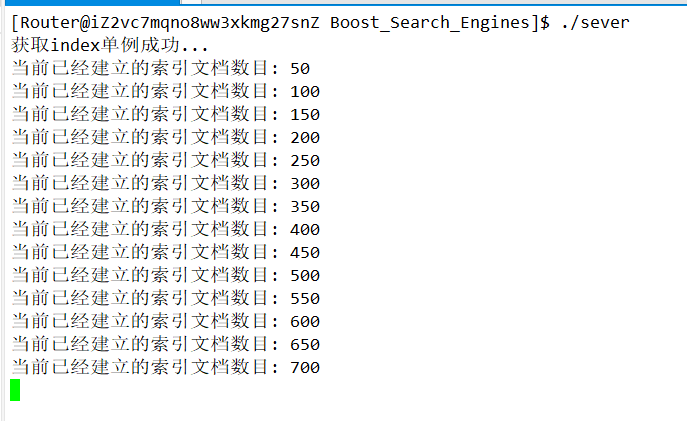
if (count % 50 == 0)
std::cout << "当前已经建立的索引文档数目: " << count << std::endl;
}
return true;
}
private:
// 建立正排索引
DocInfo* BuildForwardIndex(const std::string& file)
{
// version1:手写分割字符串
// // file:title\3content\3url
// // 1.分割字符串并填充doc
// size_t pos1 = file.find('\3');
// if (pos1 == std::string::npos)
// return nullptr;
// DocInfo doc;
// doc.title = file.substr(0, pos1);
// size_t pos2 = file.find('\3', pos1);
// if (pos2 == std::string::npos)
// return nullptr;
// doc.content = file.substr(pos1 + 1, pos2 - pos1 - 1);
// doc.url = file.substr(pos2 + 1);
// doc.doc_id = forward_index.size();
// //2.将doc插入forward_index中
// forward_index.push_back(std::move(doc));
// return &(forward_index.back());
// 利用boost库
std::vector<std::string> results;
const std::string sep = "\3";
ust::StringTools::CutString(file, results, sep);
if (results.size() != 3)
{
return nullptr;
}
DocInfo doc;
doc.url = std::move(results.back());
results.pop_back();
doc.content = std::move(results.back());
results.pop_back();
doc.title = std::move(results.back());
results.pop_back();
doc.doc_id = forward_index.size();
forward_index.push_back(std::move(doc));
return &(forward_index.back());
}
// 建立倒排索引
bool BuildInvertedIndex(const DocInfo& doc)
{
// DocInfo {title content url doc_id}
// 最终是要建立word->倒排拉链的映射
// 1. 分词
std::vector<std::string> title_words;
ust::JiebaTools::CutString(doc.title, title_words);
std::vector<std::string> content_words;
ust::JiebaTools::CutString(doc.content, content_words);
//2. 词频统计
struct word_cnt
{
int32_t title_cnt;
int32_t content_cnt;
word_cnt() : title_cnt(0), content_cnt(0) {}
};
std::unordered_map<std::string, word_cnt> cntmp;
for (auto wd : title_words)
{
boost::to_lower(wd);
++cntmp[std::move(wd)].title_cnt;
}
for (auto wd : content_words)
{
boost::to_lower(wd);
++cntmp[std::move(wd)].content_cnt;
}
// if (doc.doc_id == 701)
// {
// for (auto&& wd : title_words) std::cout << wd << ' ';
// for (auto&& wd : content_words) std::cout << wd << ' ';
// std::cout << std::endl;
// for (auto&& p : cntmp)
// {
// std::cout << p.first << ' ' << p.second.title_cnt << ' ' << p.second.content_cnt << std::endl;
// }
// }
//3.定义相关性并构造倒排索引
// InvertElem { doc_id keyword weight }
uint64_t docid = doc.doc_id;
const int vtitle = 10;
const int vcontent = 1;
for (auto&& wd_cnt : cntmp)
{
InvertElem elem;
elem.doc_id = docid;
elem.keyword = wd_cnt.first;
elem.weight = vtitle * wd_cnt.second.title_cnt + vcontent * wd_cnt.second.content_cnt;
inverted_index[wd_cnt.first].push_back(std::move(elem));
}
return true;
}
};
Index* Index::instance = nullptr;
std::mutex Index::mtx;
}
// searcher.hpp
#include "index.hpp"
#include <algorithm>
#include "jsoncpp/json/json.h"
namespace ns_searcher
{
// 倒排查找后处理完的节点
// 保证一个结点只映射一个网页
struct InvertedNode
{
uint64_t doc_id;
int32_t weight;
std::vector<std::string> keywords;
InvertedNode() : doc_id(0), weight(0) {}
};
class Searcher
{
public:
Searcher() {}
~Searcher() {}
private:
ns_index::Index* index;// 供我们进行查找的索引
public:
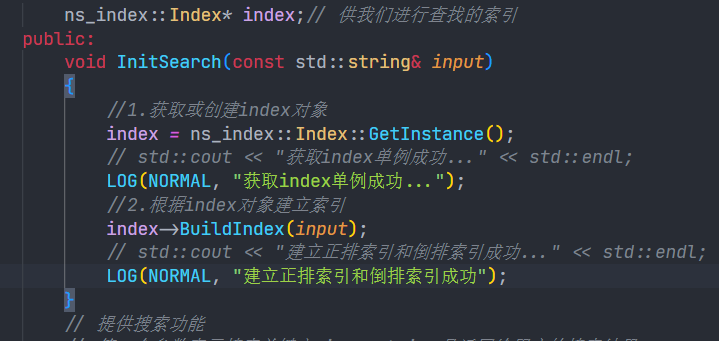
void InitSearch(const std::string& input)
{
//1.获取或创建index对象
index = ns_index::Index::GetInstance();
std::cout << "获取index单例成功..." << std::endl;
//2.根据index对象建立索引
index->BuildIndex(input);
std::cout << "建立正排索引和倒排索引成功..." << std::endl;
}
// 提供搜索功能
// 第一个参数表示搜索关键字 json_string是返回给用户的搜索结果。
void Search(const std::string& query, std::string& json_string)
{
std::vector<std::string> keywords;
//1.分词:用户的搜索内容首先进行分词
ust::JiebaTools::CutString(query, keywords);
//2.触发:根据分词的各个词进行index查找
// 设计一个结构 把这次倒排搜索的处理结果都存起来
std::vector<InvertedNode> InvertedNodeVec;
std::unordered_map<uint64_t, InvertedNode> processmp;
for (auto wd : keywords)
{
// 建立索引时是忽略大小写的,搜索时也要
boost::to_lower(wd);
// 怎么查呢? 先查倒排获得一个倒排拉链
auto* inverted_list = index->GetInvertedIndex(wd);
if (inverted_list == nullptr)
{
// 如果关键字在倒排索引中没有 那说明我们加载的文档里头都没有 那只能看下一个词了
continue;
}
// 遍历搜索出来的倒排索引
for (auto&& elem : *inverted_list)
{
auto& item = processmp[elem.doc_id];
item.doc_id = elem.doc_id;
item.keywords.push_back(elem.keyword);
item.weight += elem.weight;
}
}
// 在遍历这个processmp 把结点都整到InvertedNodeVec里头
for (auto& pi : processmp)
{
InvertedNodeVec.push_back(std::move(pi.second));
}
//3.合并排序:汇总查找结果,按照相关性(weight)进行降序排序
std::sort(InvertedNodeVec.begin(), InvertedNodeVec.end(), [](const InvertedNode& e1, const InvertedNode& e2)
{
return e1.weight > e2.weight;
});
//4.构建,构建json串(jsoncpp)
Json::Value root;
for (auto&& item : InvertedNodeVec)
{
ns_index::DocInfo* docinfo = index->GetForwardIndex(item.doc_id);
if (docinfo == nullptr) continue;
// jsoncpp是用来完成序列化和反序列化的
Json::Value cur;
cur["title"] = docinfo->title;
// id和权值just for debug
cur["id"] = (int)docinfo->doc_id;
cur["url"] = docinfo->url;
cur["weight"] = item.weight;
// GetDesc
//找到word在html_content中的首次出现,
// 然后往前找50字节(如果没有,从begin开始),往后找100字节(如果没有,到end就可以的)
//截取出这部分内容
cur["summary"] = GetSummary(*docinfo, item.keywords[0]);
root.append(cur);
}
// Json::FastWriter writer; release
Json::StyledWriter writer;
json_string = writer.write(root);
}
private:
std::string GetSummary(const ns_index::DocInfo& doc, const std::string& word)
{
//1. 找到首次出现的位置
auto iter = std::search(doc.content.begin(), doc.content.end(), word.begin(), word.end(),
[](char x, char y){
return tolower(x) == tolower(y);
});
if (iter == doc.content.end())
{
return doc.title;
}
size_t pos = iter - doc.content.begin();
//2. 获取start位置和end位置
const size_t prev_steps = 50;
const size_t next_steps = 100;
size_t start = 0;
size_t end = doc.content.size() - 1;
if (pos + 1 > prev_steps + start) start = pos + 1 - prev_steps;
if (end + 1 > next_steps + pos) end = pos + next_steps - 1;
//3. 截取子串
if (start > end) return "None";
return doc.content.substr(start, end - start + 1);
}
};
}
八、编写http_sever模块
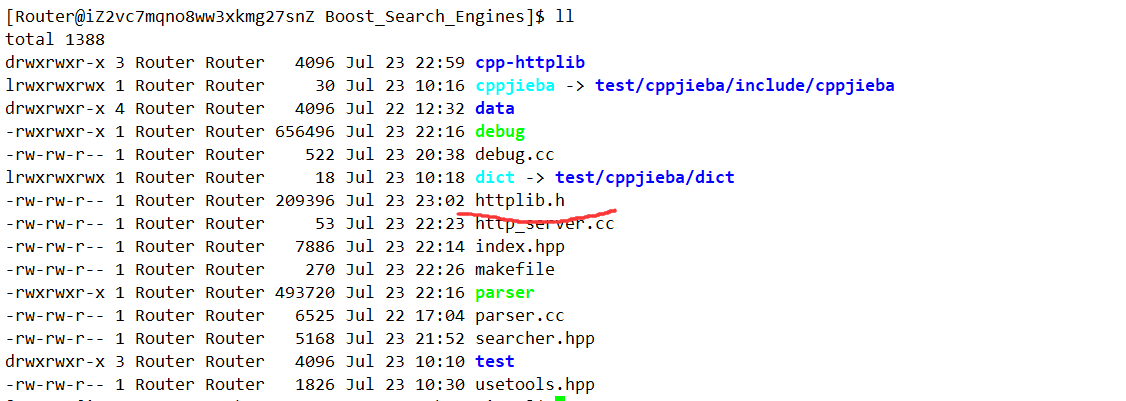
1 引入cpp-httplib库
在gitee上的链接 ,下载其中的 httplib.h文件即可。
注意,该库使用了较新的cpp版本,如果用Centos7.6下默认的4.8.5版本的gcc没法编译通过,需要更新gcc。
yum源为了保证稳定,都是比较老版本的东西,我们需要用scl源升级gcc。
2 利用scl源升级gcc
首先需要安装 scl源:
sudo yum -y install centos-release-scl scl-utils-build
安装新版本gcc(7或8或9)
sudo yum install -y devtoolset-9-gcc devtoolset-9-gcc-c++
查看我们安装的gcc:
ls /opt/rh

启动新版本gcc(仅在本次对话有效)
scl enable devtoolset-9 bash

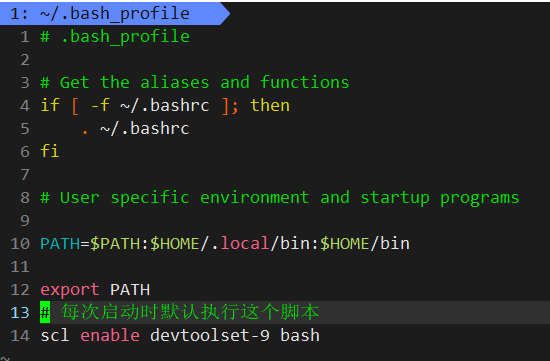
我们如果想要永久有效,无非就是每次登陆默认执行一下这条命令罢了,添加到登陆配置文件 ~/.bash_profile
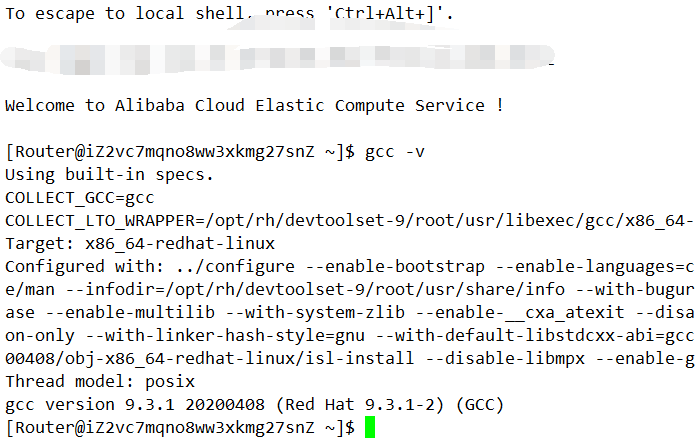
验证:
3 安装cpp-httplib库
下载一个稳定版本0.7.15,然后拖拽到我们的服务器上,然后unzip解压。
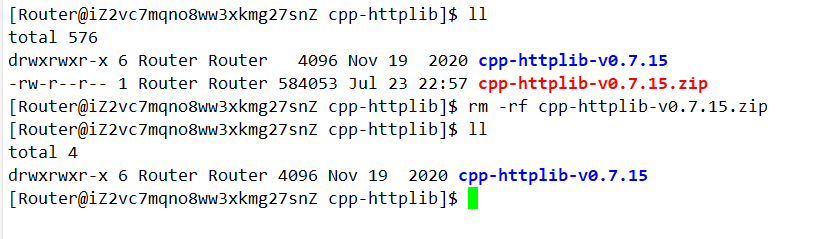
然后把httplib.h粘到我们的项目目录即可。
4 测试cpp-httplib代码
cpp-httplib使用了pthread库,记得要链接它,这个库的简单使用如下:
#include "searcher.hpp"
#include "httplib.h"

int main()
{
    httplib::Server svr;
    // 第一个参数是 IP:port/hello 这样的访问资源路径
    // 设置回调
    svr.Get("/hello", [](const httplib::Request req, httplib::Response& res)
    {
        // 表示内容是hello world 普通正文utf-8编码
        res.set_content("hello world", "text/plain: charset=utf-8");
    });
    // 设置监听状态 启动服务
    svr.listen("0.0.0.0", 712);
    return 0;
}

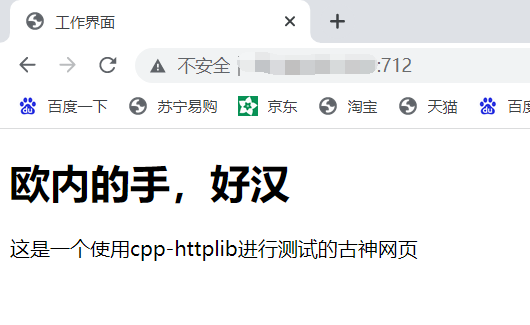
web服务器运行起来后,它必须要有一个根目录,于是我们先创建一个 wwwroot,然后往这个根目录里放 一个index.html。
然后在 http_sever.cc代码中使用 svr.set_base_dir设置根目录:
// 设置web根目录
svr.set_base_dir(root_path.c_str());
作为一个非前端,简单写一个 html:
<!DOCTYPE html>

<html>
    <head>
        <meta charset="UTF-8">
        <title>html test</title>
        <body>
            <h1>啊米浴说的道理</h1>
            <p>这是一个使用cpp-httplib进行测试的古神网页</p>
        </body>
    </head>
</html>
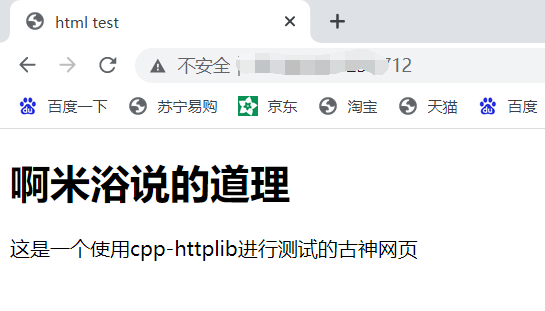
http默认会帮我们把根目录里头的index.html进行返回。
5 编写http_sever.cc
仿照百度搜索是我们都是在/s后面加一个问号搜索,所以我们设置svr.Get的第一个参数为 '\s',利用一些接口设置好回调:
#include "searcher.hpp"
#include "httplib.h"
const std::string root_path = "./wwwroot";
const std::string input = "/home/Router/Boost_Search_Engines/data/output/out.txt";
int main()
{
// 创建searcher并初始化
ns_searcher::Searcher searcher;
searcher.InitSearch(input);
httplib::Server svr;
svr.set_base_dir(root_path.c_str());
// 仿照百度 请求的是"/s"
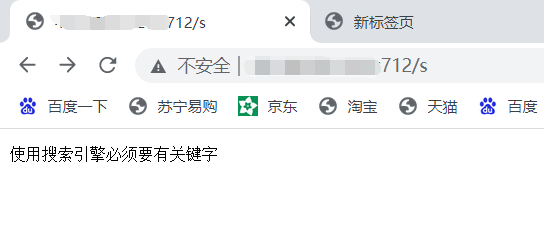
svr.Get("/s", [&](const httplib::Request& req, httplib::Response& res)
{
// 如果请求中没有参数"word"
if (!req.has_param("word"))
{
res.set_content("使用搜索引擎必须要有关键字", "text/plain; charset=UTF-8");
return;
}
// 获得请求参数"word"
std::string searchword = req.get_param_value("word");
std::cout << "用户在搜索: " << searchword << std::endl;
// 完成搜索业务
std::string jsonstring;
searcher.Search(searchword, jsonstring);
res.set_content(jsonstring, "application/json");
});
svr.listen("0.0.0.0", 712);
return 0;
}
设置返回内容 res.set_content的第二个参数是设置内容是什么类型,可以查httpcontent对照表找,json这里它的内容就是 application/json,后面:可以表示一些解析信息如编码等。
但是这里我们如果啥也不搜,按理说会返回搜索引擎必须输入搜索内容,但是返回了一堆乱码:
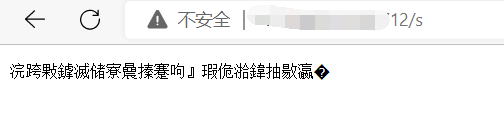
这是因为utf要小写= =,另外分隔应该是 ;
修改后就ok了:
#include "searcher.hpp"
#include "httplib.h"

const std::string root_path = "./wwwroot";
const std::string input = "/home/Router/Boost_Search_Engines/data/output/out.txt";

int main()
{
    // 创建searcher并初始化
    ns_searcher::Searcher searcher;
    searcher.InitSearch(input);
    httplib::Server svr;
    svr.set_base_dir(root_path.c_str());
    // 仿照百度 请求的是"/s"
    svr.Get("/s", [&](const httplib::Request& req, httplib::Response& res)
    {
        // 如果请求中没有参数"word"
        if (!req.has_param("word"))
        {
            res.set_content("使用搜索引擎必须要有关键字", "text/plain; charset=utf-8");
            return;
        }
        // 获得请求参数"word"
        std::string searchword = req.get_param_value("word");
        std::cout << "用户在搜索: " << searchword << std::endl;
        // 完成搜索业务
        std::string jsonstring;
        searcher.Search(searchword, jsonstring);
        res.set_content(jsonstring, "application/json");
    });
    svr.listen("0.0.0.0", 712);
    return 0;
}
九、编写前端模块
1 工具选择
现在我们已经完成了后端代码以及前端数据的显示。
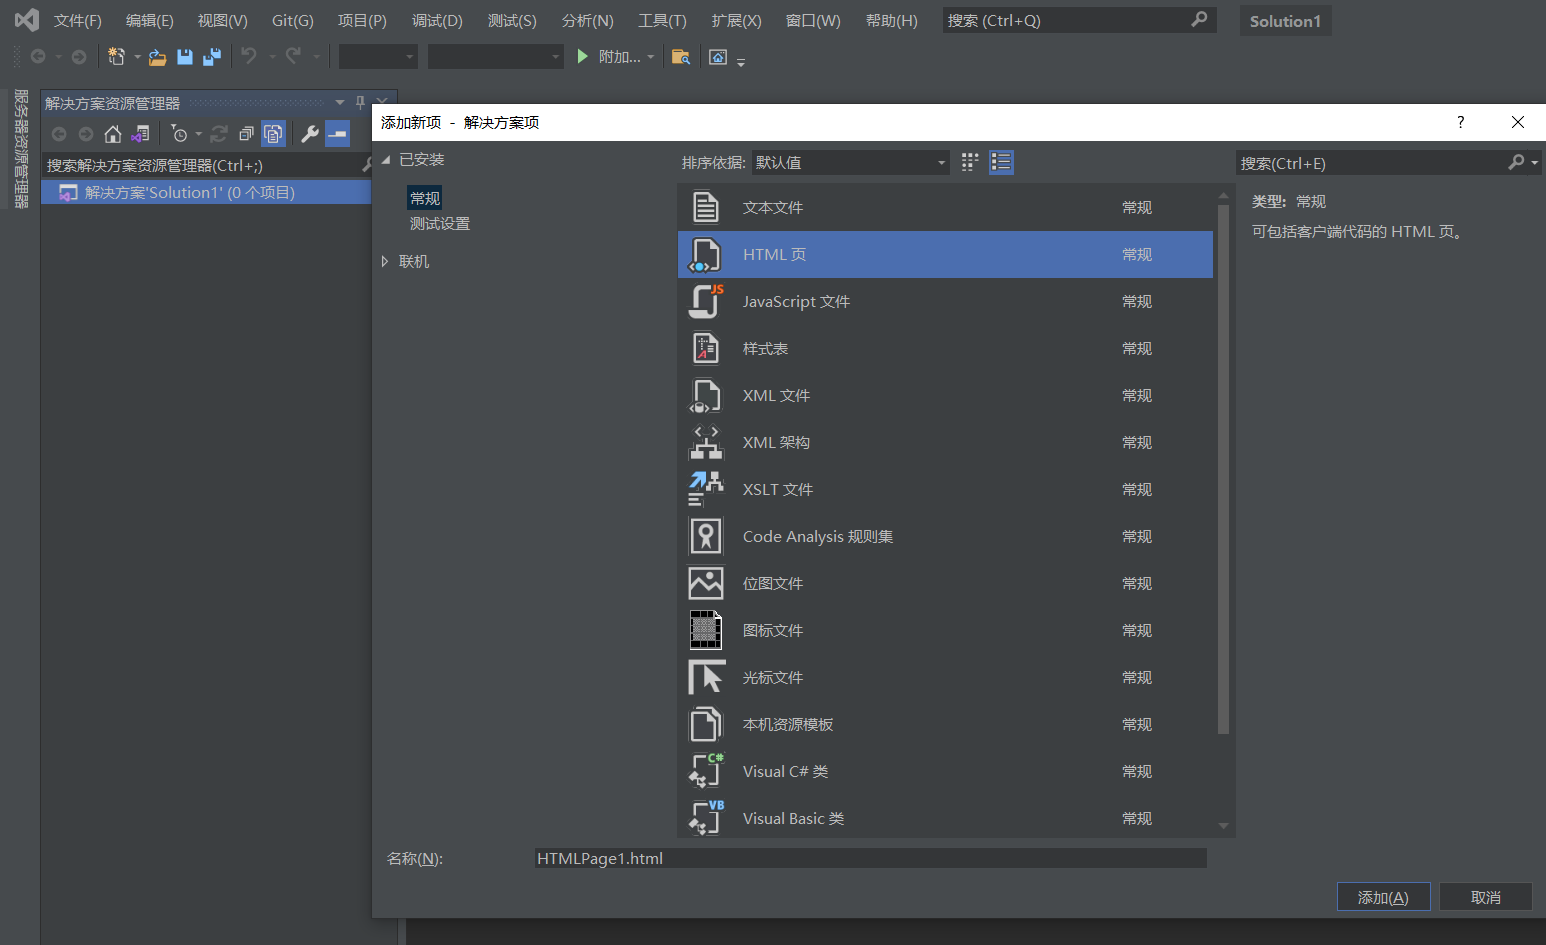
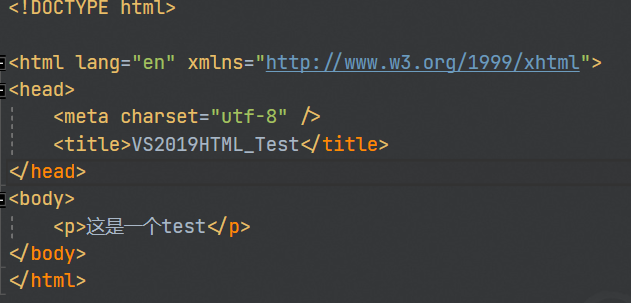
使用VS2019也可以编写前端网页,新建项目,选择空白解决项目,添加html即可。

这里因为我们是在远程服务器上直接写,不想再去用vs链接服务器,我们可以使用vscode的RemoteSSH插件。
直接一直启动着我们的服务,在远端写,然后浏览器上刷新看看,开发流程是这样。
修改前:

修改后,一直跑着我们的 http_sever修改网页后刷新浏览器即可更新修改内容:
2 html编写网页结构
!再Tab一下可以生成一个网页模板。
<!DOCTYPE html>
<html lang="en">
<head>
<meta charset="UTF-8">
<meta http-equiv="X-UA-Compatible" content="IE=edge">
<meta name="viewport" content="width=device-width, initial-scale=1.0">
<title>boost官网搜索引擎</title>
</head>
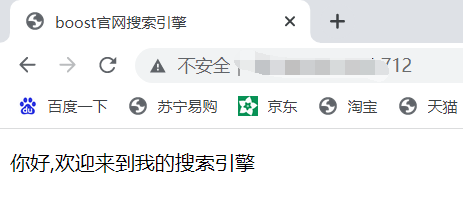
<body>
<p>你好,欢迎来到我的搜索引擎</p>
</body>
</html>
简单普及一下html的知识,html文件由标签组成,<head></head>这种是双标签,还有单标签,如 <meta>,大多数标签是双标签。
对于一个网页来说,html是网页的骨架(即网页的机构),css是网页的皮肉(即网页美观),js去负责网页的动态效果以及前后端交互,更多内容,可以去w3cschool查看。
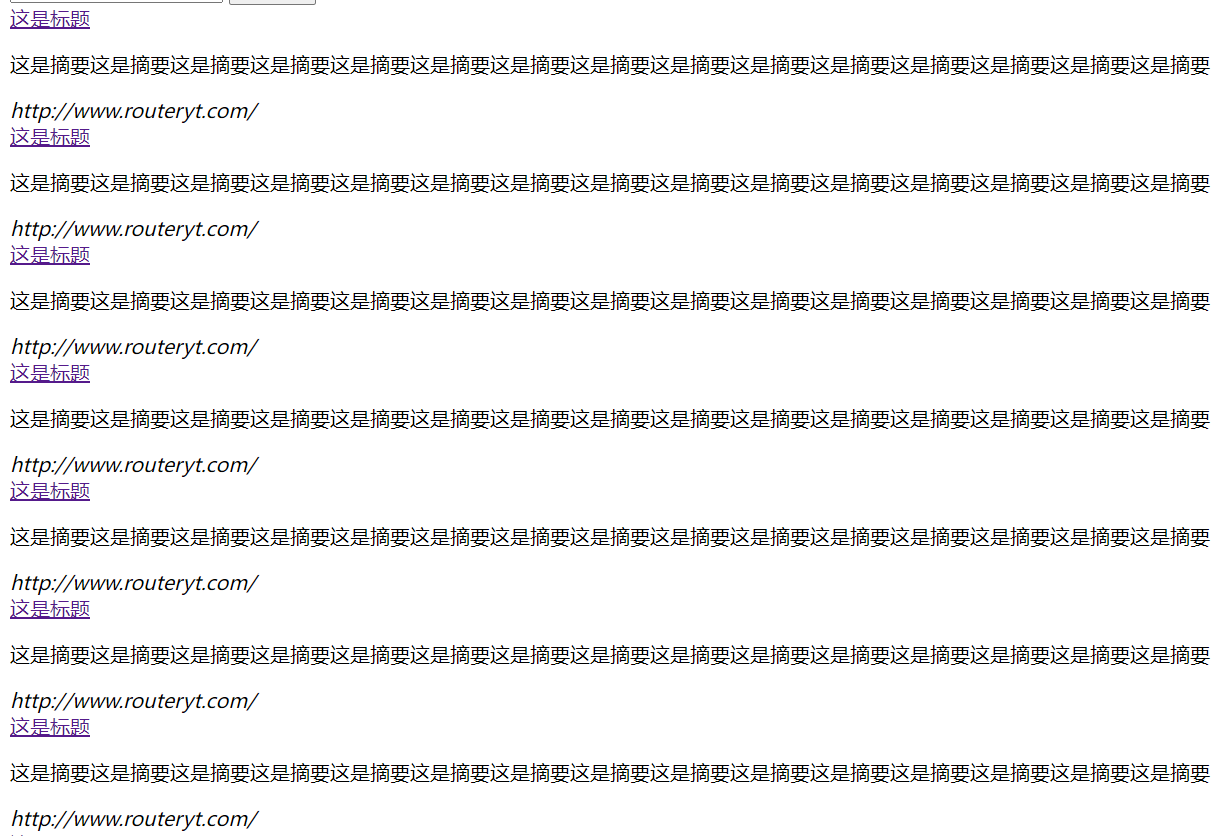
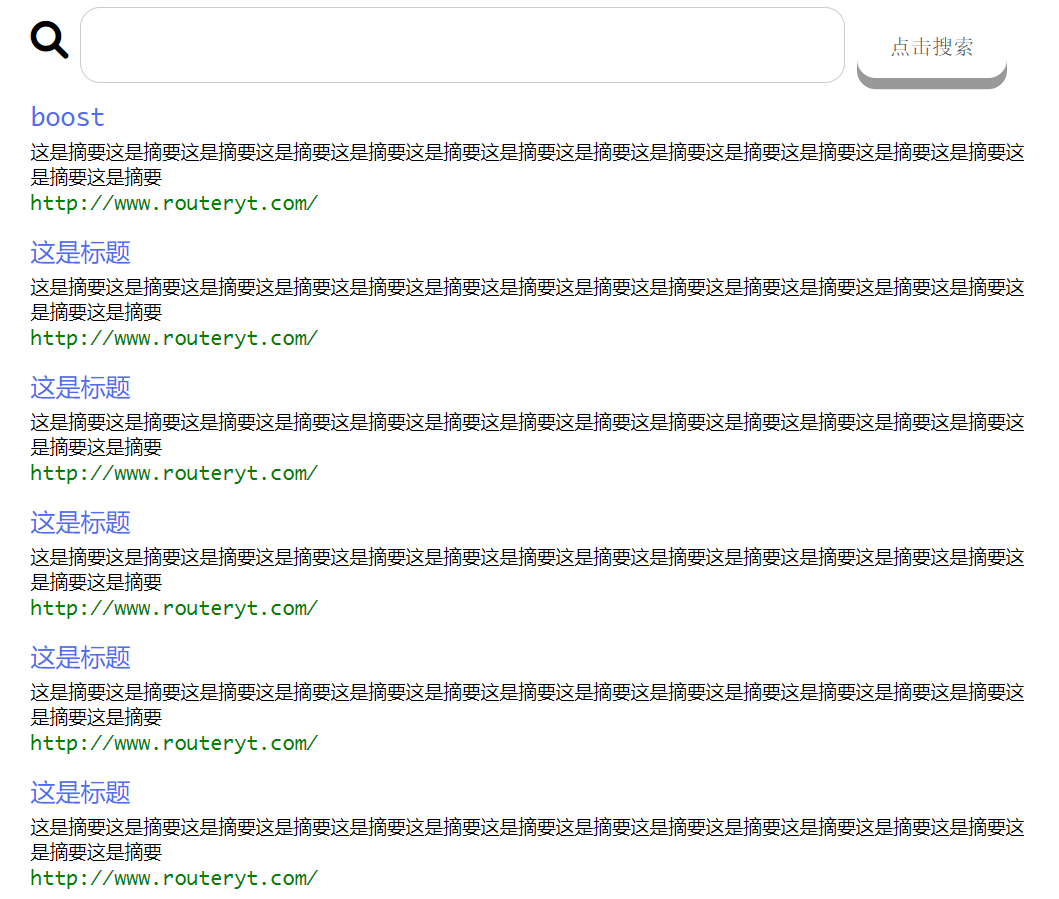
我们的目标是实现下面这样的界面:
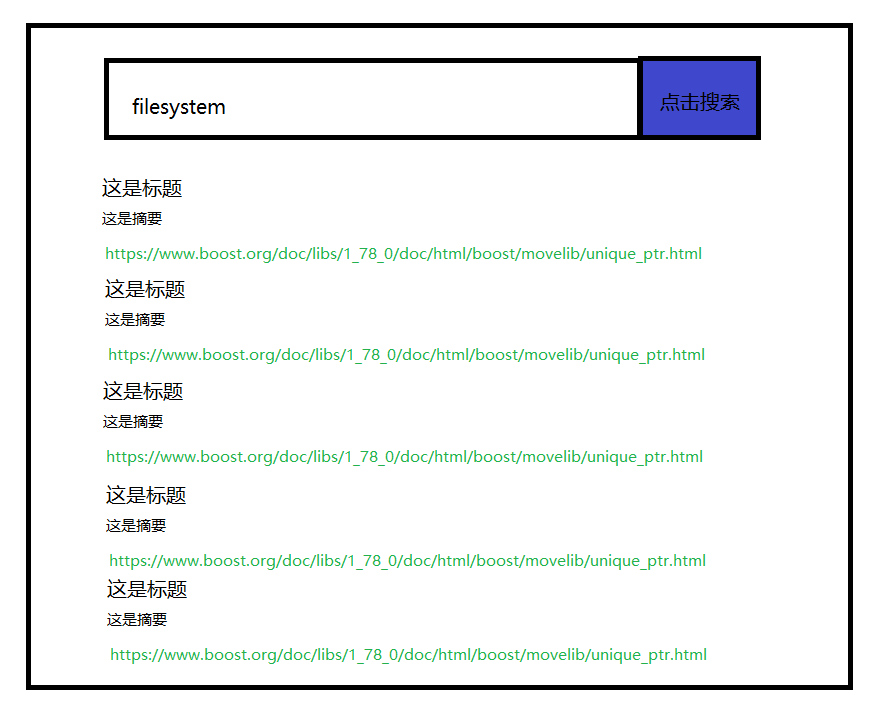
所以我们先要根据这个骨骼分析一下里头都包含什么,首先分为两部分,上面的输入框和按钮与下面的内容。
所以一个 外头整体一个 <div class="container">包整个网页结构,然后 <div>中先放上面那部分,我们命名为 search,代码如下:
<!DOCTYPE html>
<html lang="en">
<head>
<meta charset="UTF-8">
<meta http-equiv="X-UA-Compatible" content="IE=edge">
<meta name="viewport" content="width=device-width, initial-scale=1.0">
<title>boost官网搜索引擎</title>
</head>
<body>
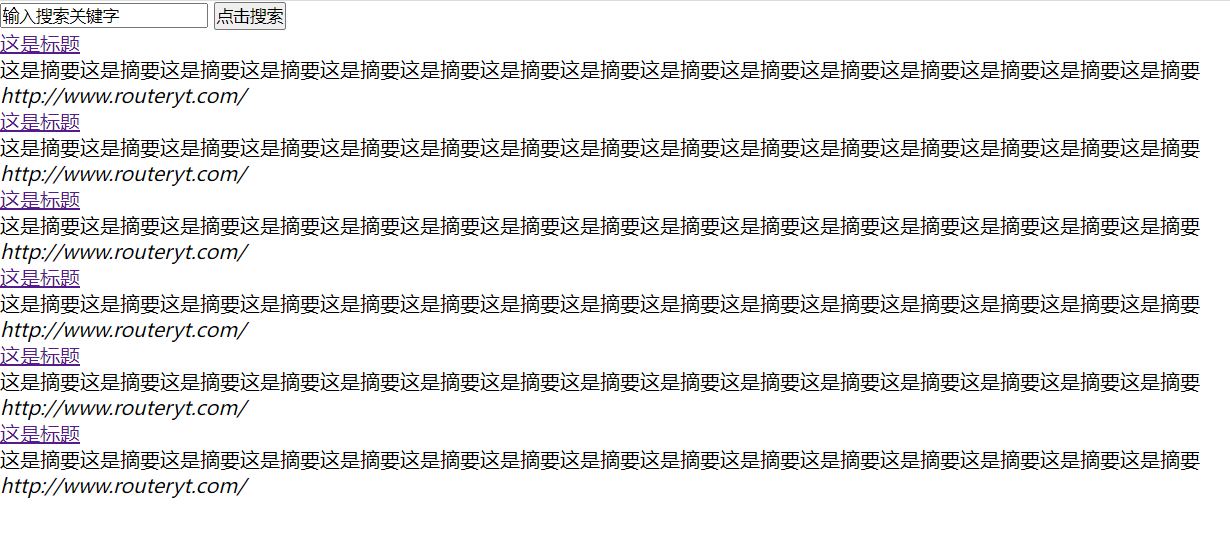
<div class="container">
<div class="search">
<input type="text" value="输入搜索关键字">
<button>点击搜索</button>
</div>
</div>
</body>
</html>
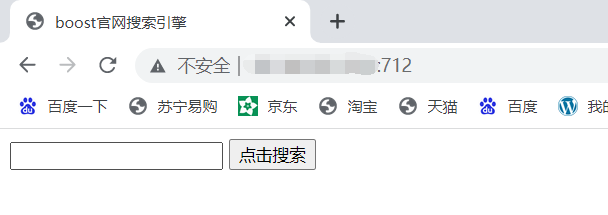
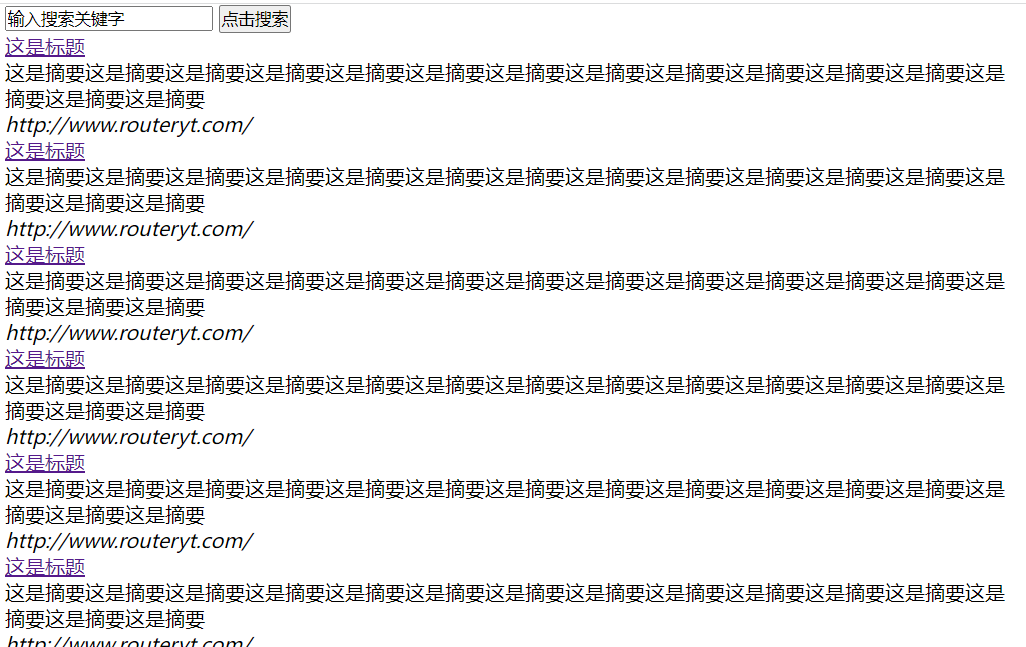
再考虑加上下面的结构,现在大概是这样:
<!DOCTYPE html>
<html lang="en">
<head>
    <meta charset="UTF-8">
    <meta http-equiv="X-UA-Compatible" content="IE=edge">
    <meta name="viewport" content="width=device-width, initial-scale=1.0">
    <title>boost官网搜索引擎</title>
</head>
<body>
    <div class="container">
        <div class="search">
            <input type="text" value="输入搜索关键字">
            <button>点击搜索</button>
        </div>
        <div class="result">
            <div class="item">
                <a href="#">这是标题</a>
                <p>这是摘要这是摘要这是摘要这是摘要这是摘要这是摘要这是摘要这是摘要这是摘要这是摘要这是摘要这是摘要这是摘要这是摘要这是摘要</p>
                <i>http://www.routeryt.com/</i>
            </div>
            <div class="item">
                <a href="#">这是标题</a>
                <p>这是摘要这是摘要这是摘要这是摘要这是摘要这是摘要这是摘要这是摘要这是摘要这是摘要这是摘要这是摘要这是摘要这是摘要这是摘要</p>
                <i>http://www.routeryt.com/</i>
            </div>
            <div class="item">
                <a href="#">这是标题</a>
                <p>这是摘要这是摘要这是摘要这是摘要这是摘要这是摘要这是摘要这是摘要这是摘要这是摘要这是摘要这是摘要这是摘要这是摘要这是摘要</p>
                <i>http://www.routeryt.com/</i>
            </div>
            <div class="item">
                <a href="#">这是标题</a>
                <p>这是摘要这是摘要这是摘要这是摘要这是摘要这是摘要这是摘要这是摘要这是摘要这是摘要这是摘要这是摘要这是摘要这是摘要这是摘要</p>
                <i>http://www.routeryt.com/</i>
            </div>
            <div class="item">
                <a href="#">这是标题</a>
                <p>这是摘要这是摘要这是摘要这是摘要这是摘要这是摘要这是摘要这是摘要这是摘要这是摘要这是摘要这是摘要这是摘要这是摘要这是摘要</p>
                <i>http://www.routeryt.com/</i>
            </div>
            <div class="item">
                <a href="#">这是标题</a>
                <p>这是摘要这是摘要这是摘要这是摘要这是摘要这是摘要这是摘要这是摘要这是摘要这是摘要这是摘要这是摘要这是摘要这是摘要这是摘要</p>
                <i>http://www.routeryt.com/</i>
            </div>
        </div>
    </div>
</body>
</html>
但是这样网页也太丑了,所以我们再用css美化一下。
3 css美化网页
其实就是找到要设置的标签,给标签设置他的属性.
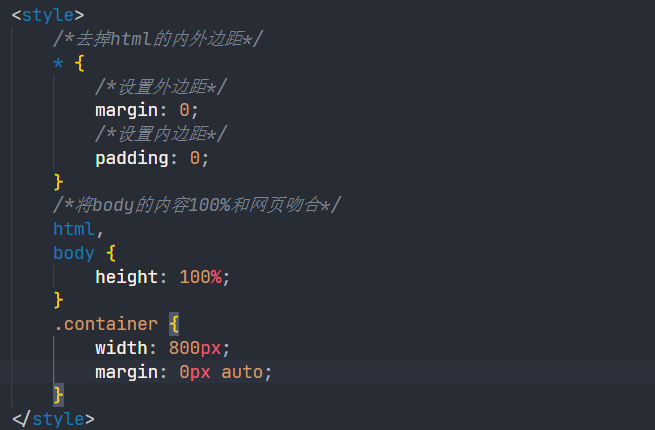
首先去内外边距:
然后居中一下:
把上面空出来:


因为我们没考虑input的边框的问题。
实在是前端知识匮乏,搞了半天只实现了这样的东西:
<!DOCTYPE html>
<html lang="en">
<meta name="viewport" content="width=device-width,initial-scale=1.0,maximum-scale=1.0,minimum-scale=1.0,user-scalable=no">
<head>
<meta charset="UTF-8">
<meta http-equiv="X-UA-Compatible" content="IE=edge">
<link rel="apple-touch-icon" sizes="180x180" href="image/png/apple-touch-icon.png">
<link rel="icon" type="image/png" sizes="32x32" href="image/png/favicon-32x32.png">
<link rel="icon" type="image/png" sizes="16x16" href="image/png/favicon-16x16.png">
<link rel="manifest" href="/site.webmanifest">
<script src="https://kit.fontawesome.com/69f4793668.js" crossorigin="anonymous"></script>
<meta name="viewport" content="width=device-width, initial-scale=1.0">
<title>boost官网搜索引擎</title>
<style>
/*去掉html的内外边距*/
* {
/*设置外边距*/
margin: 0;
/*设置内边距*/
padding: 0;
}
/*将body的内容100%和网页吻合*/
html,
body {
height: 100%;
}
/* 类选择器 */
.container {
/* 设置div的宽度 */
width: 800px;
/* 通过设置外边距达到居中的目的 */
margin: 0px auto;
/* 设置外边距的上边距保持元素和网页的上部有距离 */
margin-top: 20px;
}
/* 复合选择器 */
.container .search {
/* 宽度与父标签保持一直 */
width: 100%;
/* 高度设置为52像素点 */
height: 59px;
margin-bottom: 10px;
}
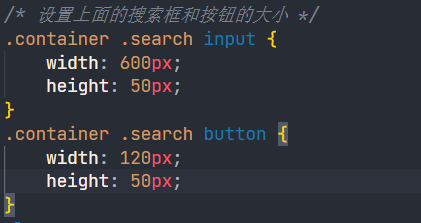
/* 设置上面的搜索框和按钮的大小 */
.container .search input {
/* float:right; */
width: 600px;
height: 59px;
font-size: 19px;
border: 1px solid#ccc; border-radius: 16px;
font-family: Georgia, Times, 'Times New Roman', serif;
padding-left: 10px;
/* border-right: none; */
}
.container .search button {
/* float: left; */
width: 120px;
height: 50px;
/* border-radius: 50%; */
display: inline-block;
padding: 15px 25px;
/* font-size: 24px; */
cursor: pointer;
text-align: center;
text-decoration: none;
outline: none;
color: #555555;
background-color: #fff;
border: none;
border-radius: 15px;
box-shadow: 0 9px #999;
font-size: 17px;
font-family: Georgia, Times, 'Times New Roman', serif;
/* background-color: #555555; */
}
.container .search button:hover {
background-color: #006650;
color:#006650;
}
.container .search button:active {
background-color: #006650;
box-shadow: 0 2px #999;
color:#006650;
transform: translateY(4px);
}
.container .result {
width: 100%;
}
.container .item {
margin-top: 15px;
}
.container .item a {
/* 去掉下划线 */
text-decoration: none;
font-size: 20px;
color: #4e6ef2;
display: block;
}
.container .item p {
margin-top:5px;
font-size: 15px;
font-family: "Microsoft YaHei","黑体","宋体",sans-serif;;
}
.container .item i {
font-style: normal;
color:green;
display: block;
}
</style>
</head>
<body>
<div class="container">
<div class="search">
<i class="fa-solid fa-magnifying-glass" style="font-size:30px;color: black;margin-top: auto;"></i>
<input type="text" value="输入搜索关键字">
<button>点击搜索</button>
</div>
<div class="result">
<div class="item">
<a href="#">boost</a>
<p>这是摘要这是摘要这是摘要这是摘要这是摘要这是摘要这是摘要这是摘要这是摘要这是摘要这是摘要这是摘要这是摘要这是摘要这是摘要</p>
<i>http://www.routeryt.com/</i>
</div>
<div class="item">
<a href="#">这是标题</a>
<p>这是摘要这是摘要这是摘要这是摘要这是摘要这是摘要这是摘要这是摘要这是摘要这是摘要这是摘要这是摘要这是摘要这是摘要这是摘要</p>
<i>http://www.routeryt.com/</i>
</div>
<div class="item">
<a href="#">这是标题</a>
<p>这是摘要这是摘要这是摘要这是摘要这是摘要这是摘要这是摘要这是摘要这是摘要这是摘要这是摘要这是摘要这是摘要这是摘要这是摘要</p>
<i>http://www.routeryt.com/</i>
</div>
<div class="item">
<a href="#">这是标题</a>
<p>这是摘要这是摘要这是摘要这是摘要这是摘要这是摘要这是摘要这是摘要这是摘要这是摘要这是摘要这是摘要这是摘要这是摘要这是摘要</p>
<i>http://www.routeryt.com/</i>
</div>
<div class="item">
<a href="#">这是标题</a>
<p>这是摘要这是摘要这是摘要这是摘要这是摘要这是摘要这是摘要这是摘要这是摘要这是摘要这是摘要这是摘要这是摘要这是摘要这是摘要</p>
<i>http://www.routeryt.com/</i>
</div>
<div class="item">
<a href="#">这是标题</a>
<p>这是摘要这是摘要这是摘要这是摘要这是摘要这是摘要这是摘要这是摘要这是摘要这是摘要这是摘要这是摘要这是摘要这是摘要这是摘要</p>
<i>http://www.routeryt.com/</i>
</div>
</div>
</div>
</body>
</html>
4 js进行前后端交互
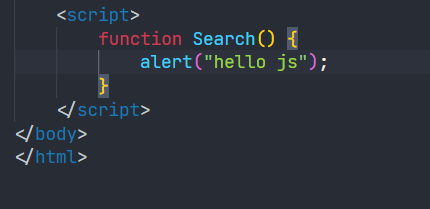
在button上增加一个事件onclick,点击时,执行search函数:

然后在 <script>标签内实现一下,先测试一下:
直接使用原生的js,成本比较高,我们使用jQuery,从这个网站上找加速jQuery CDN.
获取input里头的数据:
首先我们可以看看我们获取到的数据。
function Search() {
            // test
            //alert("hello js");
            // 1.提取数据
            // $可以看做是js的别称
            let query = $(".container .search input").val();
            console.log("query = " + query);// console是浏览器的一个对话框 可以查看浏览器数据
        }

发起http请求
利用ajax:
	    // 2.发起http请求 ajax 一个和后端进行进行数据交互的函数
            $.ajax({
                type:"GET",
                url:"/s?word=" + query,
                success: function(data) {
                    console.log(data);
                }
            });
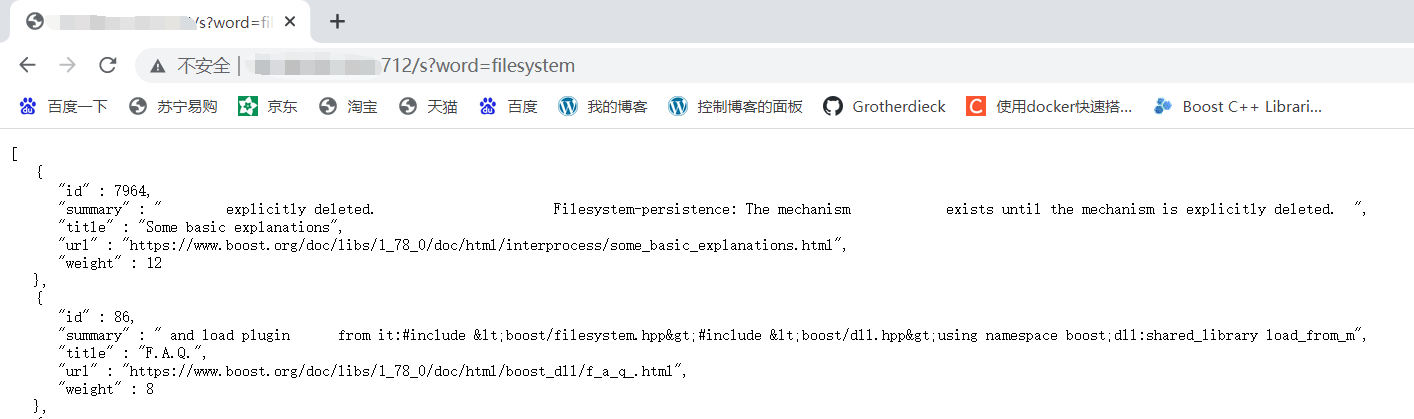
请求数据已经成功回显出来了:
获得数据后,再构建一个html,因为我们前面的是我们硬写的,我们把前面的item注释掉,根据搜索出来的个数动态的构建,使用如下js代码:
	    function Search() {
            // test
            //alert("hello js");
            // 1.提取数据
            // $可以看做是js的别称
            let query = $(".container .search input").val();
            // console.log("query = " + query);// console是浏览器的一个对话框 可以查看浏览器数据
            // 2.发起http请求 ajax 一个和后端进行进行数据交互的函数
            $.ajax({
                type:"GET",
                url:"/s?word=" + query,
                success: function(data) {
                    // console.log(data);
                    // 获得了信息去构建html
                    BuildHtml(data);
                }
            });
        }
        function BuildHtml(data)
        {
            // 获取result标签
            let result_lable = $(".container .result");
            // 清空历史结果
            result_lable.empty();
            // 遍历得到的数据
            for (let elem of data)
            {
                let a_lable = $("<a>", {
                    text: elem.title,
                    href: elem.url,
                    // 设置跳转
                    target: "_blank"
                });
                let p_lable = $("<p>", {
                    text: elem.summary
                });
                let i_lable = $("<i>", {
                    text: elem.url
                });
                // 合并为一个item
                let div_lable = $("<div>", {
                    class: "item"
                });
                a_lable.appendTo(div_lable);
                p_lable.appendTo(div_lable);
                i_lable.appendTo(div_lable);
                // 添加到result_table去
                div_lable.appendTo(result_lable);
            }
        }
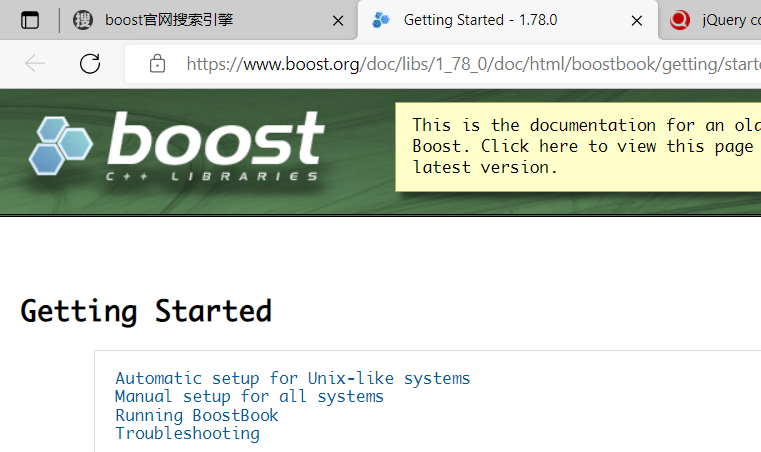
点击以后可以跳转:
5 前端代码汇总
我们通过设计js脚本,使得界面实现了一开始居中,一点击搜索就会到上面去:
<!DOCTYPE html>
<html lang="en">
    <meta name="viewport" content="width=device-width,initial-scale=1.0,maximum-scale=1.0,minimum-scale=1.0,user-scalable=no">

<head>
    <!-- jQuery库 -->
    <script src="http://code.jquery.com/jquery-2.1.1.min.js"></script>
    <meta charset="UTF-8">
    <meta http-equiv="X-UA-Compatible" content="IE=edge">
    <link rel="apple-touch-icon" sizes="180x180" href="image/png/apple-touch-icon.png">
    <link rel="icon" type="image/png" sizes="32x32" href="image/png/favicon-32x32.png">
    <link rel="icon" type="image/png" sizes="16x16" href="image/png/favicon-16x16.png">
    <link rel="manifest" href="/site.webmanifest">
    <script src="https://kit.fontawesome.com/69f4793668.js" crossorigin="anonymous"></script>
    <meta name="viewport" content="width=device-width, initial-scale=1.0">
    <title>boost官网搜索引擎</title>
    <style>
        /*去掉html的内外边距*/
        * {
            /*设置外边距*/
            margin: 0;
            /*设置内边距*/
            padding: 0;
        }
        /*将body的内容100%和网页吻合*/
        html,
        body {
            height: 100%;
        }
        /* 类选择器 */
        .container {
            /* 设置div的宽度 */
            width: 800px;
            /* 通过设置外边距达到居中的目的 */
            margin: 0px auto;
            /* 设置外边距的上边距保持元素和网页的上部有距离 */
            /* margin-top: 20px; */
            height: 100%;
            /* text-align:center; */

        }
        /* 复合选择器 */
        .container .search {
            /* 宽度与父标签保持一直 */
            width: 100%;
            /* 高度设置为52像素点 */
            height: 59px;
            padding-top: 40%;
            /* margin-bottom: 10px; */
        }
        /* 设置上面的搜索框和按钮的大小 */
        .container .search input {
            /* float:right; */
            width: 600px;
            height: 59px;
            font-size: 19px;
            border: 1px solid#ccc; border-radius: 16px;
            font-family: Georgia, Times, 'Times New Roman', serif;
            padding-left: 10px;
            /* border-right: none; */
        }
        .container .search button {
            /* float: left; */
            width: 120px;
            height: 50px;
            /* border-radius: 50%; */
            display: inline-block;
            padding: 15px 25px;
            /* font-size: 24px; */
            cursor: pointer;
            text-align: center;
            text-decoration: none;
            outline: none;
            color: #555555;
            background-color: #fff;
            border: none;
            border-radius: 15px;
            box-shadow: 0 9px #999;
            font-size: 17px;
            font-family: Georgia, Times, 'Times New Roman', serif;
            /* background-color: #555555; */
        }
        .container .search button:hover {
            background-color: #006650;
            color:#006650;
        }
        .container .search button:active {
            background-color: #006650;
            box-shadow: 0 2px #999;
            color:#006650;
            transform: translateY(4px);
        }
        .container .result {
            width: 100%;
        }
        .container .item {
            margin-top: 15px;
        }
        .container .item a {
            /* 去掉下划线 */
            text-decoration: none;
            font-size: 20px;
            color: #4e6ef2;
            display: block;
        }
        .container .item p {
            margin-top:5px;
            font-size: 15px;
            font-family: "Microsoft YaHei","黑体","宋体",sans-serif;;
        }
        .container .item i {
            font-style: normal;
            color:green;
            display: block;
        }
    </style>
</head>
<body>
    <div class="container">
        <!-- <img src="https://router-picture-bed.oss-cn-chengdu.aliyuncs.com/img/Cat.png" alt="load wrong"> -->
        <div class="search">
            <i class="fa-solid fa-magnifying-glass" style="font-size:30px;color: black;margin-top: auto;"></i>
            <input type="text" placeholder="输入搜索关键字">
            <button onclick="Search()">点击搜索</button>
        </div>

        <div class="result">
            <!-- 动态生成网页内容 -->
            <!-- <div class="item">
                <a href="#">boost</a>
                <p>这是摘要这是摘要这是摘要这是摘要这是摘要这是摘要这是摘要这是摘要这是摘要这是摘要这是摘要这是摘要这是摘要这是摘要这是摘要</p>
                <i>http://www.routeryt.com/</i>
            </div>
            <div class="item">
                <a href="#">这是标题</a>
                <p>这是摘要这是摘要这是摘要这是摘要这是摘要这是摘要这是摘要这是摘要这是摘要这是摘要这是摘要这是摘要这是摘要这是摘要这是摘要</p>
                <i>http://www.routeryt.com/</i>
            </div>
            <div class="item">
                <a href="#">这是标题</a>
                <p>这是摘要这是摘要这是摘要这是摘要这是摘要这是摘要这是摘要这是摘要这是摘要这是摘要这是摘要这是摘要这是摘要这是摘要这是摘要</p>
                <i>http://www.routeryt.com/</i>
            </div>
            <div class="item">
                <a href="#">这是标题</a>
                <p>这是摘要这是摘要这是摘要这是摘要这是摘要这是摘要这是摘要这是摘要这是摘要这是摘要这是摘要这是摘要这是摘要这是摘要这是摘要</p>
                <i>http://www.routeryt.com/</i>
            </div>
            <div class="item">
                <a href="#">这是标题</a>
                <p>这是摘要这是摘要这是摘要这是摘要这是摘要这是摘要这是摘要这是摘要这是摘要这是摘要这是摘要这是摘要这是摘要这是摘要这是摘要</p>
                <i>http://www.routeryt.com/</i>
            </div>
            <div class="item">
                <a href="#">这是标题</a>
                <p>这是摘要这是摘要这是摘要这是摘要这是摘要这是摘要这是摘要这是摘要这是摘要这是摘要这是摘要这是摘要这是摘要这是摘要这是摘要</p>
                <i>http://www.routeryt.com/</i>
            </div> -->
        </div>
    </div>
    <script>
        function Search() {
            // test
            //alert("hello js");
            // 1.提取数据
            // $可以看做是js的别称
            let psrh = $(".container .search");
            psrh.css("padding-top", "10px");
            let query = $(".container .search input").val();
            // console.log("query = " + query);// console是浏览器的一个对话框 可以查看浏览器数据
            // 2.发起http请求 ajax 一个和后端进行进行数据交互的函数
            $.ajax({
                type:"GET",
                url:"/s?word=" + query,
                success: function(data) {
                    // console.log(data);
                    // 获得了信息去构建html
                    if(data != null) BuildHtml(data);
                    else BuildEmptyRes();
                }
            });
        }
        function BuildHtml(data)
        {
            // 获取result标签
            let result_lable = $(".container .result");
            // 清空历史结果
            result_lable.empty();
            // 遍历得到的数据
            for (let elem of data)
            {
                let a_lable = $("<a>", {
                    text: elem.title,
                    href: elem.url,
                    // 设置跳转
                    target: "_blank"
                });
                let p_lable = $("<p>", {
                    text: elem.summary
                });
                let i_lable = $("<i>", {
                    text: elem.url
                });
                // 合并为一个item
                let div_lable = $("<div>", {
                    class: "item"
                });
                a_lable.appendTo(div_lable);
                p_lable.appendTo(div_lable);
                i_lable.appendTo(div_lable);
                // 添加到result_table去
                div_lable.appendTo(result_lable);
            }
        }
        function BuildEmptyRes()
        {
            // alert("搜索内容不存在.");
            let result_lable = $(".container .result");
            result_lable.empty();
            let a_lable = $("<a>", {
                    text: "这内容我们这没有,不如百度一下?",
                    href: "https://www.baidu.com",
                    // 设置跳转
                    target: "_blank"
                });
                let p_lable = $("<p>", {
                    text: "这里空空如也"
                });
                let i_lable = $("<i>", {
                    text: "https://www.baidu.com"
                });
                // 合并为一个item
                let div_lable = $("<div>", {
                    class: "item"
                });
                a_lable.appendTo(div_lable);
                p_lable.appendTo(div_lable);
                i_lable.appendTo(div_lable);
                // 添加到result_table去
                div_lable.appendTo(result_lable);
        }
    </script>
</body>
</html>
十、简易日志系统
1 编写log.hpp
日志用来记录一些日常运行信息。
我们运行时如果你出错了,我们最想知道的是你在哪个文件的第几行出错了。
所以可以利用C语言预制的宏,包装出一个宏函数,用于日志调用:
#pragma once
#include <iostream>
#include <string>
#include <fstream>
#include <ctime>

#define NORMAL 1
#define WARNING 2
#define DEBUG 3
#define FATAL 4// 毁灭性

// 封装成宏 方便调用
// 利用C语言给我们预设的__FILE__宏获得文件名 __LINE__获得当前行
#define LOG(LEVEL, MESSAGE) log(#LEVEL, MESSAGE, __FILE__, __LINE__)

const std::string logtxtfile = "/home/Router/Boost_Search_Engines/log.txt";

void log(std::string level, std::string message, std::string file, int line)
{
    std::ofstream ofs(logtxtfile, std::ios::out | std::ios::app);
    if (!ofs.is_open())
    {
        std::cerr << "open log.txt fail..." << std::endl;
        exit(-1);
    }
    ofs << "[" << level << "]" << time(nullptr) << "[" << message << "][" << file << ' ' << line << std::endl;

}
加载建立索引的地方改:

建立倒排和正排索引的位置:
最终我们的 log.txt内容如下,log.hpp代码如下:

#pragma once
#include <iostream>
#include <string>
#include <fstream>
#include <ctime>
#define NORMAL 1
#define WARNING 2
#define DEBUG 3
#define FATAL 4// 毁灭性
// 封装成宏 方便调用
// 利用C语言给我们预设的__FILE__宏获得文件名 __LINE__获得当前行
#define LOG(LEVEL, MESSAGE) log(#LEVEL, MESSAGE, __FILE__, __LINE__)
const std::string logtxtfile = "/home/Router/Boost_Search_Engines/log.txt";
void log(std::string level, std::string message, std::string file, int line)
{
std::ofstream ofs(logtxtfile, std::ios::out | std::ios::app);
if (!ofs.is_open())
{
std::cerr << "open log.txt fail..." << std::endl;
exit(-1);
}
char str[100];
struct tm *ti;
uint16_t year, yday;
uint8_t month, day, week, hour, minute, second;
time_t timestamp = time(nullptr); /*北京时间2020-06-24 01:16:51*/
/*
几个用于测试的时间戳和北京时间对应
1592932611 = 2020-06-24 01:16:51(北京时间)
1593541011 = 2020-07-01 02:16:51
1593526611 = 2020-06-30 22:16:51
*/
/* 北京时间补偿 */
// timestamp += 8*60*60;
/* 调用系统函数 */
ti = localtime(×tamp);
year = ti->tm_year; /* 自1900年算起 */
month = ti->tm_mon; /* 从1月算起,范围0-11 */
week = ti->tm_wday; /* 从周末算起,范围0-6 */
yday = ti->tm_yday; /* 从1月1日算起,范围0-365 */
day = ti->tm_mday; /* 日: 1-31 */
hour = ti->tm_hour; /* 小时:0-23点,UTC+0时间 */
minute = ti->tm_min; /* 分钟:0-59 */
second = ti->tm_sec; /* 0-60,偶尔出现的闰秒 */
/* 时间校正 */
year += 1900;
month += 1;
week += 1;
// printf("日期:%d-%d-%d 第%d天 星期%d 时间:%d:%d:%d\r\n",
// year, month, day, yday, week, hour, minute, second);
ofs << "[" << level << "]" << "["
<< "日期:" << (int)year << '-' << (int)month << '-' << (int)day << " 第" << (int)yday << "天 星期" << (int)week
<< "时间:" << (int)hour << ':' << (int)minute << ':' << (int)second
<< "][" << message << "][" << file << ' ' << line << "]" << std::endl;
}
2 部署服务到Linux上

这个命令可以以守护进程的方式运行程序,常用方法如下:
nohup ./http_server > log/log.txt 2>&1 &
2>&1 解释:将标准错误2重定向到标准输出1 ,标准输出1再前面的重定向输入到 log/log.txt 文件中,最后一个&是表示后台运行。
所以我们改一下我们的log函数,让直接标准输出就行了,不必用文件流。
#pragma once
#include <iostream>
#include <string>
#include <fstream>
#include <ctime>
#define NORMAL 1
#define WARNING 2
#define DEBUG 3
#define FATAL 4// 毁灭性
// 封装成宏 方便调用
// 利用C语言给我们预设的__FILE__宏获得文件名 __LINE__获得当前行
#define LOG(LEVEL, MESSAGE) log(#LEVEL, MESSAGE, __FILE__, __LINE__)
const std::string logtxtfile = "/home/Router/Boost_Search_Engines/log.txt";
void log(std::string level, std::string message, std::string file, int line)
{
char str[100];
struct tm *ti;
uint16_t year, yday;
uint8_t month, day, week, hour, minute, second;
time_t timestamp = time(nullptr);
/* 调用系统函数 */
ti = localtime(×tamp);
year = ti->tm_year; /* 自1900年算起 */
month = ti->tm_mon; /* 从1月算起,范围0-11 */
week = ti->tm_wday; /* 从周末算起,范围0-6 */
yday = ti->tm_yday; /* 从1月1日算起,范围0-365 */
day = ti->tm_mday; /* 日: 1-31 */
hour = ti->tm_hour; /* 小时:0-23点,UTC+0时间 */
minute = ti->tm_min; /* 分钟:0-59 */
second = ti->tm_sec; /* 0-60,偶尔出现的闰秒 */
/* 时间校正 */
year += 1900;
month += 1;
week += 1;
std::cout << "[" << level << "]" << "["
<< "日期:" << (int)year << '-' << (int)month << '-' << (int)day << " 第" << (int)yday << "天 星期" << (int)week
<< "时间:" << (int)hour << ':' << (int)minute << ':' << (int)second
<< "][" << message << "][" << file << ' ' << line << "]" << std::endl;
}
关闭服务,用 kill -9根据pid杀掉运行的进程即可。


 1534
1534

 被折叠的 条评论
为什么被折叠?
被折叠的 条评论
为什么被折叠?
 到【灌水乐园】发言


