


往期知识点整理
- 鸿蒙(HarmonyOS)北向开发知识点记录~
- 【鸿蒙实战开发】ArkTS多线程的多线程系列(一):ArkTS多线能力入门
- 【鸿蒙实战开发】ArkTS多线程的多线程系列(二):基于Sendable共享对象实现跨线程通信及UI状态刷新
- 【鸿蒙实战开发】ArkTS多线性的多线程系列(三):基于单例实现跨线程缓存
- 【鸿蒙实战开发】ArkTS多线程的多线程系列(四):基于生产者-消费者实现多线程协同
- 【鸿蒙实战开发】ArkTS多线程的多线程系列(五):通过子线程实现全局弹窗
- 【鸿蒙UI实战开发】基于List和Scroller由简单到复杂列表布局开发实践
- 【鸿蒙UI实战开发】基于原生能力的键盘控制
- 【鸿蒙UI实战开发】基于ArkUI现有能力实现自定义弹窗封装方案
- 【鸿蒙ArkUI实战】基于ImageKit对图片进行处理
- 【鸿蒙ArkUI开发】基于ArkUI的验证码实现
- 【鸿蒙ArkUI实战开发】基于原生能力的深色模式适配
- 【鸿蒙实战开发】基于自定义注解和代码生成实现路由框架
- 持续更新中……
场景描述
在应用开发中无论是出于工程组织效率还是开发体验的考虑,开发者都需要对项目进行模块间解耦,此时需要构建一套用于模块间组件跳转、数据通信的路由框架。
业界常见的实现方式是在编译期生成路由表。
1. 实现原理及流程
- 在编译期通过扫描并解析ets文件中的自定义注解来生成路由表和组件注册类
- Har中的rawfile文件在Hap编译时会打包在Hap中,通过这一机制来实现路由表的合并
- 自定义组件通过wrapBuilder封装来实现动态获取
- 通过NavDestination的Builder机制来获取wrapBuilder封装后的自定义组件
2. 使用ArkTS自定义装饰器来代替注解的定义
由于TS语言特性,当前只能使用自定义装饰器
使用@AppRouter装饰器来定义路由信息
// 定义空的装饰器
export function AppRouter(param:AppRouterParam) {
  return Object;
}

export interface AppRouterParam{
  uri:string;
}
自定义组件增加路由定义
@AppRouter({ uri: "app://login" })
@Component
export struct LoginView {
  build(){
    //...
  }
}
3. 实现动态路由模块
定义路由表(该文件为自动生成的路由表)
{
  "routerMap": [
    {
      "name": "app://login",   /* uri定义  */
      "pageModule": "loginModule",  /* 模块名  */
      "pageSourceFile": "src/main/ets/generated/RouterBuilder.ets",  /* Builder文件  */
      "registerFunction": "LoginViewRegister"  /* 组件注册函数  */
    }
  ]
}
应用启动时,在EntryAbility.onCreate中加载路由表
onCreate(want: Want, launchParam: AbilityConstant.LaunchParam): void {
  DynamicRouter.init({
    libPrefix: "@app", mapPath: "routerMap"
  }, this.context);
}
export class DynamicRouter {
  // 路由初始化配置
  static config: RouterConfig;
  // 路由表
  static routerMap: Map<string, RouterInfo> = new Map();
  // 管理需要动态导入的模块,key是模块名,value是WrappedBuilder对象,动态调用创建页面的接口
  static builderMap: Map<string, WrappedBuilder<Object[]>> = new Map();
  // 路由栈
  static navPathStack: NavPathStack = new NavPathStack();
  // 通过数组实现自定义栈的管理
  static routerStack: Array<RouterInfo> = new Array();
  static referrer: string[] = [];

  public static init(config: RouterConfig, context: Context) {
    DynamicRouter.config = config;
    DynamicRouter.routerStack.push(HOME_PAGE)
    RouterLoader.load(config.mapPath, DynamicRouter.routerMap, context)
  }
  //...
}
路由表存放在src/main/resources/rawfile目录中,通过ResourceManager进行读取
export namespace RouterLoader {

  export function load(dir: string, routerMap: Map<string, RouterInfo>, context: Context) {
    const rm: resourceManager.ResourceManager = context.resourceManager;
    try {
      rm.getRawFileList(dir)
        .then((value: Array<string>) => {
          let decoder: util.TextDecoder = util.TextDecoder.create('utf-8', {
            fatal: false, ignoreBOM: true
          })
          value.forEach(fileName => {
            let fileBytes: Uint8Array = rm.getRawFileContentSync(`${dir}/${fileName}`)
            let retStr = decoder.decodeWithStream(fileBytes)
            let routerMapModel: RouterMapModel = JSON.parse(retStr) as RouterMapModel
            loadRouterMap(routerMapModel, routerMap)
          })
        })
        .catch((error: BusinessError) => {
          //...
        });
    } catch (error) {
      //...
    }
  }
}
根据URI跳转页面时,通过动态import并执行路由表中定义的registerFunction方法来实现动态注册组件
Button("跳转")
  .onClick(()=>{
    DynamicRouter.pushUri("app://settings")
  })
export class DynamicRouter {
  //...
  public static pushUri(uri: string, param?: Object, onPop?: (data: PopInfo) => void): void {
    if (!DynamicRouter.routerMap.has(uri)) {
      return;
    }
    let routerInfo: RouterInfo = DynamicRouter.routerMap.get(uri)!;
    if (!DynamicRouter.builderMap.has(uri)) {
      // 动态加载模块
      import(`${DynamicRouter.config.libPrefix}/${routerInfo.pageModule}`)
        .then((module: ESObject) => {
          module[routerInfo.registerFunction!](routerInfo)   // 进行组件注册,实际执行了下文中的LoginViewRegister方法
          DynamicRouter.navPathStack.pushDestination({ name: uri, onPop: onPop, param: param });
          DynamicRouter.pushRouterStack(routerInfo);
        })
        .catch((error: BusinessError) => {
          console.error(`promise import module failed, error code: ${error.code}, message: ${error.message}.`);
        });
    } else {
      DynamicRouter.navPathStack.pushDestination({ name: uri, onPop: onPop, param: param });
      DynamicRouter.pushRouterStack(routerInfo);
    }
  }
}
组件注册实际执行的方法为LoginViewRegister(该文件为自动生成的模版代码)
// auto-generated RouterBuilder.ets
import { DynamicRouter, RouterInfo } from '@app/dynamicRouter/Index'
import { LoginView } from '../components/LoginView'

@Builder
function LoginViewBuilder() {
  LoginView()
}

export function LoginViewRegister(routerInfo: RouterInfo) {
  DynamicRouter.registerRouterPage(routerInfo, wrapBuilder(LoginViewBuilder))
}
通过wrapBuilder将自定义组件保存在组件表
export class DynamicRouter {
  //...
  // 通过URI注册builder
  public static registerRouterPage(routerInfo: RouterInfo, wrapBuilder: WrappedBuilder<Object[]>): void {
     const builderName: string = routerInfo.name;
     if (!DynamicRouter.builderMap.has(builderName)) {
       DynamicRouter.registerBuilder(builderName, wrapBuilder);
     }
   }

   private static registerBuilder(builderName: string, builder: WrappedBuilder<Object[]>): void {
     DynamicRouter.builderMap.set(builderName, builder);
   }

  // 通过URI获取builder
  public static getBuilder(builderName: string): WrappedBuilder<Object[]> {
    const builder = DynamicRouter.builderMap.get(builderName);
    return builder as WrappedBuilder<Object[]>;
  }
}
首页Navigation通过组件表获取自定义组件Builder
@Entry
@Component
struct Index {
  build() {
    Navigation(DynamicRouter.getNavPathStack()) {
      //...
    }
    .navDestination(this.PageMap)
    .hideTitleBar(true)
  }

  @Builder
  PageMap(name: string, param?: ESObject) {
    NavDestination() {
      DynamicRouter.getBuilder(name).builder(param);
    }
  }

}
4. 实现路由表生成插件
新建插件目录etsPlugin,建议创建在HarmonyOS工程目录之外
mkdir etsPlugin
cd etsPlugin
创建npm项目
npm init
安装依赖
npm i --save-dev @types/node @ohos/hvigor @ohos/hvigor-ohos-plugin
npm i typescript handlebars
初始化typescript配置
./node_modules/.bin/tsc --init
修改tsconfig.json
{
  "compilerOptions": {
    "target": "es2021",                                  /* Set the JavaScript language version for emitted JavaScript and include compatible library declarations. */
    "module": "commonjs",                                /* Specify what module code is generated. */
    "strict": true,                                      /* Enable all strict type-checking options. */
    "esModuleInterop": true,                             /* Emit additional JavaScript to ease support for importing CommonJS modules. This enables 'allowSyntheticDefaultImports' for type compatibility. */
    "forceConsistentCasingInFileNames": true,            /* Ensure that casing is correct in imports. */
    "skipLibCheck": true,                                 /* Skip type checking all .d.ts files. */
    "sourceMap": true,
    "outDir": "./lib",
  },
  "include": [".eslintrc.js", "src/**/*"],
  "exclude": ["node_modules", "lib/**/*"],
}
创建插件文件src/index.ts
export function etsGeneratorPlugin(pluginConfig: PluginConfig): HvigorPlugin {
  return {
    pluginId: PLUGIN_ID,
    apply(node: HvigorNode) {
      pluginConfig.moduleName = node.getNodeName();
      pluginConfig.modulePath = node.getNodePath();
      pluginExec(pluginConfig);
    },
  };
}
修改package.json
{
  //...
  "main": "lib/index.js",
  "scripts": {
    "test": "echo \"Error: no test specified\" && exit 1",
    "dev": "tsc && node lib/index.js",
    "build": "tsc"
  },
  //...
}
插件实现流程

- 通过扫描自定义组件的ets文件,解析语法树,拿到注解里定义的路由信息
- 生成路由表、组件注册类,同时更新Index.ets
定义插件配置
const config: PluginConfig = {
  builderFileName: "RouterBuilder.ets",  // 生成的组件注册类文件名
  builderDir: "src/main/ets/generated",  // 代码生成路径
  routerMapDir: "src/main/resources/rawfile/routerMap",  // 路由表生成路径
  scanDir: "src/main/ets/components",  // 自定义组件扫描路径
  annotation: "AppRouter",  // 路由注解
  viewKeyword: "struct",  // 自定义组件关键字
  builderTpl: "viewBuilder.tpl",  // 组件注册类模版文件
};
插件核心代码:
function pluginExec(config: PluginConfig) {
  // 读取指定自定义组件目录下的文件
  const scanPath = `${config.modulePath}/${config.scanDir}`;
  const files: string[] = readdirSync(scanPath);
  files.forEach((fileName) => {
    // 对每个文件进行解析
    const sourcePath = `${scanPath}/${fileName}`;
    const importPath = path
      .relative(`${config.modulePath}/${config.builderDir}`, sourcePath)
      .replaceAll("\\", "/")
      .replaceAll(".ets", "");

    // 执行语法树解析器
    const analyzer = new EtsAnalyzer(config, sourcePath);
    analyzer.start();

    // 保存解析结果
    console.log(JSON.stringify(analyzer.analyzeResult));
    console.log(importPath);
    templateModel.viewList.push({
      viewName: analyzer.analyzeResult.viewName,
      importPath: importPath,
    });
    routerMap.routerMap.push({
      name: analyzer.analyzeResult.uri,
      pageModule: config.moduleName,
      pageSourceFile: `${config.builderDir}/${config.builderFileName}`,
      registerFunction: `${analyzer.analyzeResult.viewName}Register`,
    });
  });

  // 生成组件注册类
  generateBuilder(templateModel, config);
  // 生成路由表
  generateRouterMap(routerMap, config);
  // 更新Index文件
  generateIndex(config);
}
语法树解析流程
- 遍历语法树节点,找到自定义注解@AppRouter
- 读取URI的值
- 通过识别struct关键字来读取自定义组件类名
- 其他节点可以忽略
核心代码:
export class EtsAnalyzer {
  sourcePath: string;
  pluginConfig: PluginConfig;
  analyzeResult: AnalyzeResult = new AnalyzeResult();
  keywordPos: number = 0;

  constructor(pluginConfig: PluginConfig, sourcePath: string) {
    this.pluginConfig = pluginConfig;
    this.sourcePath = sourcePath;
  }

  start() {
    const sourceCode = readFileSync(this.sourcePath, "utf-8");
    // 创建ts语法解析器
    const sourceFile = ts.createSourceFile(
      this.sourcePath,
      sourceCode,
      ts.ScriptTarget.ES2021,
      false
    );
    // 遍历语法节点
    ts.forEachChild(sourceFile, (node: ts.Node) => {
      this.resolveNode(node);
    });
  }

  // 根据节点类型进行解析
  resolveNode(node: ts.Node): NodeInfo | undefined {
    switch (node.kind) {
      case ts.SyntaxKind.ImportDeclaration: {
        this.resolveImportDeclaration(node);
        break;
      }
      case ts.SyntaxKind.MissingDeclaration: {
        this.resolveMissDeclaration(node);
        break;
      }
      case ts.SyntaxKind.Decorator: {
        this.resolveDecorator(node);
        break;
      }
      case ts.SyntaxKind.CallExpression: {
        this.resolveCallExpression(node);
        break;
      }
      case ts.SyntaxKind.ExpressionStatement: {
        this.resolveExpression(node);
        break;
      }
      case ts.SyntaxKind.Identifier: {
        return this.resolveIdentifier(node);
      }
      case ts.SyntaxKind.StringLiteral: {
        return this.resolveStringLiteral(node);
      }
      case ts.SyntaxKind.PropertyAssignment: {
        return this.resolvePropertyAssignment(node);
      }
    }
  }

  resolveImportDeclaration(node: ts.Node) {
    let ImportDeclaration = node as ts.ImportDeclaration;
  }

  resolveMissDeclaration(node: ts.Node) {
    node.forEachChild((cnode) => {
      this.resolveNode(cnode);
    });
  }

  resolveDecorator(node: ts.Node) {
    let decorator = node as ts.Decorator;
    this.resolveNode(decorator.expression);
  }

  resolveIdentifier(node: ts.Node): NodeInfo {
    let identifier = node as ts.Identifier;
    let info = new NodeInfo();
    info.value = identifier.escapedText.toString();
    return info;
  }

  resolveCallExpression(node: ts.Node) {
    let args = node as ts.CallExpression;
    let identifier = this.resolveNode(args.expression);
    this.parseRouterConfig(args.arguments, identifier);
  }

  resolveExpression(node: ts.Node) {
    let args = node as ts.ExpressionStatement;
    let identifier = this.resolveNode(args.expression);
    if (identifier?.value === this.pluginConfig.viewKeyword) {
      this.keywordPos = args.end;
    }
    if (this.keywordPos === args.pos) {
      this.analyzeResult.viewName = identifier?.value;
    }
  }

  resolveStringLiteral(node: ts.Node): NodeInfo {
    let stringLiteral = node as ts.StringLiteral;
    let info = new NodeInfo();
    info.value = stringLiteral.text;
    return info;
  }

  resolvePropertyAssignment(node: ts.Node): NodeInfo {
    let propertyAssignment = node as ts.PropertyAssignment;
    let propertyName = this.resolveNode(propertyAssignment.name)?.value;
    let propertyValue = this.resolveNode(propertyAssignment.initializer)?.value;
    let info = new NodeInfo();
    info.value = { key: propertyName, value: propertyValue };
    return info;
  }

}
使用模版引擎生成组件注册类
使用Handlebars生成组件注册类
const template = Handlebars.compile(tpl);
const output = template({ viewList: templateModel.viewList });
模版文件viewBuilder.tpl示例:
// auto-generated RouterBuilder.ets
import { DynamicRouter, RouterInfo } from '@app/dynamicRouter/Index'
{{#each viewList}}
import { {{viewName}} } from '{{importPath}}'
{{/each}}

{{#each viewList}}
@Builder
function {{viewName}}Builder() {
  {{viewName}}()
}

export function {{viewName}}Register(routerInfo: RouterInfo) {
  DynamicRouter.registerRouterPage(routerInfo, wrapBuilder({{viewName}}Builder))
}

{{/each}}
生成的RouterBuilder.ets代码示例:
// auto-generated RouterBuilder.ets
import { DynamicRouter, RouterInfo } from '@app/dynamicRouter/Index'
import { LoginView } from '../components/LoginView'

@Builder
function LoginViewBuilder() {
  LoginView()
}

export function LoginViewRegister(routerInfo: RouterInfo) {
  DynamicRouter.registerRouterPage(routerInfo, wrapBuilder(LoginViewBuilder))
}
将路由表和组件注册类写入文件
- 路由表保存在rawfile目录
- 组件注册类保存在ets代码目录
- 更新模块导出文件Index.ets
核心代码:
function generateBuilder(templateModel: TemplateModel, config: PluginConfig) {
  console.log(JSON.stringify(templateModel));
  const builderPath = path.resolve(__dirname, `../${config.builderTpl}`);
  const tpl = readFileSync(builderPath, { encoding: "utf8" });
  const template = Handlebars.compile(tpl);
  const output = template({ viewList: templateModel.viewList });
  console.log(output);
  const routerBuilderDir = `${config.modulePath}/${config.builderDir}`;
  if (!existsSync(routerBuilderDir)) {
    mkdirSync(routerBuilderDir, { recursive: true });
  }
  writeFileSync(`${routerBuilderDir}/${config.builderFileName}`, output, {
    encoding: "utf8",
  });
}

function generateRouterMap(routerMap: RouterMap, config: PluginConfig) {
  const jsonOutput = JSON.stringify(routerMap, null, 2);
  console.log(jsonOutput);
  const routerMapDir = `${config.modulePath}/${config.routerMapDir}`;
  if (!existsSync(routerMapDir)) {
    mkdirSync(routerMapDir, { recursive: true });
  }
  writeFileSync(`${routerMapDir}/${config.moduleName}.json`, jsonOutput, {
    encoding: "utf8",
  });
}

function generateIndex(config: PluginConfig) {
  const indexPath = `${config.modulePath}/Index.ets`;
  const indexContent = readFileSync(indexPath, { encoding: "utf8" });
  const indexArr = indexContent
    .split("\n")
    .filter((value) => !value.includes(config.builderDir!));
  indexArr.push(
    `export * from './${config.builderDir}/${config.builderFileName?.replace(
      ".ets",
      ""
    )}'`
  );
  writeFileSync(indexPath, indexArr.join("\n"), {
    encoding: "utf8",
  });
}
5. 在应用中使用
修改项目的hvigor/hvigor-config.json文件,导入路由表插件
{
  "hvigorVersion": "4.2.0",
  "dependencies": {
    "@ohos/hvigor-ohos-plugin": "4.2.0",
    "@app/ets-generator" : "file:../../etsPlugin"   // 插件目录的本地相对路径,或者使用npm仓版本号
  },
  //...
}
修改loginModule模块的hvigorfile.ts文件(loginModule/hvigorfile.ts),加载插件
import { harTasks } from '@ohos/hvigor-ohos-plugin';
import {PluginConfig,etsGeneratorPlugin} from '@app/ets-generator'

const config: PluginConfig = {
    builderFileName: "RouterBuilder.ets",
    builderDir: "src/main/ets/generated",
    routerMapDir: "src/main/resources/rawfile/routerMap",
    scanDir: "src/main/ets/components",
    annotation: "AppRouter",
    viewKeyword: "struct",
    builderTpl: "viewBuilder.tpl",
}

export default {
    system: harTasks,  /* Built-in plugin of Hvigor. It cannot be modified. */
    plugins:[etsGeneratorPlugin(config)]         /* Custom plugin to extend the functionality of Hvigor. */
}
在loginModule模块的oh-package.json5中引入动态路由模块依赖
{
  "name": "loginmodule",
  "version": "1.0.0",
  "description": "Please describe the basic information.",
  "main": "Index.ets",
  "author": "",
  "license": "Apache-2.0",
  "dependencies": {
    "@app/dynamicRouter": "file:../routerModule"
  }
}
在loginModule模块的自定义组件中使用@AppRouter定义路由信息
@AppRouter({ uri: "app://login" })
@Component
export struct LoginView {
  build(){
    //...
  }
}
在entry中的oh-package.json5中引入依赖
{
  "name": "entry",
  "version": "1.0.0",
  "description": "Please describe the basic information.",
  "main": "",
  "author": "",
  "license": "",
  "dependencies": {
    "@app/loginModule": "file:../loginModule",
    "@app/commonModule": "file:../commonModule",
    "@app/dynamicRouter": "file:../routerModule"
  }
}
在entry中的build-profile.json5中配置动态import
{
  "apiType": "stageMode",
  "buildOption": {
    "arkOptions": {
      "runtimeOnly": {
        "packages": [
          "@app/loginModule",  // 仅用于使用变量动态import其他模块名场景,静态import或常量动态import无需配置。
          "@app/commonModule"  // 仅用于使用变量动态import其他模块名场景,静态import或常量动态import无需配置。
        ]
      }
    }
  },
  //...
}
在entry中的EntryAbility.onCreate中初始化路由组件
onCreate(want: Want, launchParam: AbilityConstant.LaunchParam): void {
  DynamicRouter.init({
    libPrefix: "@app", mapPath: "routerMap"
  }, this.context);
}
组件内使用pushUri进行跳转
Button("立即登录", { buttonStyle: ButtonStyleMode.TEXTUAL })
  .onClick(() => {
    DynamicRouter.pushUri("app://login")
  })
  .id("button")
在entry模块执行Run/Debug,即可在编译时自动生成路由表配置并打包运行。
总是有很多小伙伴反馈说:鸿蒙开发不知道学习哪些技术?不知道需要重点掌握哪些鸿蒙开发知识点? 为了解决大家这些学习烦恼。在这准备了一份很实用的鸿蒙全栈开发学习路线与学习文档给大家用来跟着学习。
针对一些列因素,整理了一套纯血版鸿蒙(HarmonyOS Next)全栈开发技术的学习路线,包含了鸿蒙开发必掌握的核心知识要点,内容有(OpenHarmony多媒体技术、Napi组件、OpenHarmony内核、OpenHarmony驱动开发、系统定制移植……等)技术知识点。

《鸿蒙 (Harmony OS)开发学习手册》(共计892页):https://gitcode.com/HarmonyOS_MN/733GH/overview
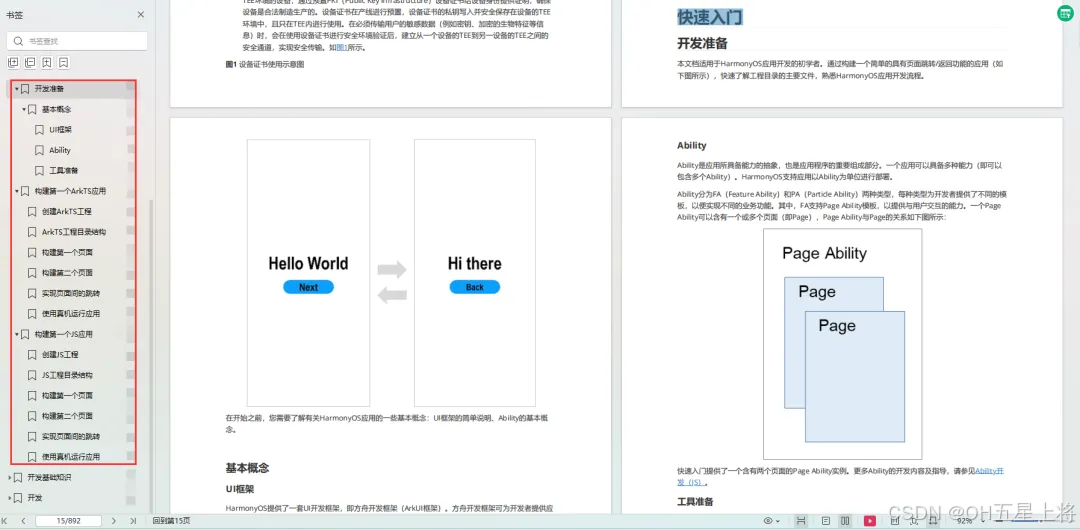
如何快速入门?
1.基本概念
2.构建第一个ArkTS应用
3.……
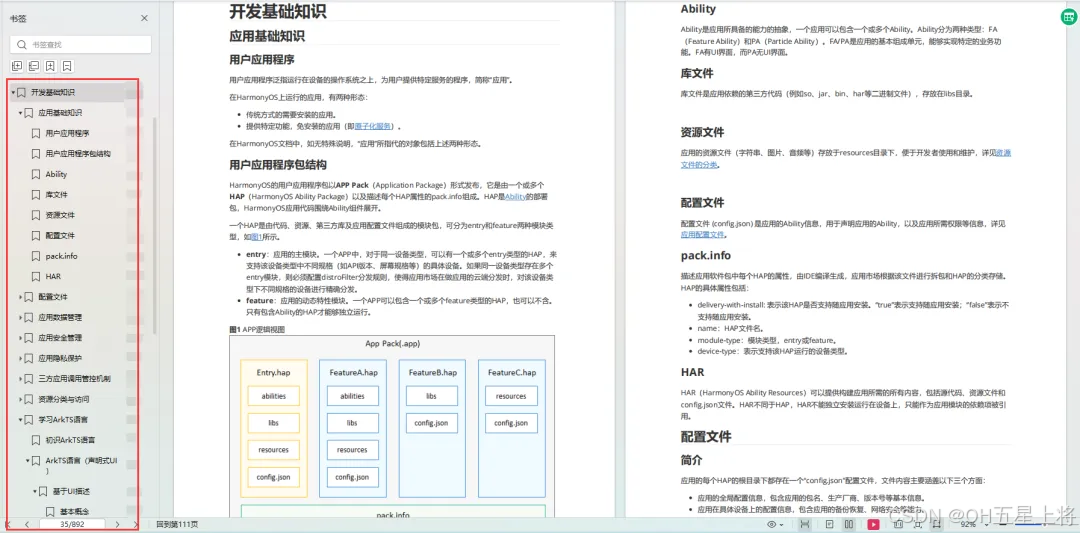
开发基础知识:
1.应用基础知识
2.配置文件
3.应用数据管理
4.应用安全管理
5.应用隐私保护
6.三方应用调用管控机制
7.资源分类与访问
8.学习ArkTS语言
9.……
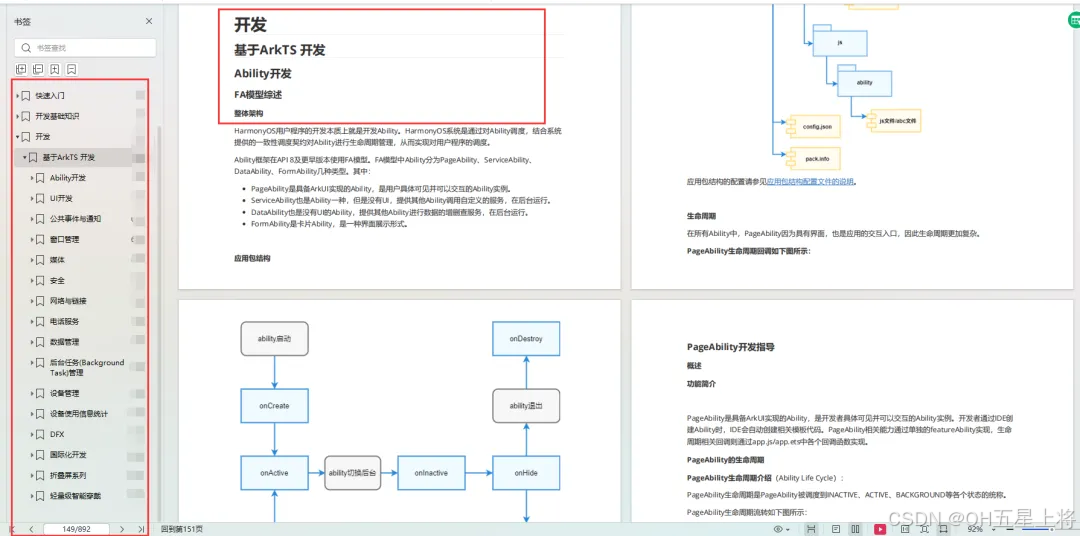
基于ArkTS 开发
1.Ability开发
2.UI开发
3.公共事件与通知
4.窗口管理
5.媒体
6.安全
7.网络与链接
8.电话服务
9.数据管理
10.后台任务(Background Task)管理
11.设备管理
12.设备使用信息统计
13.DFX
14.国际化开发
15.折叠屏系列
16.……
鸿蒙开发面试真题(含参考答案):https://gitcode.com/HarmonyOS_MN/733GH/overview
OpenHarmony 开发环境搭建
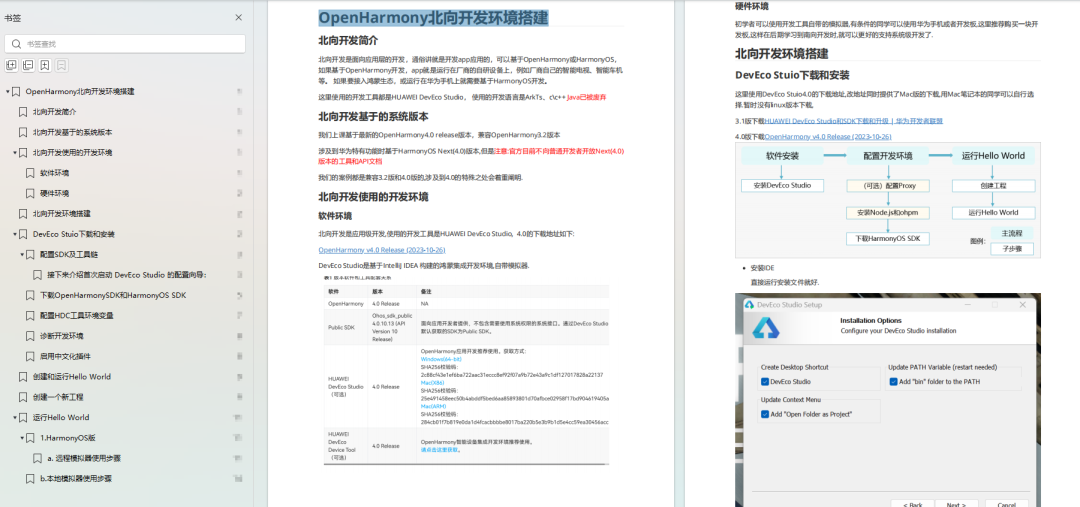
《OpenHarmony源码解析》:https://gitcode.com/HarmonyOS_MN/733GH/overview
- 搭建开发环境
- Windows 开发环境的搭建
- Ubuntu 开发环境搭建
- Linux 与 Windows 之间的文件共享
- ……
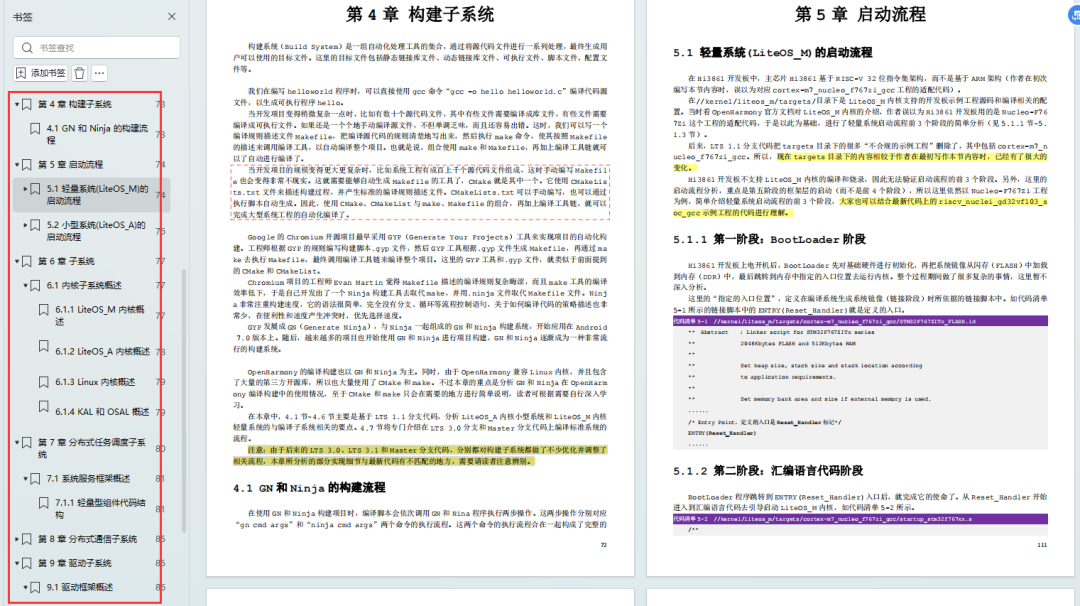
- 系统架构分析
- 构建子系统
- 启动流程
- 子系统
- 分布式任务调度子系统
- 分布式通信子系统
- 驱动子系统
- ……
OpenHarmony 设备开发学习手册:https://gitcode.com/HarmonyOS_MN/733GH/overview


 549
549

 被折叠的 条评论
为什么被折叠?
被折叠的 条评论
为什么被折叠?
 到【灌水乐园】发言


