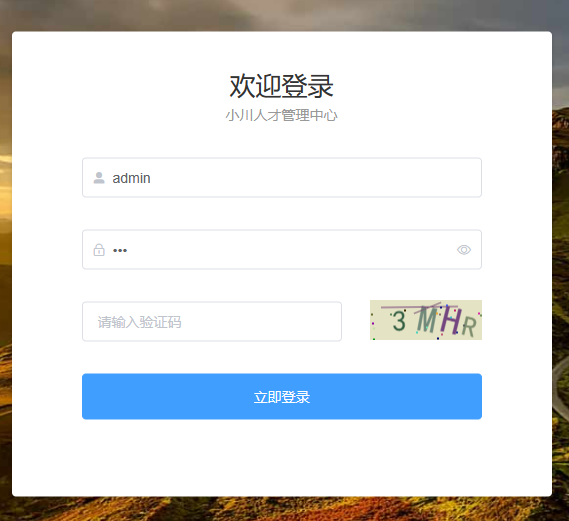
1、下载less 和less-loader
npm i less

npm i less-loader
2、components文件夹下封装vue组件(identify.vue)
直接复制粘贴过来
<template>
    <div class="s-canvas">
        <canvas id="s-canvas" :width="contentWidth" :height="contentHeight"></canvas>
    </div>
</template>
<script>
export default {
    name: 'SIdentify',
    props: {
        identifyCode: {
            type: String,
            default: '1234'
        },
        fontSizeMin: {
            type: Number,
            default: 28
        },
        fontSizeMax: {
            type: Number,
            default: 40
        },
        backgroundColorMin: {
            type: Number,
            default: 180
        },
        backgroundColorMax: {
            type: Number,
            default: 240
        },
        colorMin: {
            type: Number,
            default: 50
        },
        colorMax: {
            type: Number,
            default: 160
        },
        lineColorMin: {
            type: Number,
            default: 40
        },
        lineColorMax: {
            type: Number,
            default: 180
        },
        dotColorMin: {
            type: Number,
            default: 0
        },
        dotColorMax: {
            type: Number,
            default: 255
        },
        contentWidth: {
            type: Number,
            default: 112
        },
        contentHeight: {
            type: Number,
            default: 40
        }
    },
    methods: {
        // 生成一个随机数
        randomNum (min, max) {
            return Math.floor(Math.random() * (max - min) + min)
        },
        // 生成一个随机的颜色
        randomColor (min, max) {
            var r = this.randomNum(min, max)
            var g = this.randomNum(min, max)
            var b = this.randomNum(min, max)
            return 'rgb(' + r + ',' + g + ',' + b + ')'
        },
        drawPic () {
            var canvas = document.getElementById('s-canvas')
            var ctx = canvas.getContext('2d')
            ctx.textBaseline = 'bottom'
            // 绘制背景
            ctx.fillStyle = this.randomColor(
                this.backgroundColorMin,
                this.backgroundColorMax
            )
            ctx.fillRect(0, 0, this.contentWidth, this.contentHeight)
            // 绘制文字
            for (let i = 0; i < this.identifyCode.length; i++) {
                this.drawText(ctx, this.identifyCode[i], i)
            }
            this.drawLine(ctx)
            this.drawDot(ctx)
        },
        drawText (ctx, txt, i) {
            ctx.fillStyle = this.randomColor(this.colorMin, this.colorMax)
            ctx.font =
                this.randomNum(this.fontSizeMin, this.fontSizeMax) + 'px SimHei'
            var x = (i + 1) * (this.contentWidth / (this.identifyCode.length + 1))
            var y = this.randomNum(this.fontSizeMax, this.contentHeight - 5)
            var deg = this.randomNum(-30, 30)
            // 修改坐标原点和旋转角度
            ctx.translate(x, y)
            ctx.rotate(deg * Math.PI / 270)
            ctx.fillText(txt, 0, 0)
            // 恢复坐标原点和旋转角度
            ctx.rotate(-deg * Math.PI / 270)
            ctx.translate(-x, -y)
        },
        drawLine (ctx) {
            // 绘制干扰线
            for (let i = 0; i < 2; i++) {
                ctx.strokeStyle = this.randomColor(
                    this.lineColorMin,
                    this.lineColorMax
                )
                ctx.beginPath()
                ctx.moveTo(
                    this.randomNum(0, this.contentWidth),
                    this.randomNum(0, this.contentHeight)
                )
                ctx.lineTo(
                    this.randomNum(0, this.contentWidth),
                    this.randomNum(0, this.contentHeight)
                )
                ctx.stroke()
            }
        },
        drawDot (ctx) {
            // 绘制干扰点
            for (let i = 0; i < 20; i++) {
                ctx.fillStyle = this.randomColor(0, 255)
                ctx.beginPath()
                ctx.arc(
                    this.randomNum(0, this.contentWidth),
                    this.randomNum(0, this.contentHeight),
                    1,
                    0,
                    2 * Math.PI
                )
                ctx.fill()
            }
        }
    },
    watch: {
        identifyCode () {
            this.drawPic()
        }
    },
    mounted () {
        this.drawPic()
    }
}
</script>
<style lang='less' scoped>
.s-canvas {
    height: 38px;
}
.s-canvas canvas{
    margin-top: 1px;
    margin-left: 8px;
}
</style>
3、在需要用到的地方导入该组件
例:登录
<template>
    <div class="wrapper">
        <el-row :gutter="20">
            <el-col :span="16">
                <el-input v-model="ruleForm.code" placeholder="请输入验证码"></el-input>
            </el-col>
            <el-col :span="8" style="margin-top: 8px;">
                <span @click="refreshCode"  style="cursor: pointer;margin-top: 10px">
                    <s-identify :identifyCode="identifyCode"></s-identify>
                </span>
            </el-col>
        </el-row>
    </div>
</template>

<script>
import SIdentify from '@/components/identify.vue'

export default {
    name: "Login",
    components: { SIdentify },
    data(){
        return{
            // 图片验证码
            identifyCode: '',
            // 验证码规则
            identifyCodes: '3456789ABCDEFGHGKMNPQRSTUVWXY',
        }
    },
    methods: {
        // 切换验证码
        refreshCode() {
            this.identifyCode = ''
            this.makeCode(this.identifyCodes, 4)
        },
        // 生成随机验证码
        makeCode(o, l) {
            for (let i = 0; i < l; i++) {
                this.identifyCode += this.identifyCodes[Math.floor(Math.random() * (this.identifyCodes.length))]
            }
        },
    },
    mounted() {
        //进入页面则刷新验证码图片
        this.refreshCode();
    },
}
</script>


 346
346


 被折叠的 条评论
为什么被折叠?


