


 本文详细介绍了如何在SpringBoot项目中集成Easy-captcha开源验证码组件,包括快速入门、自定义属性、不同验证码类型生成及在前后端分离架构下的使用方法。
一、前言
最近系统开发在优化验证码的相关功能,第一反应就是有没有开源的第三方组件可以使用呢。
在一番寻觅以后,还真发现一个好用的第三方验证码组件Easy-captcha。Easy-captcha是一个开源的Java库,用于生成和验证验证码,它的API上手难度低,可以生成包含数字、字母、中文和数字运算验证码,还有会动的GIF格式验证码哦,此外还允许开发者针对长度、字符集、字体、颜色、样式等方面进行自定义,可以满足大部分复杂场景。
二、快速入门
说了这么多Easy-captcha的好处,我们入门实际体验一下吧。
-
新建一个Spring Boot项目,导入如下依赖:
<dependency> <groupId>org.springframework.boot</groupId> <artifactId>spring-boot-starter-web</artifactId> </dependency> <!--easy-captcha组件的依赖--> <dependency> <groupId>com.github.whvcse</groupId> <artifactId>easy-captcha</artifactId> <version>1.6.2</version> </dependency> -
新建一个Controller,用于生成验证码
import com.wf.captcha.utils.CaptchaUtil; import org.springframework.web.bind.annotation.RequestMapping; import org.springframework.web.bind.annotation.RestController; import javax.servlet.http.HttpServletRequest; import javax.servlet.http.HttpServletResponse; import java.io.IOException; @RestController public class CaptchaController { /** * 生成验证码 * * @param request * @param response * @throws IOException */ @RequestMapping("/captcha") public void captcha(HttpServletRequest request, HttpServletResponse response) throws IOException { // 使用这一行代码就可以生成验证码了 CaptchaUtil.out(request, response); } } -
准备一个登陆接口,用于验证验证码的正确性
import com.wf.captcha.utils.CaptchaUtil; import org.springframework.web.bind.annotation.PostMapping; import org.springframework.web.bind.annotation.RestController; import javax.servlet.http.HttpServletRequest; import javax.servlet.http.HttpServletResponse; import java.io.IOException; @RestController public class LoginController { /** * 登录 * * @param request * @param response */ @PostMapping("/login") public void login(HttpServletRequest request, HttpServletResponse response) throws IOException { // 获取验证码参数 String captcha = request.getParameter("captcha"); // 校验验证码是否正确 if (CaptchaUtil.ver(captcha, request)) { response.getOutputStream().print("captcha correct!"); } else { response.getOutputStream().print("captcha error!"); } } } -
准备一个静态文件
index.html,用于显示验证码和输入验证码验证<!DOCTYPE html> <html lang="en"> <form action="/login" method="post"> <img src="/captcha" width="160px" height="50px"> <input type="text" name="captcha"> <input type="submit" value="login"> </form> </html> -
在项目
resource目录下新建static目录,将index.html文件拷贝到该目录下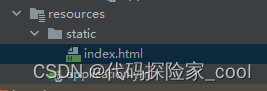
由于我本地有Nginx,出于个人习惯考虑,我将静态文件index.html交由nginx代理服务器进行代理访问,nginx参考配置如下:
    server {
        listen       80;
        server_name  localhost;

        location / {
            root   captcha; # 存放index.html文件的目录
            index  index.html;
        }

       location /captcha {
           proxy_pass http://localhost:8080/captcha;
        }

        location /login {
           proxy_pass http://localhost:8080/login;
        }
    }
-
启动项目进行测试
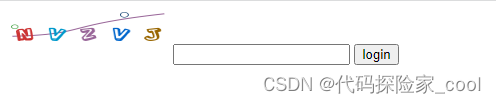
正常Spring Boot项目启动以后访问:
http://localhost:8080/index.html页面,我本地通过Nginx服务代理,直接访问http://localhost就行了(后面不再提示),会出现页面: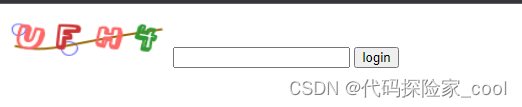
-
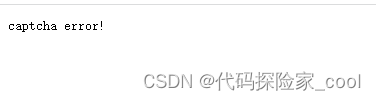
输入错误验证码,提示验证码错误
-
输入正确验证码,提示验证码正确
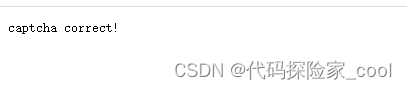
到此我们快速入门就结束了。
三、技术浅析
为了我们更好的使用Easy-captcha,我们还是了解一下源码,并针对一些疑问进行探究。
-
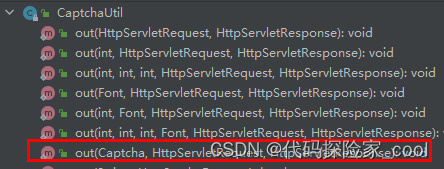
Easy-captcha生成验证码的方式只能通过CaptchaUtil.out(request, response)吗?这个问题的答案显然是否定的,查看
CaptchaUtil.out方法可以发现,它其实还有很多重载方法:
在重载方法中,我们可以指定生成验证码的宽度、高度、验证码个数,甚至指定不同的验证码类型。
-
Easy-captcha验证码组件可以生成不同类型的验证码,要怎么指定,并且可以支持哪些呢?这个问题其实通过上面也可以看到:
可以支持的类型:
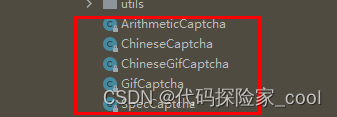
而且通过源码可以发现,默认就是SpecCaptcha格式验证码:

-
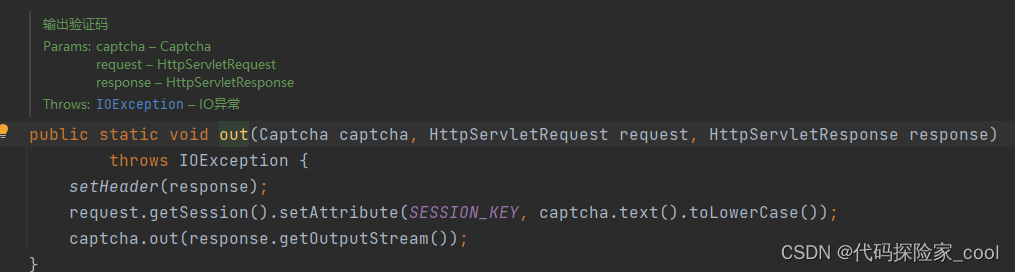
Easy-captcha组件生成验证码和校验验证码原理是什么?针对这个问题,直接跟踪源码就行了:
输出验证码核心逻辑是通过
response.getOutputStream()输出流,同时,会将生成的验证码文字信息保存到session中,(这里针对前后端分离,或者禁用session的系统会有问题,可以参考后面的解决方法)
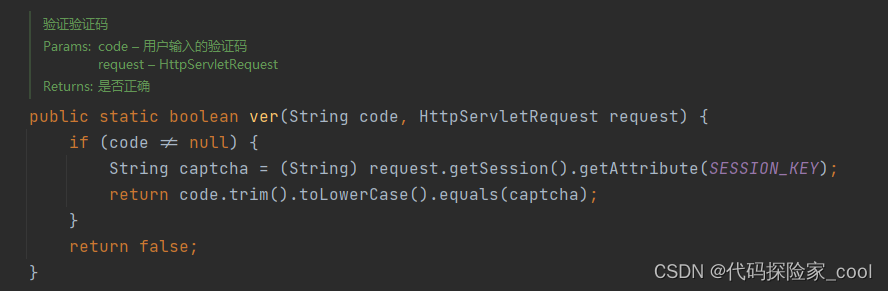
验证验证码的逻辑也很简单,就是从session中获取验证码与传入进来的值进行比较,看看是否相等。
四、 验证码使用介绍大全
1. 自定义验证码属性
我们可以自定义验证码长度、宽度、高度等属性,代码如下:
@RequestMapping("/captcha")
    public void captcha(HttpServletRequest request, HttpServletResponse response) throws IOException {
         // 指定宽度为200,高度为100,验证码字符为5个
        CaptchaUtil.out(200, 100, 5, request, response);
    }
重启应用,刷新页面:
2. 使用GifCaptcha形式验证码
示例代码:
@RequestMapping("/captcha")
public void captcha(HttpServletRequest request, HttpServletResponse response) throws IOException {
    // 创建GifCaptcha对象,设置宽度为160,高度为40,长度为5
    GifCaptcha gifCaptcha = new GifCaptcha(160, 40, 5);
    // 获取生成的验证码内容
    final String captcha = gifCaptcha.text().toLowerCase();
    System.out.println(captcha);
    // 获取生成验证码的base64字符串
    // String base64 = gifCaptcha.toBase64();
    // System.out.println(base64);
    // 输出到前端页面显示
    CaptchaUtil.out(gifCaptcha, request, response);
}
重启应用,刷新页面(验证码会动):

3. 使用ChineseGifCaptcha形式验证码
示例代码:
    @RequestMapping("/captcha")
    public void captcha(HttpServletRequest request, HttpServletResponse response) throws IOException {
        // 创建ChineseGifCaptcha对象,设置宽度为160,高度为40,长度为5
        ChineseGifCaptcha chineseGifCaptcha = new ChineseGifCaptcha(160, 40, 5);
        // 获取生成的验证码内容
        final String captcha = chineseGifCaptcha.text().toLowerCase();
        System.out.println(captcha);
        // 获取生成验证码的base64字符串
        //String base64 = chineseGifCaptcha.toBase64();
        //System.out.println(base64);
        // 输出到前端页面显示
        CaptchaUtil.out(chineseGifCaptcha, request, response);
    }
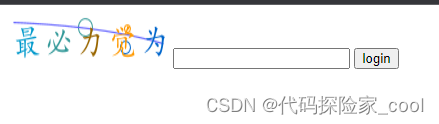
重启应用,刷新页面:

4. 使用ChineseCaptcha形式验证码
示例代码:
@RequestMapping("/captcha")
    public void captcha(HttpServletRequest request, HttpServletResponse response) throws IOException {
        // 创建ChineseCaptcha对象,设置宽度为160,高度为40,长度为5
        ChineseCaptcha chineseCaptcha = new ChineseCaptcha(160, 40, 5);
        // 获取生成的验证码内容
        final String captcha = chineseCaptcha.text().toLowerCase();
        System.out.println(captcha);
        // 获取生成验证码的base64字符串
        //String base64 = chineseCaptcha.toBase64();
        //System.out.println(base64);
        // 输出到前端页面显示
        CaptchaUtil.out(chineseCaptcha, request, response);
    }
重启应用,刷新页面:
5. 使用ArithmeticCaptcha形式验证码
示例代码:
@RequestMapping("/captcha")
public void captcha(HttpServletRequest request, HttpServletResponse response) throws IOException {
    // 创建ArithmeticCaptcha对象,设置宽度为160,高度为40,长度为5
    ArithmeticCaptcha arithmeticCaptcha = new ArithmeticCaptcha(160, 40, 5);
    // 获取生成的验证码内容
    final String captcha = arithmeticCaptcha.text().toLowerCase();
    System.out.println(captcha);
    // 获取生成验证码的base64字符串
    String base64 = arithmeticCaptcha.toBase64();
    System.out.println(base64);
    // 输出到前端页面显示
    CaptchaUtil.out(arithmeticCaptcha, request, response);
}
重启应用,刷新页面:

五、前后端分离架构怎么使用
上面我们介绍了各种验证码方式的使用,不过回到之前的问题,目前前后端架构的应用特别多,针对前后端分离架构下此时通过session去保存和获取验证码显然是不合适的,那么我们可以这么解决呢?
1. 技术方案
其实Easy-captcha组件也支持这个问题的解决,简单说一下解决思路。
-
创建需要的验证码对象;
-
获取验证码对象生成的验证码放到
redis或其他缓存组件中,存储形式为key-value,key可以设置随机字符串,并可以设置过期时间,进行验证码有效期控制; -
获取验证码对象生成的
Base64字符串,和步骤2生成的key,一起返回给前端,前端通过返回的Base64字符串生成验证码图片; -
验证码验证时,前端回传步骤3响应给前端key和输入的验证码,后端拿到key以后从
redis或其他缓存组件中获取验证码对输入的验证码进行字符串对比,如果符合则通过,否则失败。
2. 技术实现
下面我们简单实现一下这个逻辑,使用ArithmeticCaptcha形式验证码为例,示例代码如下:
import com.wf.captcha.ArithmeticCaptcha;
import org.springframework.web.bind.annotation.RequestMapping;
import org.springframework.web.bind.annotation.RestController;

import javax.servlet.http.HttpServletResponse;
import java.io.IOException;
import java.io.PrintWriter;
import java.util.HashMap;
import java.util.Map;
import java.util.UUID;
import java.util.concurrent.ConcurrentHashMap;
import java.util.concurrent.ConcurrentMap;

@RestController
public class CaptchaController {

    /**
     * 缓存,模拟redis缓存,不过没设置过期时间
     */
    public static final ConcurrentMap<String, String> REDIS = new ConcurrentHashMap<>();

    /**
     * 生成验证码
     *
     * @param request
     * @param response
     * @throws IOException
     */
    @RequestMapping("/captcha")
    public /*Map<String, Object>*/ void captcha(HttpServletResponse response) throws IOException {
        Map<String, Object> map = new HashMap<>();
        // 创建ArithmeticCaptcha对象,设置宽度为160,高度为40,长度为5
        ArithmeticCaptcha arithmeticCaptcha = new ArithmeticCaptcha(160, 40, 5);
        // 获取生成的验证码内容
        final String captcha = arithmeticCaptcha.text().toLowerCase();
        // 生成一个随机key
        String key = UUID.randomUUID().toString();
        // 模拟放入到redis中,真实业务需要设置验证码过期时间
        REDIS.put(key, captcha);
        // 获取生成验证码的base64字符串
        String base64 = arithmeticCaptcha.toBase64();

        map.put("captchaKey", key);
        map.put("captchaBase64", base64);

        // 为了演示简单,我使用response对象生成在前端显示
        response.setContentType("text/html;charset=utf-8");
        PrintWriter printWriter = response.getWriter();
        printWriter.println("<form action='/login' method='post'>");
        printWriter.println("<input type='hidden' name='captchaKey' value='" + key + "'>");
        printWriter.println("<img src='" + base64 + "' width='160px' height='50px'>");
        printWriter.println("<input type='text' name='captcha'>");
        printWriter.println("<input type='submit' value='login'>");
        printWriter.println("</from>");

        // 实际业务,将信息构建成一个MAP,返回给前端,前端生成验证码
        // return map;
    }

}
输入验证码点击登录时,前端会携带返回key信息和验证码信息,后端根据这些信息进行判断,示例代码如下:
import org.springframework.web.bind.annotation.PostMapping;
import org.springframework.web.bind.annotation.RestController;

import javax.servlet.http.HttpServletRequest;
import javax.servlet.http.HttpServletResponse;
import java.io.IOException;
import java.util.Objects;

@RestController
public class LoginController {

    /**
     * 登录
     *
     * @param request
     * @param response
     */
    @PostMapping("/login")
    public void login(HttpServletRequest request, HttpServletResponse response) throws IOException {
        // 获取验证码参数
        String captcha = request.getParameter("captcha");
        // 获取验证码Key
        String captchaKey = request.getParameter("captchaKey");
        // 从redis或者其他缓存组件中获取缓存的验证码信息,注意是否过期
        final String cacheCaptcha = CaptchaController.REDIS.get(captchaKey);
        // 校验验证码是否正确
        if (Objects.nonNull(cacheCaptcha) && cacheCaptcha.equalsIgnoreCase(cacheCaptcha)) { // 验证码一般对大小写不敏感
            response.getOutputStream().print("captcha correct!");
        } else {
            response.getOutputStream().print("captcha error!");
        }
    }
}
3. 测试
启动工程,访问http://localhost:8080/captcha地址,查看是否正常显示:

-
输入错误验证码测试:
-
输入正确验证码测试:
到此,Easy-captcha组件使用介绍就结束了。


 329
329

 被折叠的 条评论
为什么被折叠?
被折叠的 条评论
为什么被折叠?
 到【灌水乐园】发言


