


视频链接:
1. 课程内容概述
个人更关注语义分割和3D方面的内容,所以这里重点记录这两点相关的。
1.1 Openmmlab框架
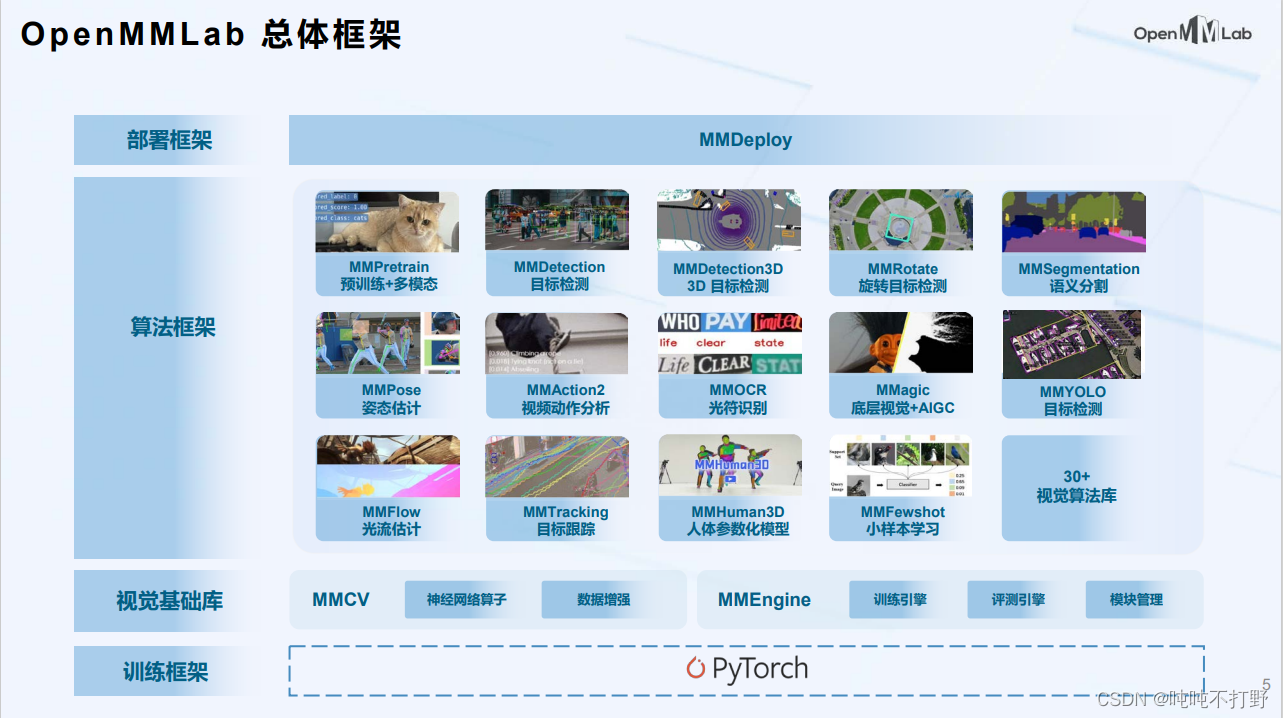
具体的模块,详见:https://openmmlab.com/codebase,这里只截取了一部分。那个github图标和文档图标是可以点击的链接。。
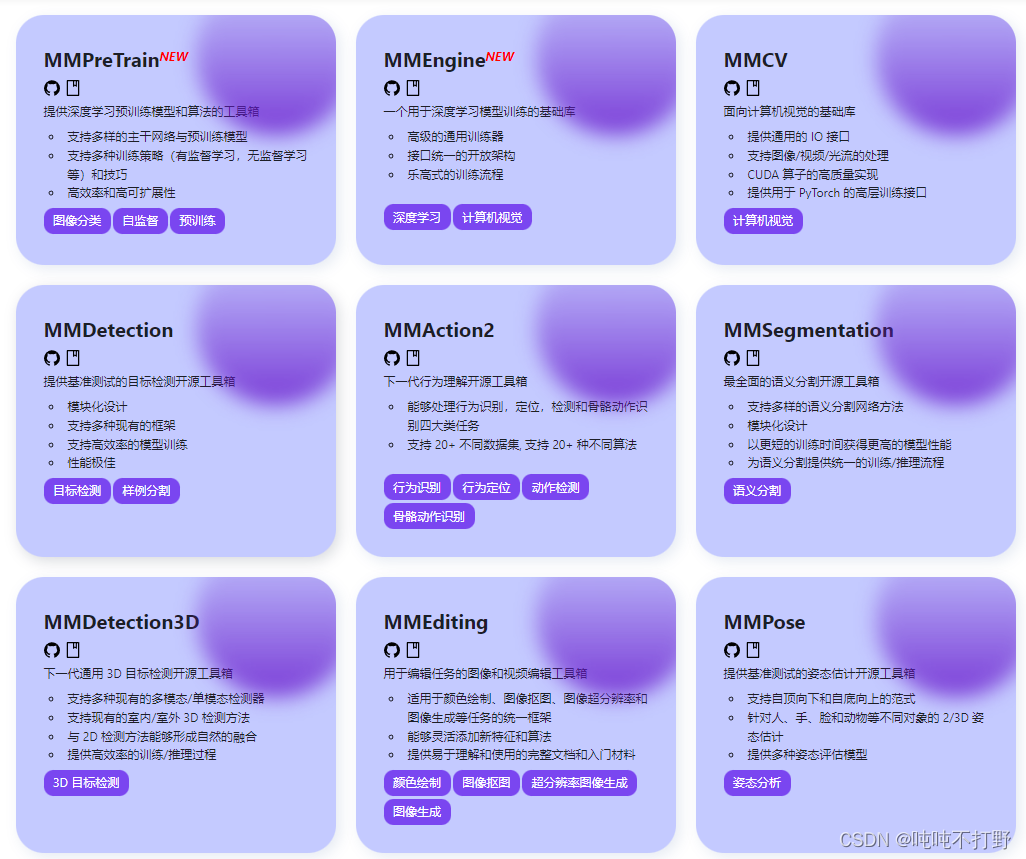
比如:
- MMSegmentation的Github:https://github.com/open-mmlab/mmsegmentation/blob/main/README_zh-CN.md
这里支持的每种网络都有对应的论文等链接,可以快速学习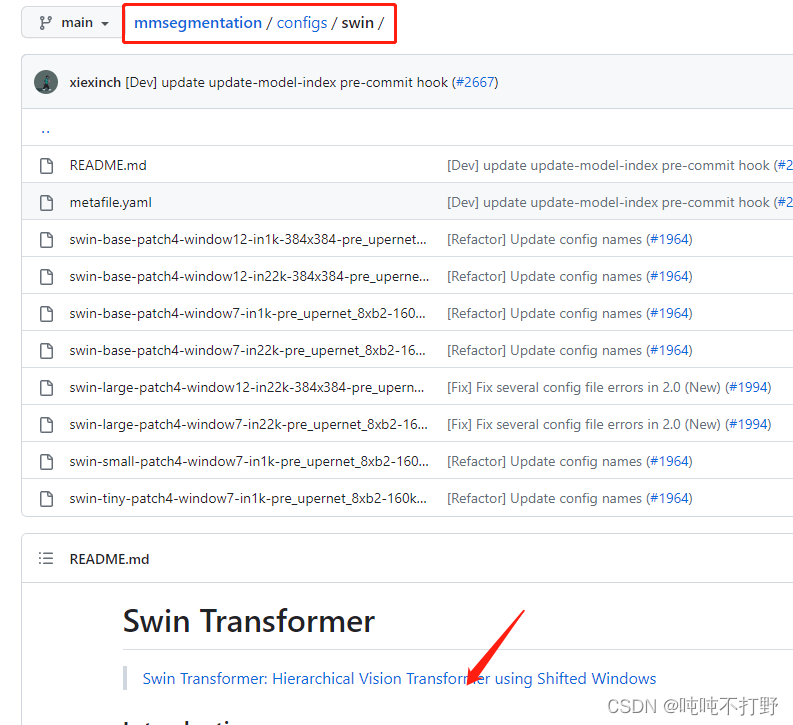
- MMSegmentation的文档:https://mmsegmentation.readthedocs.io/zh_CN/latest/index.html
- 都是有中英文两种语言的文档,维护的很好
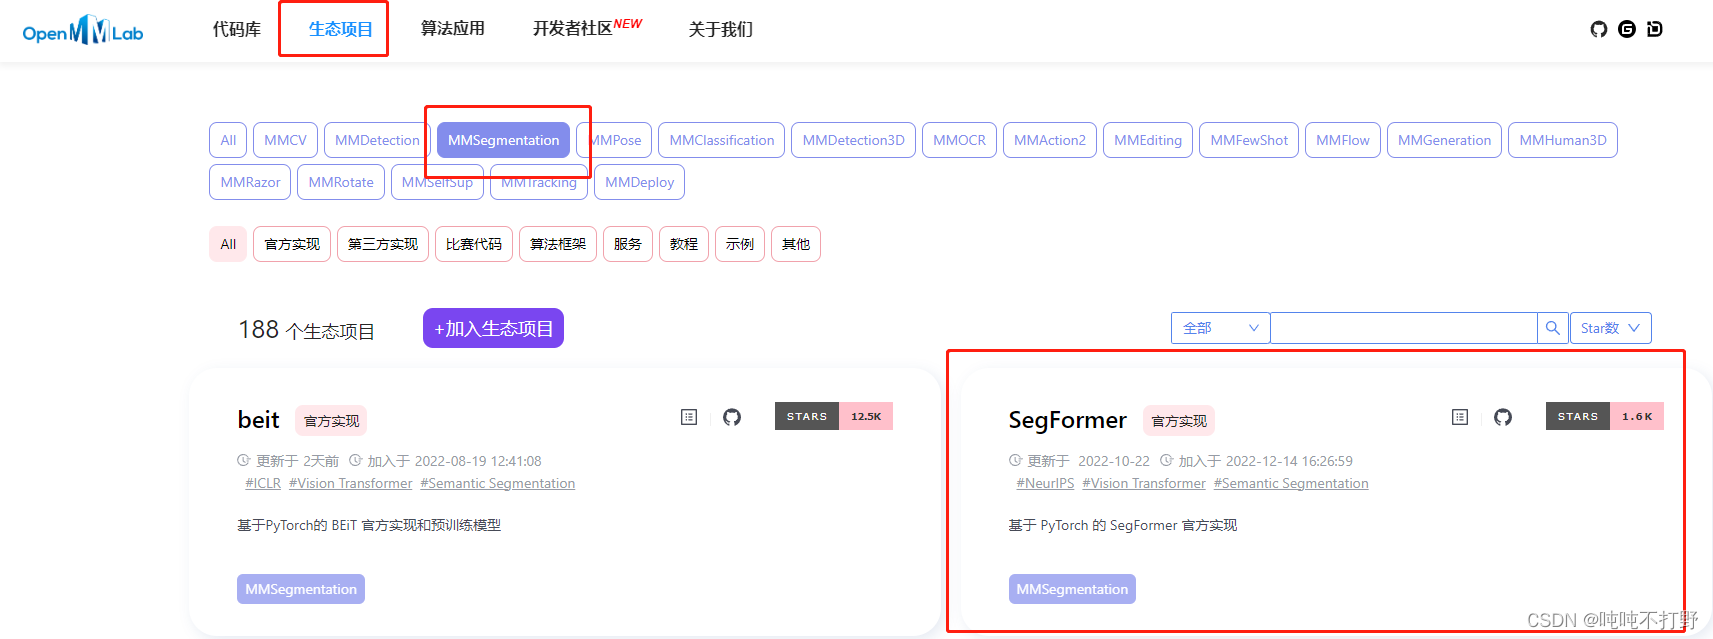
另外,主页还有个生态,里面会放一些对应模块相关的内容,比如:
1.2 课程其他说明
有一些奖品,而且运营的不错,整体来说,参加来看看,也不算亏吧
2. mmcv安装
2.1 正确步骤
- 主要参考文档:https://mmsig.openmmlab.com/general/env/win11
- 本机环境:Windows11,有GPU但是没有安装Cuda,因此偷懒选择安装cpu版本
- 注意:需要用到git、anaconda(miniconda)和vscode三个软件,可以提前准备一下
主要步骤:
// 1.创建用于课程的新python环境,为了避免多余的问题,python版本最好选择3.9
conda create -n openmmlab python=3.9

// 2. 进入刚刚创建好的环境
conda activate openmmlab

// 3. 安装cpu版本的torch,记得一定要加 cpuonly这个参数,不然后面会出现奇怪的错误
conda install pytorch torchvision torchaudio cpuonly -c pytorch

// 4. 安装openmim
pip install openmim
mim install "mmcv==2.0.0rc3"

// 5. 安装pycocotools,一定用conda安装,网上有很多其他资料,使用conda是不需要安装visual studio的
conda install pycocotools -c conda-forge

// 6. git下载mmdetection项目
git clone https://github.com/open-mmlab/mmdetection.git
# git clone https://gitee.com/open-mmlab/mmdetection.git
cd mmdetection
git checkout tags/v3.0.0

// 7. 源码安装 mmdet
pip install -v -e .

// 8.在当前目录(mmdetection)文件夹启动vscode
code .

// 9. 下载测试用的权重文件等,
// 如果用了vscode里的命令行工具,记得 conda activate openmmlab
// 确保当前执行目录是mmdetection
mim download mmdet --config rtmdet-ins_tiny_8xb32-300e_coco --dest .

// 10. 执行测试
python demo/image_demo.py demo/demo.jpg rtmdet-ins_tiny_8xb32-300e_coco.py --weights rtmdet-ins_tiny_8xb32-300e_coco_20221130_151727-ec670f7e.pth --device cpu

2.2 debug
这个debug方式有点奇怪,因为用到很多运行时参数,所以没有直接使用默认的python debug工具,而是另外安装了一个
pip install debugpy
然后点击->左边侧栏的运行和调试(或者ctrl+shift+D)->create a launch.json file->选择远程

然后提示localhost和端口号,默认回车即可。
将launch.json的内容替换为以下:
{
    // Use IntelliSense to learn about possible attributes.
    // Hover to view descriptions of existing attributes.
    // For more information, visit: https://go.microsoft.com/fwlink/?linkid=830387
    "version": "0.2.0",
    "configurations": [
        {
            "name": "Python: Remote Attach",
            "type": "python",
            "request": "attach",
            "connect": {
                "host": "localhost",
                "port": 5678
            },
            "justMyCode": false
        }
    ]
}
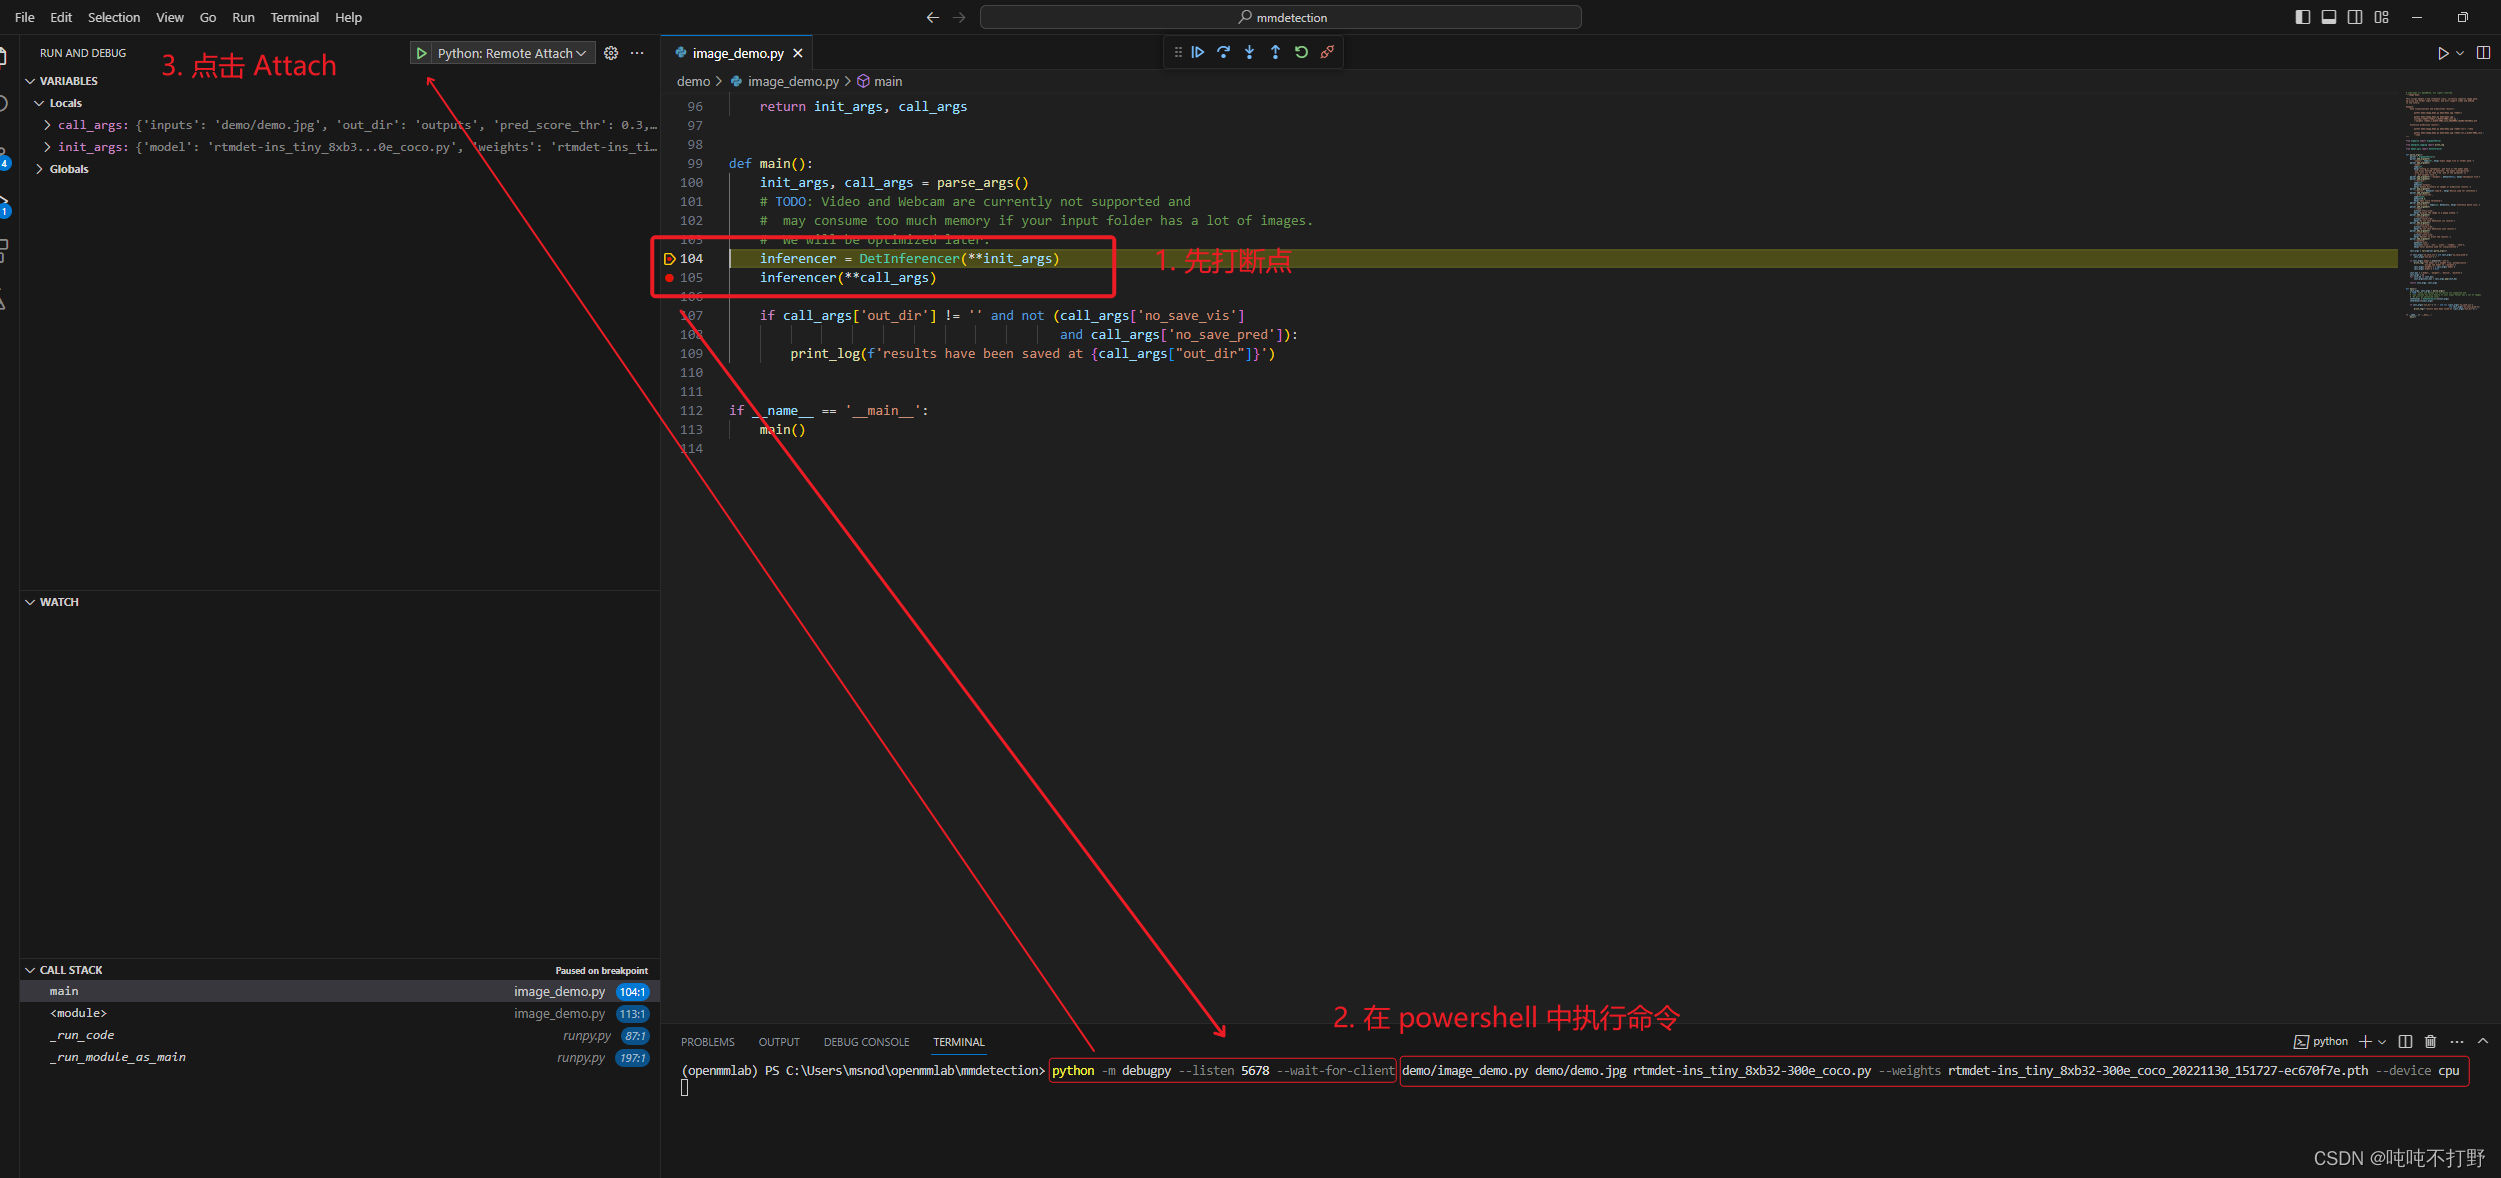
然后在命令行运行:
# 注意 一定是openmmlab环境里
>python -m debugpy --listen 5678 --wait-for-client demo/image_demo.py demo/demo.jpg rtmdet-ins_tiny_8xb32-300e_coco.py --weights rtmdet-ins_tiny_8xb32-300e_coco_20221130_151727-ec670f7e.pth --device cpu
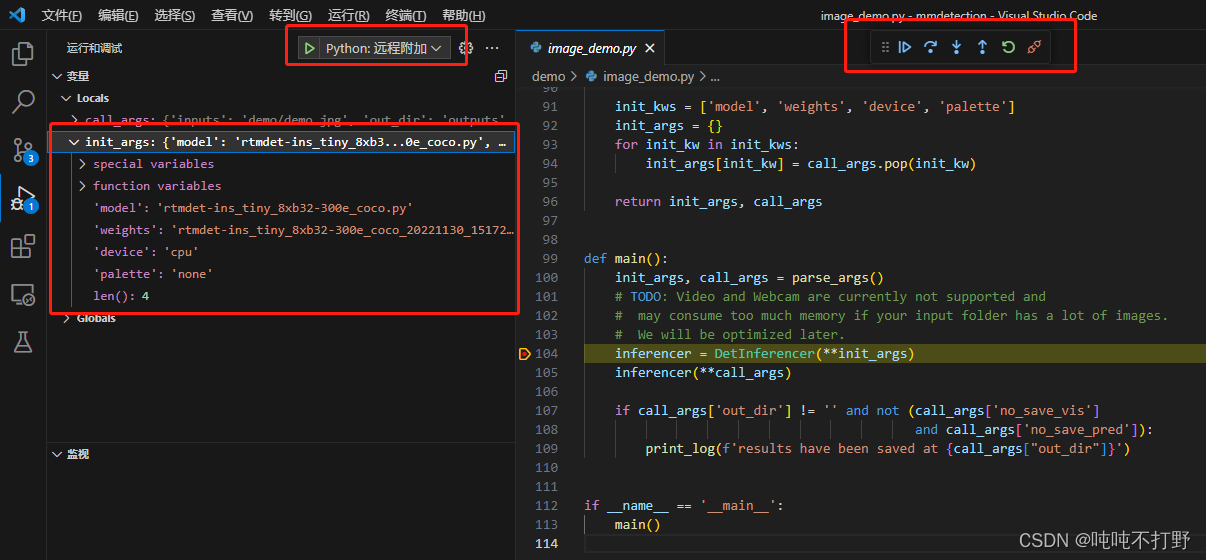
点击调试里的Attach,程序执行起来需要一会,所以点击完再去打断点也来得及,只要你手速不是特别慢。。。
然后就可以像平常一样去调试了,看不太懂左边的这些类结构,套的好复杂。。暂时还看不懂,想退出的话点击debug那个悬浮菜单最右边的🔗符号就可以了
最后这个debug的命令行太长了,要改一个别名,
- 默认教程里给的是针对powershell的,但是我的powershell没有办法执行conda切换环境。所以想设置cmd里这个命令别名,没有搜到好的解决方案,pass。
- 去解决powershell支持conda这个问题,参考:How to activate conda environment from powershell?
# 在powershell里执行 conda init powershell # 然后关闭再打开(重启)powershell即可 - powershell改别名,在powershell里运行
code $PROFILE,授权打开 powershell 的 $PROFILE 文件,插入以下内容:function pyd { python -m debugpy --wait-for-client --listen 5678 $args }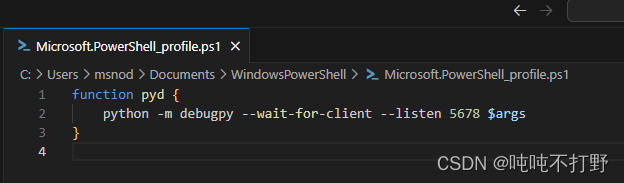
- 注意,插入保存该文件之后,同样需要重启powershell使刚刚的设置生效。
- 现在就可以用
pyd代替上面一长串的命令了,即:# 从 python -m debugpy --listen 5678 --wait-for-client demo/image_demo.py demo/demo.jpg rtmdet-ins_tiny_8xb32-300e_coco.py --weights rtmdet-ins_tiny_8xb32-300e_coco_20221130_151727-ec670f7e.pth --device cpu # 缩短成(注意,我这里为了显示加了回车,运行的时候不能有回车) pyd demo/image_demo.py demo/demo.jpg rtmdet-ins_tiny_8xb32-300e_coco.py --weights rtmdet-ins_tiny_8xb32-300e_coco_20221130_151727-ec670f7e.pth --device cpu
参考:
- stackoverflow:Aliases in Windows command prompt
- StackExchange:How to set an alias in Windows Command Line?
- ✅ Doskey
想给cmd的命令加别名,主要就是用 doskey 这个命令
类似这个形式doskey pyd="python -m debugpy --wait-for-client --listen 5678" $args但是后面命令应该还需要做额外调整,不太会,遂pass
2.3 错误探索

网上很多这个讨论,主要解决方案就是三种:
- 安装visual studio,通过下载这个工具:visualcppbuildtools_full.exe
pip install pycocotools-windows但是我python3.9会提示找不到对应的符合版本的包- 通过直接从git安装(也需要借用visual studio的cl.exe工具进行编译,不是直接的wheel版本),
pip install git+https://github.com/philferriere/cocoapi.git#subdirectory=PythonAPI
主要的讨论可以看这两个帖子:
- Github issue:Failed building wheel for pycocotools - Windows 10 conda #169
- StackOverflow: Troubleshooting pycocotools installation
其他


 被折叠的 条评论
为什么被折叠?
被折叠的 条评论
为什么被折叠?
 到【灌水乐园】发言


