


介绍
Vue3提供两种组织代码逻辑的写法:
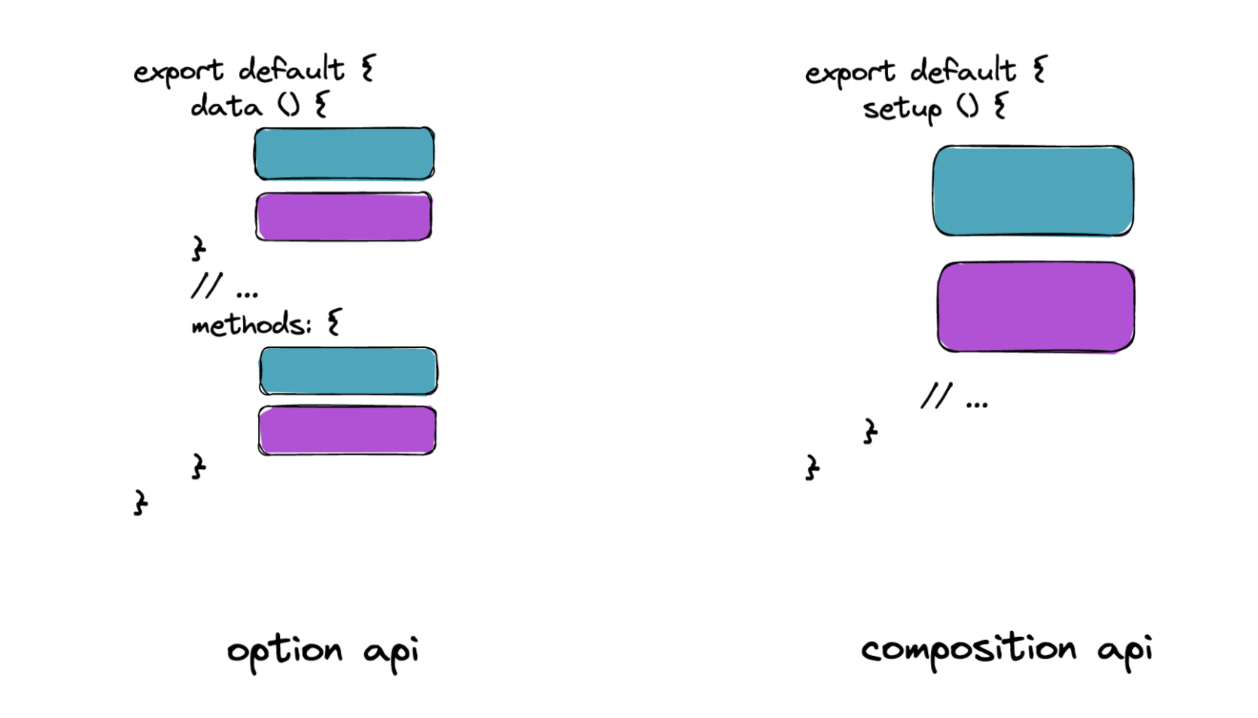
1、通过data、methods、watch 等配置选项组织代码逻辑是 选项式API 写法。所谓选项式就是你只能在vue 提供的组件封装对象的对应属性中书写代码。比如:
<script>
export default {
// data 属性中定义组件状态
data() {
},
// methods 属性中定义组件的事件处理函数
methods: {
},
// mounted 生命周期函数中获取 DOM
mounted(){
}
};
</script>
2、所有逻辑写在 setup 函数中,使用 ref、watch 等函数组织代码是 组合式API 写法。比如:
<script>
export default {
setup () {
// 用什么调用函数即可。
// vue2 用什么去对应的属性中书写。
}
};
</script>
举例
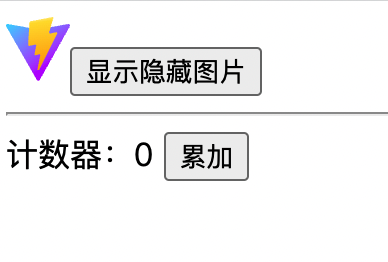
实现下面的需求
选项式
<script>
export default {
data() {
return {
show: true,
count: 0,
};
},
methods: {
toggle() {
this.show = !this.show;
},
increment() {
this.count++;
},
},
};
</script>
<template>
<img v-show="show" alt="Vite logo" src="/vite.svg" />
<button @click="toggle">显示隐藏图片</button>
<hr />
<h2>计数器:{{ count }}</h2>
<button @click="increment">累加</button>
</template>
组合式
<script>
// ref 就是一个组合式API
import { ref } from 'vue';
export default {
setup () {
// 显示隐藏
const show = ref(true)
const toggle = () => {
show.value = !show.value
}
// 计数器
const count = ref(0)
const increment = () => {
count.value ++
}
// 将组件需要的状态、方法等返回给组件
return { show, toggle, count, increment }
}
};
</script>
<template>
<img v-show="show" alt="Vue logo" src="/vite.svg" />
<button @click="toggle">显示隐藏图片</button>
<hr />
<h2>计数器:{{ count }}</h2>
<button @click="increment">累加</button>
</template>
总结
- 代码更紧凑,相关业务代码在一起,写的时候不用来会跳跃着寻找。
- 在setup中通过vue提供的函数组织代码实现功能,就是组合式API写法。
- 组合式API有什么好处?可复用,可维护。
- ref 是不是一个组合式API?是。
组合式API使用
setup 函数
说明
●setup 函数是 vue3 组合式 API 的入口函数,是 vue3 特有的选项,是组合式API的起点。
●页面需要的数据或者函数(工具函数、事件处理函数)直接定义在 setup 函数中并返回给组件。
●在页面中使用 setup 函数返回的数据或者函数。
●setup 会在原来的选项式 API 之前执行,所以就有了 vue3 中将 script 放到开头的习惯。
<script>
export default {
// setup 函数
setup() {
console.log('setup执行了');
// 定义数据
const msg = 'hello vue3';
// 定义函数
const say = () => {
console.log(msg);
};
// 将组件和函数返回给组件实例
return { msg, say };
},// 验证 setup 会在原来的选项式 API 之前执行
beforeCreate() {
console.log('beforeCreate执行了');
},
};
</script>
<template>
<div class="container">
<h1>{{ msg }}</h1>
<button @click="say">say</button>
</div>
</template>
<style scoped>
.container {
height: 300px;
width: 600px;
}
</style>
总结
setup 函数是 vue3 的最大特点,所有 vue3 的新特性写法都是在这个函数中完成的,我们后续学习的所有响应式 API,都是在这个函数中使用。
响应式数据的定义
说明
我们说 vue 框架的核心特点就是“数据驱动视图”,即数据变化页面自动更新,开发者不用再考虑 DOM 的操作(这是目前前端框架的主要设计思想)。
在 vue2 中,我们在 data 中定义数据,在事件函数中修改数据,数据变化页面刷新。
我们顺着这个思路修改上面的例子。
<script>
export default {
// setup 函数
setup () {
console.log('setup执行了')
// 将数据修改为 let 定义。
let msg = 'hello vue3'
// 定义函数
const say = () => {
// 数据修改前
console.log('msg 修改前', msg)
// 修改数据
msg = 'hello vue4'
// 数据修改后
console.log('msg 修改后', msg)
}
// 返回给组件实例使用
return { msg , say }
},
}
</script>
<template>
<div class="container">
<h2>{{msg}}</h2>
<button @click="say">say</button>
</div>
</template>
<style scoped>
.container {
height: 300px;
width: 600px;
}
</style>
页面没有响应数据的变化,这是因为在 setup 函数中定义的数据虽然可以在页面上显示,但不是响应式的。如果想实现数据变化页面对应变化的需求,需要指定数据为响应式的。
接下来我们就来看如何在 vue3 中的 setup 函数中定义响应式数据。
方式1:ref 函数
使用 ref 函数定义响应式数据。
步骤
- 导入 ref 函数
- 将想作为响应式的数据作为参数传递给 ref 函数并调用
- 定义一个变量保存 ref 函数调用后的返回值。
- 将这个变量设置为 setup 函数的返回对象的属性。
- 在template中直接 {{ 变量 }} 使用,在事件处理函数中通过 “变量.value = 新值” 的形式修改
<script>
// 导入ref函数
import { ref } from "vue";
export default {
setup() {
// 调用ref函数创建响应式数据
const age = ref(18);
const decrement = () => {
// js中使用需要 .value 修改数据
age.value -=1;
};
// 返回数据和函数给到 vue 框架
return { age, decrement };
},
};
</script>
<template>
<div>
<!-- template中使用可省略.value -->
<h1>年龄:{{ age }}</h1>
<button @click="age++">+1</button>
<button @click="decrement">-1</button>
</div>
</template>
同理如果有多个要维护的响应式数据,再次调用 ref 函数即可。比如我们新增一个 name 属性。
使用对象作为响应式数据
<script>
// 导入ref函数
import { ref } from "vue";
export default {
setup() {
// 调用ref函数创建响应式数据
const age = ref(18);
const decrement = () => {
// js中使用需要 .value 修改数据
age.value -=1;
};
// 创建 name 响应式数据
const name = ref('bingo');
const changeName = () => {
// js中使用需要 .value 修改数据
name.value = 'rose-' + Math.random().toFixed(2)
};
// 创建对象响应式数据
const obj = ref({age: 20, name: '99'})
const changeObj = () => {
// js中使用需要 .value 修改数据
obj.value.name = obj.value.name+'变'
obj.value.age = obj.value.age+1
}
// 返回数据和函数给到 vue 框架
return { age, decrement, name, changeName, obj, changeObj };
},
};
</script>
<template>
<div>
<div>
<!-- template中使用可省略.value -->
<h1>年龄:{{ age }}</h1>
<button @click="age++">+1</button>
<button @click="decrement">-1</button>
</div>
<div>
<!-- template中使用可省略.value -->
<h1>姓名:{{ name }}</h1>
<button @click="changeName">改名</button>
</div>
<div>
<!-- template中使用可省略.value -->
<h1>对象姓名:{{ obj.name }},对象年龄:{{ obj.age }}</h1>
<button @click="changeObj">改对象</button>
</div>
</div>
</template>
总结
在 js 中要通过 .value 进行数据的获取和修改,在页面中可以省略。
方式2:reactive 函数
除了上面的 ref 函数定义响应式数据外,vue3 中还提供了 reactive 函数定义响应式数据的方式。
reactive 用来定义对象类型的响应式数据,就是 reactive 函数接收一个对象作为参数,返回这个对象的响应式数据。
步骤
- 导入 reactive 函数
- 将你想作为响应式的对象数据作为参数传递给 reactive 函数并调用
- 将 reactive 函数调用后的返回值作为 setup 函数的返回值传递给 vue 框架
- 在template中直接 {{ 对象.属性 }} 使用,在事件处理函数(script)中通过“对象.属性”的形式修改
<script>
// 导入reactive函数
import { reactive } from "vue";
export default {
setup() {
// 调用ref函数创建响应式数据
const obj = reactive({name: 'bingo', age: 18})
const changeObj = () => {
obj.age = obj.age + 1
obj.name = obj.name+'变'
}// 返回数据和函数到 vue 框架
return { obj, changeObj };
},
};
</script>
<template>
<div>
<!-- template中直接使用 -->
<h1>对象姓名:{{ obj.name }},对象年龄:{{ obj.age }}</h1>
<button @click="changeObj">改对象</button>
</div>
</template>
ref 和 reactive 的选择
既然二者都可以创建响应式数据,那应给怎么选择呢?
一般来说能使用 ref 的场景就尽量使用 ref,使用 ref 基本可以满足日常的开发需求。当然如果你有多层嵌套对象数据关系时又不想使用 .value 的形式修改数据,这时可以使用 reactive 创建响应式数据。或者当你有逻辑上强相关的数据你不想分开处理,此时可以使用 reactive 处理。比如:用户名和密码这两个数据逻辑上强相关并且你想放到一起,此时可以使用 reactive 。
我们开发过程中主要使用 ref 。
setup 语法糖
说明
从上面的几个例子中,同学们应该看到 setup 函数中每次定义完响应式数据或者事件处理函数最后都要放到一个对象中返回给 vue3 框架去使用。因为开发者很容易在定义完响应式数据或者事件处理函数而忘记了在最后返回,所以 vue3 中为<script></script>标签增加了一个 setup 属性,添加了这个属性可以帮助我完成自动返回响应式数据和事件处理函数的操作。
未使用setup语法糖
<script>
// 导入reactive函数
import { reactive } from "vue";
export default {
setup() {
// 调用ref函数创建响应式数据
const obj = reactive({name: 'bingo', age: 18})
const changeObj = () => {
obj.age = obj.age + 1
obj.name = obj.name+'变'
}
// 返回数据和函数到 vue 框架
return { obj, changeObj };
},
};
</script>
<template>
<div>
<!-- template中直接使用 -->
<h1>对象姓名:{{ obj.name }},对象年龄:{{ obj.age }}</h1>
<button @click="changeObj">改对象</button>
</div>
</template>
使用setup语法糖
<script setup>
// 导入reactive函数
import { reactive } from "vue";
// 调用ref函数创建响应式数据
const obj = reactive({name: 'bingo', age: 18})
const changeObj = () => {
obj.age = obj.age + 1
obj.name = obj.name+'变'
}
</script><template>
<div>
<!-- template中直接使用 -->
<h1>对象姓名:{{ obj.name }},对象年龄:{{ obj.age }}</h1>
<button @click="changeObj">改对象</button>
</div>
</template>
总结
在 <script setup></script> 中定义的顶层变量都会默认返回。都是可以在页面中使用。
computed 函数
对比 vue2 中的用法来理解。vue2 中 computed 是一个对象,在这个对象中定义一个属性,属性是一个函数,函数的返回值作为这个属性的值在页面中使用。
vue3 中 computed 是一个函数,参数要求传入一个函数。传入函数的返回值将作为 computed 函数调用的返回值返回。这个返回值可以直接在页面和代码中使用。
步骤
- 导入 computed 函数
- 传入一个回调函数并返回一个值
- 定义一个变量接收 computed 函数的返回值
- 在template中直接 {{ 变量 }} 使用
<script setup>
// 导入computed函数
import { computed } from "vue";
// 调用computed函数创建计算属性
const count = computed(() => {
return 100
})
</script><template>
<div>
<!-- template中直接使用 -->
<h1>{{count}}</h1>
</div>
</template>
我们说一般计算属性的使用场景是基于已有的响应式数据进行计算,得出一个新数据。
如果依赖的数据变化,则计算属性算出的数据也发生变化,并且页面中使用到计算属性的地方也会更新。
<script setup>
// 导入computed函数
import { ref, computed } from "vue";
// 调用computed函数创建计算属性
const count = computed(() => {
return 100
})
// 定义一个响应式数据
const scores = ref([80, 100, 90, 70, 60]);
// 计算80分以上的数据
const goods = computed(() => {
return scores.value.filter(item => item>80)
})
</script><template>
<div>
<!-- template中直接使用 -->
<h1>{{count}}</h1>
<hr/>
<h1>{{scores}}</h1>
<button @click="scores.push(90)">改变原数组</button>
<h1>{{goods}}</h1>
</div>
</template>
总结
当你有需要基于当前组件的数据重新计算出要显示的数据时,可以使用 computed 函数。
watch 函数
watch 是一个函数,接收两个参数。第一参数是要侦听的数据源,第二个参数是一个函数会在侦听的数据源发生变化的时候执行。
一般来说开发中会有以下几种侦听数据源的需求:
- 使用 watch 监听一个响应式数据
- 使用 watch 监听多个响应式数据
- 使用 watch 监听响应式对象数据中的一个属性(简单)
- 使用 watch 监听响应式对象数据中的一个属性(复杂)
- 使用 watch 监听,配置默认执行
使用 watch 监听一个响应式数据
<script setup>
// 引入 watch
import { ref, watch } from "vue";
// 价格
const price = ref(9)
// 数量
const quantity = ref(10)
// 监听一个属性变化
watch(price, (newValue, oldValue) => {
console.log('价格变化之后', newValue, oldValue)
})
</script><template>
<div>
<!-- template中直接使用 -->
<h1>{{price}}</h1>
<button @click="price+=1">改价格</button>
<hr/>
</div>
</template>
使用 watch 监听多个响应式数据
<script setup>
// 引入 watch
import { ref, watch } from "vue";
// 价格
const price = ref(9)
// 数量
const quantity = ref(10)
// 监听一个属性变化
// watch(price, (newValue, oldValue) => {
// console.log('价格变化之后', newValue, oldValue)
// })
// 监听多个属性变化
watch([price, quantity], (newValue, oldValue) => {
console.log('价格或者数量发生变化', newValue, oldValue)
})
</script><template>
<div>
<!-- template中直接使用 -->
<h1>{{price}}</h1>
<button @click="price+=1">改价格</button>
<hr/>
<h1>{{quantity}}</h1>
<button @click="quantity+=1">改数量</button>
<hr/>
</div>
</template>
使用 watch 监听响应式对象数据中的一个属性(简单)
<script setup>
// 引入 watch
import { ref, watch } from "vue";
// 价格
const price = ref(9)
// 数量
const quantity = ref(10)
// 侦听一个属性变化
watch(price, (newValue, oldValue) => {
console.log('价格变化之后', newValue, oldValue)
})
// 侦听多个属性变化
watch([price, quantity], (newValue, oldValue) => {
console.log('价格或者数量发生变化', newValue, oldValue)
})
const user = ref({
name: 'bingo',
info: {
gender: '男',
age: 18,
}
})
// 侦听 name 属性变化
watch(() => user.value.name, (newValue, oldValue) => {
console.log('name 属性变化', newValue, oldValue)
})
</script><template>
<div>
<!-- template中直接使用 -->
<h1>{{price}}</h1>
<button @click="price+=1">改价格</button>
<hr/>
<h1>{{quantity}}</h1>
<button @click="quantity+=1">改数量</button>
<hr/>
<h1>{{user.name}}</h1>
<button @click="user.name+='变'">改姓名</button>
<hr/>
</div>
</template>
使用 watch 监听响应式对象数据中的一个属性(复杂)
<script setup>
// 引入 watch
import { ref, watch } from "vue";
// 价格
const price = ref(9)
// 数量
const quantity = ref(10)
// 侦听一个属性变化
// watch(price, (newValue, oldValue) => {
// console.log('价格变化之后', newValue, oldValue)
// })
// 侦听多个属性变化
// watch([price, quantity], (newValue, oldValue) => {
// console.log('价格或者数量发生变化', newValue, oldValue)
// })
const user = ref({
name: 'bingo',
info: {
gender: '男',
age: 18,
}
})
// 侦听 name 属性变化
// watch(() => user.value.name, (newValue, oldValue) => {
// console.log('name 属性变化', newValue, oldValue)
// })
// 侦听 gender或age变化
watch(() => user.value.info, (newValue, oldValue) => {
console.log('gender或age 变化', newValue, oldValue)
}, { deep: true })
</script><template>
<div>
<!-- template中直接使用 -->
<h1>{{price}}</h1>
<button @click="price+=1">改价格</button>
<hr/>
<h1>{{quantity}}</h1>
<button @click="quantity+=1">改数量</button>
<hr/>
<h1>{{user.name}}</h1>
<button @click="user.name+='变'">改姓名</button>
<hr/>
<h1>{{user.info.age}}</h1>
<button @click="user.info.age+=1">改年龄</button>
<hr/>
<h1>{{user.info.gender}}</h1>
<button @click="user.info.gender+='变'">改性别</button>
<hr/>
</div>
</template>
使用 watch 监听,配置默认执行
<script setup>
// 引入 watch
import { ref, watch } from "vue";
// 价格
const price = ref(9)
// 数量
const quantity = ref(10)
// 侦听一个属性变化
// watch(price, (newValue, oldValue) => {
// console.log('价格变化之后', newValue, oldValue)
// })
// 侦听多个属性变化
// watch([price, quantity], (newValue, oldValue) => {
// console.log('价格或者数量发生变化', newValue, oldValue)
// })
const user = ref({
name: 'bingo',
info: {
gender: '男',
age: 18,
}
})
// 侦听 name 属性变化
// watch(() => user.value.name, (newValue, oldValue) => {
// console.log('name 属性变化', newValue, oldValue)
// })
// 侦听 gender或age变化
watch(() => user.value.info, (newValue, oldValue) => {
console.log('gender或age 变化', newValue, oldValue)
}, { deep: true, immediate: true })
</script><template>
<div>
<!-- template中直接使用 -->
<h1>{{price}}</h1>
<button @click="price+=1">改价格</button>
<hr/>
<h1>{{quantity}}</h1>
<button @click="quantity+=1">改数量</button>
<hr/>
<h1>{{user.name}}</h1>
<button @click="user.name+='变'">改姓名</button>
<hr/>
<h1>{{user.info.age}}</h1>
<button @click="user.info.age+=1">改年龄</button>
<hr/>
<h1>{{user.info.gender}}</h1>
<button @click="user.info.gender+='变'">改性别</button>
<hr/>
</div>
</template>


 1406
1406


 被折叠的 条评论
为什么被折叠?
被折叠的 条评论
为什么被折叠?
 到【灌水乐园】发言


