


承接自前篇:3DSlicer中自己创建一个Extension项目(前篇)-CSDN博客
前篇遇到的问题补充理解:
1.补充3DSlicer中MRML节点的作用:
在扩展向导自动生成的示例代码中,有相当数量的代码管理着一个“参数节点”。此参数节点主要有用,以便您的模块可以保存和还原其与场景一起的状态,以便您可以在工作流进行到一半时保存场景,关闭3DSlicer之后,并在稍后的某个时间点打开3DSlicer,加载保存的场景,然后准确地从上次中断的地方继续。如果该功能对您来说并不重要,那么您还不需要真正了解参数节点,并且您通常可以忽略它并注释掉任何在尝试读取或修改参数节点时出现错误的行。(当您从自动生成的 UI 中删除不需要的内容时,每当现有代码引用这些已删除的 UI 元素以将内容存储在参数节点中时,就会出现错误)。
2.创建完成之后你的moudle已经加载到了Slicer中,其中的机制是什么?
模块注册: 一旦模块被加载,它需要在3D Slicer中进行注册,以便系统知道它的存在。这一步通常由Slicer的模块加载机制自动处理。当我们创建Extension的时候,已经完成注册这一流程了,所以之后会自动加载
模块交互: 一旦模块被成功加载和注册,它就可以与3D Slicer的其他部分进行交互,得益于3DSlicer已经设计好的框架。这包括与图像数据、图形用户界面、算法和其他模块的交互。
3.修改好了代码,怎么样才能重新在3DSlicer中加载module呢,现在的方法是关了3DSlicer之后重新打开,有其他方法吗?
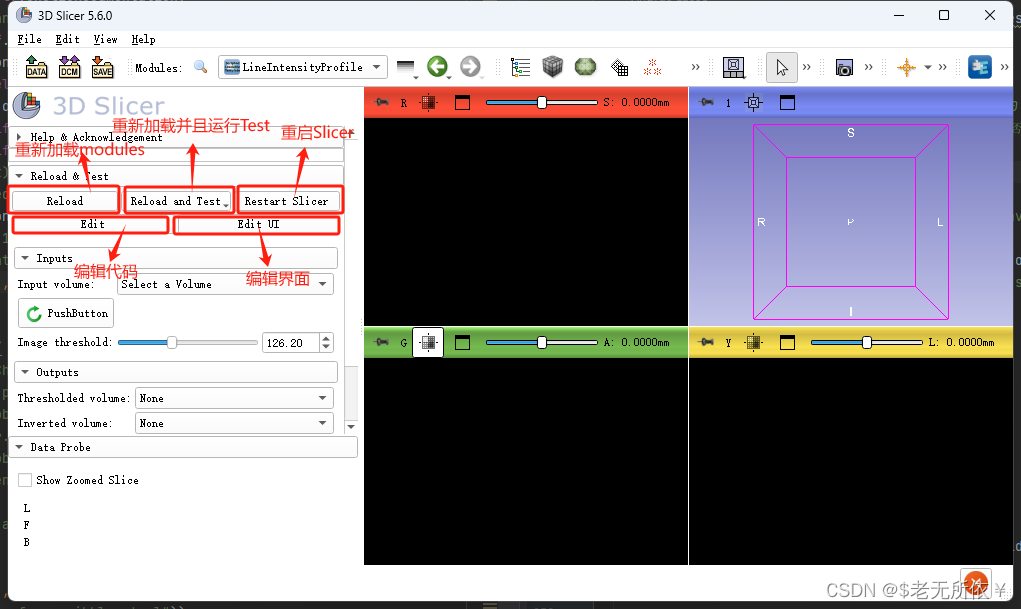
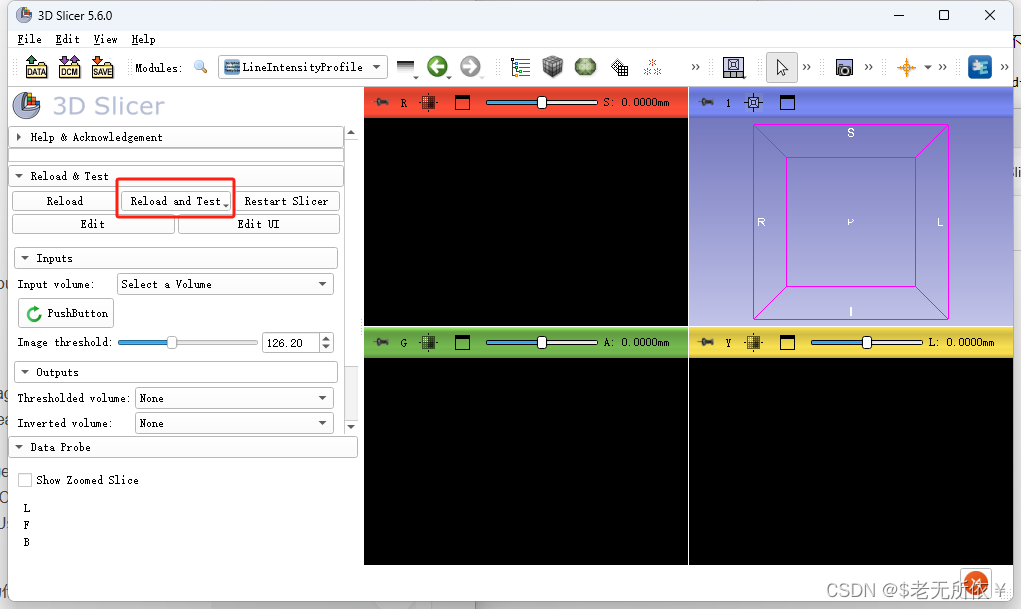
如图,我们看到,3DSlicer已经给我们完成了重新加载的功能,还有Test,Edit,Restart等功能,每当我们修改了我们的Extension中的代码,之后可以Reload,然后模块就会自动重新加载。
4.3DSlicer为什么被很多人称作IDE而不是应用软件?
在使用3DSlicer创建自定义的Extension的过程中,发现3DSlicer除了不能进行修改代码之外,其他的比如:自动生成代码,自动完成注册的一些功能,log日志,error,Python console,运行Test代码等等,完全是一个基于完善性架构的一套IDE来开发能运行在3DSlicer环境和以来的Extension,所以更加偏向于一个IDE。
5.哪些项目需要编译,怎么编译?
如果你想要开发loadable或者CLI类型的模块的话,你需要自行对slicer从源码进行编译,并且对Extension进行构建,这一类Extension在上传或者发布需要编译完成打包之后才能使用这里稍后在第三节我会详细说怎么编译
一、开发Extension的技术栈
1.技术栈学习内容和方法
前篇大概讲述了简单的创建流程,思路还是很乱,然后就去逛了社区,看到了有人在讨论怎么做到开发自定义Extension,他要求的是从头开始,如果你要真正完全掌握3DSlicer的话,就可以按照以下方式进行技术栈学习:
1.阅读VTK教材 ,从头到尾,2-3遍(我是认真的,读完了所有;读了好几遍,因为在第一次通过时,你不会有足够深入的理解来获得所有细节);这是必不可少的,在你至少读完一遍这本书之前,不要做任何其他事情
2.略读VTK 示例 https://gitlab.kitware.com/vtk/textbook/raw/master/VTKBook/VTKTextBook.pdf
https://vtk.org/download/
3.浏览ITK 软件指南 ,并阅读与您的任务相关的部分
4.完成几个SimpleITK 教程
5.完成一些关于 Python 和 numpy 的在线课程
6.完成一些关于Qt基础知识的在线教程
7.全部完成切片器教程
8.如果与您的工作相关,请完成所有SlicerIGT 教程
可以看到这么一套预估完成时间是一年左右,是一套完整的全面的体系,根据自己的需要来学习所需要的。 接下来简单介绍一下一些上面提到的名词:
2.什么是VTK
可视化工具包 (VTK) 是一个开源的免费软件系统,用于 3D 计算机图形学、建模、图像处理、体积渲染、科学可视化和 2D 绘图。它支持多种可视化算法和高级建模技术,并分别利用线程和分布式内存并行处理来提高速度和可扩展性,是跨平台的。
3.什么是ITK
ITK(Insight Segmentation and Registration Toolkit)是一个开源的图像处理软件库,主要用于医学图像分割和配准。该工具包提供了一系列用于处理二维、三维和多维图像的算法和工具,是跨平台的。
4.什么是NumPy
NumPy(Numerical Python)是一个用于科学计算的Python库,它提供了对多维数组(例如矩阵)和用于处理这些数组的数学函数的支持。NumPy是Python中科学计算生态系统的核心组件之一,它为数组操作和数学运算提供了高效的实现。
至于QT的界面设计和编写Python代码这些都是应该熟悉的东西,就不重复介绍了,这里要么自己看一些已经完成的开源的Extension代码是如何实现的,要么就是查看官方文档中开发者指南的方法。
Developer Guide — 3D Slicer documentation
二、深入理解一个Extension Demo的代码
通过一个demo来看看别人是怎么写这个自定义程序的,怎么调用Slicer的接口,怎么通过Slicer的接口拿到MRML节点信息来操作信息的等等。https://github.com/lassoan/SlicerSimpleWorkflows.git
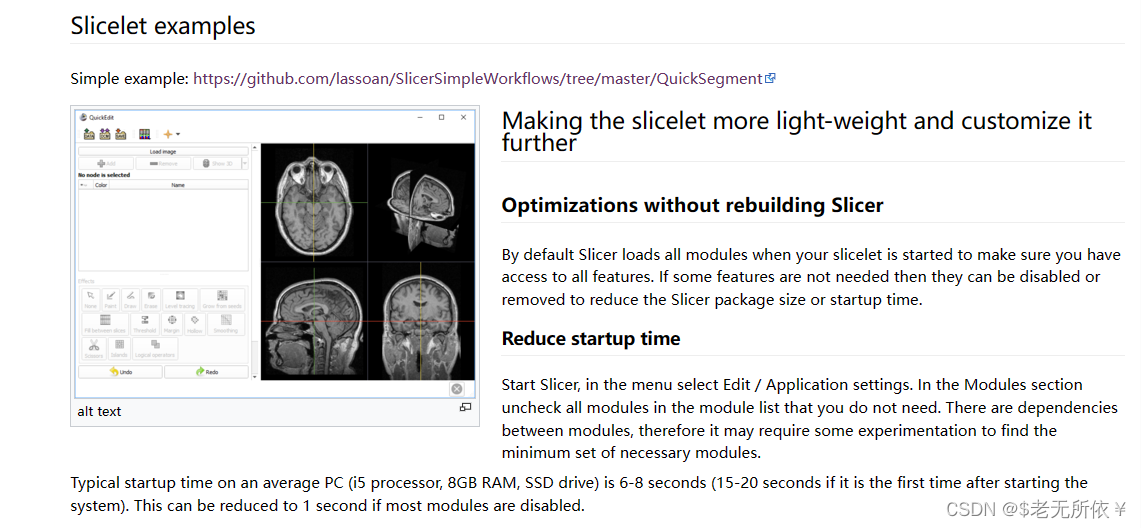
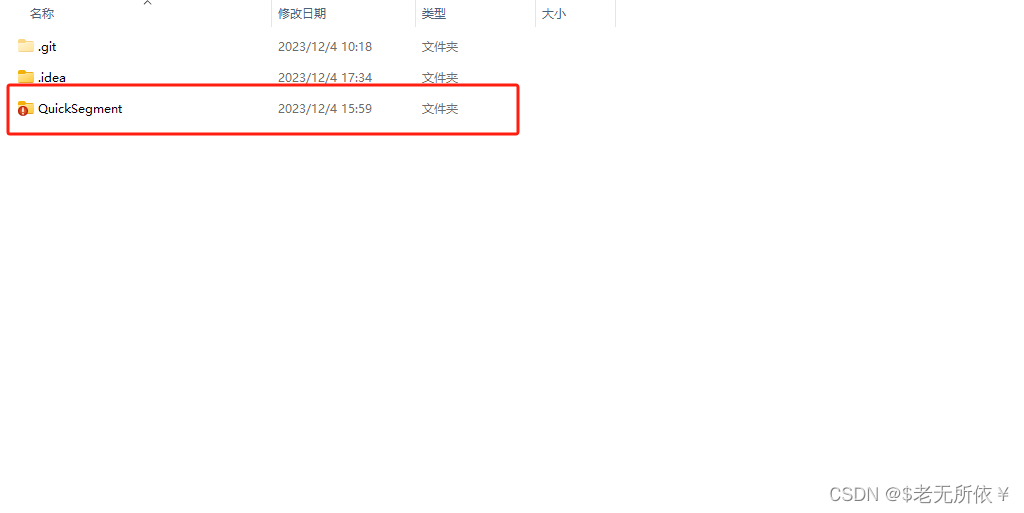
我们下载下来之后,它是一个属于Python项目的Extension,所以不需要构建,可以直接加载到3DSlicer中选择下好的文件夹即可。

然后我直接把它的核心代码贴出来,我已经几乎每行都做了中文注释和解释,可以自行查看,另外我的前篇已经讲了一般存在的几个类的意义和功能。
3DSlicer中自己创建一个Extension项目(前篇)-CSDN博客
import os
import unittest
import vtk, qt, ctk, slicer
from slicer.ScriptedLoadableModule import *
import logging
from slicer.util import VTKObservationMixin

#
# QuickSegment
# 这是一个简单的Slicelet示例
#

class QuickSegment(ScriptedLoadableModule):
  """Uses ScriptedLoadableModule base class, available at:
  https://github.com/Slicer/Slicer/blob/master/Base/Python/slicer/ScriptedLoadableModule.py
  """

  def __init__(self, parent):
    """初始化 这边是创建Extension项目就自动生成的一部分,主要有项目名字,种类,依赖,作者,帮助和知识库连接,基本上不需要更改什么"""
    ScriptedLoadableModule.__init__(self, parent)
    self.parent.title = "QuickSegment" # TODO make this more human readable by adding spaces
    self.parent.categories = ["Examples"]
    self.parent.dependencies = []
    self.parent.contributors = ["John Doe (AnyWare Corp.)"] # replace with "Firstname Lastname (Organization)"
    self.parent.helpText = """
This is an example of scripted loadable module bundled in an extension.
It performs a simple thresholding on the input volume and optionally captures a screenshot.
"""
    self.parent.helpText += self.getDefaultModuleDocumentationLink()
    self.parent.acknowledgementText = """
This file was originally developed by Jean-Christophe Fillion-Robin, Kitware Inc.
and Steve Pieper, Isomics, Inc. and was partially funded by NIH grant 3P41RR013218-12S1.
""" # replace with organization, grant and thanks.

#
# QuickSegmentWidget
#

class QuickSegmentWidget(ScriptedLoadableModuleWidget, VTKObservationMixin):
  """Uses ScriptedLoadableModuleWidget base class, available at:
  https://github.com/Slicer/Slicer/blob/master/Base/Python/slicer/ScriptedLoadableModule.py
  """

  def __init__(self, parent):
    """当用户第一次打开模块和窗口初始化时调用。"""
    ScriptedLoadableModuleWidget.__init__(self, parent)
    VTKObservationMixin.__init__(self)   #观测参数节点所需的类

  def setup(self):
    ScriptedLoadableModuleWidget.setup(self)

    # 创建逻辑类。逻辑实现所有可能运行的计算
    # 在命令模式下,没有图形用户界面。
    self.logic = QuickSegmentLogic()

    # 加载Widget的.ui文件(通过 Qt Designer创建的)。
    # 其他的Widget可以通过手动实例化然后添加到self.layout中。
    # 先利用slicer的util接口中的loadUI把Qt画的Ui导入
    uiWidget = slicer.util.loadUI(self.resourcePath('UI/QuickSegment.ui'))
    # 然后再layout中加入导入的窗口
    self.layout.addWidget(uiWidget)
    # 最后通过取util.childWidgetVariables中刚刚导入的子窗口赋值给self.ui
    self.ui = slicer.util.childWidgetVariables(uiWidget)

    # 在这里调用设置参数节点的方法函数
    self.selectParameterNode()
    # 在MRML的Widgets中设置场景。确保在Qt Designer中的窗口已经升级为qMRMLWidget
    # 并且其中的“mrmlSceneChanged(vtkMRMLScene*)”信号连接到每个MRML Widgets的
    # “setMRMLScene(vtkMRMLScene*)”槽。
    uiWidget.setMRMLScene(slicer.mrmlScene)

    # 连接 信号和槽形式
    self.ui.exportModelsButton.connect("clicked()", self.onExportModelsClicked)

    # 添加垂直切片
    self.layout.addStretch(1)

    # 初始化一个控制窗口界面是否简单模式的布尔变量
    self.isSingleModuleShown = False
    slicer.util.mainWindow().setWindowTitle("QuickEdit")
    # 通过定义的函数来设置是否进入简单模式
    self.showSingleModule(True)
    # 通过连接绑定切换窗口显示的快捷键
    shortcut = qt.QShortcut(slicer.util.mainWindow())
    shortcut.setKey(qt.QKeySequence("Ctrl+Shift+b"))
    shortcut.connect('activated()', lambda: self.showSingleModule(toggle=True))

    # 这些连接确保我们在场景关闭时更新参数节点
    self.addObserver(slicer.mrmlScene, slicer.mrmlScene.StartCloseEvent, self.onSceneStartClose)
    self.addObserver(slicer.mrmlScene, slicer.mrmlScene.EndCloseEvent, self.onSceneEndClose)
    self.addObserver(slicer.mrmlScene, slicer.mrmlScene.EndImportEvent, self.onSceneEndImport)

  #设置参数节点的方法函数
  def selectParameterNode(self):
    # 如果在场景中找到参数集节点,则选择该节点,否则创建一个
    segmentEditorSingletonTag = "QuickSegment.SegmentEditor"
    segmentEditorNode = slicer.mrmlScene.GetSingletonNode(segmentEditorSingletonTag, "vtkMRMLSegmentEditorNode")
    if segmentEditorNode is None:
      segmentEditorNode = slicer.vtkMRMLSegmentEditorNode()
      segmentEditorNode.SetSingletonTag(segmentEditorSingletonTag)
      segmentEditorNode = slicer.mrmlScene.AddNode(segmentEditorNode)
    if self.ui.segmentEditorWidget.mrmlSegmentEditorNode() == segmentEditorNode:
      # 参数节点的内容没有任何改变
      return
    self.ui.segmentEditorWidget.setMRMLSegmentEditorNode(segmentEditorNode)

  """有些函数是必须要定义的,名字还不能变,类似于c++中的重写概念,比如enter
     exit,自定义这个方法中你要实现的功能,但是这个方法是在什么时候调用的是已经由slicer框架决定好的。
     但还有些就是槽函数了,比如onSceneStartClose,onSceneEndClose,是前面创建连接的时候,和slicer.mrmlScene.xxxxevent信号链接的"""

  """每次用户打开此模块时调用。"""
  def enter(self):
    # 确保参数节点存在并已观察到
    self.selectParameterNode()
    # 允许使用键盘快捷键在效果和选定片段之间切换
    self.ui.segmentEditorWidget.installKeyboardShortcuts()
    self.ui.segmentEditorWidget.setupViewObservations()
    self.ui.segmentEditorWidget.updateWidgetFromMRML()

  """用户打开不同的模块时调用。"""
  def exit(self):
    # 移除界面响应,移除观察者,移除键盘输入。
    # 理解为,Slicer中的MRML Scene还是存在,而且不受影响,
    # 换界面而且,原本的界面移除响应和操作能力,新的界面接入进来
    self.ui.segmentEditorWidget.setActiveEffect(None)
    self.ui.segmentEditorWidget.removeViewObservations()
    self.ui.segmentEditorWidget.uninstallKeyboardShortcuts()

  """在场景关闭前调用。"""
  def onSceneStartClose(self, caller, event):
    # 参数节点将被重置,不再使用
    self.ui.segmentEditorWidget.setSegmentationNode(None)
    self.ui.segmentEditorWidget.removeViewObservations()

  """在场景关闭后立即调用。"""
  def onSceneEndClose(self, caller, event):
    # 如果此模块在场景关闭时又重新显示,则立即重新创建一个新的参数节点
    if self.parent.isEntered:
      self.selectParameterNode()
      self.ui.segmentEditorWidget.updateWidgetFromMRML()

  """在场景结束导入后立即调用。"""
  def onSceneEndImport(self, caller, event):
    # 如果此模块在场景关闭时又重新显示,则立即重新创建一个新的参数节点
    if self.parent.isEntered:
      self.selectParameterNode()
      self.ui.segmentEditorWidget.updateWidgetFromMRML()

  """当应用程序关闭并且模块小部件被销毁时调用。"""
  def cleanup(self):
    self.removeObservers()

  """当ExportModels被点击时调用"""
  def onExportModelsClicked(self):
    self.logic.exportModels(self.ui.segmentEditorWidget.segmentationNode())

  # 这个函数控制是否需要进入简单模式,简单模式则会隐藏很多工具栏。
  def showSingleModule(self, singleModule=True, toggle=False):

    if toggle:
      singleModule = not self.isSingleModuleShown

    self.isSingleModuleShown = singleModule

    if singleModule:
      # 我们隐藏所有工具栏等,但简单模式这作为默认的启动设置是不方便的,
      # 因此禁止保存这样的窗口设置。
      import qt
      settings = qt.QSettings()
      settings.setValue('MainWindow/RestoreGeometry', 'false')

    keepToolbars = [
      slicer.util.findChild(slicer.util.mainWindow(), 'MainToolBar'),
      slicer.util.findChild(slicer.util.mainWindow(), 'ViewToolBar'),
      slicer.util.findChild(slicer.util.mainWindow(), 'ViewersToolBar')]
    slicer.util.setToolbarsVisible(not singleModule, keepToolbars)
    slicer.util.setMenuBarsVisible(not singleModule)
    slicer.util.setApplicationLogoVisible(not singleModule)
    slicer.util.setModuleHelpSectionVisible(not singleModule)
    slicer.util.setModulePanelTitleVisible(not singleModule)
    slicer.util.setDataProbeVisible(not singleModule)
    slicer.util.setViewControllersVisible(not singleModule)

    if singleModule:
      slicer.util.setPythonConsoleVisible(False)

#
# QuickSegmentLogic
#

class QuickSegmentLogic(ScriptedLoadableModuleLogic):
  """This class should implement all the actual
  computation done by your module.  The interface
  should be such that other python code can import
  this class and make use of the functionality without
  requiring an instance of the Widget.
  Uses ScriptedLoadableModuleLogic base class, available at:
  https://github.com/Slicer/Slicer/blob/master/Base/Python/slicer/ScriptedLoadableModule.py
  """

  """该方法用于导出models"""
  def exportModels(self, segmentationNode):
    modelHierarchyNode = slicer.mrmlScene.AddNewNodeByClass("vtkMRMLModelHierarchyNode")
    slicer.modules.segmentations.logic().ExportAllSegmentsToModelHierarchy(segmentationNode, modelHierarchyNode)

  """这是一个用于测试的示例逻辑方法
     如果传入的卷节点具有有效的图像数据则通过"""
  def hasImageData(self,volumeNode):
    if not volumeNode:
      logging.debug('hasImageData failed: no volume node')
      return False
    if volumeNode.GetImageData() is None:
      logging.debug('hasImageData failed: no image data in volume node')
      return False
    return True

  """验证输出是否与输入不同"""
  def isValidInputOutputData(self, inputVolumeNode, outputVolumeNode):
    if not inputVolumeNode:
      logging.debug('isValidInputOutputData failed: no input volume node defined')
      return False
    if not outputVolumeNode:
      logging.debug('isValidInputOutputData failed: no output volume node defined')
      return False
    if inputVolumeNode.GetID()==outputVolumeNode.GetID():
      logging.debug('isValidInputOutputData failed: input and output volume is the same. Create a new volume for output to avoid this error.')
      return False
    return True

  """运行处理算法。可以在没有GUI小部件的情况下使用。"""
  def run(self, inputVolume, outputVolume, imageThreshold, enableScreenshots=0):
    """
    :param inputVolume:要设置阈值的卷
    :param outputVolume:阈值处理结果
    :param imageThreshold:高于 / 低于此阈值的值将设置为0
    :param inverse:如果为True,则高于阈值的值将设置为0,否则低于阈值的值设置为0
    :param showResult:以3DSlicer查看器显示输出卷
    """
    if not inputVolume or not outputVolume:
      raise ValueError("Input or output volume is invalid")

    if not self.isValidInputOutputData(inputVolume, outputVolume):
      slicer.util.errorDisplay('Input volume is the same as output volume. Choose a different output volume.')
      return False

    logging.info('Processing started')

    # 使用Threshold Scalar volume CLI模块计算阈值输出卷
    cliParams = {
         'InputVolume': inputVolume.GetID(),
         'OutputVolume': outputVolume.GetID(),
         'ThresholdValue' : imageThreshold,
         'ThresholdType' : 'Above'
    }
    cliNode = slicer.cli.run(slicer.modules.thresholdscalarvolume, None, cliParams, wait_for_completion=True)
    # 我们不再需要CLI模块节点,请将其移除,以免使场景变得混乱
    slicer.mrmlScene.RemoveNode(cliNode)

    # 屏幕捕获
    if enableScreenshots:
      self.takeScreenshot('QuickSegmentTest-Start','MyScreenshot',-1)

    # 打印程序跑完的花费时间
    import time
    stopTime = time.time()
    logging.info(f"Processing completed in {stopTime-startTime:.2f} seconds")

    return True


class QuickSegmentTest(ScriptedLoadableModuleTest):
  """
  This is the test case for your scripted module.
  Uses ScriptedLoadableModuleTest base class, available at:
  https://github.com/Slicer/Slicer/blob/master/Base/Python/slicer/ScriptedLoadableModule.py
  """

  def setUp(self):
    """ 不管怎么样都重置状态——通常情况下,一个清晰的场景就足够了。
    """
    slicer.mrmlScene.Clear(0)

  def runTest(self):
    """根据需要在此处运行或多或少的测试
    """
    self.setUp()
    self.test_QuickSegment1()

  def test_QuickSegment1(self):
    """ 理想情况下,你应该有几个级别的测试。在最低级别
        测试应该使用不同的输入来运行使用逻辑的功能
       (有效的和无效的)。在更高的级别上,您的测试应该
       按照你的意图模仿用户与您的代码交互的方式并确认其仍然有效。
       测试最重要的功能之一是当开发人员的更改将对您的
       功能产生影响时它应该提醒其他人例如,
       如果开发人员删除了您所依赖的功能,
       您的测试应该会中断,以便他们知道需要该功能。
    """

    self.delayDisplay("Starting the test")
    #
    # 首先,先获取一些数据
    #
    import SampleData
    SampleData.downloadFromURL(
      nodeNames='FA',
      fileNames='FA.nrrd',
      uris='http://slicer.kitware.com/midas3/download?items=5767')
    self.delayDisplay('Finished with download and loading')
    """ 这里的测试是当成命令行的方式来测试的,
        就是没有用户交互界面来完成交互,
        自己给数据,模拟然后完成你的功能实现的流程,
        如果流程复杂的话,就可以很好的给别人一个示例,
        让别人知道你的这个功能是怎么用的。
    """
    volumeNode = slicer.util.getNode(pattern="FA")
    logic = QuickSegmentLogic()
    #测试hasImageData的方法
    self.assertIsNotNone( logic.hasImageData(volumeNode) )
    self.delayDisplay('Test passed!')
三、构建Extesion
接下来官方提到的构建了,Python项目前面提到似乎是不用的,这下面的应该就是C++的CLI和loadable项目的构建,我们还是先来看看官方文档的描述:
Similarly to the building of Slicer core, multi-configuration builds are not supported: one build tree can be only used for one build mode (Release or Debug or RelWithDebInfo or MinSizeRel). If a release and debug mode build are needed then the same source code folder can be used (e.g., ) but a separate binary folder must be created for each build mode (e.g., and for release and debug modes).C:\D\SlicerHeartC:\D\SlicerHeart-RC:\D\SlicerHeart-D
Assuming that the source code of your extension is located in folder , an extension can be built by the following steps.MyExtension
人话就是要用到Cmake来构建的时候,你需要分Debug或者Release文件夹,和当初编译Slicer源码一样,可参考我对Slicer源码编译的文章
For testing purposes, it is possible to force the Slicer revision associated with the extension build by setting the environment variable before configuring the project:Slicer_REVISION
这是另一个文档,说的是3DSlicer中Python console里面的方式

Linux & Mac
我们看的是设置自己的系统,官方提到了一个强制设置一个文件Slicer版本的环境变量值,用命令行,这里分为Linux和Windows上构建项目
Linux:
$ cd MyExtension-debug
$ export Slicer_REVISION=32591
$ mkdir MyExtension-debug
$ cd MyExtension-debug
$ cmake -DCMAKE_BUILD_TYPE:STRING=Debug -DSlicer_DIR:PATH=/path/to/Slicer-SuperBuild-Debug/Slicer-build ../MyExtension
$ makeCMAKE_OSX_变量:
在 macOS 上,必须配置扩展,指定与用于配置 Slicer 的变量匹配的变量:CMAKE_OSX_*-DCMAKE_OSX_ARCHITECTURES:STRING=x86_64 -DCMAKE_OSX_DEPLOYMENT_TARGET:STRING=/same/as/Slicer -DCMAKE_OSX_SYSROOT:PATH=SameAsSlicer
在扩展中,包括项目语句之前的组件,而不是手动设置这些变量,应确保它使用与 Slicer 相同的 CMAKE_OSX_* 变量:
ConfigurePrerequisitesfind_package(Slicer COMPONENTS ConfigurePrerequisites REQUIRED) project(Foo) # [...] find_package(Slicer REQUIRED) include(${Slicer_USE_FILE}) # [...]
当然Linux系统还未尝试,只是跟着看了一下,主要我们还是在Windows上进行创建。
Windows
Windows:
> cd MyExtension-debug
> $env:Slicer_REVISION=32591
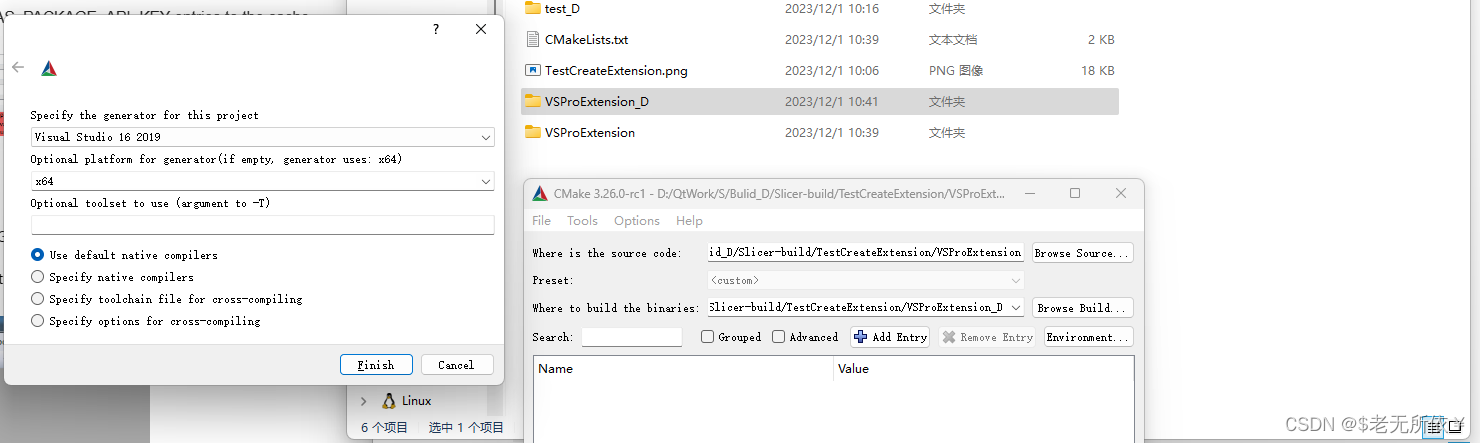
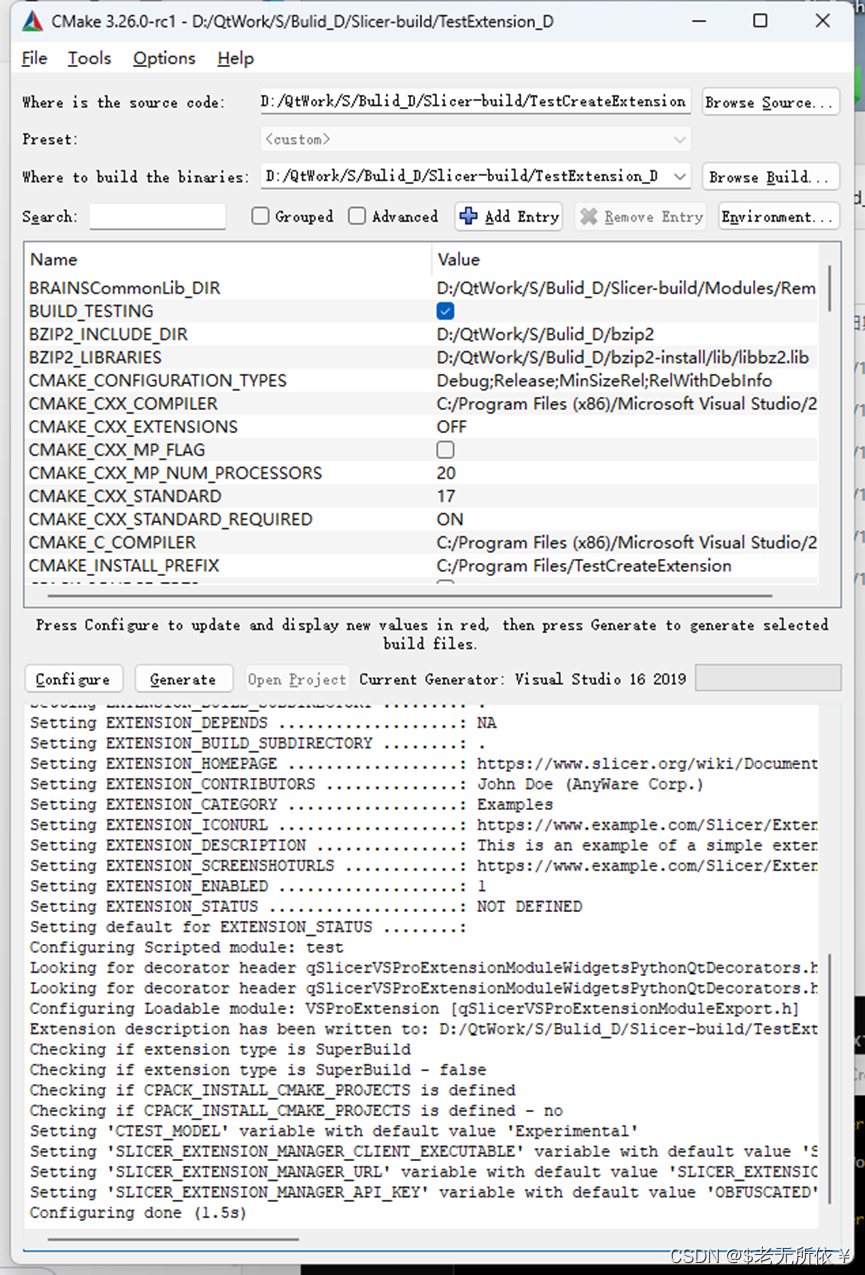
 从Windows“开始”菜单运行。CMake(CMake-gui)
- Select source and build directory(选择源和生成目录)
- Click Configure(单击配置)
- Select generator (just accept the default if you only have one compiler toolset installed)(选择生成器(如果只安装了一个编译器工具集,则接受默认值))
- Choose to create build directory if asked(如果询问,请选择创建生成目录)
- The configuration is expected to display an error message due to variable not specified yet.Slicer_DIR(由于尚未指定变量,配置应显示错误消息。Slicer_DIR)
- Specify by replacing by the Slicer inner-build folder (for example ).Slicer_DIRSlicer_DIR-NOTFOUNDc:/D/SD/Slicer-build(通过替换为切片器内部生成文件夹来指定(例如)。Slicer_DIRSlicer_DIR-NOTFOUNDc:/D/SD/Slicer-build)
- Click . No errors should be displayed.Configure(单击。不应显示任何错误。配置)
- Click button.Generate(单击按钮生成)
- Click button to open in Visual Studio.Open
projectMyExtension.sln(单击按钮在Visual Studio中打开。打开项目MyExtension.sln)- Select build configuration (Debug, Release, …) that matches the build configuration (Release, Debug, …) of the chosen Slicer build.(选择与所选切片器生成的生成配置(发布、调试…)匹配的生成配置。)
- In the menu choose Build / Build Solution.(在菜单中,选择“生成/生成解决方案”。)
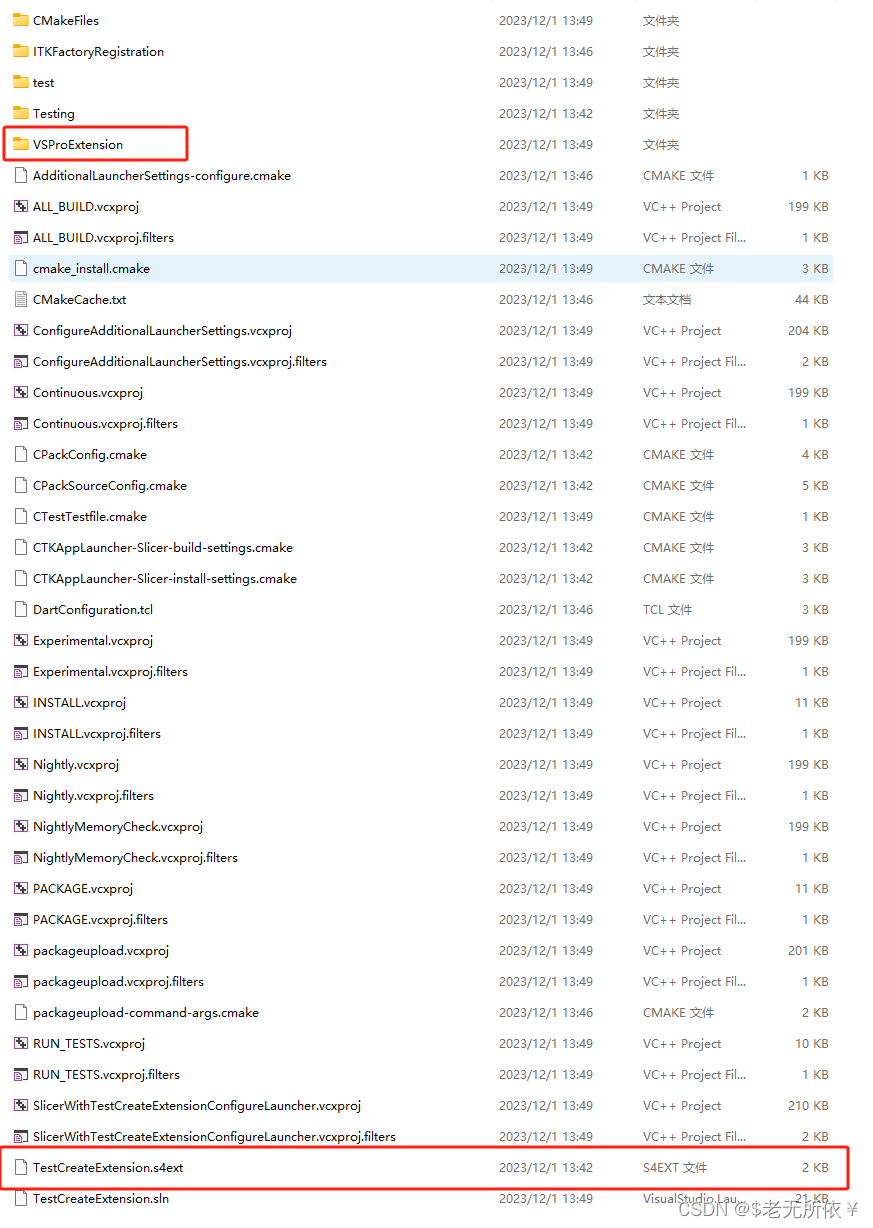
这是以整个Extension包的来构建的,而一个Extension包里面可以有很多的moudles,包括c++或者Python的,我都有,也构建成功了,但是有个注意事项就是,你要用git init
建立存储库,不然它会有一个cmake 的git 报错
D:/QtWork/S/Src/CMake/SlicerMacroExtractRepositoryInfo.cmake:87 (message):
Skipping repository info extraction: directory
[D:/QtWork/S/Bulid_D/Slicer-build/TestCreateExtension]
is not a GIT checkout Call Stack (most recent call first):
D:/QtWork/S/Src/Extensions/CMake/SlicerExtensionPackageAndUploadTarget.cmake:128 (SlicerMacroExtractRepositoryInfo) D:/QtWork/S/Src/CMake/SlicerExtensionCPack.cmake:332 (include) CMakeLists.txt:28 (include) This warning is for project developers.
Use -Wno-dev to suppress it.
四、测试Extesion
当你完成编写Test类中的测试流程和方法方式之后

点击Reload and Test,3DSlicer就会自动重新加载Module然后开始运行你的Test,并抛出运行结果。
总结
以上就是这只是一个简单的demo,我们需要靠自己举一反三,当我们知道一些基础的调用方式和运行逻辑之后,
我们有几种方法可以解决自己开发上的问题
1.先从头学起,按照3DSlicer需要的技术栈依次学习,扎实掌握所有机制,然后编写(较慢)
2.通过学习别人已经写好的扩展,然后快速建立起自己的扩展(较快但遇到问题需要有思路解决)
3.通过社区和开源代码来讨论借鉴完成(较快,但需要找到现成的比较相近的功能)
本作者是准备开始看一个两千行的Python代码的扩展插件,再熟悉一下大神们如何实现的,然
后查缺补漏看看自己哪里不会,然后直接开始写扩展,当然,写之前可以看看别人是否已经有实现这个功能的。
之后还有一篇关于如何打包,写文档以及发布流程的文章,就完成了整个流程,当然并没有就此结束,有新的内容会继续分享出来,敬请期待。如有疑问,可留言讨论。


 747
747

 被折叠的 条评论
为什么被折叠?
被折叠的 条评论
为什么被折叠?
 到【灌水乐园】发言


