


一.知识回顾
【0.SpringBoot专栏的相关文章都在这里哟,后续更多的文章内容可以点击查看】
【1.SpringBoot初识之Spring注解发展流程以及常用的Spring和SpringBoot注解】
【2.SpringBoot自动装配之SPI机制&SPI案例实操学习&SPI机制核心源码学习】
【3.详细学习SpringBoot自动装配原理分析之核心流程初解析-1】
二、详细学习SpringBoot自动装配原理之自定义手写Starter
特别说明:感谢恩师dpb,博客:波波烤鸭
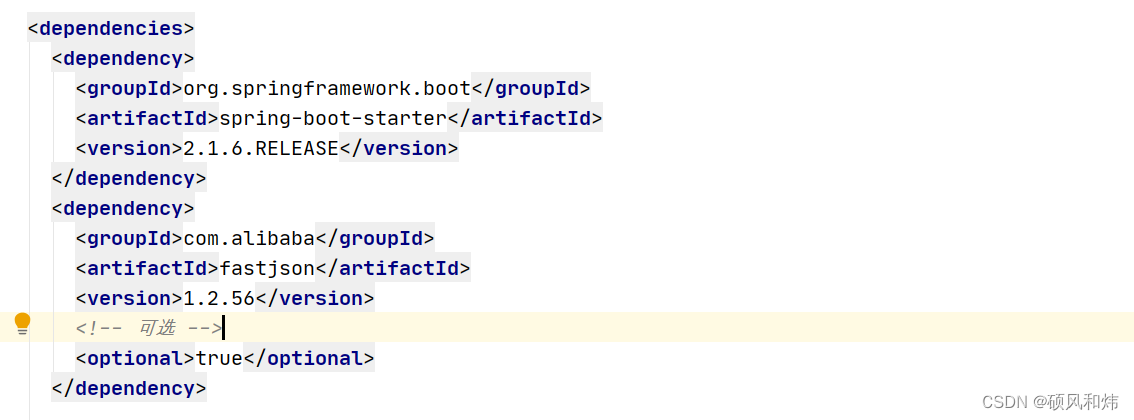
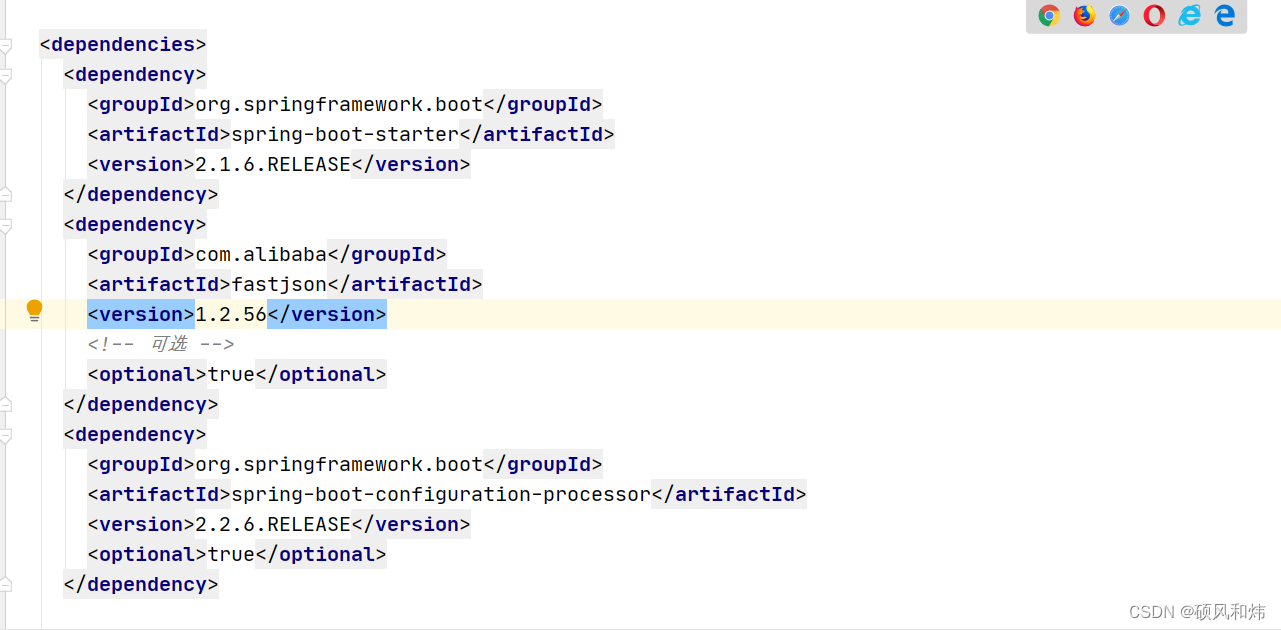
2.1 创建一个Maven项目并定义相关的依赖
<dependency>
    <groupId>org.springframework.boot</groupId>
    <artifactId>spring-boot-starter</artifactId>
    <version>2.1.6.RELEASE</version>
</dependency>
<dependency>
    <groupId>com.alibaba</groupId>
    <artifactId>fastjson</artifactId>
    <version>1.2.56</version>
    <!-- 可选 -->
    <optional>true</optional>
</dependency>
2.1.1 创建maven项目
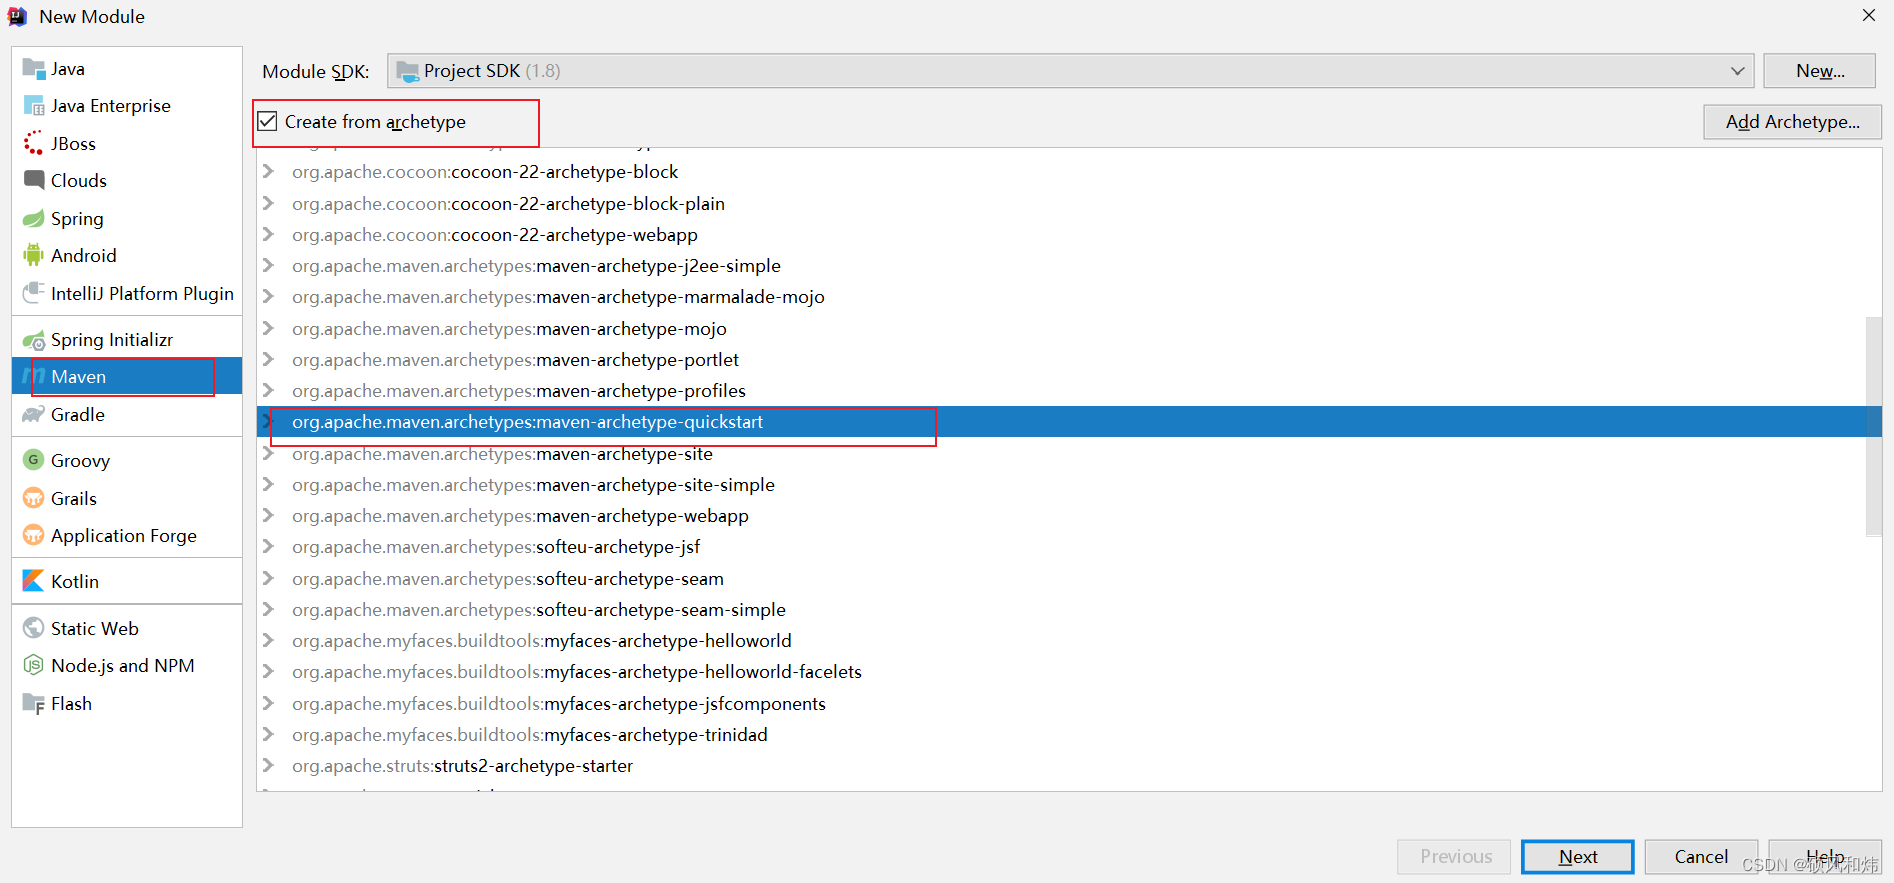
2.1.2 导入依赖
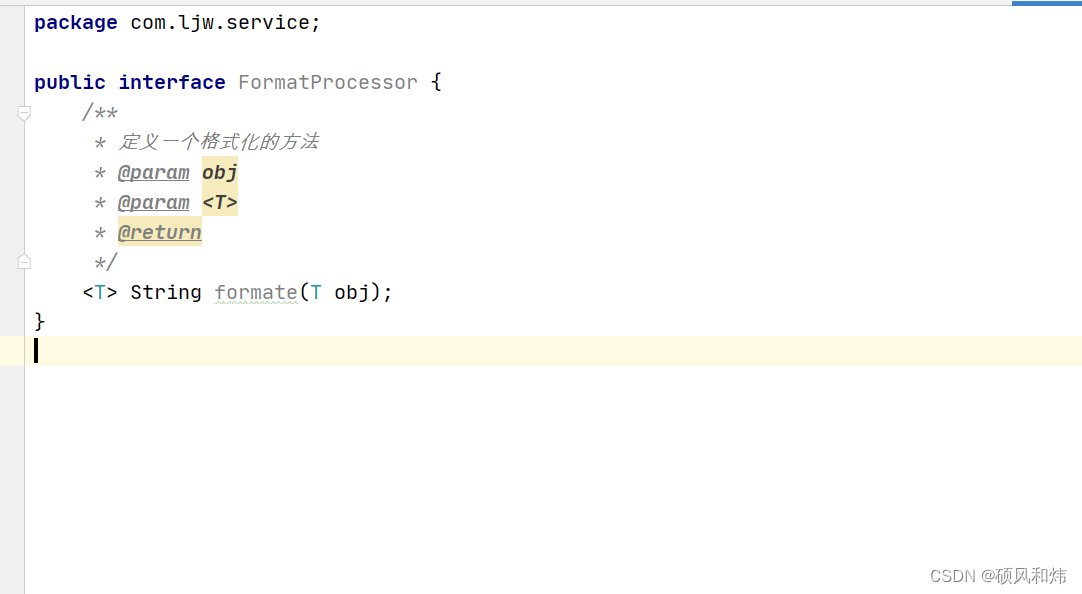
2.2 定义FormatProcessor接口
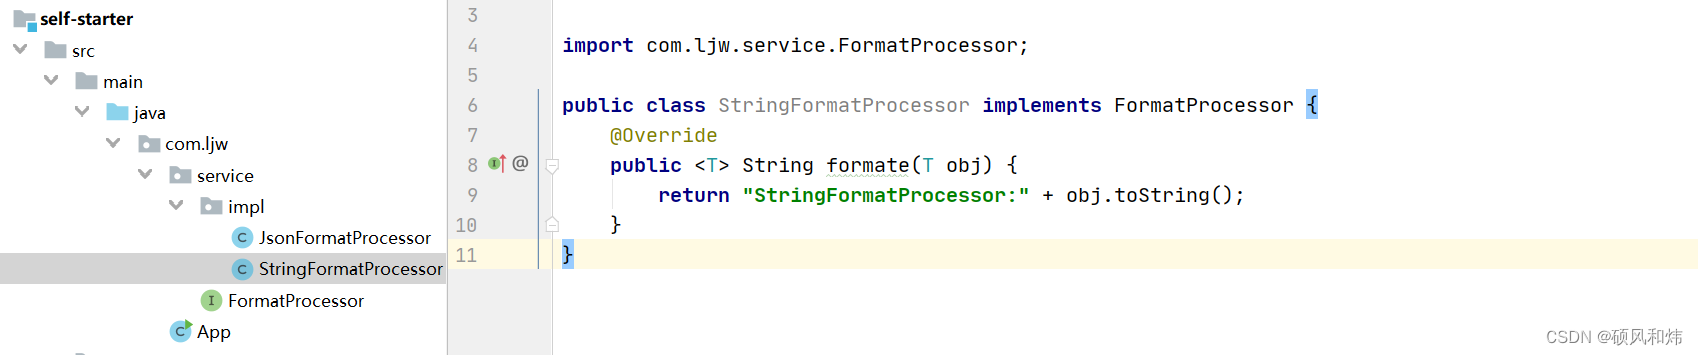
2.2.1 定义的格式转换的接口,并且定义两个实现类
public interface FormatProcessor {
    /**
     * 定义一个格式化的方法
     * @param obj
     * @param <T>
     * @return
     */
    <T> String formate(T obj);
}
public class JsonFormatProcessor implements FormatProcessor {
    @Override
    public <T> String formate(T obj) {
        return "JsonFormatProcessor:" + JSON.toJSONString(obj);
    }
}

public class StringFormatProcessor implements FormatProcessor {
    @Override
    public <T> String formate(T obj) {
        return "StringFormatProcessor:" + obj.toString();
    }
}
2.3 定义相关的配置类
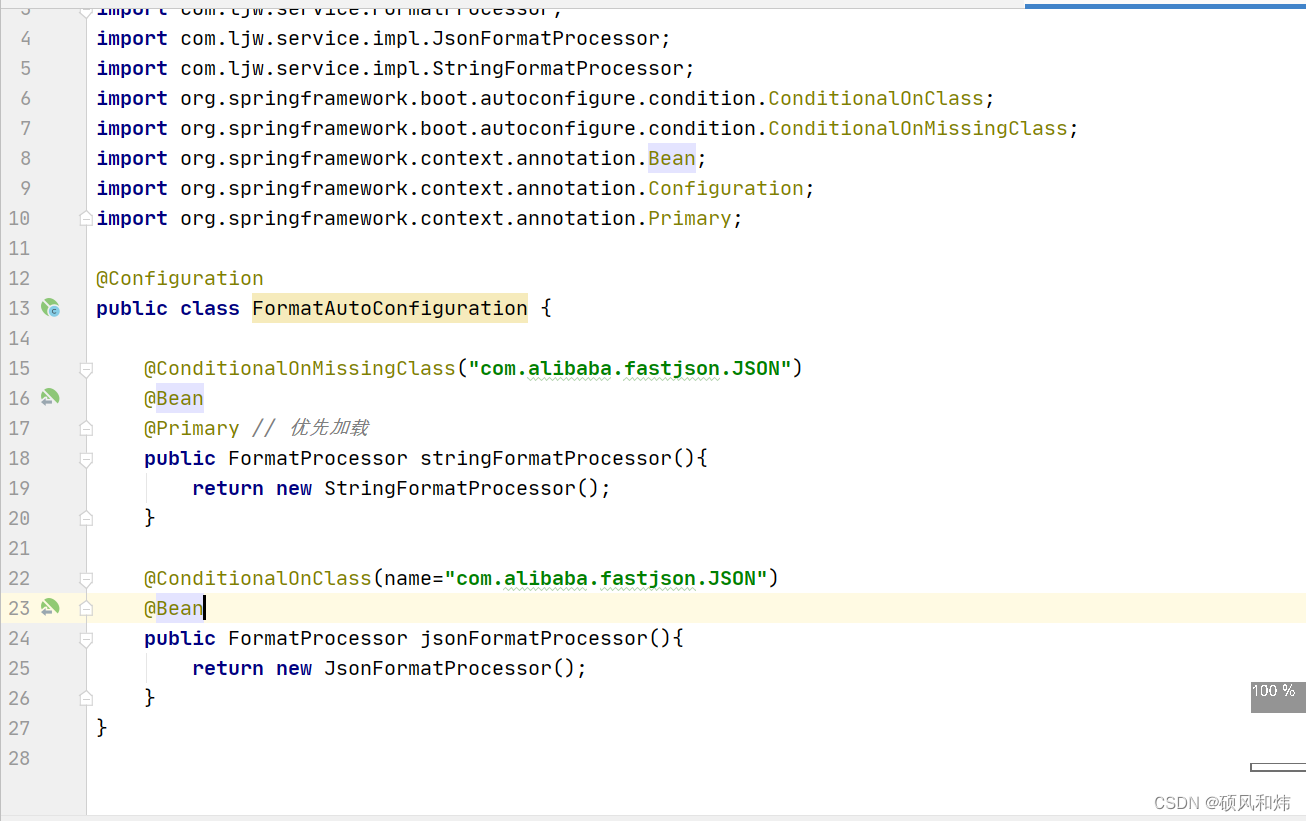
2.3.1 首先定义格式化加载的Java配置类
@Configuration
public class FormatAutoConfiguration {

    @ConditionalOnMissingClass("com.alibaba.fastjson.JSON")
    @Bean
    @Primary // 优先加载
    public FormatProcessor stringFormatProcessor(){
        return new StringFormatProcessor();
    }

    @ConditionalOnClass(name="com.alibaba.fastjson.JSON")
    @Bean
    public FormatProcessor jsonFormatProcessor(){
        return new JsonFormatProcessor();
    }
}
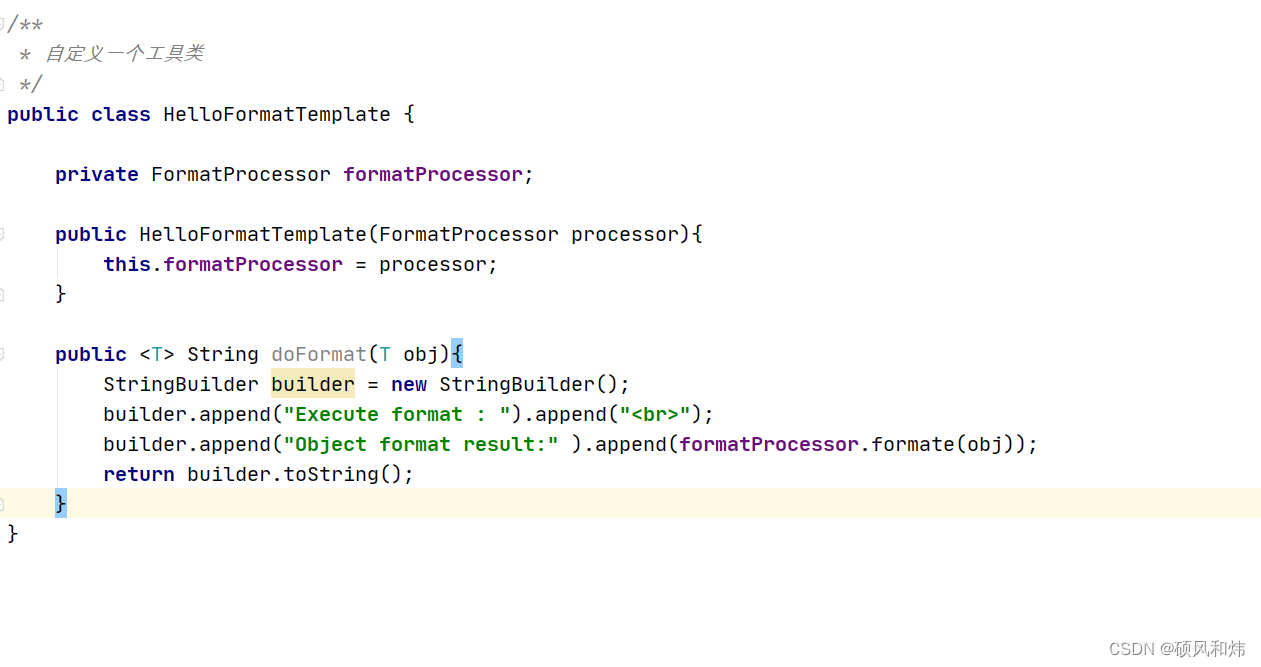
2.3.2 定义一个模板工具类
public class HelloFormatTemplate {

    private FormatProcessor formatProcessor;


    public HelloFormatTemplate(FormatProcessor processor){
        this.formatProcessor = processor;
    }

    public <T> String doFormat(T obj){
        StringBuilder builder = new StringBuilder();
        builder.append("Execute format : ").append("<br>");
        builder.append("Object format result:" ).append(formatProcessor.formate(obj));
        return builder.toString();
    }
}
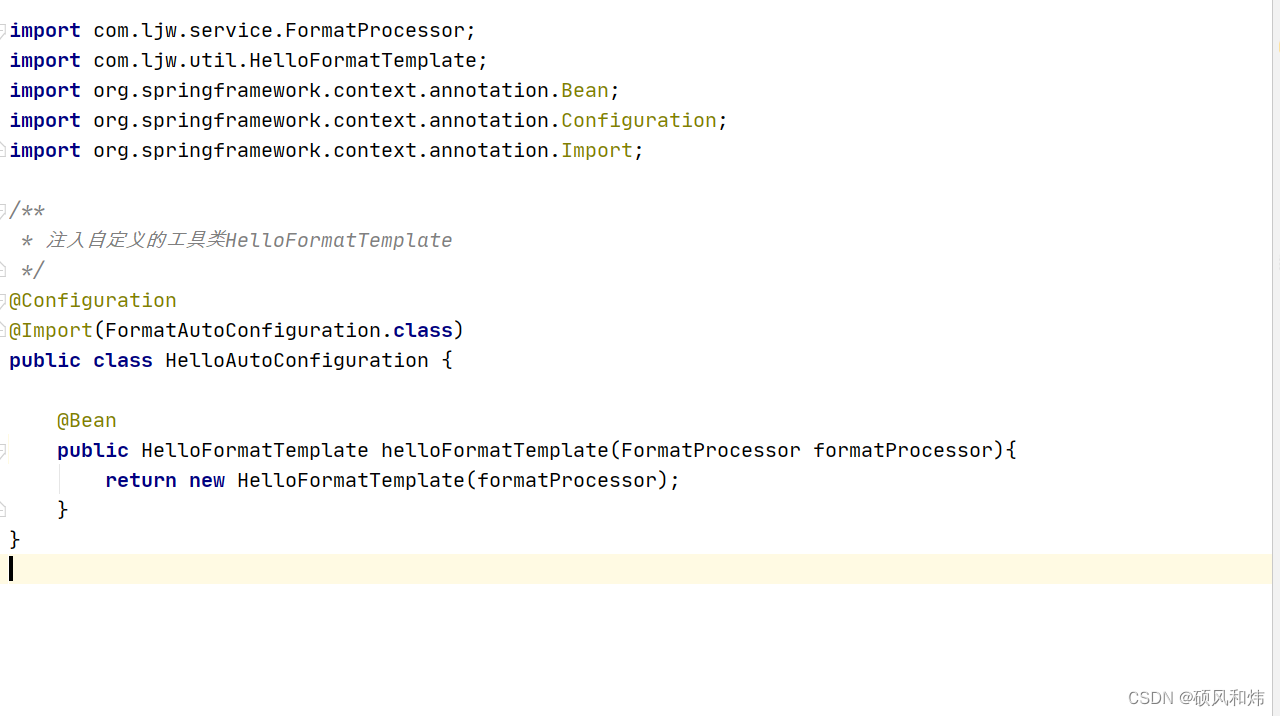
2.3.3 整合到SpringBoot中去的Java配置类
@Configuration
@Import(FormatAutoConfiguration.class)
public class HelloAutoConfiguration {

    @Bean
    public HelloFormatTemplate helloFormatTemplate(FormatProcessor formatProcessor){
        return new HelloFormatTemplate(formatProcessor);
    }
}
2.4 创建spring.factories文件
2.4.1 在resources下创建META-INF目录,再在其下创建spring.factories文件
org.springframework.boot.autoconfigure.EnableAutoConfiguration=\
org.mashibingedu.autoconfiguration.HelloAutoConfiguration
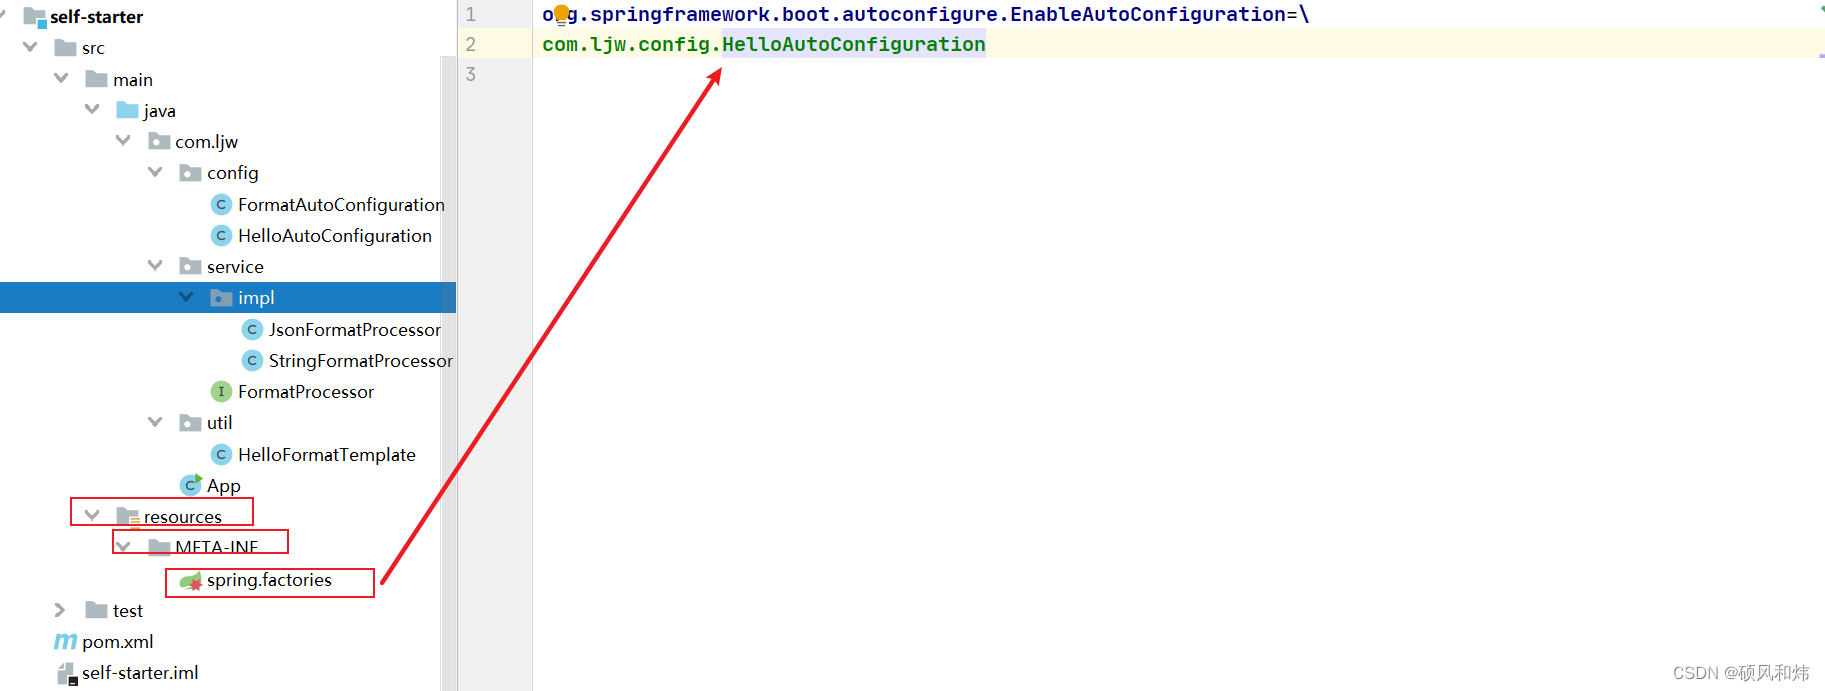
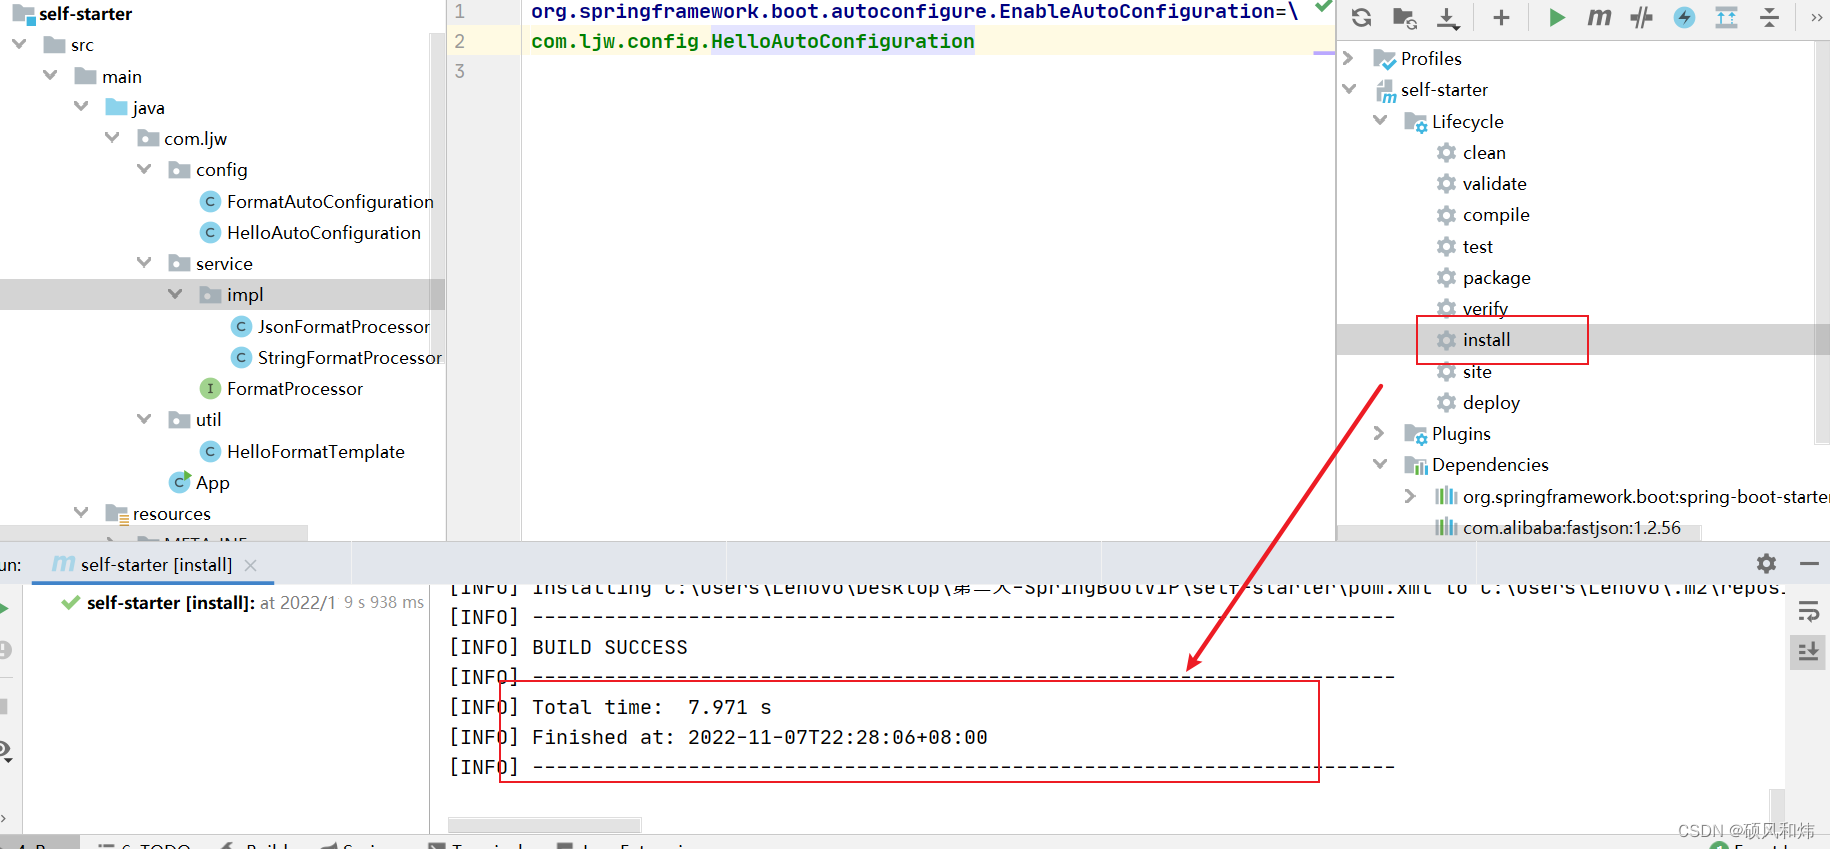
2.4.2 install 打包,然后就可以在SpringBoot项目中依赖改项目来操作了。
2.5 测试
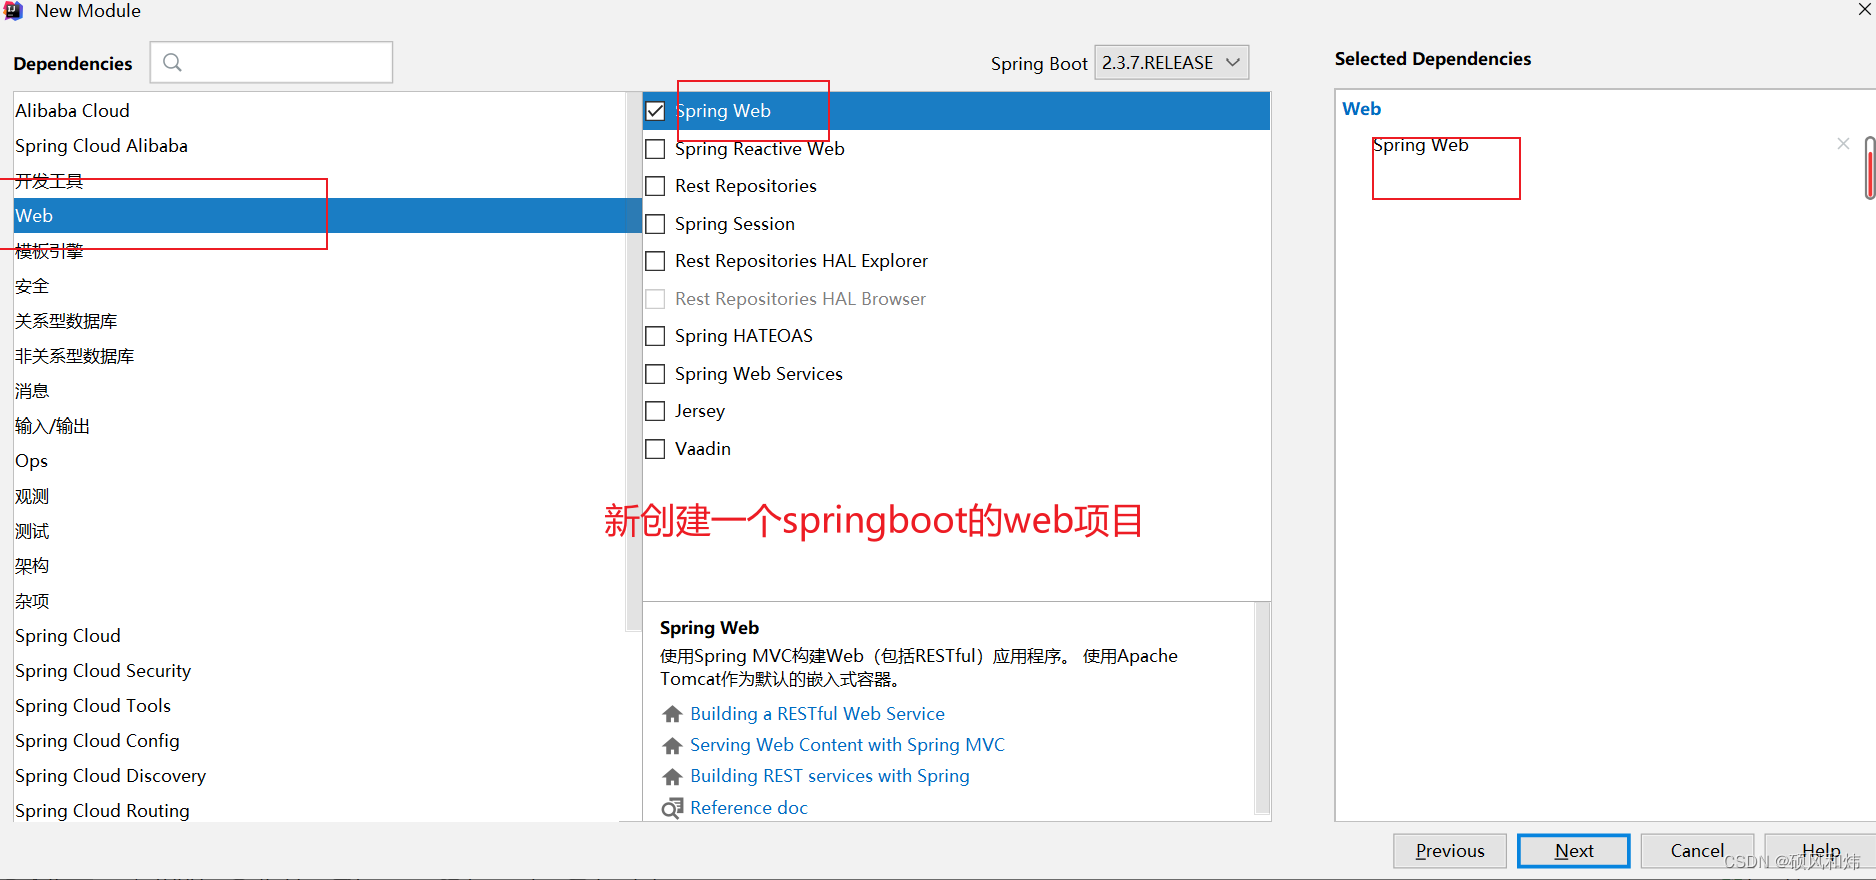
2.5.1 新创建一个springboot的web项目
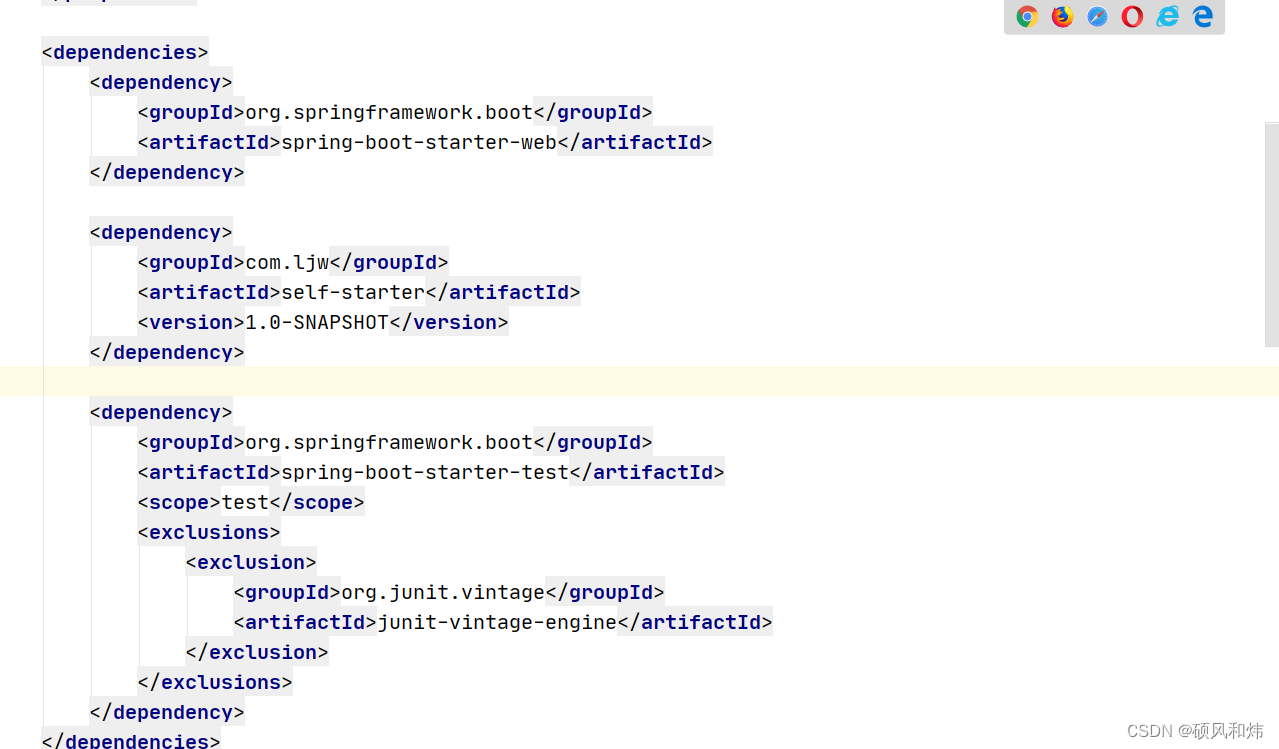
2.5.2 在SpringBoot中引入依赖刚我们打包好的依赖
<dependency>
  <groupId>com.ljw</groupId>
  <artifactId>self-starter</artifactId>
  <version>1.0-SNAPSHOT</version>
</dependency>
2.5.3 定义需要使用的实体对象
public class User {

    private String username;

    private Integer password;

    public User(){}

    public User(String username,Integer password){
        this.username=username;
        this.password=password;
    }

    public String getUsername() {
        return username;
    }

    public void setUsername(String username) {
        this.username = username;
    }

    public Integer getPassword() {
        return password;
    }

    public void setPassword(Integer password) {
        this.password = password;
    }
}
2.5.4 在controller中使用引入的stater
import com.ljw.teststarter.domain.User;
import com.ljw.util.HelloFormatTemplate;
import org.springframework.beans.factory.annotation.Autowired;
import org.springframework.web.bind.annotation.GetMapping;
import org.springframework.web.bind.annotation.RestController;
@RestController
public class HelloController {
@Autowired
private HelloFormatTemplate helloFormatTemplate;
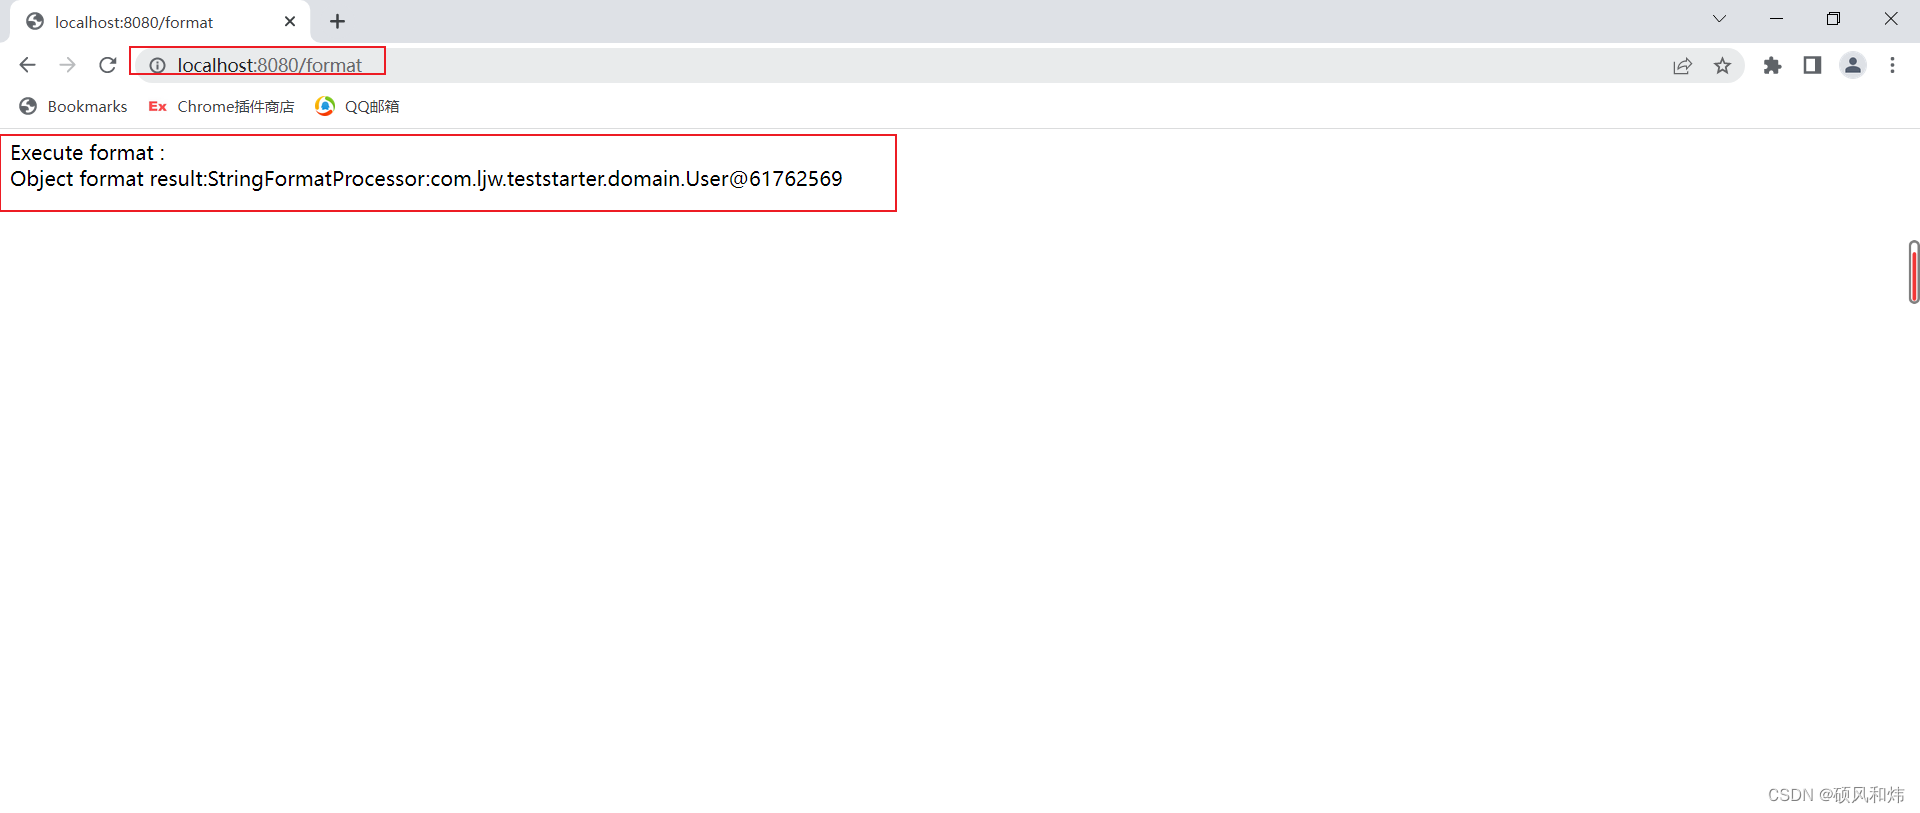
@GetMapping("/format")
public String format(){
User user = new User();
user.setUsername("ljw");
user.setPassword(18);
return helloFormatTemplate.doFormat(user);
}
}
2.5.5 测试搞定~
2.6 自定义Starter关联配置信息
有些情况下我们可以需要用户在使用的时候动态的传递相关的配置信息,比如Redis的ip,端口等等,这些信息显然是不能直接写到代码中的,这时我们就可以通过SpringBoot的配置类来实现。
2.6.1 首先在我们自定义的starter项目中引入依赖支持
<dependency>
    <groupId>org.springframework.boot</groupId>
    <artifactId>spring-boot-configuration-processor</artifactId>
    <version>2.2.6.RELEASE</version>
    <optional>true</optional>
</dependency>
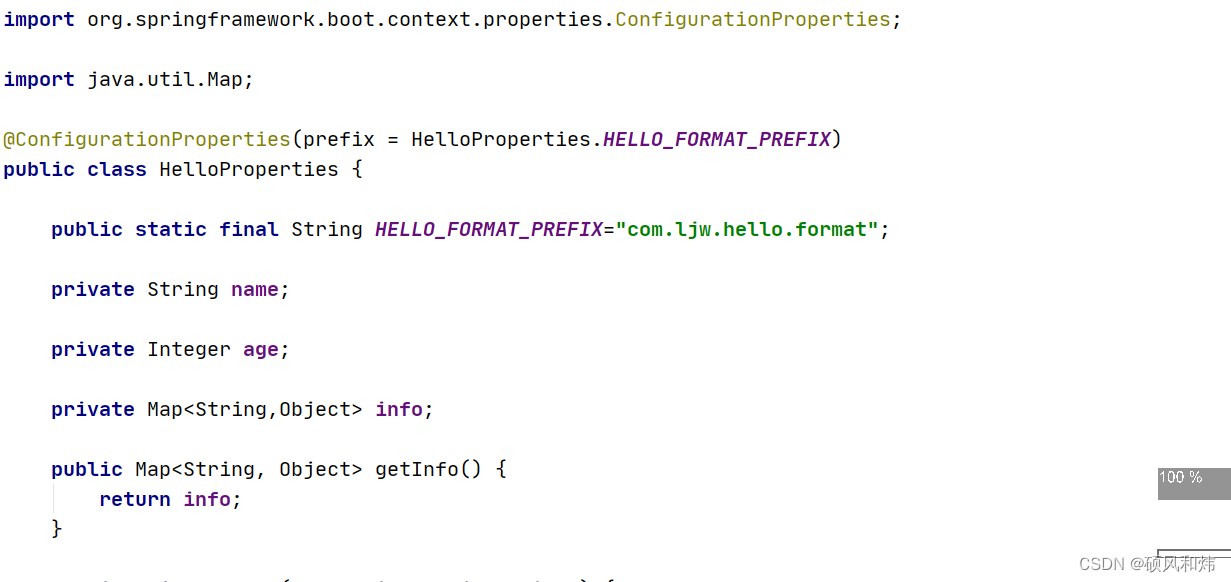
2.6.2 创建对应的属性类
import org.springframework.boot.context.properties.ConfigurationProperties;

import java.util.Map;

@ConfigurationProperties(prefix = HelloProperties.HELLO_FORMAT_PREFIX)
public class HelloProperties {

    public static final String HELLO_FORMAT_PREFIX="com.ljw.hello.format";

    private String name;

    private Integer age;

    private Map<String,Object> info;

    public Map<String, Object> getInfo() {
        return info;
    }

    public void setInfo(Map<String, Object> info) {
        this.info = info;
    }

    public String getName() {
        return name;
    }

    public void setName(String name) {
        this.name = name;
    }

    public Integer getAge() {
        return age;
    }

    public void setAge(Integer age) {
        this.age = age;
    }
}
2.6.3 在Java配置类中关联
@Configuration
@Import(FormatAutoConfiguration.class)
@EnableConfigurationProperties(HelloProperties.class)
public class HelloAutoConfiguration {

    @Bean
    public HelloFormatTemplate helloFormatTemplate(HelloProperties helloProperties,FormatProcessor formatProcessor){
        return new HelloFormatTemplate(helloProperties,formatProcessor);
    }
}

2.6.4 调整模板方法
/**
 * 自定义一个工具类
 */
public class HelloFormatTemplate {

    private FormatProcessor formatProcessor;

    private HelloProperties helloProperties;

    public HelloFormatTemplate(HelloProperties helloProperties, FormatProcessor processor){
        this.helloProperties = helloProperties;
        this.formatProcessor = processor;
    }

    public <T> String doFormat(T obj){
        StringBuilder builder = new StringBuilder();
        builder.append("Execute format : ").append("<br>");
        builder.append("HelloProperties:").append(formatProcessor.formate(helloProperties.getInfo())).append("<br>");
        builder.append("Object format result:" ).append(formatProcessor.formate(obj));
        return builder.toString();
    }

}
2.6.5 增加提示:在这个工程的META-INF/下创建一个additional-spring-configuration-metadata.json,这个是设置属性的提示类型
{
  "properties": [
    {
      "name": "com.ljw.hello.format.name",
      "type": "java.lang.String",
      "description": "用户名",
      "defaultValue": "root"
    },{
      "name": "mashibing.hello.format.age",
      "type": "java.lang.Integer",
      "description": "年龄",
      "defaultValue": 18
    }
  ]
}
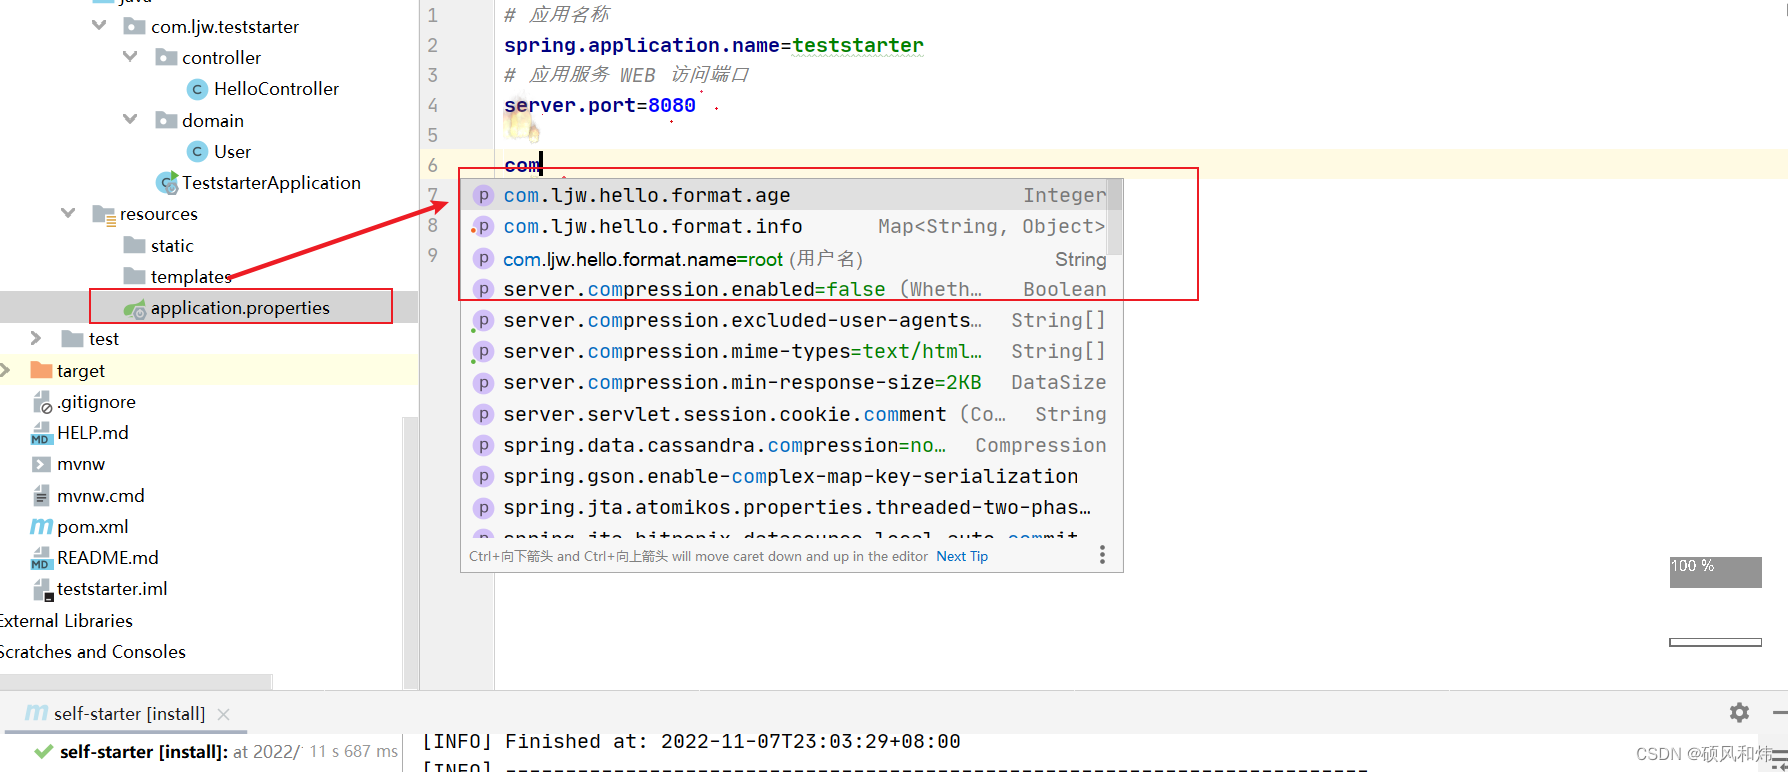
2.6.6 测试:再次重复之前的操作,install打包,再导入测试,在我们的application.properties文件中进行我们自定义的starter的项目文件配置。
好了,到这里【详细学习SpringBoot自动装配原理之自定义手写Starter-2】就结束了,关于SpringBoot更多优质的内容后续持续更新创作中,谢谢您的关注,笔芯 ^ _ ^


 1884
1884


 被折叠的 条评论
为什么被折叠?
被折叠的 条评论
为什么被折叠?
 到【灌水乐园】发言


