


前言
本文梳理了一些使用Nexus搭建Maven私服的方法。Maven私服Nexus的作用,主要是为了节省资源,在内部作为Maven开发资源共享服务器来使用。另外Nexus3和Nexus2之间存在较大差异,因此本方法只适用于Nexus2.x,Nexus3请绕开。更多说明请参考官网
https://help.sonatype.com/repomanager3/installation/run-as-a-service
正文
在Ubuntu8.2下搭建Nexus2
- 下载Nexus
通过root用户进去Ubuntu server
    $ cd /opt
    $ wget https://sonatype-download.global.ssl.fastly.net/repository/repositoryManager/3/nexus-3.14.0-04-mac.tgz
注意:
- 使用wget下载时比较慢,下载过程可以使用迅雷下载,之后再拷贝到/opt下
- Nexus并没有提供Linux版本,但可以使用mac版或者unix版,此处我们直接使用mac版
官网地址:
https://www.sonatype.com/download-oss-sonatype
- 启动
环境准备,启动Nexus之前,必须先完成JDK环境的配置。此处略过
    $ cd /opt/
    $ tar -zxvf nexus-3.14.0-04-mac.tgz
    $ mv nexus-3.14.0-04 nexus3
    $ cd /opt/nexus3/bin
    $ vi nexus.rc
最后是将run_as_user设为root,否则root用户将无法启动Nexus服务:
run_as_user="root"
vi的使用方式请自行百度

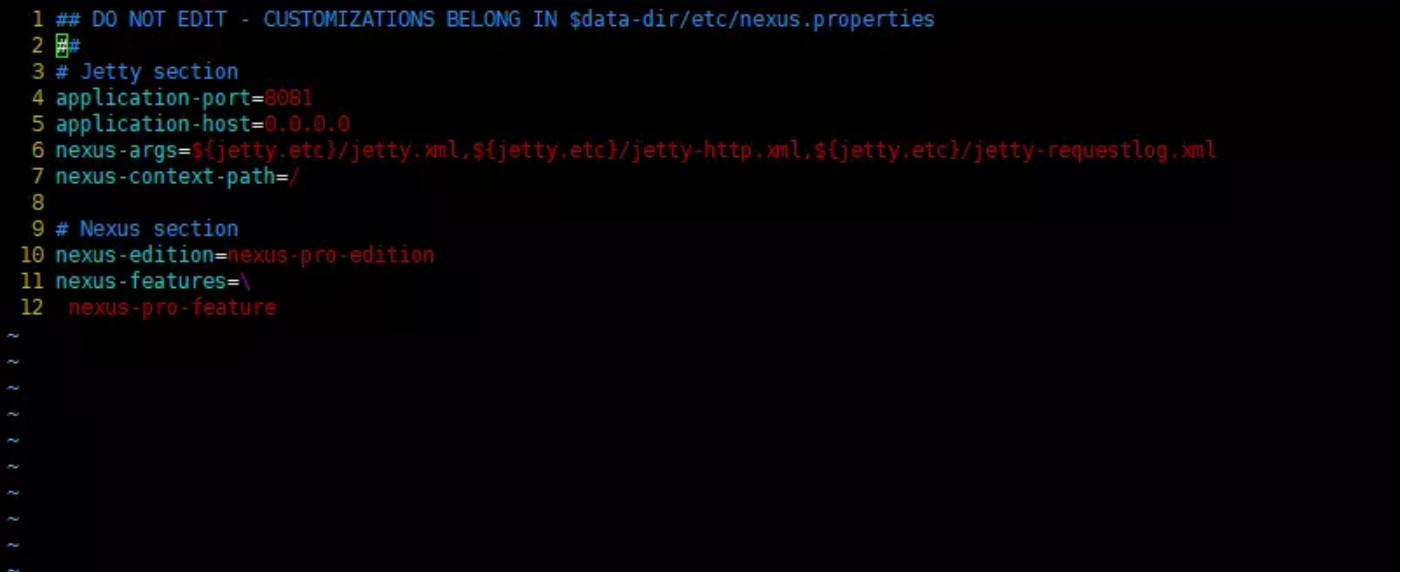
站点的其他配置文件设置命令如下,可以按需修改:
$ vi /opt/nexus3/etc/nexus-default.properties
保存退出之后,即可启动nexus,命令如下:
$ ./nexus start
启动之后即可以访问:
http://127.0.0.1:8081/
或者
http://ip:8081/
以上,Nexus的服务器就算搭建起来了
- 配置Nexus
默认的管理员账户:admin,密码:admin123
关于仓库的类型介绍:
hosted 类型的仓库,内部项目的发布仓库
releases 内部的模块中release模块的发布仓库
snapshots 发布内部的SNAPSHOT模块的仓库
3rd party 第三方依赖的仓库,这个数据通常是由内部人员自行下载之后发布上去
proxy 类型的仓库,从远程中央仓库中寻找数据的仓库
group 类型的仓库,组仓库用来方便我们开发人员进行设置的仓库
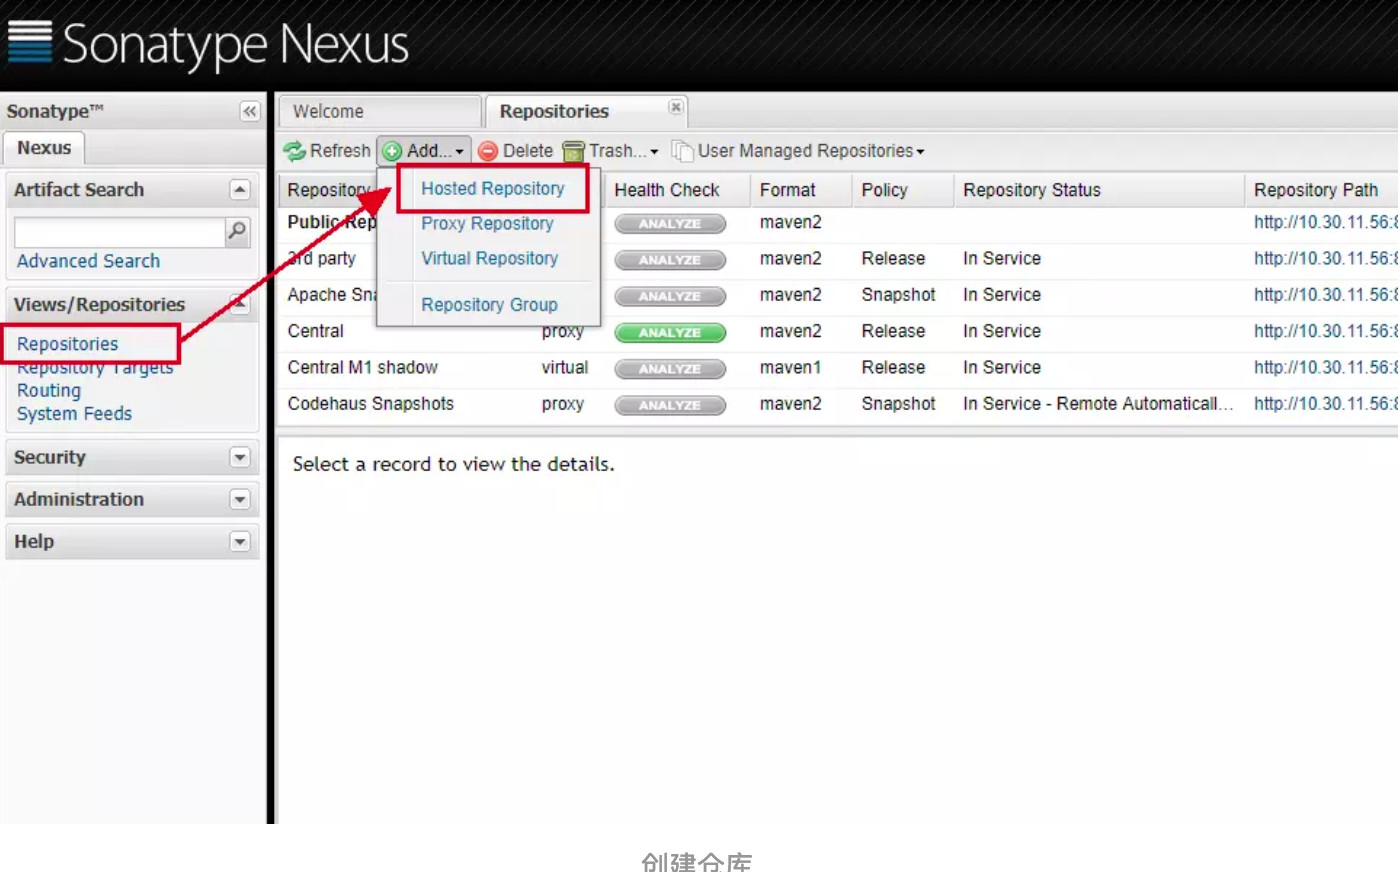
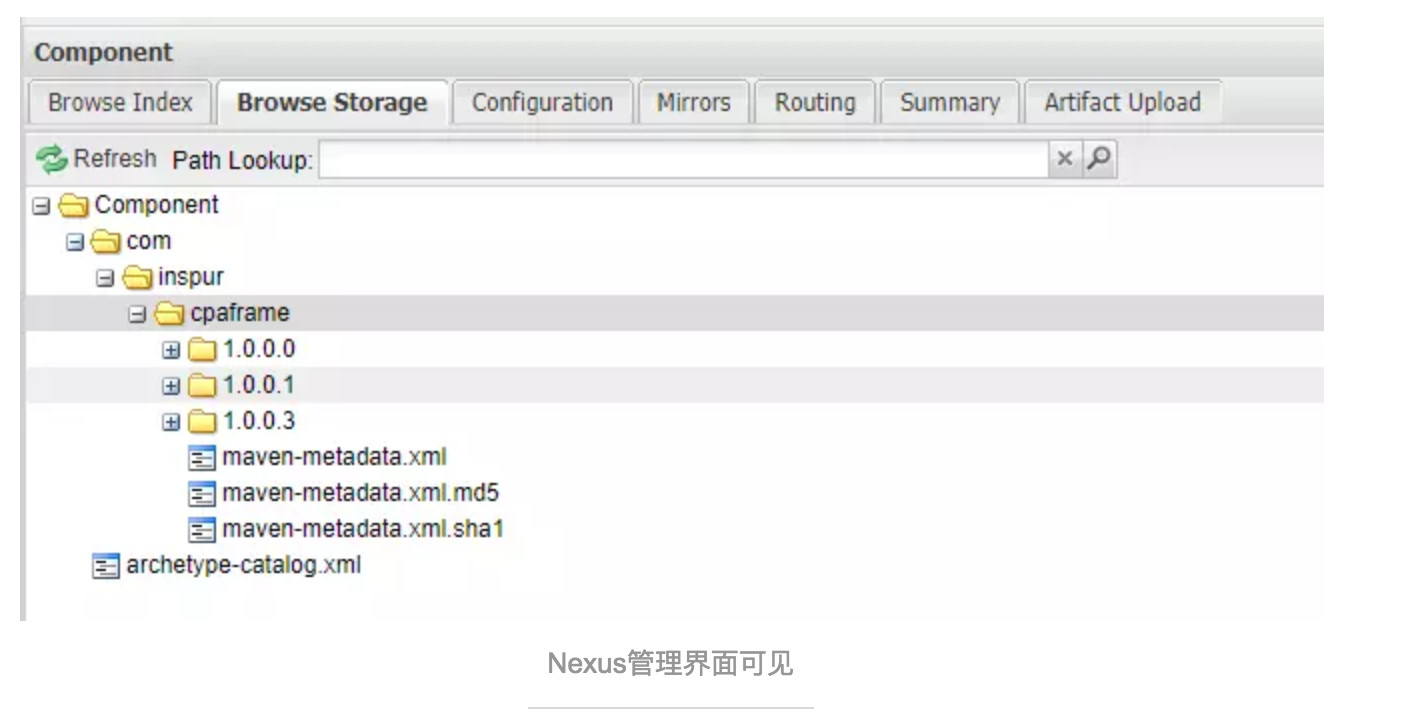
- 创建仓库

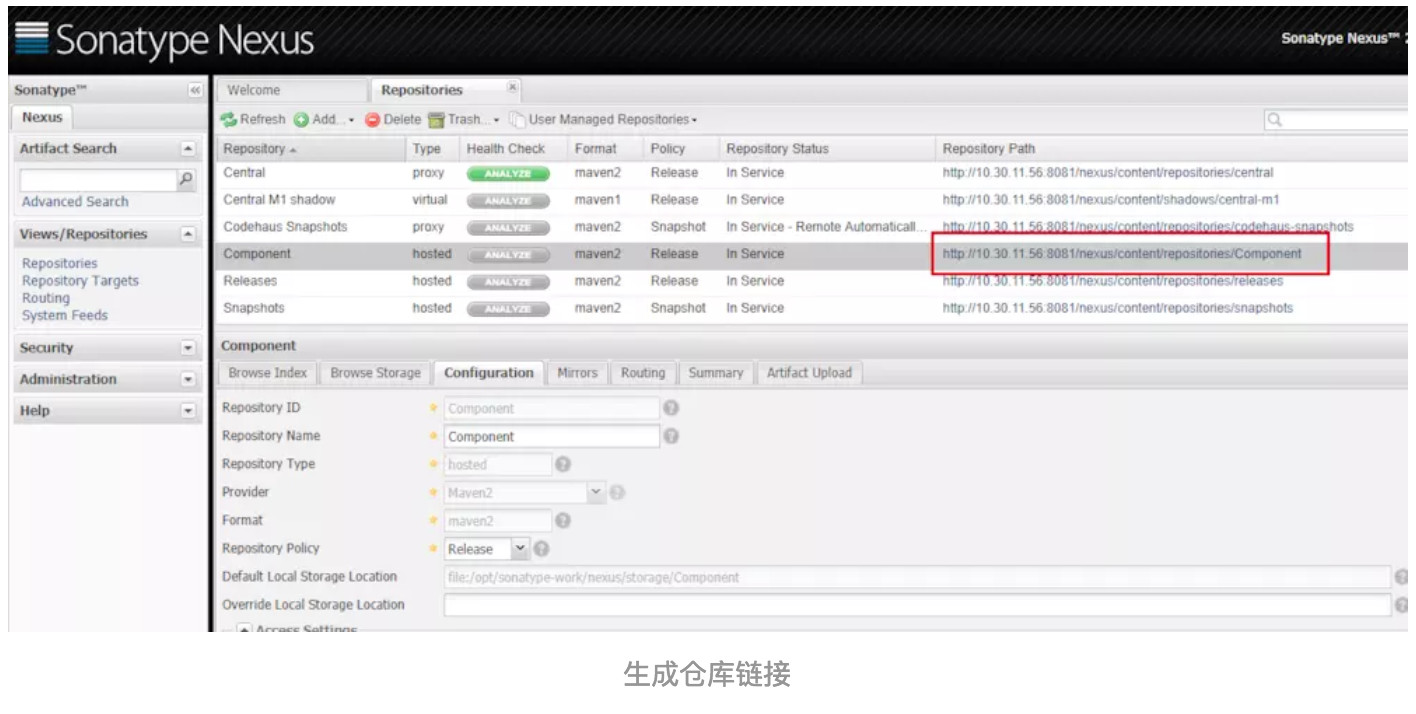
生成的仓库链接将会在项目中用到:
http://10.30.11.56:8081/nexus/content/repositories/Component/
在AndroidStudio集成
- 打包上传到远程库
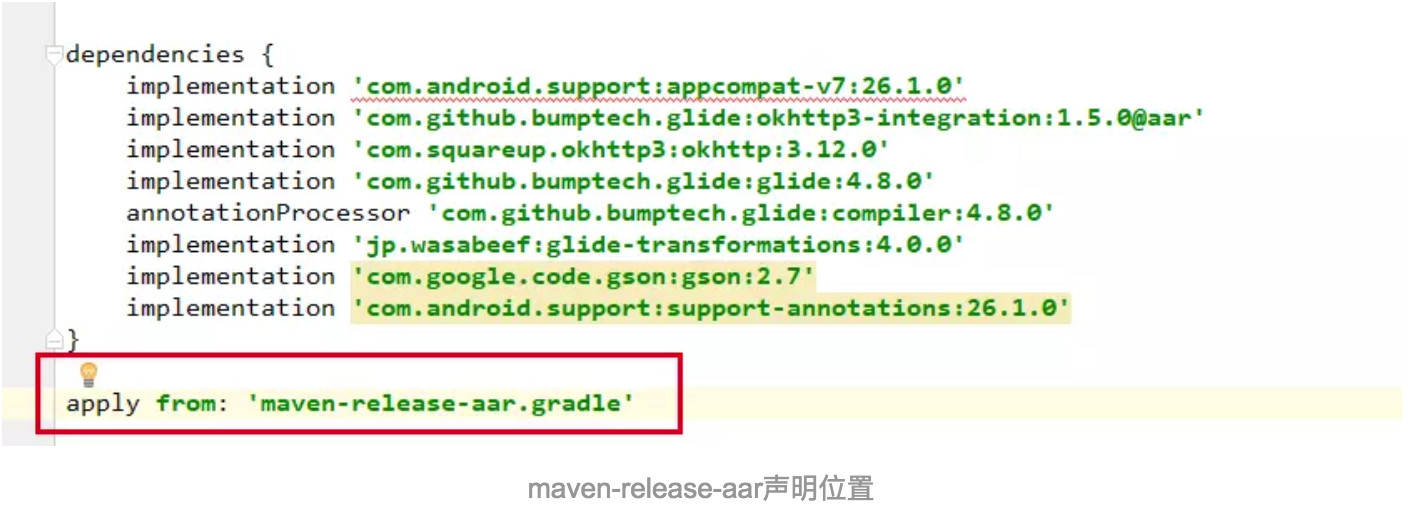
为了使module的gradle尽量整洁,将打包配置信息单独放置在maven-release-aar.gradle中
以下为maven-release-aar.gradle的内容
// 1.maven-插件
apply plugin: 'maven'
// 2.maven-信息
ext {
    PUBLISH_GROUP_ID = 'com.inspur'
    PUBLISH_ARTIFACT_ID = 'cpaframe'//组件名
    PUBLISH_VERSION = '1.0.0.1'//组件版本
    PUBLISH_PACHAGE = 'jar'//打包类型,根据场景可选jar或aar
}
// 3.maven-路径
uploadArchives {
    repositories.mavenDeployer {
        //指定maven仓库url
        repository(url: "http://10.30.11.56:8081/nexus/content/repositories/Component/") {
            //Nexus登录默认用户名和密码
            authentication(userName: "admin", password: "admin123")
        }
        pom.project {
            groupId project.PUBLISH_GROUP_ID
            artifactId project.PUBLISH_ARTIFACT_ID
            version project.PUBLISH_VERSION
            pom.packaging = PUBLISH_PACHAGE
        }
    }
}

//aar包内包含注释
task androidSourcesJar(type: Jar) {
    classifier = 'sources'
    from android.sourceSets.main.java.sourceFiles
}

artifacts {
    archives androidSourcesJar
}
最后使用Terminal执行如下命令:
gradlew uploadArchives //win下执行
./gradlew uploadArchives //mac下执行
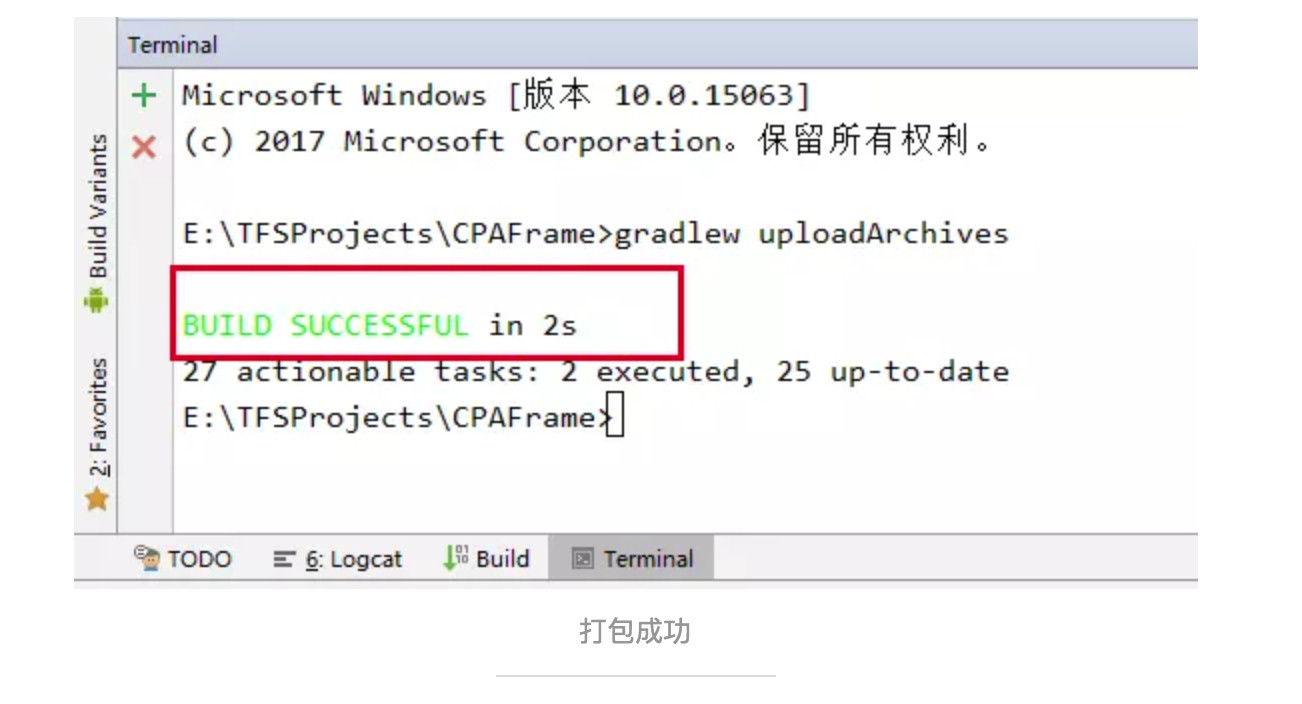
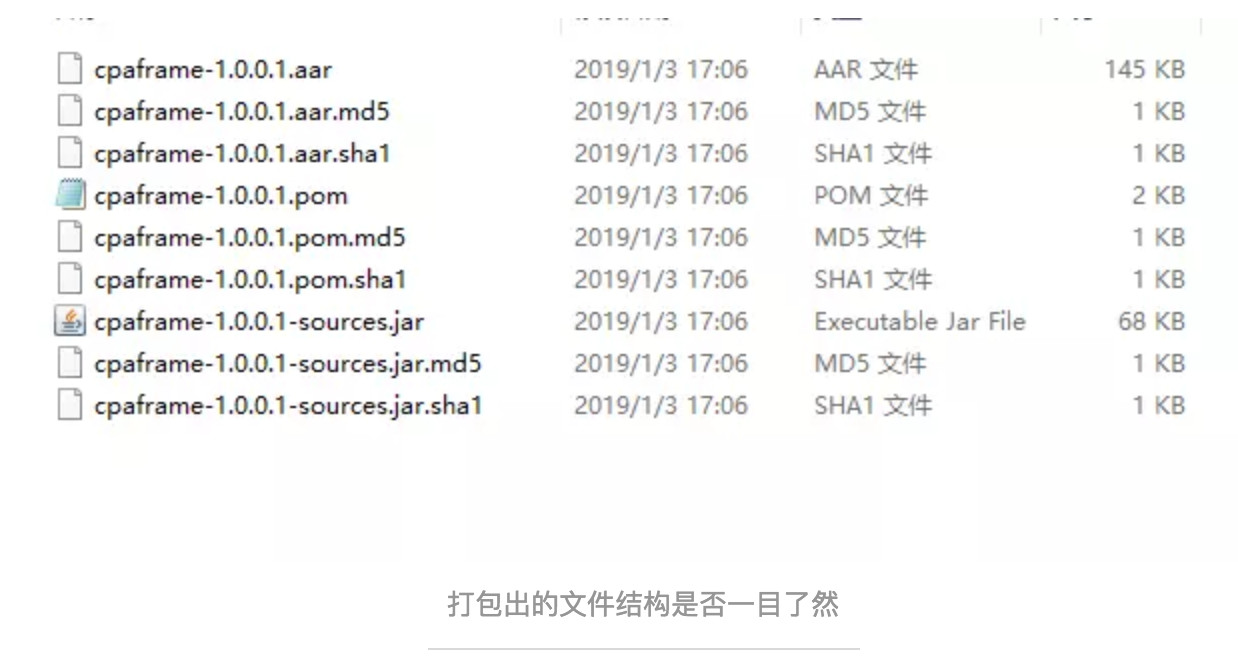
以上,打包上传的过程完成。
- 更新组件版本
每次有更新时,只需要修改PUBLISH_VERSION的值,再使用Terminal执行gradlew命令即可。
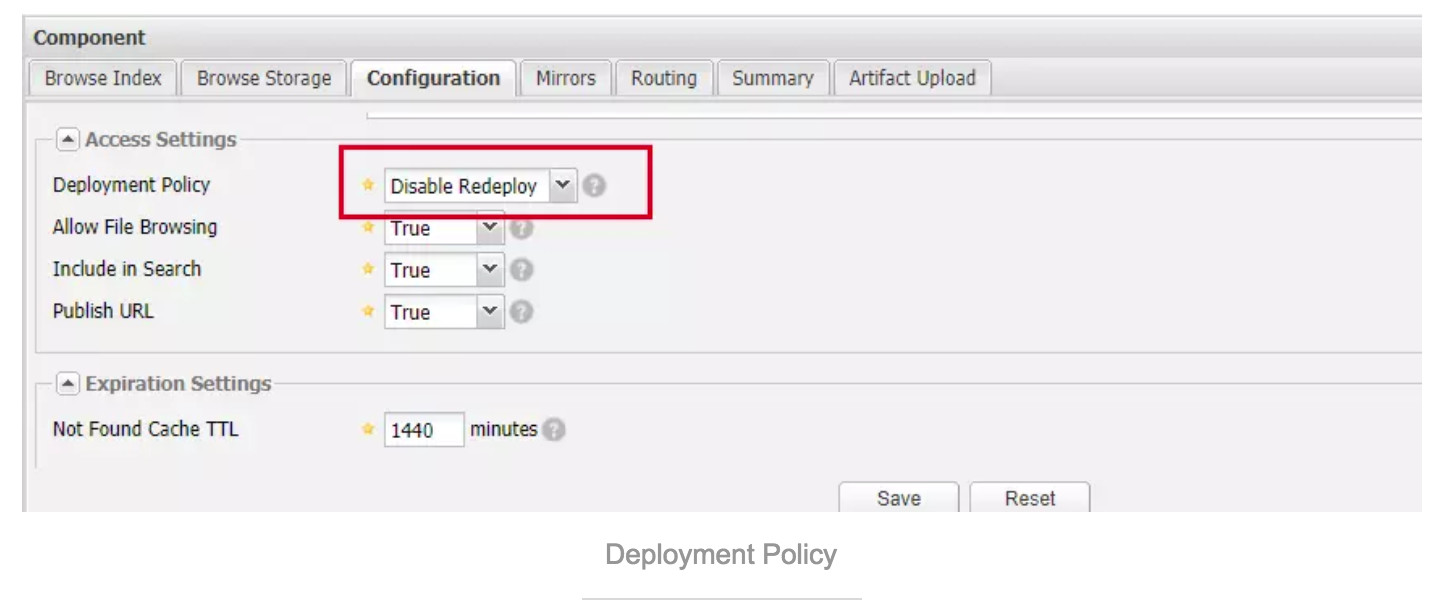
注意:每次打包的版本不要和远程库中的版本号有重复,否则会看到以下结果:
> Task :app:uploadArchives FAILED
Could not transfer artifact com.inspur:cpaframe:aar:1.0.0.3 from/to remote (http://10.30.11.56:8081/nexus/content/repositories/Component/): Fa
iled to transfer file: http://10.30.11.56:8081/nexus/content/repositories/Component/com/inspur/cpaframe/1.0.0.3/cpaframe-1.0.0.3.aar. Return c
ode is: 400, ReasonPhrase: Bad Request.
Could not transfer artifact com.inspur:cpaframe:pom:1.0.0.3 from/to remote (http://10.30.11.56:8081/nexus/content/repositories/Component/): Fa
iled to transfer file: http://10.30.11.56:8081/nexus/content/repositories/Component/com/inspur/cpaframe/1.0.0.3/cpaframe-1.0.0.3.pom. Return c
ode is: 400, ReasonPhrase: Bad Request.
Could not transfer artifact com.inspur:cpaframe:jar:sources:1.0.0.3 from/to remote (http://10.30.11.56:8081/nexus/content/repositories/Compone
nt/): Failed to transfer file: http://10.30.11.56:8081/nexus/content/repositories/Component/com/inspur/cpaframe/1.0.0.3/cpaframe-1.0.0.3-sourc
es.jar. Return code is: 400, ReasonPhrase: Bad Request.


FAILURE: Build failed with an exception.

* What went wrong:
Execution failed for task ':app:uploadArchives'.
> Could not publish configuration 'archives'
   > Failed to deploy artifacts: Could not transfer artifact com.inspur:cpaframe:aar:1.0.0.3 from/to remote (http://10.30.11.56:8081/nexus/con
tent/repositories/Component/): Failed to transfer file: http://10.30.11.56:8081/nexus/content/repositories/Component/com/inspur/cpaframe/1.0.0
.3/cpaframe-1.0.0.3.aar. Return code is: 400, ReasonPhrase: Bad Request.

* Try:
Run with --stacktrace option to get the stack trace. Run with --info or --debug option to get more log output. Run with --scan to get full ins
ights.

* Get more help at https://help.gradle.org

BUILD FAILED in 2s
因为默认情况下,远程库是将部署策略设置为禁止重新部署的关闭的,如下:
使用远程库
方法很简单,和开源库的使用方法类似,以上面的Component为例:
allprojects {
    repositories {
        google()
        jcenter()
        maven {
            url "http://10.30.11.56:8081/nexus/content/repositories/Component/"
        }
    }
}


dependencies {
    ...
    implementation 'com.inspur:cpaframe:1.0.0.1'
}
- 列举一些好处
- 更方便的版本控制。
- 更有效的使用gradle构建项目。
- 使用远程库时默认不会被编译到jar或aar中,可以有效的减小发布版本时的工作量。
- 组件所依赖的组件信息也会在打包时被保存在pom文件中,在构建项目时可以进一步减小工作量。
一下是pom的文件结构
<?xml version="1.0" encoding="UTF-8"?>
<project xsi:schemaLocation="http://maven.apache.org/POM/4.0.0 http://maven.apache.org/xsd/maven-4.0.0.xsd" xmlns="http://maven.apache.org/POM/4.0.0"
    xmlns:xsi="http://www.w3.org/2001/XMLSchema-instance">
  <modelVersion>4.0.0</modelVersion>
  <groupId>com.inspur</groupId>
  <artifactId>cpaframe</artifactId>
  <version>1.0.0.4</version>
  <packaging>aar</packaging>
  <dependencies>
    <dependency>
      <groupId>com.android.support</groupId>
      <artifactId>appcompat-v7</artifactId>
      <version>26.1.0</version>
      <scope>compile</scope>
    </dependency>
    <dependency>
      <groupId>com.github.bumptech.glide</groupId>
      <artifactId>okhttp3-integration</artifactId>
      <version>1.5.0</version>
      <type>aar</type>
      <scope>compile</scope>
      <exclusions>
        <exclusion>
          <artifactId>*</artifactId>
          <groupId>*</groupId>
        </exclusion>
      </exclusions>
    </dependency>
    <dependency>
      <groupId>com.squareup.okhttp3</groupId>
      <artifactId>okhttp</artifactId>
      <version>3.12.0</version>
      <scope>compile</scope>
    </dependency>
    <dependency>
      <groupId>com.github.bumptech.glide</groupId>
      <artifactId>glide</artifactId>
      <version>4.8.0</version>
      <scope>compile</scope>
    </dependency>
    <dependency>
      <groupId>jp.wasabeef</groupId>
      <artifactId>glide-transformations</artifactId>
      <version>4.0.0</version>
      <scope>compile</scope>
    </dependency>
    <dependency>
      <groupId>com.google.code.gson</groupId>
      <artifactId>gson</artifactId>
      <version>2.7</version>
      <scope>compile</scope>
    </dependency>
    <dependency>
      <groupId>com.android.support</groupId>
      <artifactId>support-annotations</artifactId>
      <version>26.1.0</version>
      <scope>compile</scope>
    </dependency>
  </dependencies>
</project>
原文链接:https://www.jianshu.com/u/ec6eb984ba33
免费获取安卓开发架构的资料(包括Fultter、高级UI、性能优化、架构师课程、 NDK、Kotlin、混合式开发(ReactNative+Weex)和一线互联网公司关于android面试的题目汇总可以加:936332305 / 链接:点击链接加入【安卓开发架构】:https://jq.qq.com/?_wv=1027&k=515xp64


 133
133


 被折叠的 条评论
为什么被折叠?
被折叠的 条评论
为什么被折叠?
 到【灌水乐园】发言


