


需求:
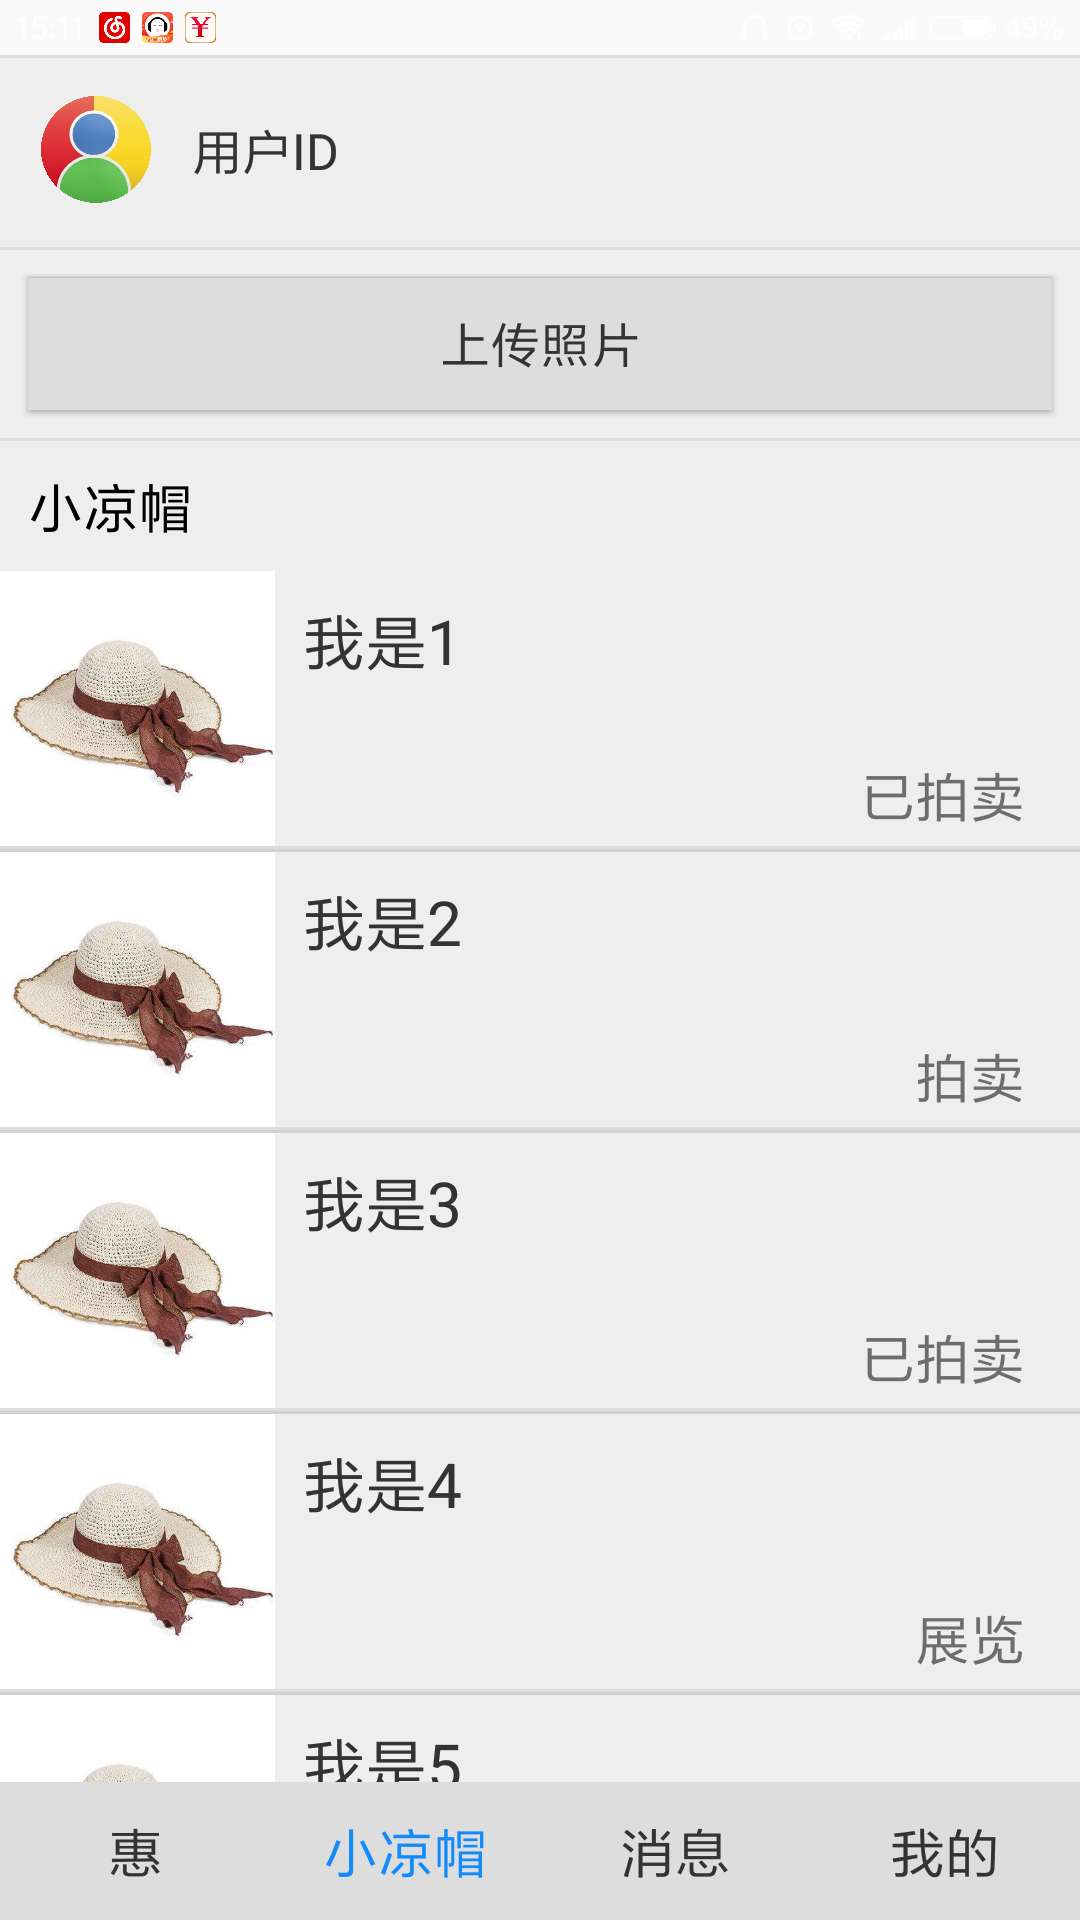
在fragment中写入几个listview.,先看下效果图。这里的照片我写的是固定值,可置为不同照片。
1.编写fragment的布局文件fragment_hat,插入<ListView>标签.(此处MyListView是继承自ListView,稍后说明)
<LinearLayout xmlns:android="http://schemas.android.com/apk/res/android"
    xmlns:tools="http://schemas.android.com/tools"
    android:layout_width="match_parent"
    android:layout_height="match_parent"
    android:orientation="vertical"
    tools:context="com.yaya.summerhat.fragment.HatFragment">

    <!--<RelativeLayout-->
        <!--android:id="@+id/rl_message"-->
        <!--android:layout_width="match_parent"-->
        <!--android:layout_height="wrap_content">-->

        <!--<com.yaya.summerhat.element.RoundImageView-->
            <!--android:id="@+id/portrait"-->
            <!--android:layout_margin="15dp"-->
            <!--android:layout_width="40dp"-->
            <!--android:layout_height="40dp"-->
            <!--android:layout_alignParentTop="true"-->
            <!--android:layout_alignParentLeft="true"-->
            <!--android:src="@drawable/portrait_default"/>-->

        <!--<TextView-->
            <!--android:id="@+id/user_id"-->
            <!--style="@style/user_id"-->
            <!--android:text="用户ID"-->
            <!--android:layout_centerVertical="true"-->
            <!--android:layout_toRightOf="@id/portrait"-->
            <!--/>-->

    <!--</RelativeLayout>-->

    <TextView
        android:layout_width="match_parent"
        android:layout_height="1dp"
        android:background="@color/gray_light"/>

    <LinearLayout
        android:layout_width="match_parent"
        android:layout_height="wrap_content"
        android:orientation="horizontal">

        <RelativeLayout
            android:layout_width="0dp"
            android:layout_weight="1"
            android:layout_height="wrap_content">
            <Button
                android:id="@+id/upload"
                style="@style/button_normal"
                android:text="@string/button_upload"
                android:layout_centerInParent="true"
                android:onClick="uploadImage"
                />
        </RelativeLayout>

    </LinearLayout>

    <TextView
        android:layout_width="match_parent"
        android:layout_height="1dp"
        android:background="@color/gray_light"/>

    <TextView
        style="@style/navi_text"
        android:text="@string/hat"/>

    <com.yaya.summerhat.element.MyListView
        android:id="@+id/hat_list"
        android:layout_width="match_parent"
        android:layout_height="wrap_content">

    </com.yaya.summerhat.element.MyListView>


</LinearLayout>
2.编写每个项目的布局文件item_hat.
<?xml version="1.0" encoding="utf-8"?>
<RelativeLayout xmlns:android="http://schemas.android.com/apk/res/android"
    android:layout_width="match_parent"
    android:layout_height="wrap_content">

    <ImageView
        android:id="@+id/gift_pic"
        android:layout_width="100dp"
        android:layout_height="100dp"
        android:background="#ffffff"/>

    <TextView
        android:id="@+id/gift_desc"
        style="@style/gift_desc"
        android:layout_toRightOf="@id/gift_pic"
        android:text="@string/gift_desc"
        />

    <TextView
        android:layout_width="match_parent"
        android:layout_height="1sp"
        android:background="@color/gray_light"
        android:layout_below="@id/gift_pic"/>
</RelativeLayout>
3.在HatFragment中引入fragment_hat资源文件,贴出OnCreatView方法
@Override
    public View onCreateView(LayoutInflater inflater, ViewGroup container,
                             Bundle savedInstanceState) {
        View v = inflater.inflate(R.layout.fragment_hat, container, false);
        hats = (MyListView) v.findViewById(R.id.hat_list);
        upload = (Button) v.findViewById(R.id.upload);

        upload.setOnClickListener(new View.OnClickListener() {
            @Override
            public void onClick(View view) {
                startActivity(new Intent(getActivity(),UploadActivity.class));
            }
        });
        initData();
        hatsAdapter = new HatsAdapter();
        hats.setAdapter(hatsAdapter);
        hats.setOnItemClickListener(new AdapterView.OnItemClickListener() {
            @Override
            public void onItemClick(AdapterView<?> adapterView, View view, int i, long l) {
                startActivity(new Intent(getActivity(), HatsActivity.class));
            }
        });
        return v;
    }
4.定义一个JavaBeans,记录Hat的各项信息
public class HatBeans {

    private String description;
    private int picture;
    private int state;

    public HatBeans(String description,int state){
        this.description=description;
        this.state=state;
    }

    public HatBeans(String description,int picture,int state){
        this.description=description;
        this.picture=picture;
        this.state=state;
    }

    public String getDescription() {
        return description;
    }

    public void setDescription(String description) {
        this.description = description;
    }

    public int getPicture() {
        return picture;
    }

    public void setPicture(int picture) {
        this.picture = picture;
    }

    public int getState(){
        return this.state;
    }

    public void setState(int state){
        this.state=state;
    }
}
5.自定义HatsAdapter,继承BaseAdapter,重写四个方法
public class HatsAdapter extends BaseAdapter {


        @Override
        public int getCount() {
            return hatList.size();
        }

        @Override
        public Object getItem(int i) {
            return hatList.get(i);
        }

        @Override
        public long getItemId(int i) {
            return i;
        }

        @Override
        public View getView(int i, View convertView, ViewGroup viewGroup) {
            HatBeans hatBeans = hatList.get(i);
            View view;
            ViewHolder viewHolder;
            if (convertView == null) {
                view = LayoutInflater.from(getActivity()).inflate(R.layout.item_hat, null);
                viewHolder = new ViewHolder();
                viewHolder.picture = (ImageView) view.findViewById(R.id.hat_pic);
                viewHolder.description = (TextView) view.findViewById(R.id.hat_desc);
                viewHolder.state = (TextView) view.findViewById(R.id.hat_state);
                view.setTag(viewHolder);
            } else {
                view = convertView;
                viewHolder = (ViewHolder) view.getTag();
            }


            viewHolder.picture.setImageResource(R.drawable.pic_launcher);
            viewHolder.description.setText(hatBeans.getDescription());

            int state = hatBeans.getState();
            if (state == HAT_STATE_AUCTIONED)
                viewHolder.state.setText(R.string.state_auctioned);
            else if (state == HAT_STATE_AUCTIONING)
                viewHolder.state.setText(R.string.state_auctioning);
            else if (state == HAT_STATE_SHOW)
                viewHolder.state.setText(R.string.state_show);

            return view;
        }
    }

    class ViewHolder {
        ImageView picture;
        TextView description;
        TextView state;
}6.关于ListView,当屏幕不够大时,仅仅ListView部分会发生滚动,这个界面看起来不够完整。我希望得到的效果是,除底部导航栏外所有组件一起滚动。
①可以用ScrollView实现我期待的效果,需要注意的是ScrollView只能直接包含一个组件,我们要将所有参与滚动的组件扔到一个LinearLayout中,并将其的orientation设置为vertical.
②当ScrollView中包含ListView时,我们会遇到一个坑,就是ListView部分只显示一个条目。这时候一个解决办法是重写MyListView继承ListView,,重写OnMeasure方法。注意的是layout和Fragment中保持一致,使用MyListView.
public class MyListView extends ListView{

    public MyListView(Context context) {
        super(context);
    }
    public MyListView(Context context, AttributeSet attrs) {
        super(context, attrs);
    }
    public MyListView(Context context, AttributeSet attrs,
                                 int defStyle) {
        super(context, attrs, defStyle);
    }
    @Override
    protected void onMeasure(int widthMeasureSpec, int heightMeasureSpec) {
        int expandSpec = MeasureSpec.makeMeasureSpec(Integer.MAX_VALUE >> 2,
                MeasureSpec.AT_MOST);
        super.onMeasure(widthMeasureSpec, expandSpec);
    }
}
③还有一个问题是,ScrollView会自动定位到第一个ListView条目(显示在顶端)。所以其上部组件被挤到屏幕外,解决这个问题有两种方法,
a.将其上部写入ListView中,设置为固定的部分。
b.在代码中重新设置ScrollView的位置,
scrollView = (ScrollView) findViewById(R.id.scrollView);
scrollView.smoothScrollTo(0, 0);


 158
158

 被折叠的 条评论
为什么被折叠?
被折叠的 条评论
为什么被折叠?
 到【灌水乐园】发言


