


Spring MVC异常处理有三种方式:
(1).使用SpringMVC提供的简单异常处理器SimpleMappingExceptionResolver;
(2).实现Spring的异常处理接口HandlerExceptionResolver自定义自己的异常处理器;
(3).使用@ExceptionHandler注解实现异常处理。
这里写了一个SimpleMappingExceptionResolver处理器来处理异常的例子:
首先是springmvc的配置文件:
<?xml version="1.0" encoding="UTF-8"?>
<beans xmlns="http://www.springframework.org/schema/beans"
        xmlns:xsi="http://www.w3.org/2001/XMLSchema-instance" xmlns:p="http://www.springframework.org/schema/p"
        xmlns:context="http://www.springframework.org/schema/context"
        xmlns:mvc="http://www.springframework.org/schema/mvc"
        xsi:schemaLocation="http://www.springframework.org/schema/beans http://www.springframework.org/schema/beans/spring-beans.xsd
        http://www.springframework.org/schema/mvc http://www.springframework.org/schema/mvc/spring-mvc-4.0.xsd
        http://www.springframework.org/schema/context http://www.springframework.org/schema/context/spring-context.xsd">

    <!-- 扫描注解的驱动 -->
        <mvc:annotation-driven />
        <!-- 设置扫描包 -->
        <context:component-scan base-package="com.springmvc.controllers" />

        <bean
                class="org.springframework.web.servlet.handler.SimpleMappingExceptionResolver">
                <!-- 定义默认的异常处理页面 -->
                <property name="defaultErrorView" value="error"></property>
                <!-- 定义异常处理页面用来获取异常信息的变量名 -->
                <property name="exceptionAttribute" value="ex"></property>
                <!-- 定义需要特殊处理的异常,用类名或者完全路径作为key,异常页面名作为值 -->
                <property name="exceptionMappings">
                        <props>
                                <prop key="com.springmvc.exception.MyException">my-error</prop>
                        </props>
                </property>
        </bean>

        <!-- 视图解析器 -->
        <bean id="jspViewResolver"
                class="org.springframework.web.servlet.view.InternalResourceViewResolver">
                <!-- 前缀 -->
                <property name="prefix" value="/WEB-INF/jsp/" />
                <!-- 后缀 -->
                <property name="suffix" value=".jsp" />
        </bean>
</beans>
package com.springmvc.controllers;

import javax.servlet.http.HttpServletRequest;
import javax.servlet.http.HttpServletResponse;
import org.springframework.stereotype.Controller;
import org.springframework.web.bind.annotation.RequestMapping;
import org.springframework.web.bind.annotation.RequestMethod;
import org.springframework.web.servlet.ModelAndView;
import com.springmvc.exception.MyException;
import com.springmvc.pojo.User;

@Controller("annotationcontroller")
@RequestMapping("/annotation/") //设置请求路径
public class AnnotationController {
        //url=====>>>>>/annotation/index 执行该方法
        @RequestMapping("index")
        public ModelAndView index(HttpServletRequest request,HttpServletResponse response) {
                System.out.println("**********annotation——index***********");
                return new ModelAndView("other");
        }
        @RequestMapping("exception")
        public String error(HttpServletRequest request) throws Exception {
                System.out.println("**********annotation——exception***********");
                String errorName = request.getParameter("errorName");
                if("myexception".equals(errorName)) {
                        throw new MyException(" -------------input myexception---------- ");
                }else if("defaultexception".equals(errorName)) {
                        throw new Exception("-------------input defaultexception----------");
                }
                return "";
        }
}
public class MyException extends Exception {
	public MyException() {}

	public MyException(String msg) {
		super(msg);
	}

	public MyException(String msg,Throwable th) {
		super(msg,th);
	}
}
然后是工程中欢迎页面进行了一次转发:
<%response.sendRedirect("annotation/index");%>
执行控制器中的index方法,跳转到/WEB-INF/jsp/目录下的other.jsp页面:
<body>
	------------------Exception------------------------
	<form action="exception" method="post">
		ExceptionName:<input  name="errorName"/><br>
		<input type="submit" value="提交" />
	</form>
</body>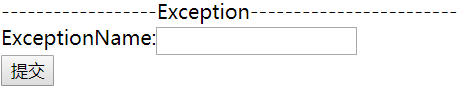
输入myexception,执行控制器中的error方法,并且throw new MyException("-------------input myexception---------- ");
跳转到/WEB-INF/jsp/目录下的my-error.jsp页面:
<body>
	<h1>my-error!</h1>
	<h1>error:${ex.message }</h1>
</body>
输入defaultexception,提交,并且throw newException("-------------input defaultexception----------");
跳转到/WEB-INF/jsp/目录下的error.jsp页面:
<body>
	<h1>Error!</h1>
	<h1>error:${ex.message }</h1>
</body>


 220
220

 被折叠的 条评论
为什么被折叠?
被折叠的 条评论
为什么被折叠?
 到【灌水乐园】发言


