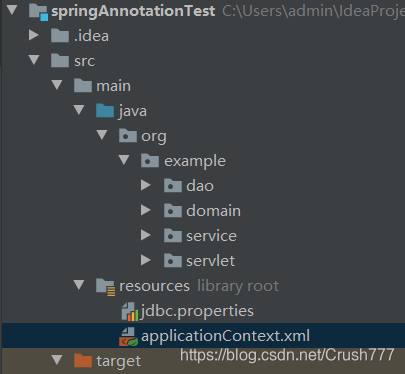
一、目录结构(xml配置下)
二、代码编写及xml配置
1、创建User类
package org.example.domain;

public class User {
    private String name;
    private int age;

    public String getName() {
        return name;
    }

    public void setName(String name) {
        this.name = name;
    }

    public int getAge() {
        return age;
    }

    public void setAge(int age) {
        this.age = age;
    }

    @Override
    public String toString() {
        return "User{" +
                "name='" + name + '\'' +
                ", age=" + age +
                '}';
    }
}
2、创建UserDao接口及其实现类
package org.example.dao;

import org.example.domain.User;

public interface UserDao {
    public User getUser();
}
创建User属性为了注入user对象 (使用setter方法注入)
package org.example.dao.impl;

import org.example.dao.UserDao;
import org.example.domain.User;

public class UserDaoImpl implements UserDao {

    private User user;

    public void setUser(User user) {
        this.user = user;
    }

    @Override
    public User getUser() {
        return user;
    }
}
3、创建UserService接口及其实现
package org.example.service;

import org.example.domain.User;

public interface UserService {

    public User getUser();
}
同上,创建UserDao属性也是为了将UserDaoImpl注入到UserServiceImpl中,这在后面的applicationContext.xml文件中有体现
package org.example.service.impl;

import org.example.dao.UserDao;
import org.example.domain.User;
import org.example.service.UserService;

public class UserServiceImpl implements UserService {
    private UserDao userDao;

    public void setUserDao(UserDao userDao) {
        this.userDao = userDao;
    }

    @Override
    public User getUser() {
        return userDao.getUser();
    }
}
4、配置applicationContext.xml文件
<?xml version="1.0" encoding="UTF-8"?>
<beans xmlns="http://www.springframework.org/schema/beans"
       xmlns:xsi="http://www.w3.org/2001/XMLSchema-instance"
       xmlns:context="http://www.springframework.org/schema/context"
       xsi:schemaLocation="http://www.springframework.org/schema/beans http://www.springframework.org/schema/beans/spring-beans.xsd
                           http://www.springframework.org/schema/context http://www.springframework.org/schema/context/spring-context.xsd">

    <bean id="user" class="org.example.domain.User">
        <property name="name" value="赵晴"></property>
        <property name="age" value="20"></property>
    </bean>
    <bean id="userDao" class="org.example.dao.impl.UserDaoImpl">
        <property name="user" ref="user"></property>
    </bean>
    <bean id="userService" class="org.example.service.impl.UserServiceImpl">
        <property name="userDao" ref="userDao"></property>
    </bean>
    <!--配置组件扫描-->
    <context:component-scan base-package="org.example"></context:component-scan>

</beans>
5、测试运行、由于测试项目的环境不是真实web项目,所以没有真实的web层,因此测试使用的假web层(仅仅只是包名为web层而已)
package org.example.servlet;

import org.example.domain.User;
import org.example.service.UserService;
import org.junit.Test;
import org.springframework.context.ApplicationContext;
import org.springframework.context.support.ClassPathXmlApplicationContext;

public class ServletTest {
    @Test
    public void test1(){
        ApplicationContext app =new ClassPathXmlApplicationContext("applicationContext.xml");
        UserService userService = app.getBean(UserService.class);
        User user = userService.getUser();
        System.out.println(user);
    }
}
6、测试结果如下
User{name='赵晴', age=20}
三、将其替换为全注解配置
1、User对象
package org.example.domain;

import org.springframework.beans.factory.annotation.Value;
import org.springframework.stereotype.Component;

@Component("user")
public class User {
    @Value("猪头")
    private String name;
    @Value("20")
    private int age;

    public String getName() {
        return name;
    }

    public void setName(String name) {
        this.name = name;
    }

    public int getAge() {
        return age;
    }

    public void setAge(int age) {
        this.age = age;
    }

    @Override
    public String toString() {
        return "User{" +
                "name='" + name + '\'' +
                ", age=" + age +
                '}';
    }
}
2、UserDaoImpl类
package org.example.dao.impl;

import org.example.dao.UserDao;
import org.example.domain.User;
import org.springframework.beans.factory.annotation.Autowired;
import org.springframework.beans.factory.annotation.Qualifier;
import org.springframework.stereotype.Repository;

@Repository("userDao")  //持久层注解,相当于<bean id="userDao" class="org.example.dao.impl.UserDaoImpl">
public class UserDaoImpl implements UserDao {

    @Autowired //按照数据类型从spring容器中进行匹配的
    @Qualifier("user")//是按照id值从容器中进行匹配的,但是此处Qualifier要结合Autowired一起使用
    private User user;


    @Override
    public User getUser() {
        return user;
    }
}
3、UserServiceImpl类
package org.example.service.impl;

import org.example.dao.UserDao;
import org.example.domain.User;
import org.example.service.UserService;
import org.springframework.beans.factory.annotation.Autowired;
import org.springframework.beans.factory.annotation.Qualifier;
import org.springframework.stereotype.Service;

@Service("userService")
public class UserServiceImpl implements UserService {
    @Autowired
    @Qualifier("userDao")//相当于<property name="userDao" ref="userDao"></property>
    private UserDao userDao;

    @Override
    public User getUser() {
        return userDao.getUser();
    }
}
4、在example目录下创建一个config文件夹,在config文件夹中创建SpringConfiguration.class以及DataSourceConfiguration.class
package org.example.config;

import org.springframework.context.annotation.ComponentScan;
import org.springframework.context.annotation.Configuration;
import org.springframework.context.annotation.Import;

@Configuration //标志该类是spring的核心配置类
@ComponentScan("org.example")//配置组件扫描 其功能相当于xml文件中的<context:component-scan base-package="org.example"></context:component-scan>
@Import(DataSourceConfiguration.class) //导入其他配置,相当于xml中的<import resource=" "></import>
public class SpringConfiguration {

}
package org.example.config;

import org.springframework.context.annotation.PropertySource;

@PropertySource("classpath:jdbc.properties")
public class DataSourceConfiguration {
}
5、测试代码
package org.example.servlet;

import org.example.config.SpringConfiguration;
import org.example.domain.User;
import org.example.service.UserService;
import org.junit.Test;
import org.springframework.context.ApplicationContext;
import org.springframework.context.annotation.AnnotationConfigApplicationContext;
import org.springframework.context.support.ClassPathXmlApplicationContext;

public class ServletTest {
    @Test
    public void test1(){
        ApplicationContext app =new ClassPathXmlApplicationContext("applicationContext.xml");
        UserService userService = app.getBean(UserService.class);
        User user = userService.getUser();
        System.out.println(user);
    }

    @Test
    public void test2(){
        ApplicationContext app = new AnnotationConfigApplicationContext(SpringConfiguration.class);
        UserService userService = (UserService) app.getBean("userService");
        User user = userService.getUser();
        System.out.println(user);
    }
}
6、test2的运行结果
User{name='猪头', age=20}
四、内容不全,正在完善中!


 4966
4966


 被折叠的 条评论
为什么被折叠?
被折叠的 条评论
为什么被折叠?
 到【灌水乐园】发言


