


自定义控件—入门
重点内容想从android初级开发人员到中高级开发人员,其中android自定义控件是必须经历的一步。下面我们一起走进这个陌生而令人兴奋的领域。
android中自定控件分为三种:
- 1.对现有的控件进行拓展,常见的有特殊的Button,Textview,下拉刷新的listview等。
- 2.创建复合型控件,由几个基础控件组合在一起,常用于解决组合控件复用,常见有界面顶部栏。
- 3.重新view实现全新的控件,这里相比于前两个难度大一点,但是也最有趣。
下面我们一步步来实现每一种:
 开始之前,我们先了解下view中常用的方法:
          onFinishInflate():从xml加载组件后回调
          onSizeChanged():组件大小改变时回调
          onMeasure():回调该方法进行测量
          onLayout():    回调该方法来确定显示的位置
          onTouchEvent():监听到触摸事件回调
          onDraw():绘图
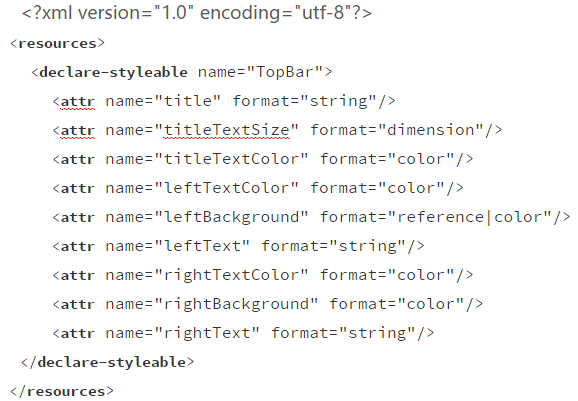
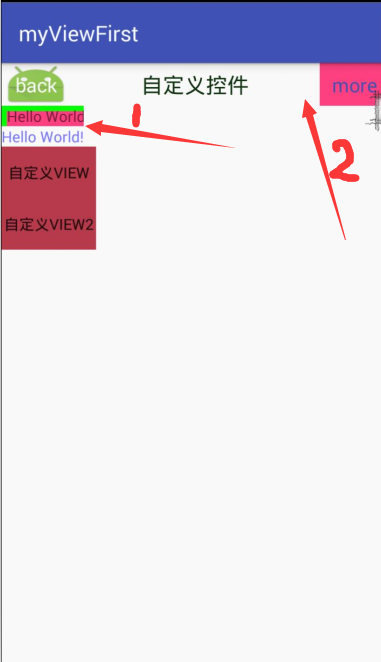
1.对现有控件拓展,主要使用 onDraw() 方法,我们实现自定义 Textview,为其加背景颜色
创建类继承Textview,实现构造方法,initview()方法在构造方法中负责初始化
public MyTextView(Context context) {
super(context);
initview();
}
public MyTextView(Context context, AttributeSet attrs) {
super(context, attrs);
initview();
}
public MyTextView(Context context, AttributeSet attrs, int defStyleAttr) {
super(context, attrs, defStyleAttr);
initview();
}
/**
*初始化控件
*/
public void initview(){
paint = new Paint();
paint.setColor(Color.GREEN);
paint.setStyle(Paint.Style.FILL);
paint2 = new Paint();
paint2.setColor(getResources().getColor(R.color.colorAccent));
paint2.setStyle(Paint.Style.FILL);
}
- 重写onDraw()方法
@Override
protected void onDraw(Canvas canvas) {
canvas.drawRect(0,0,getMeasuredWidth(),getMeasuredHeight(),paint);
canvas.drawRect(10,10,getMeasuredWidth(),getMeasuredHeight(),paint2);
canvas.save();
canvas.translate(10,0);
super.onDraw(canvas);
canvas.restore();
}- 效果展示 图中1

2.创建组合控件
- 首先在res/values目录下,创建attrs.xml属性文件,定义相应的属性
- 其次创建类继承ViewGroup,这里我们继承RelativeLayout,实现构造方法,initview()方法在构造方法中负责初始化,获取定义的属性值
public TopBar(Context context) {
super(context);
}
public TopBar(Context context, AttributeSet attrs) {
super(context, attrs);
init(context,attrs);
}
public TopBar(Context context, AttributeSet attrs, int defStyleAttr) {
    super(context, attrs, defStyleAttr);
    init(context,attrs);
}

private void init(Context con,AttributeSet attrs) {
    //获取所有属性值集合,并分别获取各个属性
    typedArray = con.obtainStyledAttributes(attrs, R.styleable.TopBar);
    mleftbackground = typedArray.getDrawable(R.styleable.TopBar_leftBackground);
    mleftcolor = typedArray.getColor(R.styleable.TopBar_leftTextColor, 0);
    leftText = typedArray.getString(R.styleable.TopBar_leftText);
    righttextcolor = typedArray.getColor(R.styleable.TopBar_rightTextColor, 0);
    rightbackgrout = typedArray.getDrawable(R.styleable.TopBar_rightBackground);
    righttext = typedArray.getString(R.styleable.TopBar_rightText);
    tilesize = typedArray.getDimension(R.styleable.TopBar_titleTextSize, 10);
    titletextcolor = typedArray.getColor(R.styleable.TopBar_titleTextColor, 0);
    title = typedArray.getString(R.styleable.TopBar_title);
    typedArray.recycle(); //资源回收
    //为控件设置属性
    mleftButton = new Button(con);
    mrightButton = new Button(con);
    mTitleview = new TextView(con);
    mleftButton.setTextColor(mleftcolor);
    mleftButton.setBackground(mleftbackground);
    mleftButton.setText(leftText);
    mrightButton.setTextColor(righttextcolor);
    mrightButton.setBackground(rightbackgrout);
    mrightButton.setText(righttext);
    mTitleview.setText(title);
    mTitleview.setTextColor(titletextcolor);
    mTitleview.setTextSize(tilesize);
    mTitleview.setGravity(Gravity.CENTER);
    //为控件定义布局
    leftParams = new LayoutParams(ViewGroup.LayoutParams.WRAP_CONTENT, ViewGroup.LayoutParams.MATCH_PARENT);
    leftParams.addRule(RelativeLayout.ALIGN_PARENT_LEFT,TRUE);
    addView(mleftButton, leftParams);
    rightParams = new LayoutParams(ViewGroup.LayoutParams.WRAP_CONTENT, ViewGroup.LayoutParams.MATCH_PARENT);
    rightParams.addRule(RelativeLayout.ALIGN_PARENT_RIGHT,TRUE);
    addView(mrightButton, rightParams);
    titleParams = new LayoutParams(ViewGroup.LayoutParams.WRAP_CONTENT, ViewGroup.LayoutParams.MATCH_PARENT);
    titleParams.addRule(RelativeLayout.CENTER_IN_PARENT,TRUE);
    addView(mTitleview, titleParams);
    //控件点击事件
    mleftButton.setOnClickListener(new OnClickListener() {
        @Override
        public void onClick(View view) {
            listener.leftClick();
        }
    });
    mrightButton.setOnClickListener(new OnClickListener() {
        @Override
        public void onClick(View view) {
            listener.leftClick();
        }
    });
}
- 为控件设置回调事件,在使用界面可操作
定义接口
public interface topbarClickListener{
void leftClick();
void rightClick();
}
topbarClickListener listener;
回调方法:
public void setOnTopbarClickListener(topbarClickListener listener){
this.listener=listener;
}
Activity调用:
bar.setOnTopbarClickListener(new TopBar.topbarClickListener() {
@Override
public void leftClick() {
        }

        @Override
        public void rightClick() {

        }
    });
- 引用模版
自定义属性命名空间
xmlns:custom=”http://schemas.android.com/apk/res-auto”
引用
《 testsqileandcontentprovider.siqiyan.com.myviewfirst.view.TopBar
android:id=”@+id/dd”
android:layout_width=”match_parent”
android:layout_height=”40dp”
custom:leftBackground=”@mipmap/ic_launcher”
custom:leftText=”back”
custom:leftTextColor=”#ffffff”
custom:rightBackground=”@color/colorAccent”
custom:rightText=”more”
custom:rightTextColor=”@color/colorPrimary”
custom:title=”自定义控件”
custom:titleTextColor=”#123412”
custom:titleTextSize=”10dp”
/>: 效果展示 图中2
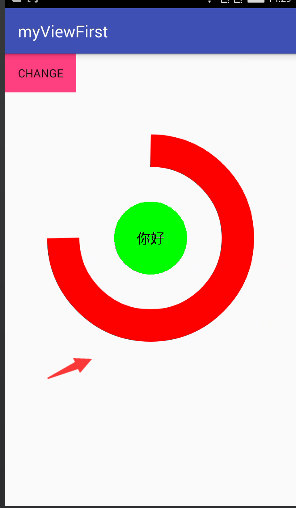
3.重写view,主要用到onDraw(),onSizechanged()方法,onsizechange方法早于onDraw()方法执行
- 创建类继承View,实现构造方法,initview()方法在构造方法中负责初始化
public Myview(Context context) {
super(context);
init();
}public Myview(Context context, AttributeSet attrs) {
super(context, attrs);
init();
}public Myview(Context context, AttributeSet attrs, int defStyleAttr) {
super(context, attrs, defStyleAttr);
init();
}
private void init() {
paint = new Paint();
paint.setColor(Color.GREEN);
paint2 = new Paint();
paint2.setColor(Color.RED);
paint2.setAntiAlias(true); //设置画笔为无锯齿
//白色背景
paint2.setStrokeWidth((float) 80.0); //线宽
paint2.setStyle(Paint.Style.STROKE);
paint3 = new Paint();
paint3.setColor(Color.BLACK);
paint3.setTextSize(35);
//获取屏幕宽度
wm = (WindowManager) getContext()
.getSystemService(Context.WINDOW_SERVICE);
width = wm.getDefaultDisplay().getWidth();
circlexy = width/2;//圆心
cirRadius = (float) (width*0.5/4);//半径
mRectF = new RectF((float) (width*0.2),(float) (width*0.2),(float) (width*0.8),(float) (width*0.8));//外接矩形
}
- 重写onDraw()方法
@Override
protected void onDraw(Canvas canvas) {
super.onDraw(canvas);
canvas.drawCircle(circlexy,circlexy,cirRadius,paint);//画圆
canvas.drawArc(mRectF,270,270,false,paint2);//画弧形
canvas.drawText(title,0,title.length(),circlexy-35,circlexy+13,paint3);//画text
}- 效果如图
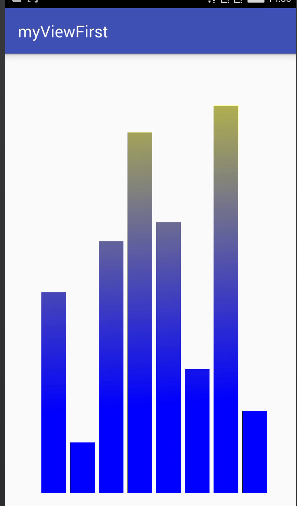
另外还写了一个详细参考源码:


 被折叠的 条评论
为什么被折叠?
被折叠的 条评论
为什么被折叠?
 到【灌水乐园】发言


