Ajax流程图:

一:GET请求
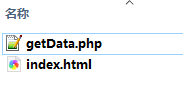
目录结构

index.html
<html>
<head>
<meta charset="utf-8">
<title>get请求数据</title>
</head>
<body>

<input type="button" value="get数据" />
<h3></h3>


</body>

</html>

<script>
  //点击事件
  document.querySelector('input').onclick = function(){
	//1.创建对象
	var xhr = new XMLHttpRequest();

	//2. 设置请求行
	xhr.open('get','getData.php?name=Daisy&skill=learn');

	//3.设置请求头(get可以省略)

	//3.5注册回调函数
	xhr.onload = function(){
		//获取数据
		console.log(xhr.responseText);

		//修改页面dom元素
		document.querySelector('h3').innerHTML = xhr.responseText;

	}

	//4. 请求主体 ( get请求为空 , 或者写 null , post请求数据写在这里,如果没有数据,直接为空或者null )

	xhr.send(null);


  }

</script>
getData.php:
<?php

print_r($_GET);

sleep(2);
运行界面

案例:检测用户名是否存在
思路:

index.html
<html>
<head>
<meta charset="utf-8">
<title>账户注册</title>
</head>
<body>
<h2>用户注册</h2>
<input type="text" placeholder= "请输入用户名" />
<h3></h3>


</body>

</html>

<script>
  //点击事件
  document.querySelector('input').onblur = function(){
	//1.创建对象
	var xhr = new XMLHttpRequest();

	//2. 设置请求行
	xhr.open('get','checkName.php?name='+this.value);

	//3.设置请求头(get可以省略)

	//3.5注册回调函数
	xhr.onload = function(){
		//获取数据
		console.log(xhr.responseText);

		//修改页面dom元素
		document.querySelector('h3').innerHTML = xhr.responseText;

	}

	//4. 请求主体 ( get请求为空 , 或者写 null , post请求数据写在这里,如果没有数据,直接为空或者null )

	xhr.send(null);


  }

</script>
checkName.php
<?php

$name = $_GET['name'];
//假数据
$nameArr = array('jack','rose');
//判断是否存在
$result = in_array($name , $nameArr);

if( $result ){
	echo "有人注册了,换一个吧";
}else{
	echo "还没人注册,赶快注册哦";
}
运行结果


二:POST请求
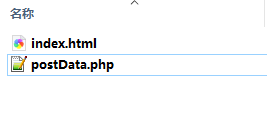
目录结构:

注意: post请求 1.需要添加请求头 2.数据添加在send中
index.html
<html>
<head>
<meta charset="utf-8">
<title>post请求数据</title>
</head>
<body>
<h2>post请求数据</h2>
<input type="button" value="post数据" />
<h3></h3>


</body>

</html>

<script>
  //点击事件
  document.querySelector('input').onclick = function(){
	//1.创建对象
	var xhr = new XMLHttpRequest();

	//2. 设置请求行
	xhr.open('post','postData.php');

	//3.设置请求头(get可以省略)
	xhr.setRequestHeader("Content-type","application/x-www-form-urlencoded")

	//3.5注册回调函数
	xhr.onload = function(){
		//获取数据
		console.log(xhr.responseText);

		//修改页面dom元素
		document.querySelector('h3').innerHTML = xhr.responseText;

	}

	//4. 请求主体 ( get请求为空 , 或者写 null , post请求数据写在这里,如果没有数据,直接为空或者null )
	//post请求发送数据 写在send中
	// 格式   key=value&key2=value2

	xhr.send('name=Daisy&friend=daisy');


  }

</script>
运行结果:


 2958
2958


 被折叠的 条评论
为什么被折叠?


