


现在比较多的互联网公司都在尝试将微服务迁到云上,这样的能够通过一些成熟的云容器管理平台更为方便地管理微服务集群,从而提高微服务的稳定性,同时也能较好地提升团队开发效率。但是迁云存在一定的技术难点,今天这篇文章主要介绍如何从0开始搭建一套基于K8s部署的SpringBoot案例教程。
基础环境准备:
- mac操作系统
- SpringBoot的简单Web工程
minikube的环境搭建
安装一个适合我们初级入门的k8s环境,比较好的推荐是使用minikube工具,同时使用该工具可以更好地降低我们对k8s的学习门槛。
首先我们需要下载minikube文件:
curl -Lo minikube https://github.com/kubernetes/minikube/releases/download/v1.5.0/minikube-linux-amd64 && chmod +x minikube && sudo mv minikube /usr/local/bin/
在安装minikube的时候,尝试下载镜像的时候可能会卡住,例如出现下边的这类异常:
【idea @ Mac】>>>>>>minikube start --registry-mirror=https://w4i0ckag.mirror.aliyuncs.com
😄  Darwin 10.15.3 上的 minikube v1.16.0
✨  根据现有的配置文件使用 docker 驱动程序
👍  Starting control plane node minikube in cluster minikube
🚜  Pulling base image ...


E0126 17:03:30.131026   34416 cache.go:180] Error downloading kic artifacts:  failed to download kic base image or any fallback image
🔥  Creating docker container (CPUs=2, Memory=1988MB) ...

🤦  StartHost failed, but will try again: creating host: create: creating: setting up container node: preparing volume for minikube container: docker run --rm --entrypoint /usr/bin/test -v minikube:/var gcr.io/k8s-minikube/kicbase:v0.0.15-snapshot4@sha256:ef1f485b5a1cfa4c989bc05e153f0a8525968ec999e242efff871cbb31649c16 -d /var/lib: exit status 125
stdout:

stderr:
Unable to find image 'gcr.io/k8s-minikube/kicbase:v0.0.15-snapshot4@sha256:ef1f485b5a1cfa4c989bc05e153f0a8525968ec999e242efff871cbb31649c16' locally
docker: Error response from daemon: Get https://gcr.io/v2/: net/http: request canceled while waiting for connection (Client.Timeout exceeded while awaiting headers).
See 'docker run --help'.

🤷  docker "minikube" container is missing, will recreate.

🔥  Creating docker container (CPUs=2, Memory=1988MB) ...
😿  Failed to start docker container. Running "minikube delete" may fix it: recreate: creating host: create: creating: setting up container node: preparing volume for minikube container: docker run --rm --entrypoint /usr/bin/test -v minikube:/var gcr.io/k8s-minikube/kicbase:v0.0.15-snapshot4@sha256:ef1f485b5a1cfa4c989bc05e153f0a8525968ec999e242efff871cbb31649c16 -d /var/lib: exit status 125
stdout:

stderr:
Unable to find image 'gcr.io/k8s-minikube/kicbase:v0.0.15-snapshot4@sha256:ef1f485b5a1cfa4c989bc05e153f0a8525968ec999e242efff871cbb31649c16' locally
docker: Error response from daemon: Get https://gcr.io/v2/: net/http: request canceled while waiting for connection (Client.Timeout exceeded while awaiting headers).
See 'docker run --help'.


❌  Exiting due to GUEST_PROVISION: Failed to start host: recreate: creating host: create: creating: setting up container node: preparing volume for minikube container: docker run --rm --entrypoint /usr/bin/test -v minikube:/var gcr.io/k8s-minikube/kicbase:v0.0.15-snapshot4@sha256:ef1f485b5a1cfa4c989bc05e153f0a8525968ec999e242efff871cbb31649c16 -d /var/lib: exit status 125
stdout:

stderr:
Unable to find image 'gcr.io/k8s-minikube/kicbase:v0.0.15-snapshot4@sha256:ef1f485b5a1cfa4c989bc05e153f0a8525968ec999e242efff871cbb31649c16' locally
docker: Error response from daemon: Get https://gcr.io/v2/: net/http: request canceled while waiting for connection (Client.Timeout exceeded while awaiting headers).
See 'docker run --help'.


😿  If the above advice does not help, please let us know:
👉  https://github.com/kubernetes/minikube/issues/new/choose
此时可以尝试先在宿主机上安装好对应的镜像文件:
docker pull anjone/kicbase
然后minikube在启动的时候使用本地的镜像,这样可以减少minikube start过程的耗时。
minikube下载了之后便到了启动环节:
minikube start --vm-driver=docker --base-image="anjone/kicbase"
如果启动失败,不妨试试更换指定的镜像仓库,例如下边这段:
minikube start
--registry-mirror=https://bmtb46e4.mirror.aliyuncs.com
--vm-driver=docker
--base-image="anjone/kicbase"
--image-repository=registry.cn-hangzhou.aliyuncs.com/google_containers
这里头我大概介绍一下启动参数的含义:
–registry-mirror 这里的地址会和启动的minikube内部的docker.daemon文件中所指向的镜像仓库地址一致。
–vm-driver 虚拟机引擎 这里是指minikube的内部通过docker来作为核心
–base-image 声明好基础镜像,如果宿主机内部有对应镜像,就不需要额外拉取
–image-repository 拉取镜像的仓库
当minikube启动成功之后,大致如下所示:
【idea @ Mac】>>>>>>minikube start --vm-driver=docker --base-image="anjone/kicbase"
😄  Darwin 10.15.3 上的 minikube v1.16.0
✨  根据现有的配置文件使用 docker 驱动程序
👍  Starting control plane node minikube in cluster minikube
🤷  docker "minikube" container is missing, will recreate.
🔥  Creating docker container (CPUs=2, Memory=1988MB) ...
❗  This container is having trouble accessing https://k8s.gcr.io
💡  To pull new external images, you may need to configure a proxy: https://minikube.sigs.k8s.io/docs/reference/networking/proxy/
🐳  正在 Docker 19.03.2 中准备 Kubernetes v1.20.0…
    ▪ Generating certificates and keys ...
    ▪ Booting up control plane ...\

    ▪ Configuring RBAC rules ...
🔎  Verifying Kubernetes components...
🌟  Enabled addons: default-storageclass
🏄  Done! kubectl is now configured to use "minikube" cluster and "default" namespace by default
【idea @ Mac】>>>>>>
好了,接下来便到了部署SpringBoot应用的部分了。
基于SpringBoot部署到k8s中
首先我们需要搭建一个简单的SpringBoot应用:
引入dependency依赖
<dependencies>
    <dependency>
        <groupId>org.springframework.boot</groupId>
        <artifactId>spring-boot-starter-web</artifactId>
    </dependency>
</dependencies>
打包docker镜像的配置:
<build>
    <finalName>打包出来的镜像名称</finalName>
    <plugins>
        <plugin>
            <groupId>org.springframework.boot</groupId>
            <artifactId>spring-boot-maven-plugin</artifactId>
            <version>2.2.5.RELEASE</version>
        </plugin>
        <!-- Docker maven plugin -->
        <plugin>
            <groupId>com.spotify</groupId>
            <artifactId>docker-maven-plugin</artifactId>
            <version>1.0.0</version>
            <configuration>
                <imageName>${project.artifactId}</imageName>
                <imageTags>
                    <tag>1.0.1</tag>
                </imageTags>
                <dockerDirectory>src/main/docker</dockerDirectory>
                <resources>
                    <resource>
                        <targetPath>/</targetPath>
                        <directory>${project.build.directory}</directory>
                        <include>${project.build.finalName}.jar</include>
                    </resource>
                </resources>
            </configuration>
        </plugin>
        <!-- Docker maven plugin -->
    </plugins>
</build>
接着是简单的controller和启动类:
@RestController
@RequestMapping(value = "/test")
public class TestController {

    @GetMapping(value = "/do-test")
    public String doTest(){
        System.out.println("this is a test");
        return "success";
    }
}

@SpringBootApplication
public class WebApplication {

    public static void main(String[] args) {
        SpringApplication.run(WebApplication.class);
    }
}
编写Dockerfile的脚本:
FROM openjdk:8-jdk-alpine
VOLUME /tmp
#将springboot-k8s-template.jar复制到容器内部 并且别名叫springboot-k8s-template-v1.jar
ADD springboot-k8s-template.jar springboot-k8s-template-v1.jar
#相当于在容器中用cmd命令执行jar包  指定外部配置文件
ENTRYPOINT ["java","-Djava.security.egd=file:/dev/./urandom","-jar","/springboot-k8s-template-v1.jar"]
然后进入到Dockerfile的目录底下,进行镜像的构建:
【idea @ Mac】>>>>>>docker build -t springboot-k8s-template:1.0 .
[+] Building 0.5s (7/7) FINISHED
 => [internal] load build definition from Dockerfile                                                                                                                                       0.0s
 => => transferring dockerfile: 419B                                                                                                                                                       0.0s
 => [internal] load .dockerignore                                                                                                                                                          0.0s
 => => transferring context: 2B                                                                                                                                                            0.0s
 => [internal] load metadata for docker.io/library/openjdk:8-jdk-alpine                                                                                                                    0.0s
 => [internal] load build context                                                                                                                                                          0.3s
 => => transferring context: 17.60MB                                                                                                                                                       0.3s
 => CACHED [1/2] FROM docker.io/library/openjdk:8-jdk-alpine                                                                                                                               0.0s
 => [2/2] ADD springboot-k8s-template.jar springboot-k8s-template-v1.jar                                                                                                                   0.1s
 => exporting to image                                                                                                                                                                     0.1s
 => => exporting layers                                                                                                                                                                    0.1s
 => => writing image sha256:86d02961c4fa5bb576c91e3ebf031a3d8b140ddbb451b9613a2c4d601ac4d853                                                                                               0.0s
 => => naming to docker.io/library/springboot-k8s-template:1.0                                                                                                                             0.0s

Use 'docker scan' to run Snyk tests against images to find vulnerabilities and learn how to fix them

【idea @ Mac】>>>>>>docker images | grep template
springboot-k8s-template                                   1.0                                                     86d02961c4fa   48 seconds ago   122MB
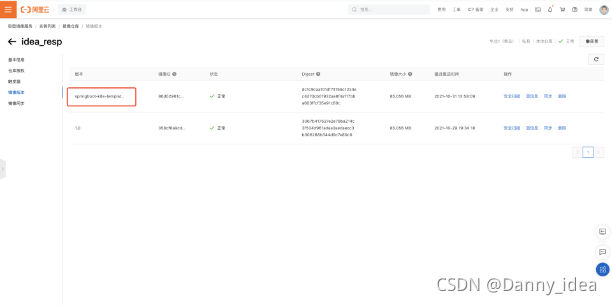
构建完成之后,将本地镜像打包发布到镜像仓库中,这里我是通过推送到阿里云镜像仓库的方式来处理的。
推送本地镜像到阿里云
首先是登录到docker仓库,然后记录对应的tag信息,最终推送镜像。
$ docker login --username=[阿里云账户名称] registry.cn-qingdao.aliyuncs.com
$ docker tag [ImageId] registry.cn-qingdao.aliyuncs.com/idea_hub/idea_resp:[镜像版本号]
$ docker push registry.cn-qingdao.aliyuncs.com/idea_hub/idea_resp:[镜像版本号]
例如:
【idea @ Mac】>>>>>>docker images | grep config
qiyu-framework-k8s-config 1.0 6168639757e9 2 minutes ago 122MB
【idea @ Mac】>>>>>>docker tag 6168639757e9 registry.cn-qingdao.aliyuncs.com/idea_hub/idea_resp:qiyu-framework-k8s-config-1.0
【idea @ Mac】>>>>>>docker push registry.cn-qingdao.aliyuncs.com/idea_hub/idea_resp:qiyu-framework-k8s-config-1.0
The push refers to repository [registry.cn-qingdao.aliyuncs.com/idea_hub/idea_resp]
1ace00556b41: Pushed
ceaf9e1ebef5: Layer already exists
9b9b7f3d56a0: Layer already exists
f1b5933fe4b5: Layer already exists
qiyu-framework-k8s-config-1.0: digest: sha256:50c1a87484f6cbec699d65321fa5bbe70f5ad6da5a237e95ea87c7953a1c80da size: 1159
【idea @ Mac】>>>>>>
请根据实际镜像信息替换示例中的[ImageId]和[镜像版本号]参数。
将镜像文件打包并且推送到镜像仓库之后,可以通过在yaml文件中编写对应的镜像地址,这样就能保证在镜像下载的时候能从仓库拉取出对应的镜像文件。
通常项目中我们会采用统一的yaml文件来进行pod节点的部署与构建。
yaml配置文件:
apiVersion: apps/v1  #kubectl api-versions 可以通过这条指令去看版本信息
kind: Deployment # 指定资源类别
metadata: #资源的一些元数据
  name: springboot-k8s-template-deployment #deloyment的名称
  labels:
    app: springboot-k8s-template-deployment  #标签
spec:
  replicas: 2 #创建pod的个数
  selector:
    matchLabels:
      app: springboot-k8s-template-deployment #满足标签为这个的时候相关的pod才能被调度到
  template:
    metadata:
      labels:
        app: springboot-k8s-template-v1
    spec:
      containers:
        - name: springboot-k8s-template-v1
          image: registry.cn-qingdao.aliyuncs.com/idea_hub/idea_resp:1.0
          imagePullPolicy: IfNotPresent
          ports:
            - containerPort: 8080
由于阿里云的镜像仓库需要用户账号密码权限访问,所以这里我们可以尝试简单一些的策略,登录minikube的内部,提前下载好对应的阿里云镜像。
通过 minikube ssh 指令即可登录到minikube的内部:
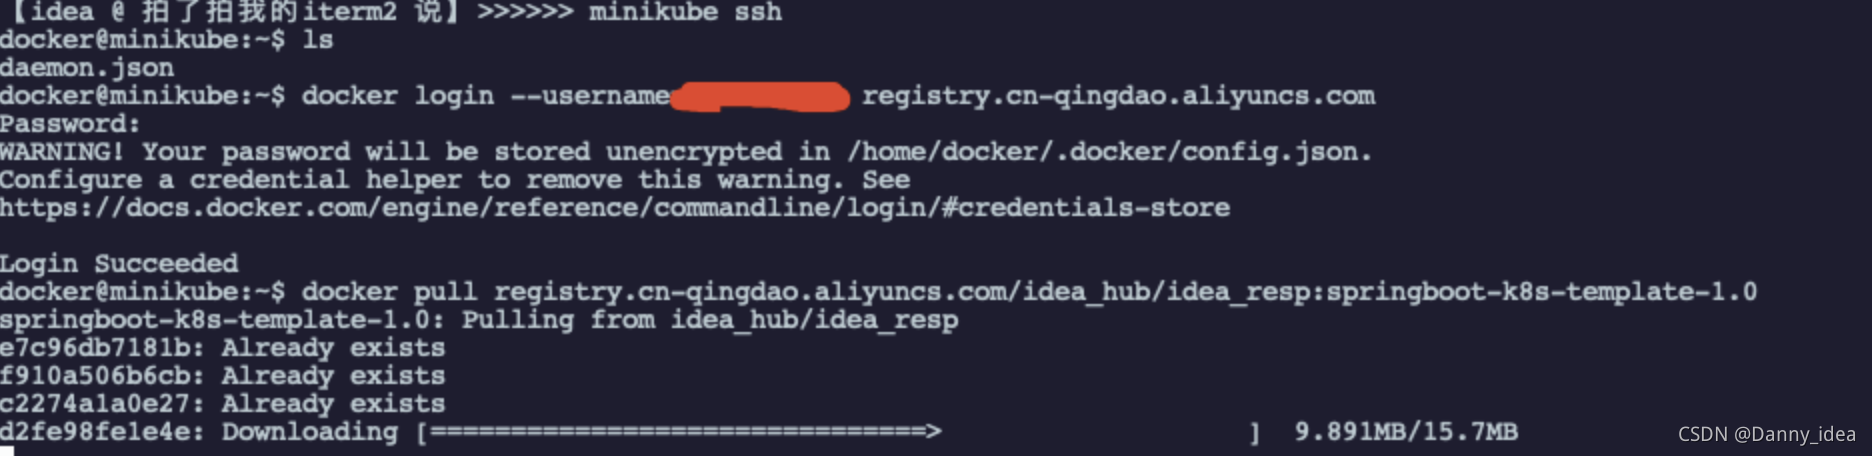
采用docker pull指令即可下载对应资源:
docker@minikube:~$ docker pull registry.cn-qingdao.aliyuncs.com/idea_hub/idea_resp:springboot-k8s-template-1.0
springboot-k8s-template-1.0: Pulling from idea_hub/idea_resp
e7c96db7181b: Already exists
f910a506b6cb: Already exists
c2274a1a0e27: Already exists
d2fe98fe1e4e: Pull complete
Digest: sha256:dc1c9caa101df74159c1224ec4d7dcb01932aa8f4a117bba603ffcf35e91c60c
Status: Downloaded newer image for registry.cn-qingdao.aliyuncs.com/idea_hub/idea_resp:springboot-k8s-template-1.0
registry.cn-qingdao.aliyuncs.com/idea_hub/idea_resp:springboot-k8s-template-1.0
docker@minikube:~$
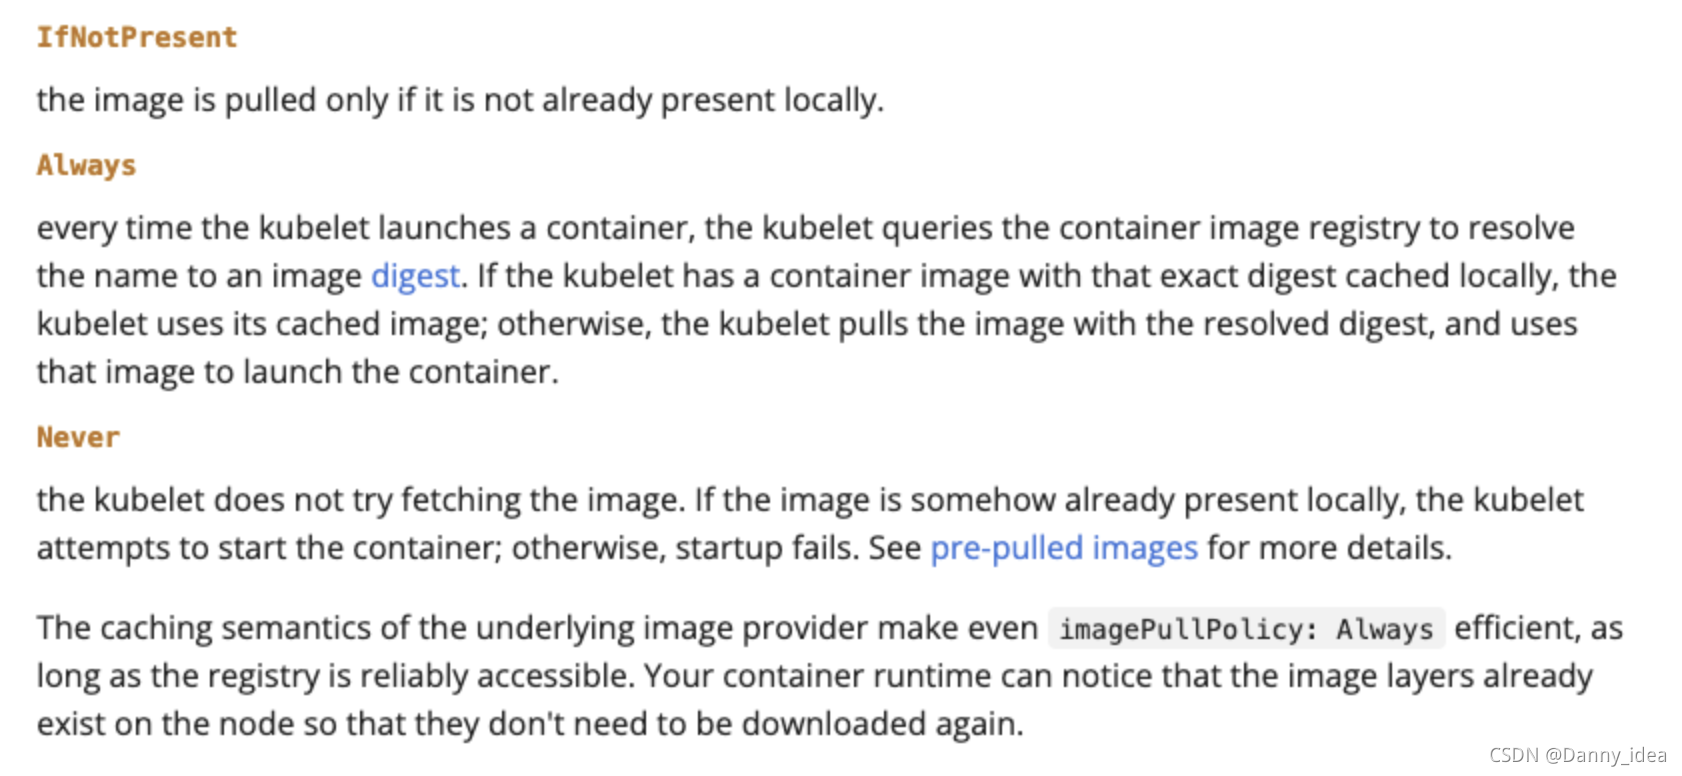
查看对应的镜像文件

镜像拉取策略可以对照官网的介绍来系统认识:
https://kubernetes.io/docs/concepts/containers/images/
在yaml文件里我选用了IfNotPresent策略,这条策略能够保证当本地有镜像的时候优先选用本地,没有才选择网络拉取。
最后是找到相关的yaml文件进行pod的部署启动。
kubectl create -f ./k8s-springboot-template.yaml
此时通过 kubectl get pod 命令可以看到对应的pod节点:
最终需要暴露deployment服务:
【idea @ 拍了拍我的iterm2 说】>>>>>> kubectl expose deployment springboot-k8s-template-deployment --type=NodePort
service/springboot-k8s-template-deployment exposed
【idea @ 拍了拍我的iterm2 说】>>>>>> kubectl get pods
NAME                                                  READY   STATUS    RESTARTS   AGE
springboot-k8s-template-deployment-687f8bf86d-gqxcp   1/1     Running   0          7m50s
springboot-k8s-template-deployment-687f8bf86d-lcq5p   1/1     Running   0          7m50s
【idea @ 拍了拍我的iterm2 说】>>>>>> minikube service springboot-k8s-template-deployment
|-----------|------------------------------------|-------------|---------------------------|
| NAMESPACE |                NAME                | TARGET PORT |            URL            |
|-----------|------------------------------------|-------------|---------------------------|
| default   | springboot-k8s-template-deployment |        8080 | http://192.168.49.2:31179 |
|-----------|------------------------------------|-------------|---------------------------|
🏃  Starting tunnel for service springboot-k8s-template-deployment.
|-----------|------------------------------------|-------------|------------------------|
| NAMESPACE |                NAME                | TARGET PORT |          URL           |
|-----------|------------------------------------|-------------|------------------------|
| default   | springboot-k8s-template-deployment |             | http://127.0.0.1:57109 |
|-----------|------------------------------------|-------------|------------------------|
🎉  正通过默认浏览器打开服务 default/springboot-k8s-template-deployment...
❗  Because you are using a Docker driver on darwin, the terminal needs to be open to run it.
暴露之后访问:
http://127.0.0.1:57109/test/do-test
验证接口正常。
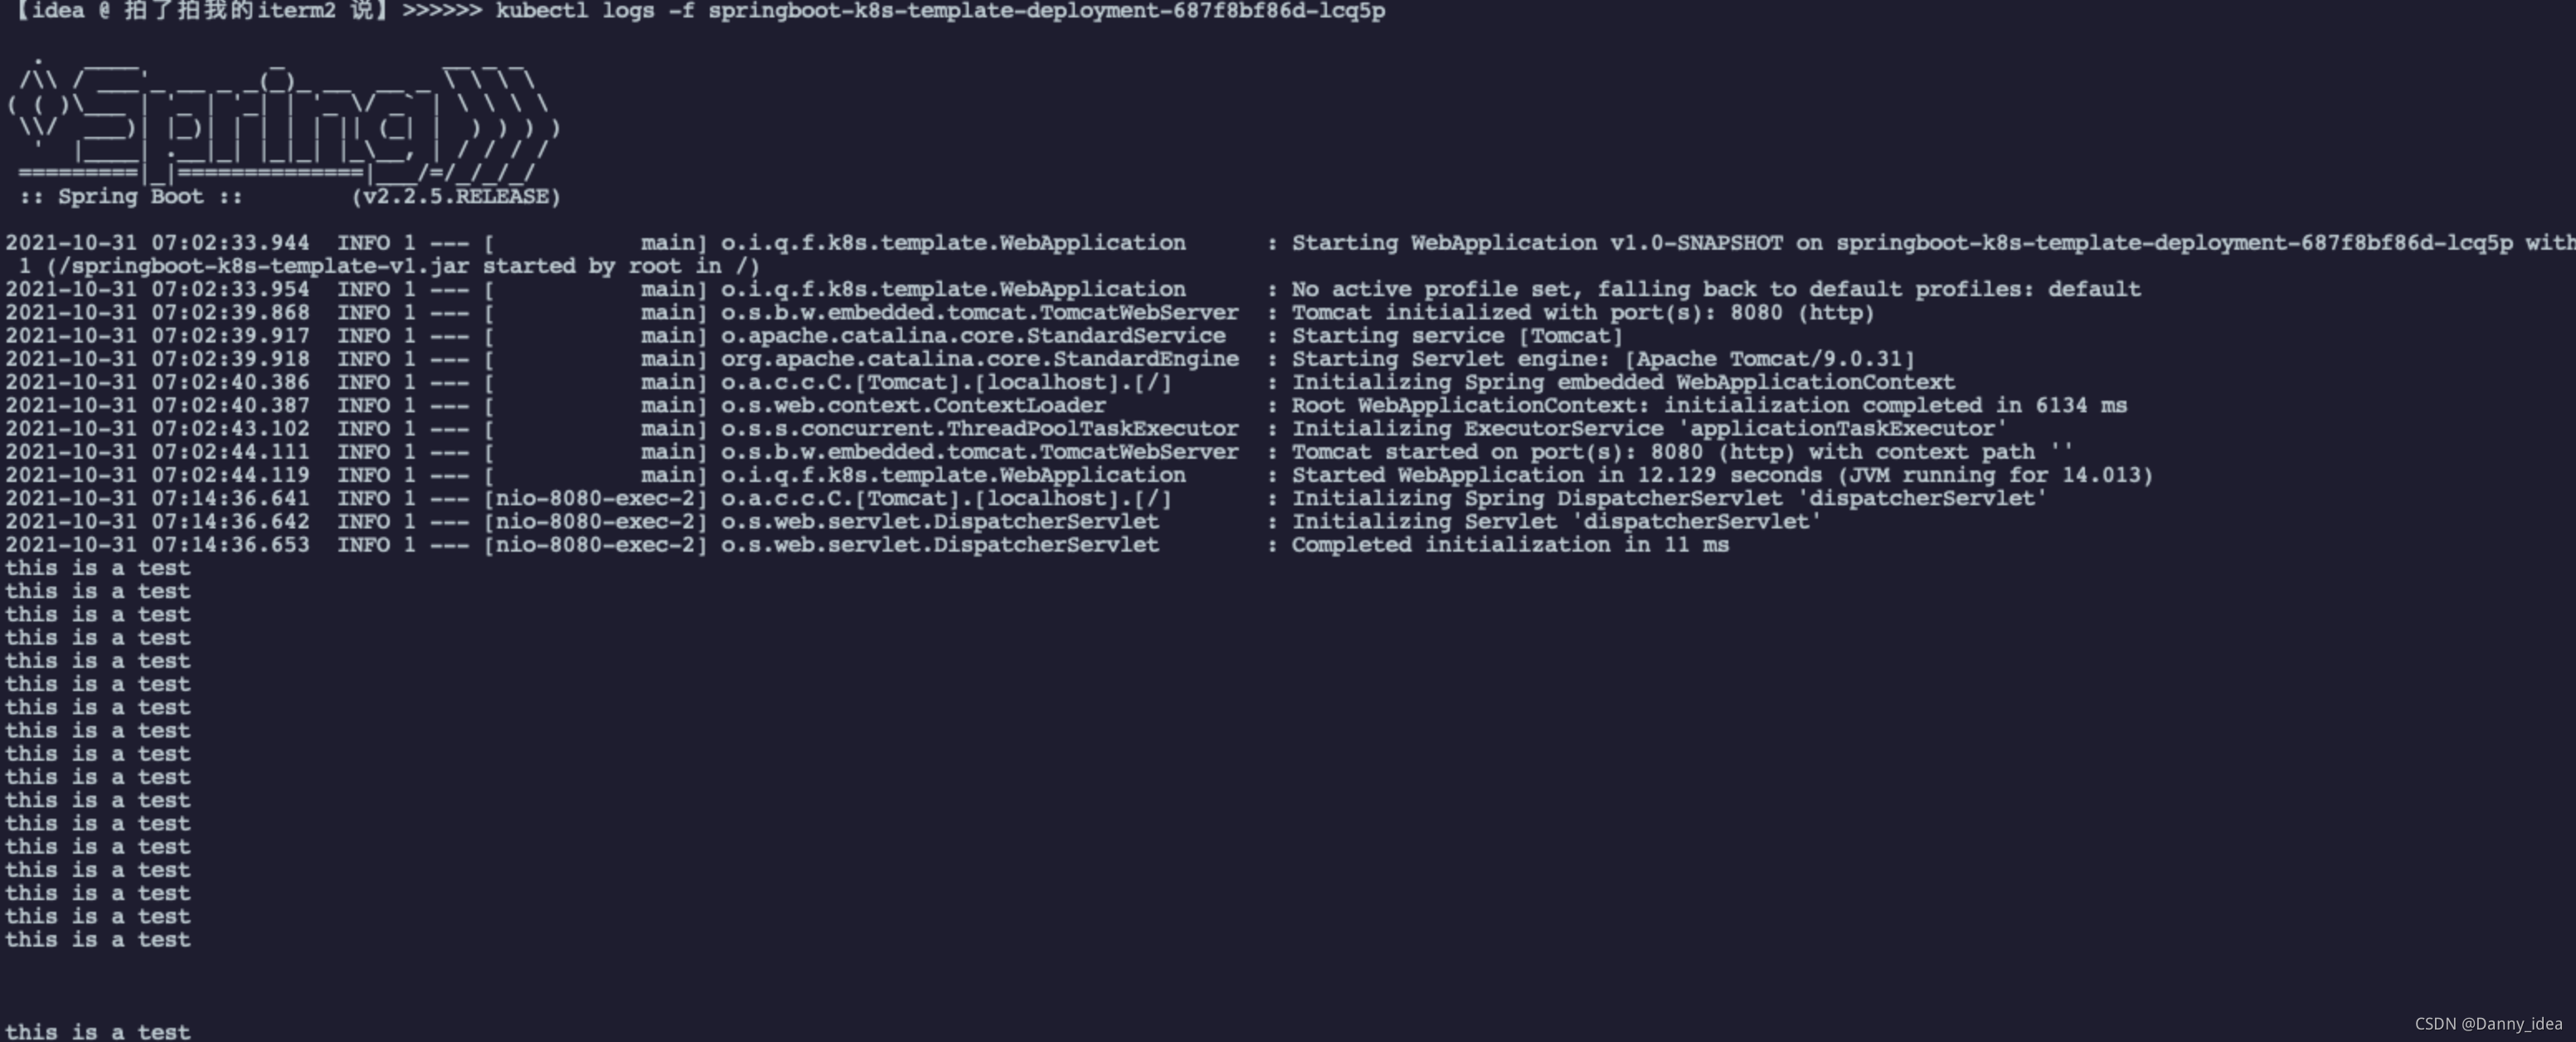
minikube日志查看:
kubectl logs -f springboot-k8s-template-deployment-687f8bf86d-lcq5p


 790
790


 被折叠的 条评论
为什么被折叠?
被折叠的 条评论
为什么被折叠?
 到【灌水乐园】发言


