


文章目录
Davids实操笔记:Spring Boot 使用docker整合ElasticSearch
ElasticSearch是我们经常用到的搜索引擎之一,本篇博客从零开始使用docker安装elasticsearch,elasticsearch-head然后整合Spring Boot对数据进行新增和查询。由于篇幅原因,后面会分两篇blog实战使用分词器以及拼音搜索功能。
准备工作
新建Spring Boot项目
添加我们需要使用的依赖,除了elasticsearch其他两个非必要,web是为了方便调试,如果没有使用过lombok的需要安装IDEA//Eclipse插件。
<!-- elasticsearch -->
<dependency>
    <groupId>org.springframework.boot</groupId>
    <artifactId>spring-boot-starter-data-elasticsearch</artifactId>
</dependency>
<!-- web方便调试 -->
<dependency>
    <groupId>org.springframework.boot</groupId>
    <artifactId>spring-boot-starter-web</artifactId>
</dependency>
<!-- lombok -->
<dependency>
    <groupId>org.projectlombok</groupId>
    <artifactId>lombok</artifactId>
    <optional>true</optional>
</dependency>
安装ElasticSearch
因为我的电脑是Windows10,所以这里我们选择使用docker来安装elasticsearch,操作简单。没有安装docker的可以试一下。docker win10安装教学。
- 首先我们访问dockerhub找到
elasticsearch,下载自己需要的版本,我这边就下载最新版。
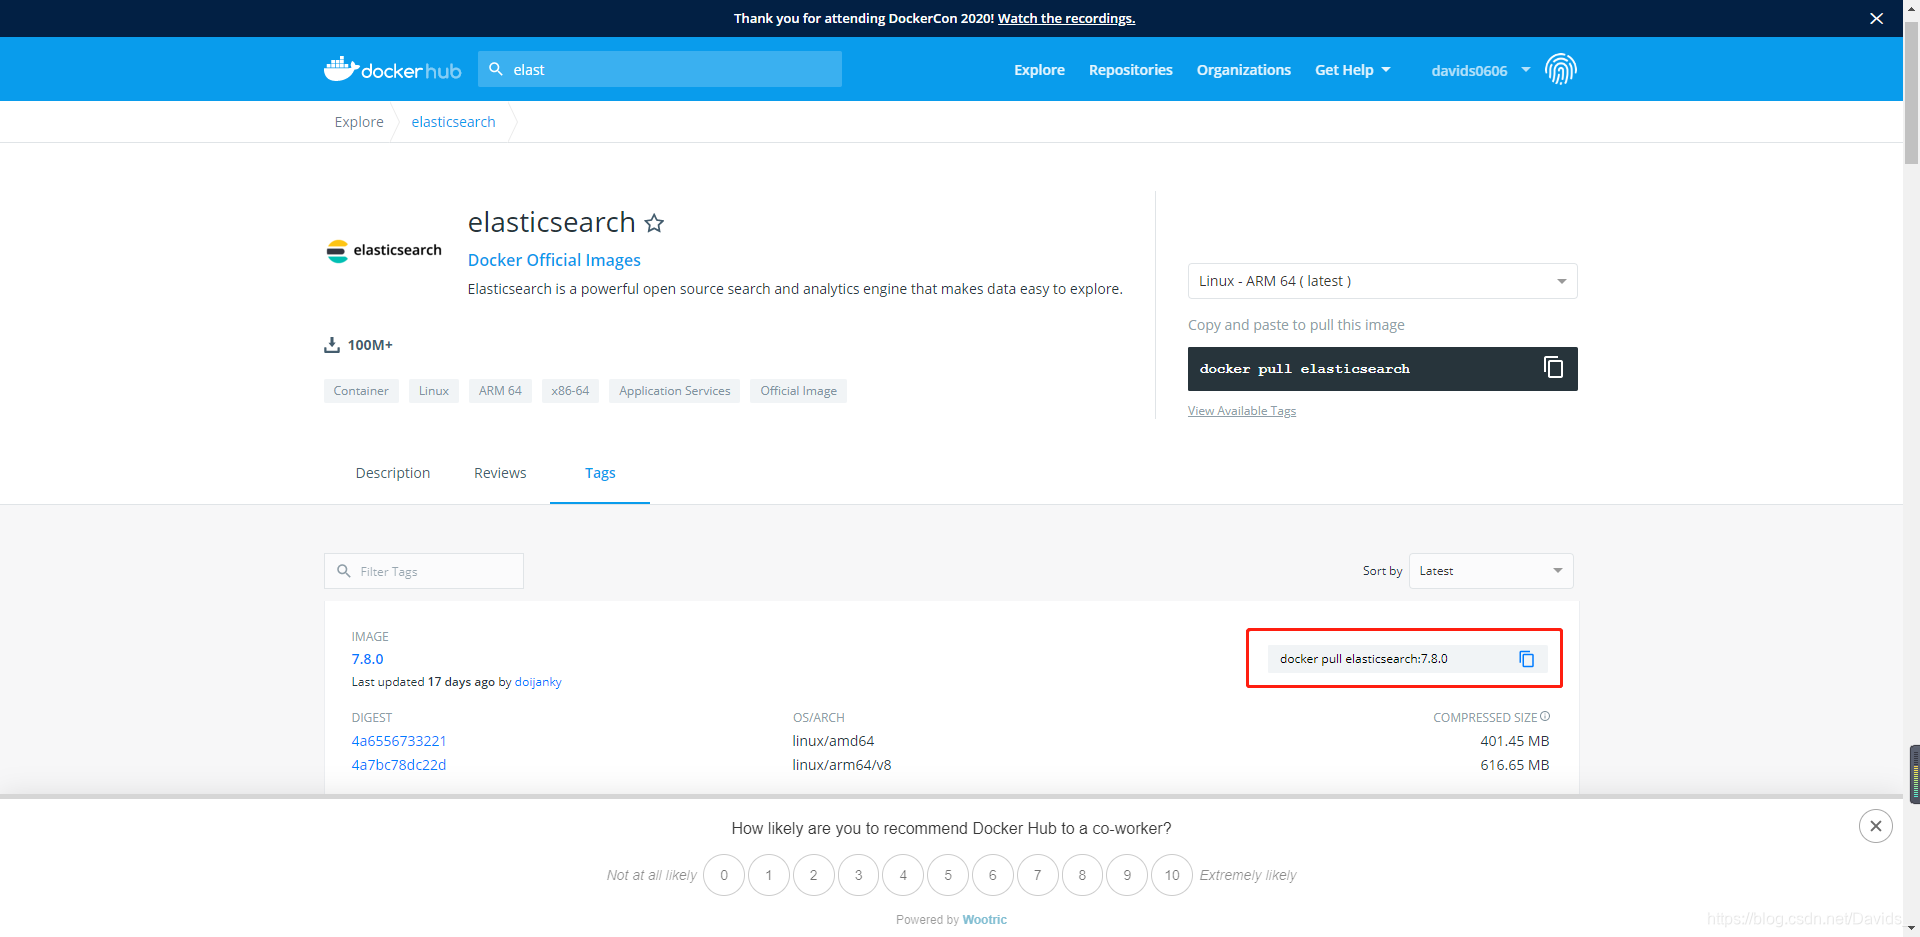
- 打开shell命令,拉取镜像

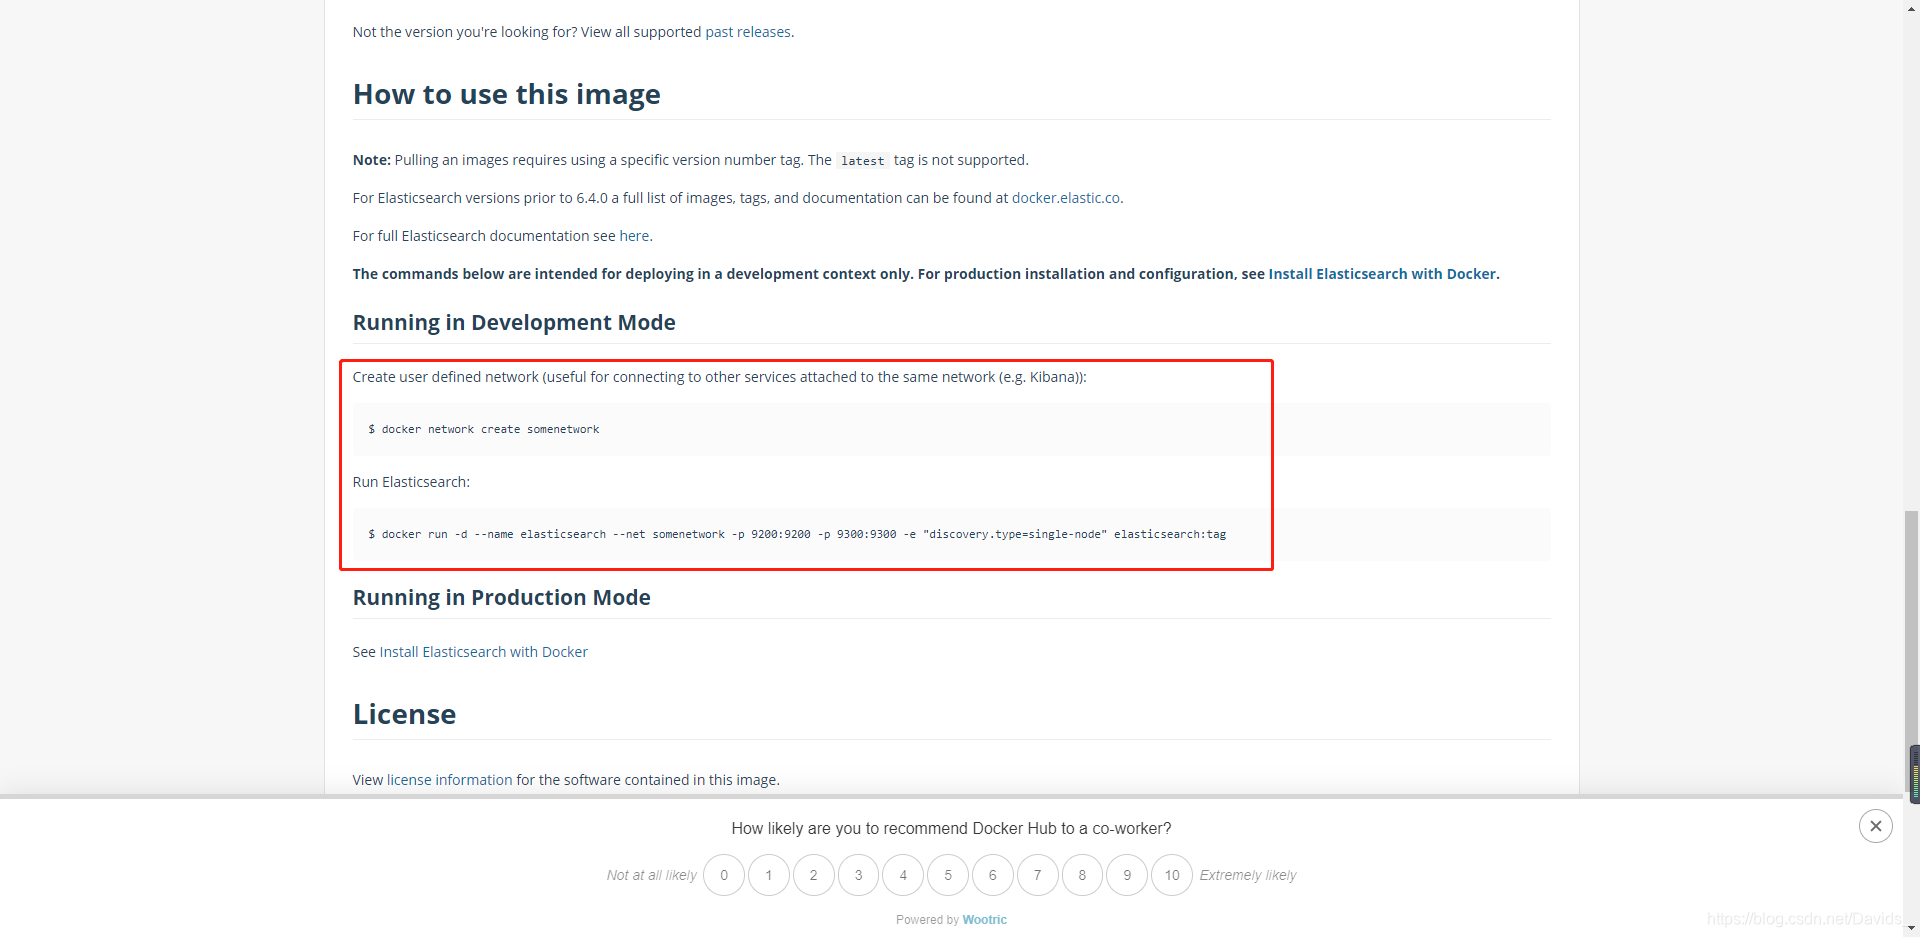
- 启动elasticsearch,我们按照dockerhub description启动开发配置的elasticsearch。
// shell命令
docker network create somenetwork

docker run -d --name elasticsearch --net somenetwork -p 9200:9200 -p 9300:9300 -e "discovery.type=single-node" elasticsearch:tag
灰色有些命令看不清楚,所以换个背景颜色,启动完成之后docker ps看一下容器是否启动成功。
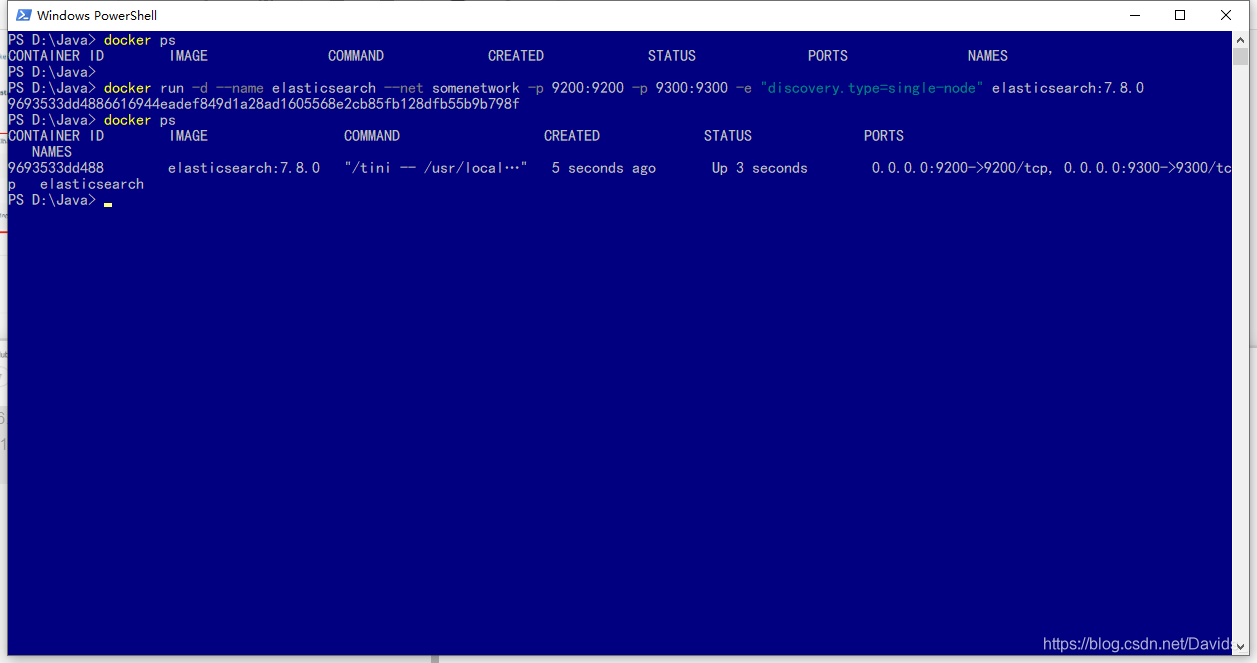
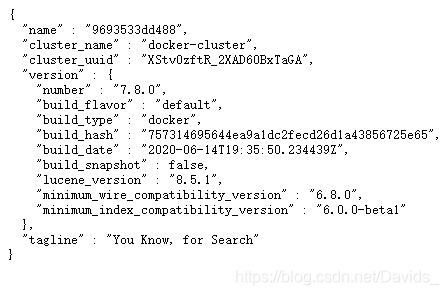
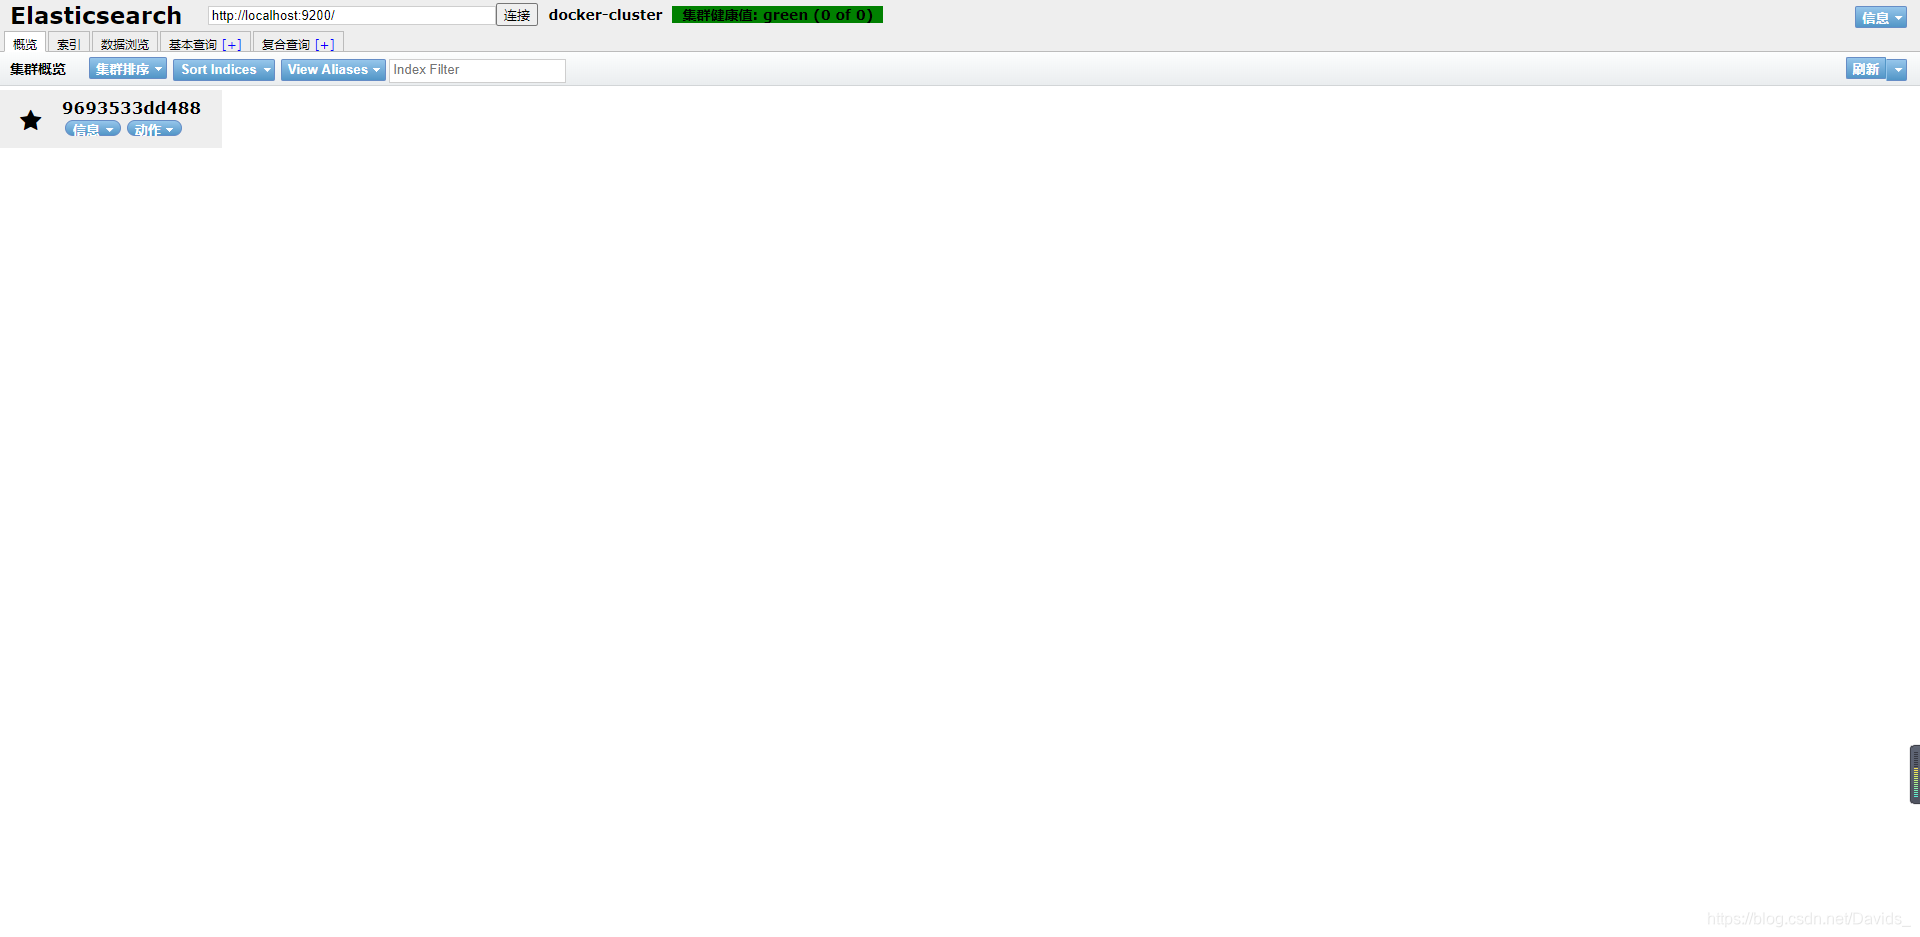
浏览器访问127.0.0.1:9200,查看是否启动成功。
安装elasticsearch-head
- 同样适用docker安装,但是访问
dockerhub的时候发现elasticsearch-head404了,执行docker pull mobz/elasticsearch-head也不可以,但是好在docker pull mobz/elasticsearch-head:5是可以拉取的,安装并启动。
// shell命令
docker pull mobz/elasticsearch-head:5

docker run -d --name es_admin -p 9100:9100 mobz/elasticsearch-head:5

- 访问http://127.0.0.1:9100/,检查head是否启动成功,发现head是启动成功了,但是没有连接上elasticsearch,因为我们自定义了网络,所以需要配置一下elasticsearch支持跨域访问。

- 配置elasticsearch.yml支持跨域。
// shell命令
// 进入容器
docker exec -it elasticsearch /bin/bash

// 修改配置文件
vi ./config/elasticsearch.yml

// 添加以下配置
http.cors.enabled: true
http.cors.allow-origin: "*"

// ctrl + c,:wq!保存配置
// 退出容器
exit

// 重启elasticsearch
docker restart elasticsearch
再重新访问一下http://127.0.0.1:9100/,连接成功了。
使用Spring Boot访问ElasticSearch
添加application.yml配置
# application.yml
server:
  port: 8080

spring:
  application:
    name: elasticsearch-demo
  elasticsearch:
    rest:
      uris: http://127.0.0.1:9200
      connection-timeout: 1s
      read-timeout: 30s
启动Spring Boot project
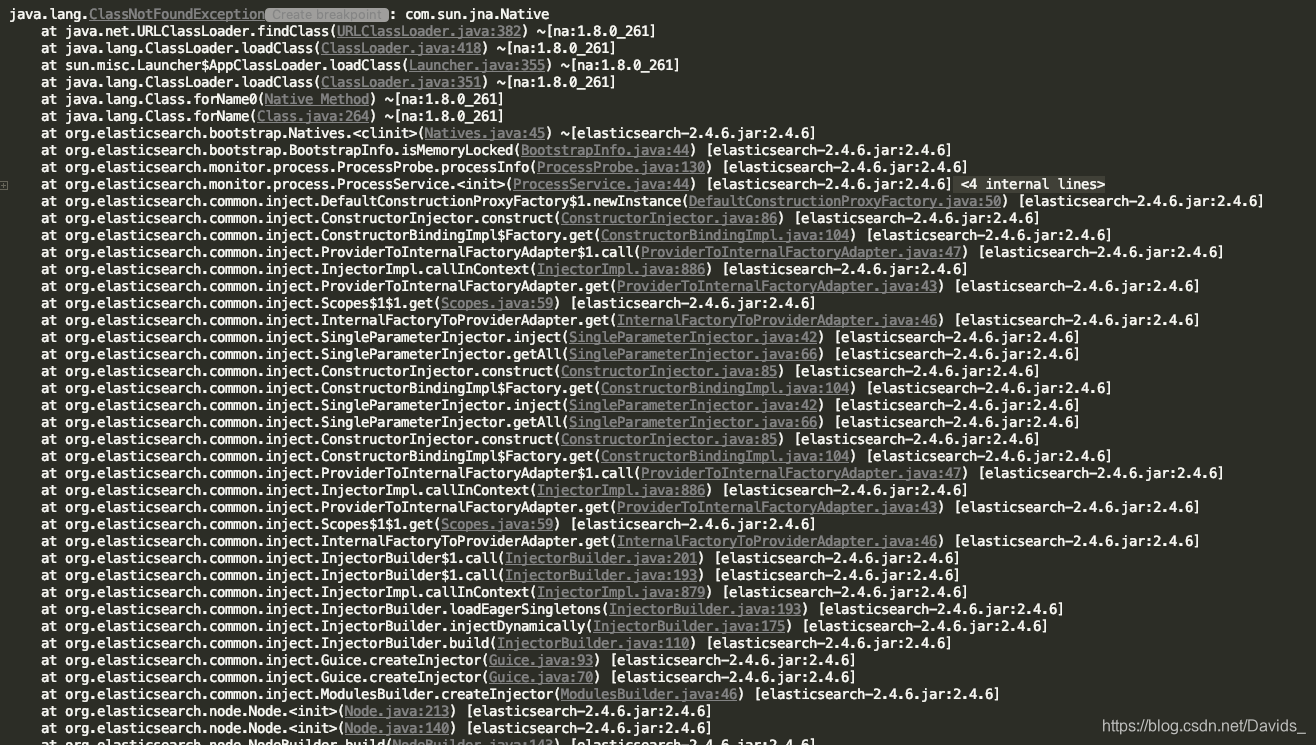
我这里使用的是SpringBoot 2.x,在使用Spring Boot 1.5.x的时候可能会遇到java.lang.ClassNotFoundException: com.sun.jna.Native缺少Native依赖,这个时候只需要添加上相关依赖即可。
<!-- https://mvnrepository.com/artifact/com.sun.jna/jna -->
<dependency>
    <groupId>com.sun.jna</groupId>
    <artifactId>jna</artifactId>
    <version>3.0.9</version>
</dependency>
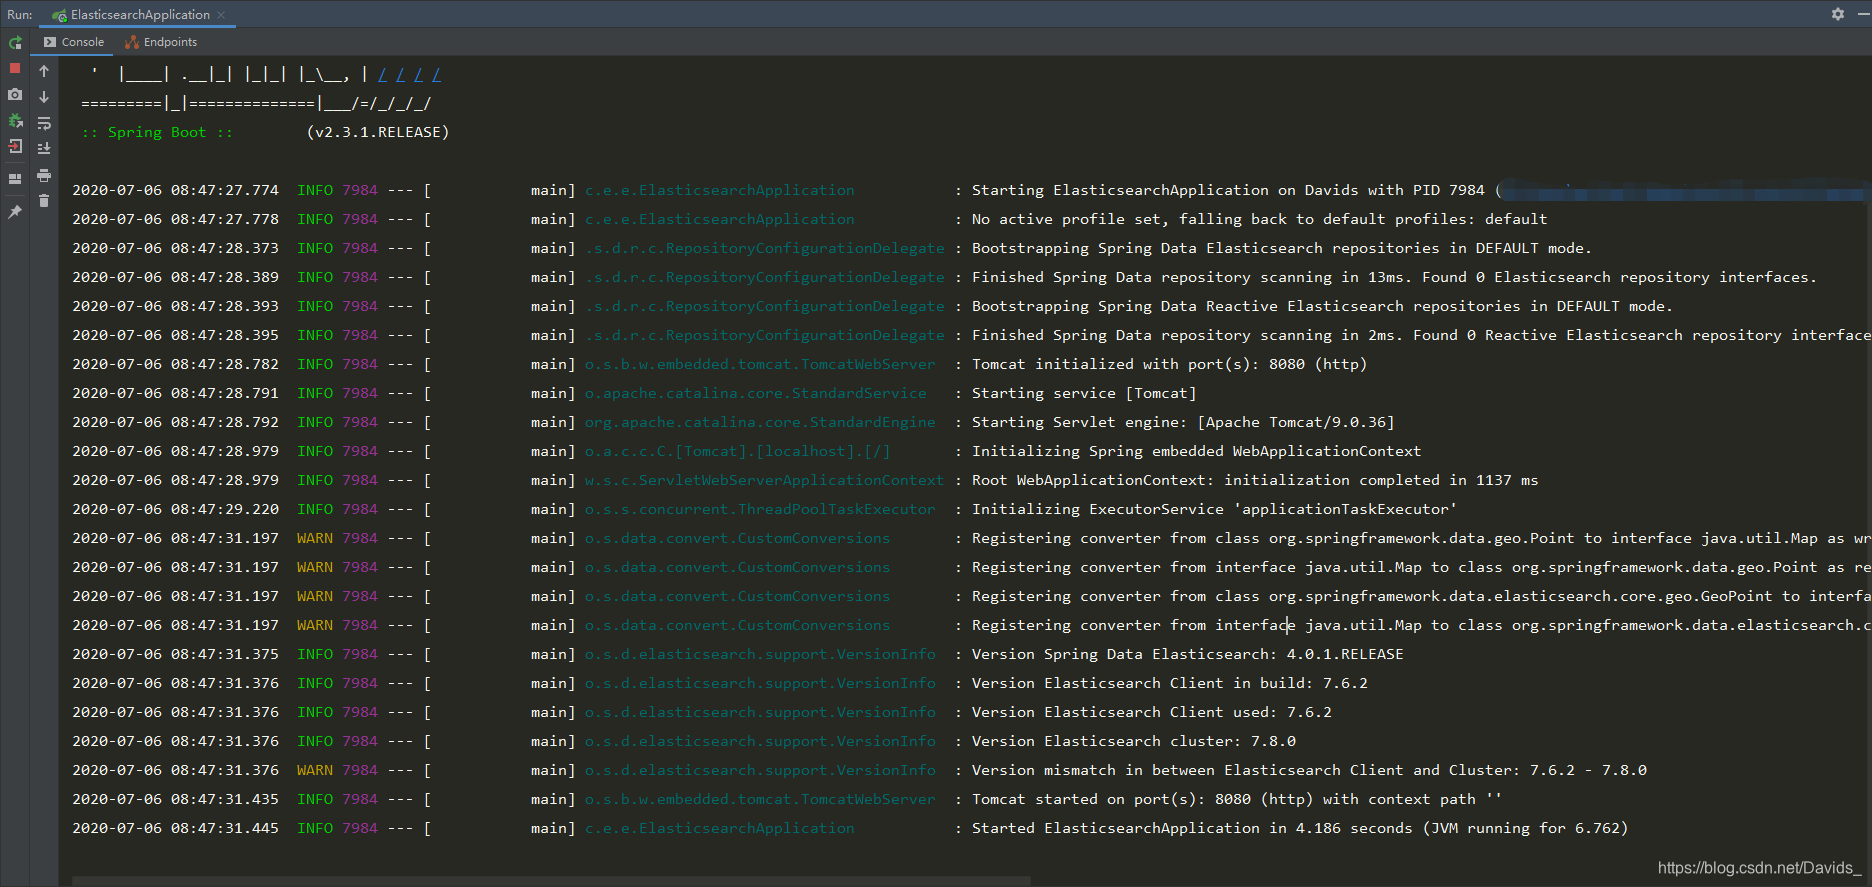
启动成功
使用ElasticSearchRepository存取数据
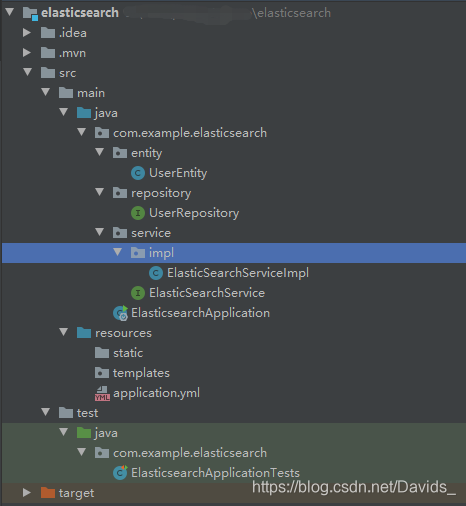
// UserEntity
package com.example.elasticsearch.entity;

import org.springframework.data.annotation.Id;
import org.springframework.data.elasticsearch.annotations.Document;

import lombok.AllArgsConstructor;
import lombok.Builder;
import lombok.Data;
import lombok.NoArgsConstructor;

@Data
@NoArgsConstructor
@AllArgsConstructor
@Builder
@Document(indexName = "user")
public class UserEntity {

    @Id
    private Long userId;

    private String userName;

    private Integer age;

    private Integer sex;

}

// UserRepository
package com.example.elasticsearch.repository;

import com.example.elasticsearch.entity.UserEntity;

import org.springframework.data.elasticsearch.repository.ElasticsearchRepository;

public interface UserRepository extends ElasticsearchRepository<UserEntity, Long> {

}

// ElasticSearchService
package com.example.elasticsearch.service;

import com.example.elasticsearch.entity.UserEntity;

import java.util.List;

public interface ElasticSearchService {

    void saveUser( UserEntity userEntity );

    void saveUser( List<UserEntity> userEntity );

    UserEntity findById(Long id);

}

// ElasticSearchServiceImpl
package com.example.elasticsearch.service.impl;

import com.example.elasticsearch.entity.UserEntity;
import com.example.elasticsearch.repository.UserRepository;
import com.example.elasticsearch.service.ElasticSearchService;

import org.springframework.stereotype.Service;

import java.util.List;

import javax.annotation.Resource;

@Service
public class ElasticSearchServiceImpl implements ElasticSearchService {

    @Resource
    private UserRepository userRepository;

    @Override
    public void saveUser( UserEntity userEntity ) {
        userRepository.save(userEntity);
    }

    @Override
    public void saveUser( List<UserEntity> userEntity ) {
        userEntity.containsAll(userEntity);
    }

    @Override
    public UserEntity findById( Long id ) {
        return userRepository.findById(id).get();
    }
}

// Test
package com.example.elasticsearch;

import com.example.elasticsearch.entity.UserEntity;
import com.example.elasticsearch.service.ElasticSearchService;

import org.junit.jupiter.api.Test;
import org.springframework.boot.test.context.SpringBootTest;

import javax.annotation.Resource;

@SpringBootTest
class ElasticsearchApplicationTests {

    @Resource
    private ElasticSearchService elasticSearchService;

    @Test
    void save() {
        elasticSearchService.saveUser(UserEntity.builder()
                .userId(1L).userName("David").age(18).sex(1)
                .build());
    }

    @Test
    void findById() {
        UserEntity byId = elasticSearchService.findById(1L);
        System.out.println(byId);
    }

}
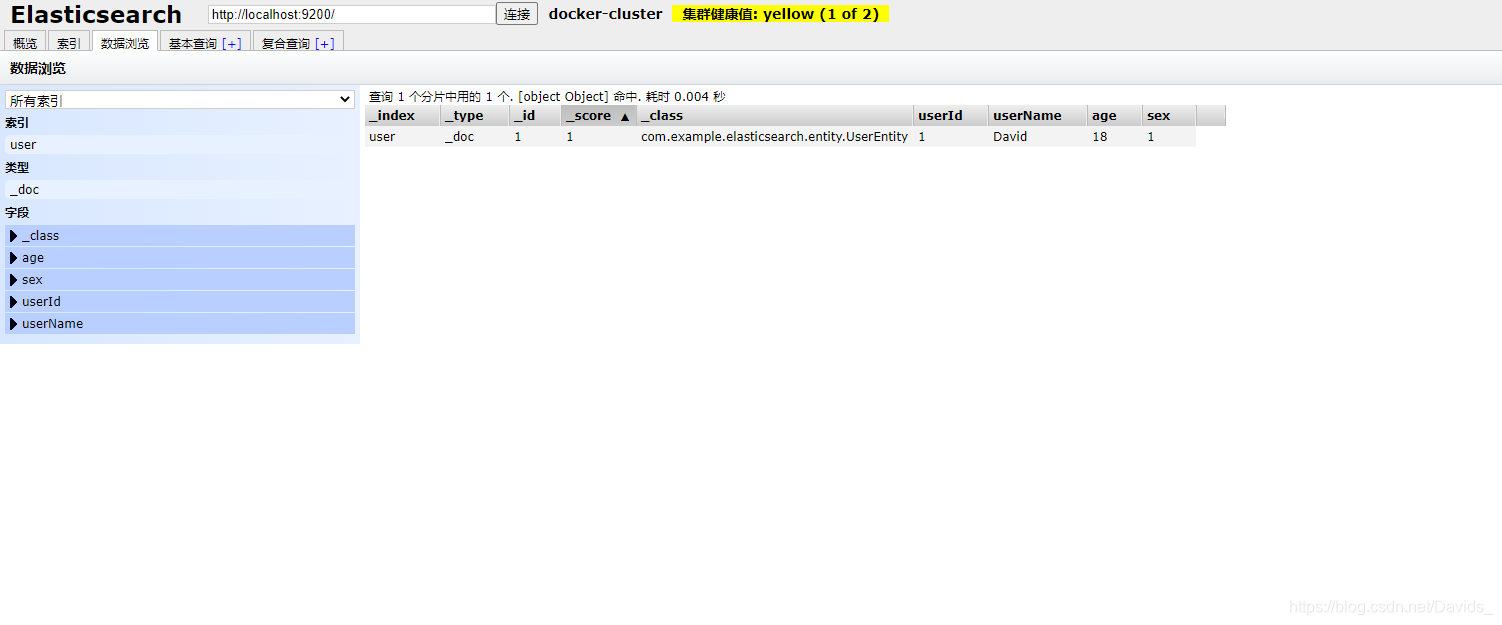
数据插入成功后,head无法查看,因为我们使用的head是5,但是es是7,解析格式不同,所以我们需要修改vendor.js文件。
// 将vendor.js拷贝至本地
docker cp es_admin:/usr/src/app/_site/vendor.js ./

// 修改6886和7573行 application/x-www-form-urlencoded修改为application/json;charset=UTF-8
// 将vendor.js拷贝到es_admines_admin原处
docker cp vendor.js es_admin:/usr/src/app/_site
操作完成后直接刷新页面即可。
总结
ElasticSearch是我们经常用到的搜索引擎之一,本篇博客从零开始使用docker安装elasticsearch,elasticsearch-head然后整合Spring Boot对数据进行新增和查询。后面会分两篇blog实战使用分词器以及拼音搜索功能。使用docker可以为我们很大的便利,docker对容器和镜像的管理使用起来非常简单,后面我还会使用docker来进行MongoDB实战,以及Linux的学习,大家可以到docker菜鸟教程学习一下,玩一玩儿就会了。


 1517
1517

 被折叠的 条评论
为什么被折叠?
被折叠的 条评论
为什么被折叠?
 到【灌水乐园】发言


