


搜集一些UIImage的各种使用功能
1.图片压缩
- (UIImage *)imageByScalingAndCroppingForSourceImage:(UIImage *)sourceImage targetSize:(CGSize)targetSize
{
    UIImage *newImage = nil;
    CGSize imageSize = sourceImage.size;
    CGFloat width = imageSize.width;
    CGFloat height = imageSize.height;
    CGFloat targetWidth = targetSize.width;
    CGFloat targetHeight = targetSize.height;
    CGFloat scaleFactor = 0.0;
    CGFloat scaledWidth = targetWidth;
    CGFloat scaledHeight = targetHeight;
    CGPoint thumbnailPoint = CGPointMake(0.0,0.0);
    if (CGSizeEqualToSize(imageSize, targetSize) == NO)
    {
        CGFloat widthFactor = targetWidth / width;
        CGFloat heightFactor = targetHeight / height;

        if (widthFactor > heightFactor)
            scaleFactor = widthFactor; // scale to fit height
        else
            scaleFactor = heightFactor; // scale to fit width
        scaledWidth  = width * scaleFactor;
        scaledHeight = height * scaleFactor;

        // center the image
        if (widthFactor > heightFactor)
        {
            thumbnailPoint.y = (targetHeight - scaledHeight) * 0.5;
        }
        else
            if (widthFactor < heightFactor)
            {
                thumbnailPoint.x = (targetWidth - scaledWidth) * 0.5;
            }
    }
    UIGraphicsBeginImageContext(targetSize); // this will crop
    CGRect thumbnailRect = CGRectZero;
    thumbnailRect.origin = thumbnailPoint;
    thumbnailRect.size.width  = scaledWidth;
    thumbnailRect.size.height = scaledHeight;

    [sourceImage drawInRect:thumbnailRect];

    newImage = UIGraphicsGetImageFromCurrentImageContext();
    if(newImage == nil) NSLog(@"could not scale image");

    //pop the context to get back to the default
    UIGraphicsEndImageContext();
    return newImage;
}
+ (UIImage *)imageWithColor:(UIColor *)color size:(CGSize)size
{
    @autoreleasepool {
        CGRect rect = CGRectMake(0, 0, size.width, size.height);
        UIGraphicsBeginImageContext(rect.size);
        CGContextRef context = UIGraphicsGetCurrentContext();
        CGContextSetFillColorWithColor(context,
                                       color.CGColor);
        CGContextFillRect(context, rect);
        UIImage *img = UIGraphicsGetImageFromCurrentImageContext();
        UIGraphicsEndImageContext();

        return img;
    }
}

+ (UIImage *)imageFromView:(UIView *)theView
{
    UIGraphicsBeginImageContext([theView bounds].size);
    CGContextRef context = UIGraphicsGetCurrentContext();
    [[theView layer] renderInContext:context];
    UIImage *theImage = UIGraphicsGetImageFromCurrentImageContext();
    UIGraphicsEndImageContext();
    return theImage;
}
- (UIImage*)blurredImage:(CGFloat)blurAmount
{
    if (blurAmount < 0.0 || blurAmount > 1.0) {
        blurAmount = 0.5;
    }

    int boxSize = (int)(blurAmount * 40);
    boxSize = boxSize - (boxSize % 2) + 1;

    CGImageRef img = self.CGImage;

    vImage_Buffer inBuffer, outBuffer;
    vImage_Error error;

    void *pixelBuffer;

    CGDataProviderRef inProvider = CGImageGetDataProvider(img);
    CFDataRef inBitmapData = CGDataProviderCopyData(inProvider);

    inBuffer.width = CGImageGetWidth(img);
    inBuffer.height = CGImageGetHeight(img);
    inBuffer.rowBytes = CGImageGetBytesPerRow(img);

    inBuffer.data = (void*)CFDataGetBytePtr(inBitmapData);

    pixelBuffer = malloc(CGImageGetBytesPerRow(img) * CGImageGetHeight(img));

    outBuffer.data = pixelBuffer;
    outBuffer.width = CGImageGetWidth(img);
    outBuffer.height = CGImageGetHeight(img);
    outBuffer.rowBytes = CGImageGetBytesPerRow(img);

    error = vImageBoxConvolve_ARGB8888(&inBuffer, &outBuffer, NULL, 0, 0, boxSize, boxSize, NULL, kvImageEdgeExtend);

    if (!error) {
        error = vImageBoxConvolve_ARGB8888(&outBuffer, &inBuffer, NULL, 0, 0, boxSize, boxSize, NULL, kvImageEdgeExtend);
    }

    if (error) {
#ifdef DEBUG
        NSLog(@"%s error: %zd", __PRETTY_FUNCTION__, error);
#endif

        return self;
    }

    CGColorSpaceRef colorSpace = CGColorSpaceCreateDeviceRGB();

    CGContextRef ctx = CGBitmapContextCreate(outBuffer.data,
                                             outBuffer.width,
                                             outBuffer.height,
                                             8,
                                             outBuffer.rowBytes,
                                             colorSpace,
                                             (CGBitmapInfo)kCGImageAlphaNoneSkipLast);

    CGImageRef imageRef = CGBitmapContextCreateImage (ctx);

    UIImage *returnImage = [UIImage imageWithCGImage:imageRef];

    CGContextRelease(ctx);
    CGColorSpaceRelease(colorSpace);

    free(pixelBuffer);
    CFRelease(inBitmapData);

    CGImageRelease(imageRef);

    return returnImage;
}
+ (UIImage *)screenshot
{
    CGSize imageSize = [[UIScreen mainScreen] bounds].size;

    UIGraphicsBeginImageContextWithOptions(imageSize, NO, 0);

    CGContextRef context = UIGraphicsGetCurrentContext();

    for (UIWindow *window in [[UIApplication sharedApplication] windows]) {
        if (![window respondsToSelector:@selector(screen)] || [window screen] == [UIScreen mainScreen]) {
            CGContextSaveGState(context);

            CGContextTranslateCTM(context, [window center].x, [window center].y);

            CGContextConcatCTM(context, [window transform]);

            CGContextTranslateCTM(context,
                                  -[window bounds].size.width * [[window layer] anchorPoint].x,
                                  -[window bounds].size.height * [[window layer] anchorPoint].y);

            [[window layer] renderInContext:context];

            CGContextRestoreGState(context);
        }
    }

    UIImage *image = UIGraphicsGetImageFromCurrentImageContext();

    UIGraphicsEndImageContext();

    return image;
}
5.给UIImage替换原有的底色
- (UIImage *)jsq_imageMaskedWithColor:(UIColor *)maskColor
{
    NSParameterAssert(maskColor != nil);

    CGRect imageRect = CGRectMake(0.0f, 0.0f, self.size.width, self.size.height);
    UIImage *newImage = nil;

    UIGraphicsBeginImageContextWithOptions(imageRect.size, NO, self.scale);
    {
        CGContextRef context = UIGraphicsGetCurrentContext();

        CGContextScaleCTM(context, 1.0f, -1.0f);
        CGContextTranslateCTM(context, 0.0f, -(imageRect.size.height));

        CGContextClipToMask(context, imageRect, self.CGImage);
        CGContextSetFillColorWithColor(context, maskColor.CGColor);
        CGContextFillRect(context, imageRect);

        newImage = UIGraphicsGetImageFromCurrentImageContext();
    }
    UIGraphicsEndImageContext();

    return newImage;
}
// 图片叠加
+ (UIImage *)addImage:(UIImage *)image1 withImage:(UIImage *)image2 {

    UIGraphicsBeginImageContext(image1.size);

    [image1 drawInRect:CGRectMake(0, 0, image1.size.width, image1.size.height)];

    [image2 drawInRect:CGRectMake((image1.size.width - image2.size.width)/2,(image1.size.height - image2.size.height)/2, image2.size.width, image2.size.height)];

    UIImage *resultingImage = UIGraphicsGetImageFromCurrentImageContext();

    UIGraphicsEndImageContext();

    return resultingImage;
}
7.获取视频播放的某一帧图片
// 获取帧图片
+ (UIImage*) thumbnailImageForVideo:(NSURL *)videoURL atTime:(NSTimeInterval)ts {

    AVURLAsset *asset = [[AVURLAsset alloc] initWithURL:videoURL options:nil];
    AVAssetImageGenerator *gen = [[AVAssetImageGenerator alloc] initWithAsset:asset];

    gen.appliesPreferredTrackTransform = YES;
    CMTime time = CMTimeMakeWithSeconds(ts, 600);
    NSError *error = nil;
    CMTime actualTime;
    CGImageRef image = [gen copyCGImageAtTime:time actualTime:&actualTime error:&error];
    UIImage *img = [[UIImage alloc] initWithCGImage:image];
    CGImageRelease(image);
    return img;

}
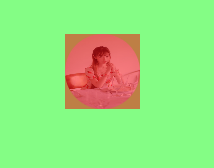
8.流畅的tableView优化之异步处理圆角
- (void)mkj_cornerImageWithSize:(CGSize)size fillColor:(UIColor *)color completion:(block)completionBlock
{
    /**
     异步绘制圆角图片
     */
    dispatch_async(dispatch_get_global_queue(0, 0), ^{
        NSTimeInterval time = CACurrentMediaTime();
        // 1.创建上下文  第二个参数就是不透明  第三个参数scale是0,视图透明会增加GPU的计算
        UIGraphicsBeginImageContextWithOptions(size, YES, 0);


        CGRect rec = CGRectMake(0, 0, size.width, size.height);

        // 2.让裁减掉的多余填充部分为白色,不然是黑色的
        [color setFill];
        UIRectFill(rec);
        // 3.BezierPath创建裁减路径
        UIBezierPath *path = [UIBezierPath bezierPathWithOvalInRect:rec];
        [path addClip];

        // 4.绘制
        [self drawInRect:rec];


        // 5.从上下文取图片
        UIImage *image = UIGraphicsGetImageFromCurrentImageContext();

        // 6.关闭上下文
        UIGraphicsEndImageContext();

        NSLog(@"%lf",CACurrentMediaTime()-time);
        // 7.回调到主线程
        dispatch_async(dispatch_get_main_queue(), ^{
            if (completionBlock) {
                completionBlock(image);
            }

        });
    });
}
注意:这里有个模拟器上的视图优化知识点
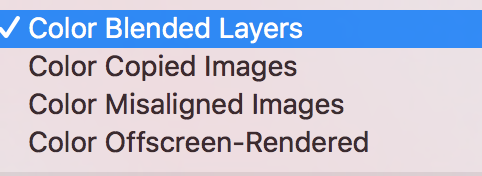
1.屏幕上的每个像素点的颜色是由当前像素点上的多层layer(如果存在)共同决定的,GPU会进行计算出混合颜色的RGB值,最终显示在屏幕上。而这需要让GPU计算,所以我们要尽量避免设置alpha,这样GPU会忽略下面所有的layer,节约计算量
如果你两个视图,相互遮盖,上面的视图如果是由alpha的,那么打开这个属性你的View会是红色的,而且用传统的cornerRadius也会是红色的,绿色是没有性能问题,红色有,那么UILabel比较特殊,没得玩,其他还是可以改改的
2.苹果的GPU只解析32bit的颜色格式,记住是32bit
3.不要出现image size与imageView size不同的情况,这样会触发反锯齿计算,增加性能损耗,本地图片好处理,可以直接看到大小,但是网络图片加载时可以根据容器的大小传参获取,或者下载下来进行压缩,不然会触发反锯齿计算
4.离屏渲染,这个完全不知道是啥,反正就是离屏渲染会导致CPU在后台保存一份bitmap,所以会导致CPU多余运算
当drawInRect或者MaskToBounds会触发,尽量避免,应该是cell还没有滑进屏幕的时候进行提前绘制
1.常规做法
imageView.layer.cornerRadius = imageView.bounds.size.width/2;
    imageView.layer.masksToBounds = YES;
    imageView.image = image;
红色警告,需要优化
2.异步做圆角 代码在上面

红色没了,完美搞定,tableview滑动的时候就不会一直重绘了,丝滑丝滑的
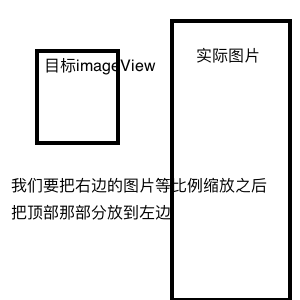
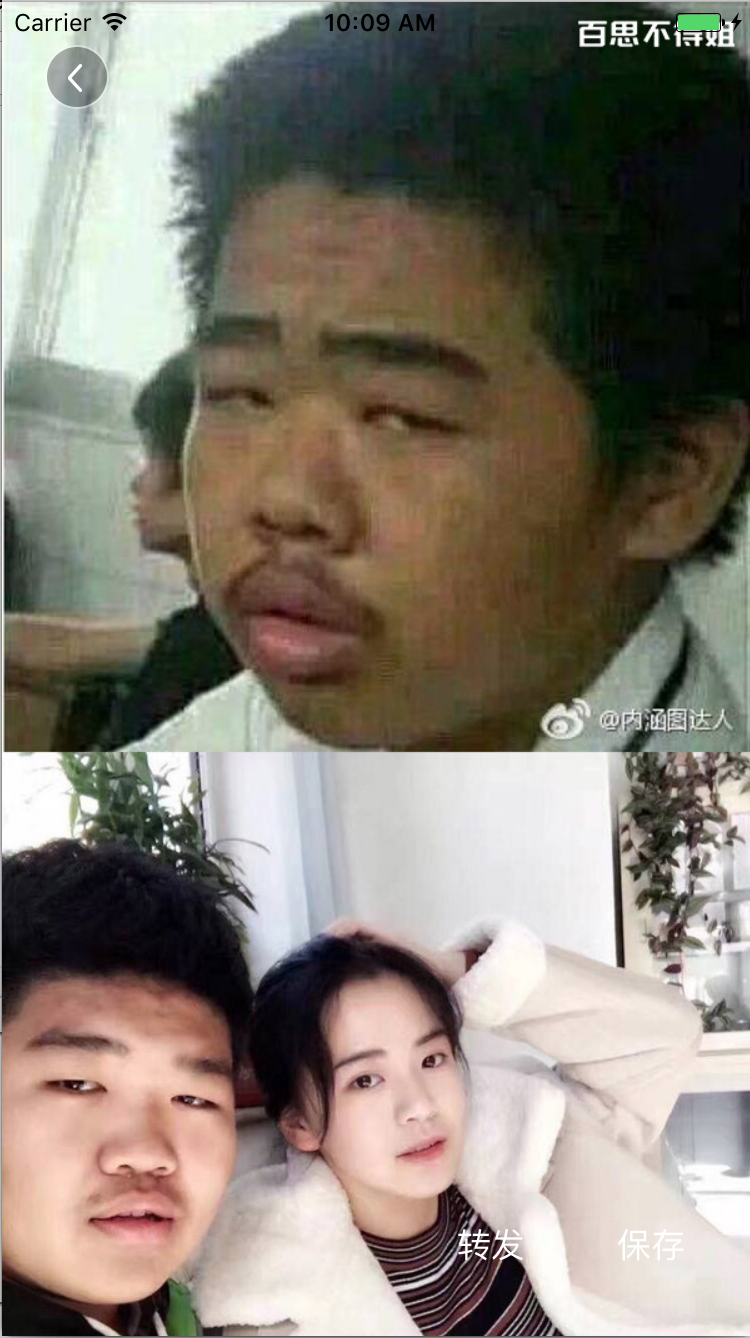
8.微博,糗事百科这一类发布的长图片如何压缩只显示顶部区域,点开展示大图
// 开启图形上下文  给定一个尺寸框框,无论下面那句话画出来的新的image是多大,都根据这个尺寸框进行获取,一般获取超级长图头部图片的方法
        UIGraphicsBeginImageContextWithOptions(CGSizeMake(topic.picFrame.size.width, topic.picFrame.size.height), YES, 0.0);

        // 根据大小绘制  这里给一个图片压缩后的尺寸,这个时候是等比例长度缩放的,而且是全尺寸长度的
        CGFloat width = topic.picFrame.size.width;
        CGFloat height = topic.picFrame.size.width * image.size.height / image.size.width;
        [image drawInRect:CGRectMake(0, 0, width, height)];


        // 从图形上下文获取图片
        self.backImageView.image = UIGraphicsGetImageFromCurrentImageContext();


        // 结束图形上下文
        UIGraphicsEndImageContext();
看下实际需求点:
当我们在头部展示的时候是显示顶部图片,然后点开就是全部图片的展示,不然直接设置图片的contentMode,大图的时候显示位置会有问题

持续更新。。。。。。。。


 464
464

 被折叠的 条评论
为什么被折叠?
被折叠的 条评论
为什么被折叠?
 到【灌水乐园】发言


