


安装vue-router
使用CDN:
<script src="https://unpkg.com/vue-router/dist/vue-router.js"></script>或者安装vue-cli脚手架的时候,都会被问到是否需要安装,如果你输入了" Y " ,那么脚手架就会自动帮你安装上vue-router
![]()
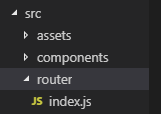
并且会在src文件夹下生成一个router文件夹,该文件下有个index.js文件,作为存放路由的地方
如果选择" n ",没有安装,可后续通过以下方式安装
npm install vue-router为了更易于维护,也可向上面的文件结构一样,在src文件夹下创建router文件夹,再创建index.js
使用vue-router:main.js文件下
import Router from 'vue-router'     //导入vue-router

Vue.use(Router)                     //vue全局引入vue-router

let router = new Router({
  routes: [
    ...
  ]
})

new Vue({
   ...
  router,
   ...
})
如果是分开写在index.js下,然后引入main.js
router中的index.js文件下
import Vue from 'vue'
import Router from 'vue-router'

Vue.use(Router)

export default new Router({
  routes: [
    ...
  ]
})
main.js 文件下
import router from './router'       //默认为router文件夹下的index.js文件

new Vue({
   ...
  router,
   ...
})
路由的设置:路由就被包裹在routes数组中,注意:routes的书写,不要拼错
export default new Router({
  routes: [
    //写路由的位置
  ]
})
可以使用import导入组件,再引用入路由,路由最重要的就是path和component两个属性名,前者是路由名,后者是所要显示的组件
import HelloWorld from '../components/HelloWorld'

export default new Router({
  routes: [
    {
      path: '/HelloWorld',        //作为路由,命名自定义
      component: HelloWorld       //直接使用引入组件的命名变量
    }
  ]
})
特殊的重定向:
path的路由会被redirect的路由代替,常用于当刚开启网页,路由为‘/’或没有明确指向时,直接设置成redirect指向的路由
{
    path: '/',
    redirect: '/index'
}
动态路由
如果遇到文章页或者视频页这种多个相同页面只是内容不同的页面时,就需要使用动态路由,就是在静态路由后加 " : "冒号,然后在自定义一个词,这样就可以将不同的页面内容渲染在一个组件上
import article from '../components/Article '
{
    path: '/article/:id',
    component: article
}
懒加载路由
const Index = () => import('../view/index/index.vue')

const router = new VueRouter({
  routes: [
    { path: '/index', component: Index }
  ]
})
如果不想使用import导入组件的方式,也可以使用以下方式,同时使用了懒加载
{
     path: '/index',
     component: resolve => { require(['../view/index/index.vue'], resolve); }
}


 2517
2517


 被折叠的 条评论
为什么被折叠?
被折叠的 条评论
为什么被折叠?
 到【灌水乐园】发言


