


在https://blog.csdn.net/Dora_5537/article/details/87918022这篇博客中,我们使用 vue-cli 新建了自己的项目;
在https://blog.csdn.net/Dora_5537/article/details/87921443这篇博客中,我们使用 WebStorm 打开并运行了自己的项目;
接下来,我们就简单使用 vue router 来实现页面之间的跳转吧~
1.index.html文件
在index.html文件中增加以下代码:
第一处:

第二处:
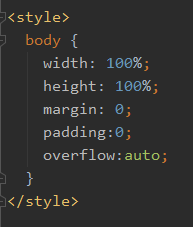
完整代码如下:
<!DOCTYPE html>
<html style="height: 100%">
  <head>
    <meta charset="utf-8">
    <meta name="viewport" content="width=device-width,initial-scale=1.0">
    <title>vuedemo</title>
  </head>
  <body>
    <div id="app"></div>
    <!-- built files will be auto injected -->
  </body>
</html>

<style>
  body {
    width: 100%;
    height: 100%;
    margin: 0;
    padding:0;
    overflow:auto;
  }
</style>
2.main.js文件
main.js文件暂时不做变动。
完整代码如下:
// The Vue build version to load with the `import` command
// (runtime-only or standalone) has been set in webpack.base.conf with an alias.
import Vue from 'vue'
import App from './App'
import router from './router'

Vue.config.productionTip = false

/* eslint-disable no-new */
new Vue({
  el: '#app',
  router,
  components: { App },
  template: '<App/>'
})
3.App.vue文件
在App.vue文件中删除多余代码。
完整代码如下:
<template>
  <div>
    <router-view/>
  </div>
</template>

<script>
export default {
  name: 'App'
}
</script>
4.router目录下的index.js文件
在index.js文件中引入你的所有.vue文件,并定义每一条路由的路径(payh)、名字(name)、组件(component)。
在这里,总共有三个页面,四条路由信息。
三个页面分别是 initial.vue,HelloWorld.vue,Position.vue。
四条路由信息中,除了对应以上三个页面的信息,还有一条默认路由,默认路由是指项目初始默认跳转的页面。在这里,它使用的组件是 initial.vue,即刚开始进入到 initial.vue 这个页面。
注意:
1. 一定不要忘记以下三行代码:
import Vue from 'vue'
import Router from 'vue-router'

Vue.use(Router)
2. 每一条路由的name是唯一的,绝不能重复。
完整代码如下:
import Vue from 'vue'
import Router from 'vue-router'

import initial from '@/components/initial'
import HelloWorld from '@/components/HelloWorld'
import Position from '@/components/Position'

Vue.use(Router)

export default new Router({
  routes: [
    {
      path: '/',
      name: 'default',
      component: initial
    },
    {
      path: '/initial',
      name: 'initial',
      component: initial
    },
    {
      path: '/HelloWorld',
      name: 'HelloWorld',
      component: HelloWorld
    },
    {
      path: '/Position',
      name: 'Position',
      component: Position
    }
  ]
})
5.components目录下的.vue文件
1)initial.vue
这是进行页面跳转的首页,我采用了两种方法来实现,分别是:
第一种:使用 “ path(路径) ”
<router-link to = "/HelloWorld" class = "text">/HelloWorld</router-link>第二种:使用 “ name(名字) ”
<router-link :to = "{name: 'Position'}" class = "text">/Position</router-link>完整代码如下:
<template>
  <div class = "main">
    <div class = "line1">
      Welcome to Your Vue.js App!
    </div>
    <div class = "line2">
      请点击下方链接进行页面跳转!
    </div>
    <div class = "line">
      <router-link to = "/HelloWorld" class = "text">/HelloWorld</router-link>
    </div>
    <div class = "line">
      <router-link :to = "{name: 'Position'}" class = "text">/Position</router-link>
    </div>
  </div>
</template>

<script>
export default {
  name: 'initial'
}
</script>

<style scoped>
  .main {
    padding-top: 10%;
    text-align: center
  }
  .line1 {
    font-size: 50px;
    color: #1e90ff
  }
  .line2 {
    margin-top: 40px;
    font-size: 20px;
    color: black
  }
  .line {
    margin-top: 40px
  }
  .text {
    font-size: 30px
  }
</style>
效果图如下:

2)HelloWorld.vue
这就是新建好项目之后,自带的.vue文件。我增加了两个地方的代码(大家也可以不修改这里,直接忽略):
第一处:
<img src="./../assets/logo.png">
第二处:
  .hello {
    text-align: center;
    margin-top: 10%;
  }
完整代码如下:
<template>
  <div class="hello">
    <img src="./../assets/logo.png">
    <h1>{{ msg }}</h1>
    <h2>Essential Links</h2>
    <ul>
      <li>
        <a
          href="https://vuejs.org"
          target="_blank"
        >
          Core Docs
        </a>
      </li>
      <li>
        <a
          href="https://forum.vuejs.org"
          target="_blank"
        >
          Forum
        </a>
      </li>
      <li>
        <a
          href="https://chat.vuejs.org"
          target="_blank"
        >
          Community Chat
        </a>
      </li>
      <li>
        <a
          href="https://twitter.com/vuejs"
          target="_blank"
        >
          Twitter
        </a>
      </li>
      <br>
      <li>
        <a
          href="http://vuejs-templates.github.io/webpack/"
          target="_blank"
        >
          Docs for This Template
        </a>
      </li>
    </ul>
    <h2>Ecosystem</h2>
    <ul>
      <li>
        <a
          href="http://router.vuejs.org/"
          target="_blank"
        >
          vue-router
        </a>
      </li>
      <li>
        <a
          href="http://vuex.vuejs.org/"
          target="_blank"
        >
          vuex
        </a>
      </li>
      <li>
        <a
          href="http://vue-loader.vuejs.org/"
          target="_blank"
        >
          vue-loader
        </a>
      </li>
      <li>
        <a
          href="https://github.com/vuejs/awesome-vue"
          target="_blank"
        >
          awesome-vue
        </a>
      </li>
    </ul>
  </div>
</template>

<script>
export default {
  name: 'HelloWorld',
  data () {
    return {
      msg: 'Welcome to Your Vue.js App'
    }
  }
}
</script>

<!-- Add "scoped" attribute to limit CSS to this component only -->
<style scoped>
  .hello {
    text-align: center;
    margin-top: 10%;
  }
  h1, h2 {
    font-weight: normal;
  }
  ul {
    list-style-type: none;
    padding: 0;
  }
  li {
    display: inline-block;
    margin: 0 10px;
  }
  a {
    color: #42b983;
  }
</style>
效果图如下:

3)Position.vue
这个是我在https://blog.csdn.net/Dora_5537/article/details/87932957这篇博客中使用的页面,用于理解CSS Position (定位),这里不再细说。
完整代码如下:
<template>
  <div class="absolute">
    <div class="absolute1"><h2 style="padding-left: 20px">absolute1: 第二层</h2></div>
    <div class="absolute2"><h2 style="padding-left: 20px">absolute2: 第三层</h2></div>
    <div class="fixed"><h2 style="padding-top: 100px;text-align: center">fixed:第四层</h2></div>
    <h2 style="padding-left: 20px">absolute: 第一层 ( 这部分的位置按文档流是在 class="relative" 的区域块上面,被遮挡了,看不到。) </h2>
    <div class="relative">
      <div class="absolute3"><h2 style="padding-left: 20px">absolute3:第六层</h2></div>
      <div class="absolute4">
        <h2 style="padding-left: 20px">absolute4:第七层</h2>
        <div class="fixed1"><h2 style="padding-top: 100px;text-align: center">fixed1:第八层</h2></div>
      </div>
      <!--padding-top:30%是指父元素宽度的30%-->
      <h2 style="padding-left: 20px;padding-top: 30%">relative:第五层</h2>
    </div>
    <h2 style="padding-left: 20px">absolute: 第一层 ( 这部分的位置按文档流是在 class="relative" 的区域块下面,被遮挡了,看不到。) </h2>
  </div>
</template>

<script>
export default {
  name: 'position'
}
</script>

<style scoped>
  /* absolute 绝对定位的元素的位置相对于最近的已定位父元素,如果元素没有已定位的父元素,那么它的位置相对于<html>。
     absolute 定位使元素的位置与文档流无关,因此不占据空间。
     absolute 定位的元素和其他元素重叠。*/
  /* 父元素为<html> */
  .absolute{
    position: absolute;
    width: 100%;
    height: 100%;
    overflow: hidden;
  }
  /* 父元素为<div class="absolute"> */
  .absolute1{
    position:absolute;
    width: 100%;
    height: 500px;
    background: #7fffd4;
  }
  /* 父元素为<div class="absolute"> */
  .absolute2{
    position:absolute;
    width: 100%;
    bottom: 0;
    background: #47c1ff;
    top: 500px;
  }
  /* fixed 元素的位置相对于浏览器窗口是固定位置。即使窗口是滚动的它也不会移动。
     fixed 定位使元素的位置与文档流无关,因此不占据空间。
     fixed 定位的元素和其他元素重叠。*/
  .fixed{
    position:fixed;
    top:700px;
    left:100px;
    width: 500px;
    height: 260px;
    background: #ff2c2c;
  }
  /* relative 相对定位元素的定位是相对其正常位置。
     移动相对定位元素,但它原本所占的空间不会改变。
     相对定位元素经常被用来作为绝对定位元素的容器块。*/
  /* 父元素为<div class="absolute"> */
  .relative{
    position: relative;
    width: 1440px;
    /* height: 50%是指父元素高度的50% */
    height: 50%;
    background: #ffffff;
    margin: 170px auto;
  }
  /* 父元素为<div class="relative"> */
  .absolute3{
    position:absolute;
    /* width: 100%是指父元素宽度的100% */
    width: 100%;
    height: 200px;
    background: #fcff2e;
  }
  /* 父元素为<div class="relative"> */
  .absolute4{
    position:absolute;
    /* width: 50%是指父元素宽度的50% */
    width: 50%;
    /* height: 50%是指父元素高度的50% */
    height: 50%;
    background: #77ff74;
    /* 父元素宽度的25% */
    left:25%;
    /* 父元素高度的25% */
    top:25%;
  }
  .fixed1{
    position:fixed;
    top:700px;
    right:100px;
    width: 500px;
    height: 260px;
    background: #ff2c2c;
  }
</style>
效果图如下:

END


 7726
7726


 被折叠的 条评论
为什么被折叠?
被折叠的 条评论
为什么被折叠?
 到【灌水乐园】发言


