


一、webpack的使用
1、webpack的起步
(1)webpack安装(全局)
nodejs:官网 https://nodejs.org/zh-cn/(推荐下载LTS版本)
下载好直接双击安装,设置对应环境变量即可
C:\Users\Dream>npm install cnpm -g -registry=https://registry.npm.taobao.org     ###由于npn网速过慢,用淘宝的cnpm
C:\Users\Dream>cnpm install webpack@3.6.0 -g     ###安装webpack
C:\Users\Dream>webpack --version                 ###查看版本
3.6.0
(2)webpack初体验
所有东西都放在
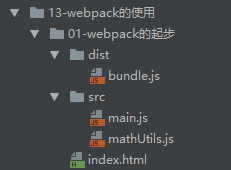
01-webpack的起步目录里面,并在目录下创建dist和src目录
文件目录:
<1> 配置src/main.js
//1、使用commonjs的模块化规范
const {add, mul} = require('./mathUtils');

//2、使用ES6的模块化规范
// import {add, mul} form "./mathUtils";
console.log(add(20,30));
console.log(mul(20,30));
<2> 配置src/mathUtils.js
function add(num1, num2) {
    return num1 + num2
}

function mul(num1, num2) {
    return num1 * num2
}

module.exports = {
    add,
    mul
}
<3> 配置index.html
<!DOCTYPE html>
<html lang="en">
<head>
    <meta charset="UTF-8">
    <title>Title</title>
</head>
<body>
</body>
</html>
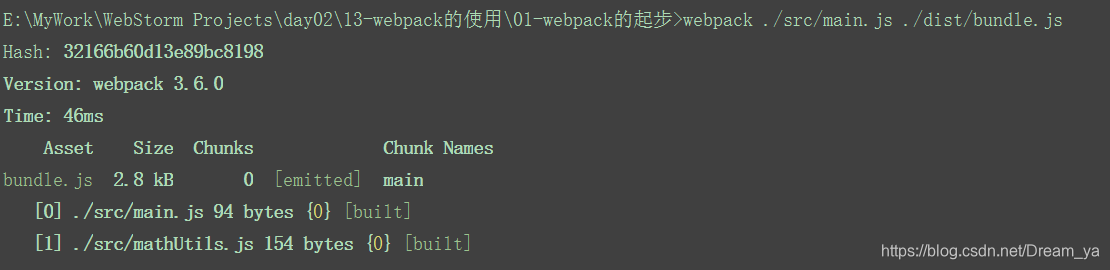
<4> 生成bundle.js
可以在dist目录发现bundle.js文件
E:\MyWork\WebStorm Projects\day02\13-webpack的使用\01-webpack的起步>webpack ./src/main.js ./dist/bundle.js
<5> 修改index.html
<!DOCTYPE html>
<html lang="en">
<head>
    <meta charset="UTF-8">
    <title>Title</title>
</head>
<body>

<script src="./dist/bundle.js"></script>
</body>
</html>
<6> 查看结果

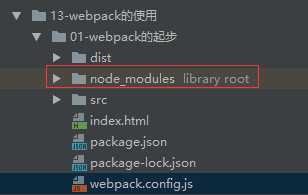
2、配置webpack.config.js和package.json
(1)package.json生成
<1> 通过npm生成
E:\MyWork\WebStorm Projects\day02\13-webpack的使用\01-webpack的起步>npm init
This utility will walk you through creating a package.json file.
It only covers the most common items, and tries to guess sensible defaults.

See `npm help json` for definitive documentation on these fields
and exactly what they do.

Use `npm install <pkg>` afterwards to install a package and
save it as a dependency in the package.json file.

Press ^C at any time to quit.
package name: (01-webpack的起步) meetwebpack
version: (1.0.0)
description:
entry point: (webpack.config.js) index.js
test command:
git repository:
keywords:
author:
license: (ISC)
About to write to E:\MyWork\WebStorm Projects\day02\13-webpack的使用\01-webpack的起步\package.json:

{
  "name": "meetwebpack",
  "version": "1.0.0",
  "description": "",
  "main": "index.js",
  "scripts": {
    "test": "echo \"Error: no test specified\" && exit 1"
  },
  "author": "",
  "license": "ISC"
}


Is this OK? (yes)
<2> 查看结果
{
  "name": "meetwebpack",
  "version": "1.0.0",
  "description": "",
  "main": "index.js",
  "scripts": {
    "test": "echo \"Error: no test specified\" && exit 1"
  },
  "author": "",
  "license": "ISC"
}
<3> 安装依赖
这里我们没有依赖,存在的话就需要这样进行安装
E:\MyWork\WebStorm Projects\day02\13-webpack的使用\01-webpack的起步>npm install
npm notice created a lockfile as package-lock.json. You should commit this file.
npm WARN meetwebpack@1.0.0 No description
npm WARN meetwebpack@1.0.0 No repository field.

up to date in 1.016s
found 0 vulnerabilities
(2)webpack.config.js配置
<1> webpack.config.js
const path = require('path');

module.exports = {
    entry: './src/main.js',
    output: {
        path: path.resolve(__dirname, 'dist'),
        filename: 'bundle.js'
    }
};
<2> 执行结果
其实就是把webpack命令放在了配置文件中
E:\MyWork\WebStorm Projects\day02\13-webpack的使用\01-webpack的起步>webpack
Hash: 1441f3377024c13872f7
Version: webpack 3.6.0
Time: 42ms
    Asset     Size  Chunks             Chunk Names
bundle.js  2.92 kB       0  [emitted]  main
   [0] ./src/main.js 211 bytes {0} [built]
   [1] ./src/mathUtils.js 154 bytes {0} [built]
3、局部安装webpack
(1)安装
E:\MyWork\WebStorm Projects\day02\13-webpack的使用\01-webpack的起步>npm install webpack@3.6.0 --save-dev
(2)修改package.json
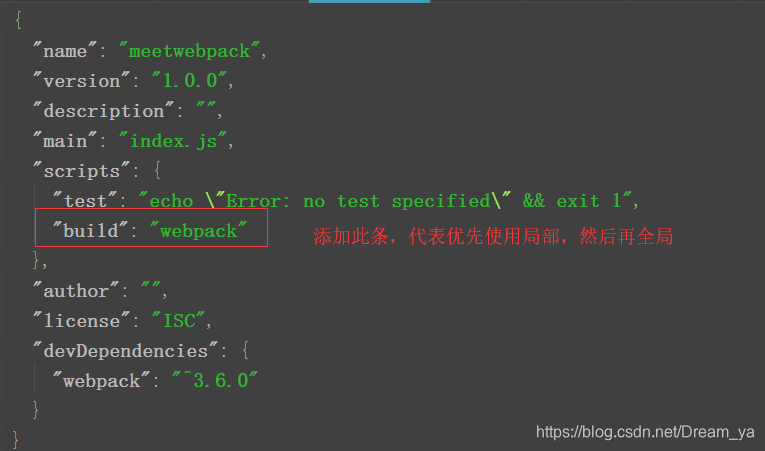
4、webpack的loader
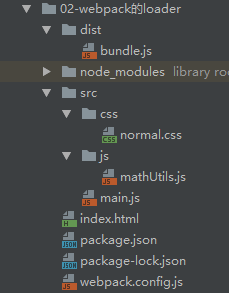
复制上面的内容,新建css目录
(1)查看目录结构
(2)配置normal.css
body {
    background-color: red;
}
(3)修改webpack.config.js
const path = require('path');

module.exports = {
    entry: './src/main.js',
    output: {
        path: path.resolve(__dirname, 'dist'),
        filename: 'bundle.js'
    },
    module: {
        rules: [
            {
                test: /\.css$/,
                //只负责将css文件进行加载
                //使用多个loader时,是从右向左
                use: ['style-loader','css-loader']
            }
        ]
    }
};
(4)修改main.js
//1、使用commonjs的模块化规范
const {add, mul} = require('./js/mathUtils');
//2、使用ES6的模块化规范
// import {add, mul} form "./mathUtils";
console.log(add(20,30));
console.log(mul(20,30));

//3、依赖css
require('./css/normal.css');
(5)打包
可以发现页面整体变为红色
E:\MyWork\WebStorm Projects\day02\13-webpack的使用\02-webpack的loader>npm install --save-dev css-loader
E:\MyWork\WebStorm Projects\day02\13-webpack的使用\02-webpack的loader>npm install --save-dev style-loader
E:\MyWork\WebStorm Projects\day02\13-webpack的使用\02-webpack的loader>npm run build
(6)less
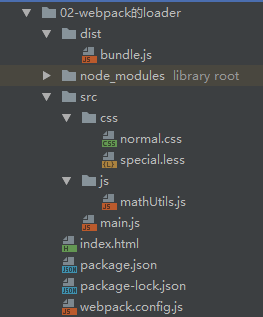
<1> 配置special.less
@fontSize: 50px;
@fontColor: orange;
body {
  font-size: @fontSize;
  color: @fontColor;
}
<2> 配置webpack.config.js
const path = require('path');

module.exports = {
    entry: './src/main.js',
    output: {
        path: path.resolve(__dirname, 'dist'),
        filename: 'bundle.js'
    },
    module: {
        rules: [
            {
                test: /\.css$/,
                //只负责将css文件进行加载
                //使用多个loader时,是从右向左
                use: ['style-loader','css-loader']
            },
            {
                test: /\.less$/,
                use: [{
                    loader: "style-loader" // creates style nodes from JS strings
                }, {
                    loader: "css-loader" // translates CSS into CommonJS
                }, {
                    loader: "less-loader" // compiles Less to CSS
                }]
            }
        ]
    }
};
<3> 修改main.js
//1、使用commonjs的模块化规范
const {add, mul} = require('./js/mathUtils');
//2、使用ES6的模块化规范
// import {add, mul} form "./mathUtils";
console.log(add(20,30));
console.log(mul(20,30));

//3、依赖css
require('./css/normal.css');

//4、依赖less文件
require('./css/special.less');
document.writeln('<h1>hello,vue</h1>');
<4> 查看结果
E:\MyWork\WebStorm Projects\day02\13-webpack的使用\02-webpack的loader>npm install --save-dev less-loader@4.1.0 less@3.9.0
E:\MyWork\WebStorm Projects\day02\13-webpack的使用\02-webpack的loader>npm run build

二、Vuecli安装
1、Vuecli2安装与初始化
C:\Users\Dream>cnpm install -g @vue/cli@3.2.1      ###版本3
C:\Users\Dream>vue --version
3.2.1

C:\Users\Dream>cnpm install @vue/cli-init -g       ###版本2

E:\MyWork\VscodeProject>vue init webpack testvue   ###版本2创建项目
? Project name testvue
? Project description A Vue.js project
? Author
? Vue build standalone
? Install vue-router? Yes
? Use ESLint to lint your code? Yes
? Pick an ESLint preset Standard
? Set up unit tests No
? Setup e2e tests with Nightwatch? No
? Should we run `npm install` for you after the project has been created? (recommended) npm

   vue-cli · Generated "testvue".
2、Vuecli3项目创建
(1)创建项目与启动项目
E:\MyWork\VscodeProject>vue create testvuecli3
E:\MyWork\VscodeProject>vue-cli-service serve     ###启动项目
(2)修改配置两种方式
<1> vue ui
通过浏览器访问http://localhost:8000/dashboard
E:\MyWork\VscodeProject>vue ui ###启动项目管理
<2> 创建vue.config.js
module.exports = {

}
三、路由vue-router
1、url的hash和HTML5的histroy
(1)hash
在浏览器控制台执行
location.href='aaa'        ###可以发现页面会刷新
location.hash='bbb'        ###页面不会进行刷新
(2)HTML5
<1> pushState
history.pushState({},'','home')      ###页面不会进行刷新,url放入栈中
history.pushState({},'','about')
history.back()                       ###返回url,会发现url回到home
history.go(-1)    =>  history.back()
history.go(1)     =>  history.forward()
<2> replaceState
url无法返回
history.replaceState({},'','home')
2、安装和使用vue-router
(1)安装
npm install vue-router --save
(2)配置
<1> 配置src/router/index.js
router目录自行创建
import Vue from 'vue';
import VueRouter from 'vue-router';

// 1、安装插件
Vue.use(VueRouter);

// 2、创建VueRouter对象
const  routes = []

const router = new VueRouter({
    routers
})
export default router
<2> 配置src/main.js
import App from './App.vue'
import { router } from './router'

Vue.config.productionTip = false

new Vue({
  router,
  render: h => h(App),
}).$mount('#app')
3、基本使用
(1) 配置src/router/index.js
import Vue from 'vue';
import VueRouter from 'vue-router';
import Home from '../components/Home'
import About from '../components/About'

// // 1、安装插件
Vue.use(VueRouter);

// 2、创建VueRouter对象
const  routes = [
    {
        path: '/home',
        component: Home
    },
    {
        path: '/about',
        component: About
    }
]

const router = new VueRouter({
    routes
})
export default router
(2)修改src/main.js
import Vue from 'vue'
import App from './App.vue'
import router from './router'

Vue.config.productionTip = false

new Vue({
  router,
  render: h => h(App),
}).$mount('#app')
(3)配置src/components/About.vue
<template>
  <div>
      <h2>我是about</h2>
      <p>呵呵呵</p>
  </div>
</template>

<script>
  export default {
  }
</script>

<style scoped>

</style>
(4)配置src/components/Home.vue
<template>
  <div>
    <h2>我是home</h2>
    <p>嘻嘻嘻</p>
  </div>
</template>

<script>
export default {};
</script>

<style scoped>
</style>
(5)修改src/App.vue
<template>
  <div id="app">
    <router-link to='/home'>首页</router-link>
    <router-link to='/about'>关于</router-link>
    <router-view></router-view>
  </div>
</template>

<script>

export default {
  name: 'App',
}
</script>

<style>

</style>
(6)查看结果

4、路由默认值和history设置
import Vue from 'vue';
import VueRouter from 'vue-router';
import Home from '../components/Home'
import About from '../components/About'

// // 1、安装插件
Vue.use(VueRouter);

// 2、创建VueRouter对象
const  routes = [
    //设置默认路由
    {
        path: '/',
        redirect: '/home'
    }
    ,
    {
        path: '/home',
        component: Home
    },
    {
        path: '/about',
        component: About
    }
]

const router = new VueRouter({
    routes,
    mode: 'history',            // 设置为history模式
})
export default router
5、router-link属性补充
<router-link to='/home' tag='button'>首页</router-link>       ###修改为button
<router-link to='/home' active-class="active">首页</router-link>   ###默认:router-link-active,修改class为active
批量修改:

6、通过代码跳转
修改App.vue
<template>
  <div id="app">
    <!-- <router-link to='/home' tag='button' active-class="active">首页</router-link>
    <router-link to='/about' tag='button' active-class="active">关于</router-link> -->
    <!-- <router-view></router-view> -->
    <button @click="homeClick">首页</button>
    <button @click="aboutClick">关于</button>
    <router-view></router-view>
  </div>
</template>

<script>

export default {
  name: 'App',
  methods: {
    homeClick() {
      // this.$router.push('/home')    //可以返回
      this.$router.replace('/home')    //不可以返回
    },
    aboutClick() {
      // this.$router.push('/about')
      this.$router.replace('/about')
    }
  }
}
</script>

<style>

</style>
7、动态路由
(1)配置src/User.vue
<template>
  <div>
    <h2>我是用户界面</h2>
    <p>用户信息,嘿嘿</p>
    <h2>{{userId}}</h2>
    <h2>{{$route.params.userId}}</h2>
  </div>
</template>

<script>
  export default {
    computed: {
      userId() {
        return this.$route.params.userId
      }
    }
  }
</script>

<style scoped>

</style>
(2)修改src/router/index.js
import Vue from 'vue';
import VueRouter from 'vue-router';
import Home from '../components/Home'
import About from '../components/About'
import User from '../components/User'

// // 1、安装插件
Vue.use(VueRouter);

// 2、创建VueRouter对象
const  routes = [
    {
        path: '/',
        redirect: '/home'
    },
    {
        path: '/home',
        component: Home
    },
    {
        path: '/about',
        component: About
    },
    {
        path: '/user/:userId',
        component: User
    }
]

const router = new VueRouter({
    routes,
    mode: 'history',
    linkActiveClass: 'active'
})
export default router
(3)修改App.vue
<template>
  <div id="app">
    <router-link to="/home">首页</router-link>
    <router-link to="/about">关于</router-link>
    <router-link :to="'/user/'+userId">用户</router-link>
    <router-view></router-view>
  </div>
</template>

<script>

export default {
  name: 'App',
  data() {
    return {
      userId: 'Wielun'
    }
  },
  methods: {
    homeClick() {
      // this.$router.push('/home')    //可以返回
      this.$router.replace('/home')    //不可以返回
    },
    aboutClick() {
      // this.$router.push('/about')
      this.$router.replace('/about')
    }
  }
}
</script>

<style>
</style>
8、路由懒加载
访问才进行加载
修改router/index.js
### 1、AMD写法
const About = resolve => reqire(['../components/About.vue'], resolve)
### 2、ES6写法
const About = () => import(''../components/About.vue')
9、路由嵌套
(1)创建HomeNews.vue
<template>
  <div>
    <ul>
      <li>新闻1</li>
      <li>新闻2</li>
    </ul>
  </div>
</template>

<script>
  export default {
  }
</script>

<style scoped>

</style>
(2)创建HomeMessage.vue
<template>
  <div>
    <ul>
      <li>消息1</li>
      <li>消息2</li>
    </ul>
  </div>
</template>

<script>
  export default {
  }
</script>

<style scoped>

</style>
(3)修改Home.vue
<template>
  <div>
    <h2>我是home</h2>
    <p>嘻嘻嘻</p>
    <router-link to="/home/news">新闻</router-link>
    <router-link to="/home/message">消息</router-link>
    <router-view></router-view>
  </div>
</template>

<script>
export default {};
</script>

<style scoped>
</style>
(4)修改router/index.js
import Vue from 'vue';
import VueRouter from 'vue-router';
const Home = () => import('../components/Home')
const HomeNews = () => import('../components/HomeNews')
const HomeMessage = () => import('../components/HomeMessage')
const About = () => import('../components/About')
const User = () => import('../components/User')

// // 1、安装插件
Vue.use(VueRouter);

// 2、创建VueRouter对象
const  routes = [
    {
        path: '/',
        redirect: '/home'
    },
    {
        path: '/home',
        component: Home,
        children: [
            {
                path: '/',
                component: HomeNews
            },
            {
                path: 'news',
                component: HomeNews
            },
            {
                path: 'message',
                component: HomeMessage
            }
        ]
    },
    {
        path: '/about',
        component: About
    },
    {
        path: '/user/:userId',
        component: User
    }
]

const router = new VueRouter({
    routes,
    mode: 'history',
    linkActiveClass: 'active'
})
export default router
(5)结果

10、参数传递
(1)配置Profile.vue
<template>
  <div>
    <h2>我是Profile</h2>
    <h2>{{$route.query.name}}</h2>
    <h2>{{$route.query.age}}</h2>
    <h2>{{$route.query.height}}</h2>
  </div>
</template>

<script>
  export default {
  }
</script>

<style scoped>

</style>
(2)修改router/index.js
import Vue from 'vue';
import VueRouter from 'vue-router';
const Home = () => import('../components/Home')
const HomeNews = () => import('../components/HomeNews')
const HomeMessage = () => import('../components/HomeMessage')
const About = () => import('../components/About')
const User = () => import('../components/User')
const Profile = () => import('../components/Profile')

// // 1、安装插件
Vue.use(VueRouter);

// 2、创建VueRouter对象
const  routes = [
    {
        path: '/',
        redirect: '/home'
    },
    {
        path: '/home',
        component: Home,
        children: [
            {
                path: '/',
                component: HomeNews
            },
            {
                path: 'news',
                component: HomeNews
            },
            {
                path: 'message',
                component: HomeMessage
            }
        ]
    },
    {
        path: '/about',
        component: About
    },
    {
        path: '/user/:userId',
        component: User
    },
    {
        path: '/profile',
        component: Profile
    }
]

const router = new VueRouter({
    routes,
    mode: 'history',
    linkActiveClass: 'active'
})
export default router
(3)修改App.vue
<template>
  <div id="app">
    <router-link to="/home">首页</router-link>
    <router-link to="/about">关于</router-link>
    <router-link :to="'/user/'+userId">用户</router-link>
    <router-link :to="{path: '/profile', query: {name: 'wielun', age: 18, height: 1.8}}">档案</router-link>
    <router-view></router-view>
  </div>
</template>

<script>

export default {
  name: 'App',
  data() {
    return {
      userId: 'Wielun'
    }
  },
  methods: {
    homeClick() {
      // this.$router.push('/home')    //可以返回
      this.$router.replace('/home')    //不可以返回
    },
    aboutClick() {
      // this.$router.push('/about')
      this.$router.replace('/about')
    }
  }
}
</script>

<style>
</style>
(4)查看结果

(5) 修改为button
<1> 修改App.vue
<template>
  <div id="app">
    <router-link to="/home">首页</router-link>
    <router-link to="/about">关于</router-link>
    <button @click='userClick'>用户</button>
    <button @click='ProfileClick'>档案</button>
    <router-view></router-view>
  </div>
</template>

<script>

export default {
  name: 'App',
  data() {
    return {
      userId: 'Wielun'
    }
  },
  methods: {
    homeClick() {
      // this.$router.push('/home')    //可以返回
      this.$router.replace('/home')    //不可以返回
    },
    aboutClick() {
      // this.$router.push('/about')
      this.$router.replace('/about')
    },
    userClick() {
      this.$router.push('/user/' + this.userId)
    },
    ProfileClick() {
      this.$router.push({
        path: '/profile',
        query: {name: 'wielun', age: 18, height: 1.8}
      })
    }
  }
}
</script>

<style>
</style>
<2> 查看结果

11、全局导航守卫
修改router/index.js
跳转页面title跟着修改
import Vue from 'vue';
import VueRouter from 'vue-router';
const Home = () => import('../components/Home')
const HomeNews = () => import('../components/HomeNews')
const HomeMessage = () => import('../components/HomeMessage')
const About = () => import('../components/About')
const User = () => import('../components/User')
const Profile = () => import('../components/Profile')

// // 1、安装插件
Vue.use(VueRouter);

// 2、创建VueRouter对象
const  routes = [
    {
        path: '/',
        redirect: '/home'
    },
    {
        path: '/home',
        component: Home,
        children: [
            {
                path: '/',
                component: HomeNews
            },
            {
                path: 'news',
                component: HomeNews
            },
            {
                path: 'message',
                component: HomeMessage
            }
        ],
        meta: {
            title: '首页'
         }
    },
    {
        path: '/about',
        component: About,
        meta: {
            title: '关于'
         }
    },
    {
        path: '/user/:userId',
        component: User,
        meta: {
            title: '用户'
         }
    },
    {
        path: '/profile',
        component: Profile,
        meta: {
            title: '档案'
         }
    }
]

const router = new VueRouter({
    routes,
    mode: 'history',
    linkActiveClass: 'active'
})
router.beforeEach((to, from, next) => {
    document.title = to.matched[0].meta.title;
    next()
})
export default router
12、keep-alive
实现切换后还保留之前打开的内容,组件不会频繁重新创建,可以提升性能
include:只有匹配的组件会被缓存
exclude:不会被缓存
(1)修改Home.vue
<template>
  <div>
    <h2>我是home</h2>
    <p>嘻嘻嘻</p>
    <router-link to="/home/news">新闻</router-link>
    <router-link to="/home/message">消息</router-link>
    <router-view></router-view>
  </div>
</template>

<script>
export default {
  data() {
    return {
      path: '/home/news'
    }
  },
  activated () {
  this.$router.push(this.path)
  },
  beforeRouteLeave (to, from, next) {
  this.path = this.$route.path;
  next()
  },

};

</script>

<style scoped>
</style>
(2)修改App.vue

(3)查看结果

(5)属性


 1万+
1万+


 被折叠的 条评论
为什么被折叠?
被折叠的 条评论
为什么被折叠?
 到【灌水乐园】发言


