


源码版本:Android 9
编译环境:AndroidStudio3.5.3
针对Androidx
一、插件化换肤
何为插件化换肤,顾名思义,就是通过插件的形式向宿主Apk添加资源(图片/颜色等资源)。宿主apk进行资源应用,最终将宿主apk上面的资源替换掉。二、换肤时机
在进行换肤之前,我们需要了解Andorid布局文件的解析流程,具体可以查看 setContentView源码解读。三、源码分析
3.1 控件的生成
通过查看 setContentView源码解读可以知道,我们进行换肤的核心操作就是替换LayoutInflater类中的mFactory2变量。虽然mFactory2在Activity启动之前已经被赋值了,不过LayoutInflater给我提供了修改mFactory2的入口( setFactory2方法)。 setFactory2方法源码如下:public void setFactory2(Factory2 factory) {
//调用setFactory2方法一次之后,再次调用时将会抛出异常
if (mFactorySet) {
throw new IllegalStateException("A factory has already been set on this LayoutInflater");
}
if (factory == null) {
throw new NullPointerException("Given factory can not be null");
}
//第一次调用之后mFactorySet将会被赋值为true,所以要想实现插件化则必须在调用setFactory2中之前修改mFactorySet的值
mFactorySet = true;
if (mFactory == null) {
mFactory = mFactory2 = factory;
} else {
mFactory = mFactory2 = new FactoryMerger(factory, factory, mFactory, mFactory2);
}
}
通过分析上述源码可以知道,要想二次给mFractory2赋值成功则必须要将mFractorySet的值修改为false。
3.2 Apk中的资源的加载流程分析(Android8.0 Api26)
先来一张apk中的资源关系图,如下所示: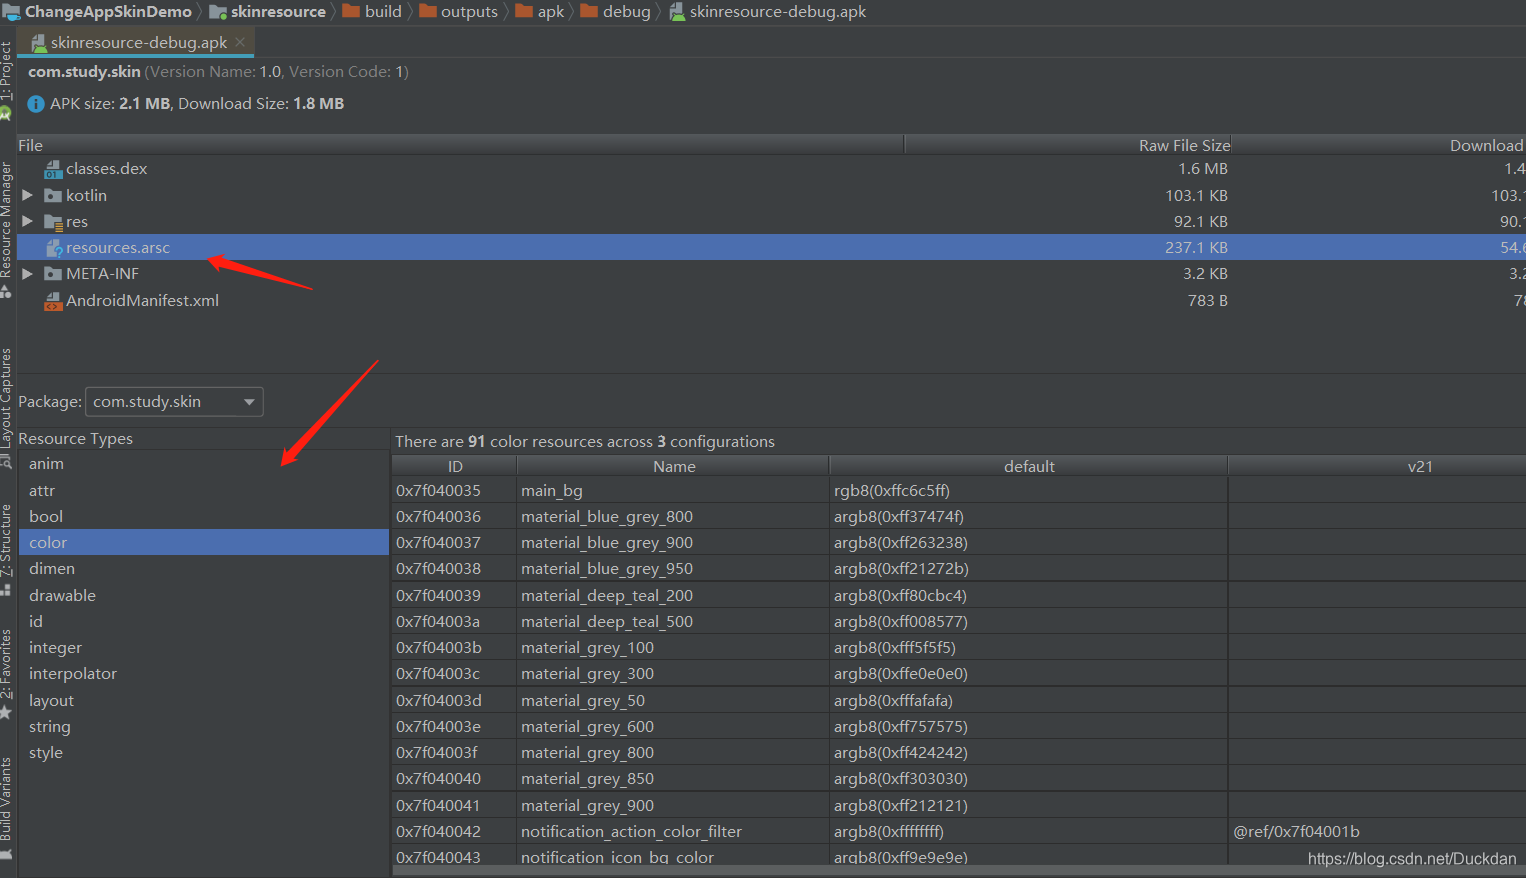
此处用Android8.0的源码来作分析,因为Demo中使用的Api接口是基于Android8.0的。在Android8.0之后Demo中用到的Api有些已经被谷歌标注为过时了,不过目前仍然可以用。资源加载的入口源码如下:
private void handleBindApplication(AppBindData data) {
        //...不相关代码


        //ContextImpl.createAppContext核心代码
        final ContextImpl appContext = ContextImpl.createAppContext(this, data.info);

        //...不相关代码
        if (ii != null) {
            //...不相关代码
            final LoadedApk pi = getPackageInfo(instrApp, data.compatInfo,
                    appContext.getClassLoader(), false, true, false);
            final ContextImpl instrContext = ContextImpl.createAppContext(this, pi);

            //...不相关代码
        } else {
            //...不相关代码
        }

        //...不相关代码
    }
上述ContextImpl.createAppContext方法源码如下所示:
 static ContextImpl createAppContext(ActivityThread mainThread, LoadedApk packageInfo) {

        ContextImpl context = new ContextImpl(null, mainThread, packageInfo, null, null, null, 0,
                null);
        //设置资源,packageInfo.getResources()核心代码
        context.setResources(packageInfo.getResources());
        return context;
}
上述packageInfo.getResources方法源码如下所示:
public Resources getResources() {
    if (mResources == null) {

        //创建resource
        mResources = ResourcesManager.getInstance().getResources(null, mResDir,
                    splitPaths, mOverlayDirs, mApplicationInfo.sharedLibraryFiles,
                    Display.DEFAULT_DISPLAY, null, getCompatibilityInfo(),
                getClassLoader());
    }
    return mResources;
}
上述ResourcesManager.getInstance().getResources源码如下所示:
public @Nullable Resources getResources(@Nullable IBinder activityToken,
            @Nullable String resDir,
            @Nullable String[] splitResDirs,
            @Nullable String[] overlayDirs,
            @Nullable String[] libDirs,
            int displayId,
            @Nullable Configuration overrideConfig,
            @NonNull CompatibilityInfo compatInfo,
            @Nullable ClassLoader classLoader) {
        try {
          //...不相关代码
            return getOrCreateResources(activityToken, key, classLoader);
        } finally {
            Trace.traceEnd(Trace.TRACE_TAG_RESOURCES);
        }
    }
getOrCreateResources方法源码如下所示:
private @Nullable Resources getOrCreateResources(@Nullable IBinder activityToken,
            @NonNull ResourcesKey key, @NonNull ClassLoader classLoader) {
        synchronized (this) {
            //...不相关代码
            ResourcesImpl resourcesImpl = createResourcesImpl(key);
            //...不相关代码
            if (resourcesImpl != null && resourcesImpl != resources.getImpl()) {
                //给resources设置ResourceImpl对象
                resources.setImpl(resourcesImpl);
         	 }
            return resources;
        }
}
上述createResourcesImpl方法源码如下:
  private @Nullable ResourcesImpl createResourcesImpl(@NonNull ResourcesKey key) {
        final DisplayAdjustments daj = new DisplayAdjustments(key.mOverrideConfiguration);
        daj.setCompatibilityInfo(key.mCompatInfo);

        final AssetManager assets = createAssetManager(key);
        if (assets == null) {
            return null;
        }

        final DisplayMetrics dm = getDisplayMetrics(key.mDisplayId, daj);
        final Configuration config = generateConfig(key, dm);
        final ResourcesImpl impl = new ResourcesImpl(assets, dm, config, daj);

        if (DEBUG) {
            Slog.d(TAG, "- creating impl=" + impl + " with key: " + key);
        }
        return impl;
    }
上述createAssetManager方法源码如下所示:
 protected @Nullable AssetManager createAssetManager(@NonNull final ResourcesKey key) {
        AssetManager assets = new AssetManager();


        if (key.mResDir != null) {
              //assets加载资源
            if (assets.addAssetPath(key.mResDir) == 0) {
                Log.e(TAG, "failed to add asset path " + key.mResDir);
                return null;
            }
        }

        if (key.mSplitResDirs != null) {
            for (final String splitResDir : key.mSplitResDirs) {
              //assets加载资源,添加资源报的路径
                if (assets.addAssetPath(splitResDir) == 0) {
                    return null;
                }
            }
        }

        if (key.mOverlayDirs != null) {
            for (final String idmapPath : key.mOverlayDirs) {
                assets.addOverlayPath(idmapPath);
            }
        }

        if (key.mLibDirs != null) {
            for (final String libDir : key.mLibDirs) {
                if (libDir.endsWith(".apk")) {
                   //assets加载资源
                    if (assets.addAssetPathAsSharedLibrary(libDir) == 0) {

                    }
                }
            }
        }
        return assets;
}
3.3 如何通过Resources对象回去Apk中的资源
宿主加载插件的资源的简易效果图如下所示: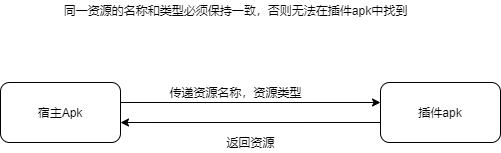
举个例子通过Resources对象回去apk中文本资源,代码如下:
val appName = resources.getText(R.string.app_name)
上述getText的源码如下所示:
public CharSequence getText(@StringRes int id) throws NotFoundException {
		//关键语句,可以看到获取资源的操作实质是通过AssertManager完成的
        CharSequence res = mResourcesImpl.getAssets().getResourceText(id);
        if (res != null) {
            return res;
        }
        throw new NotFoundException("String resource ID #0x"
                + Integer.toHexString(id));
    }
AssertManager中获取资源id的四大核心方法如下所示:
	//获取资源id
  /*package*/ native final int getResourceIdentifier(String name,
                                                       String defType,
                                                       String defPackage);
	//通过资源id获取资源名称
    /*package*/ native final String getResourceName(int resid);
    //通过资源id获取包名
    /*package*/ native final String getResourcePackageName(int resid);
    //通过资源id获取类型名
    /*package*/ native final String getResourceTypeName(int resid);


 664
664

 被折叠的 条评论
为什么被折叠?
被折叠的 条评论
为什么被折叠?
 到【灌水乐园】发言


