


一、背景
虽然 “博客” 已经是很多很多年前流行的东西了,但是时至今日,仍然有一部分人在维护自己的博客站点,输出不少高质量的文章。
我使用过几种博客托管平台或静态博客生成框架,前段时间使用Hono.js+Fauna ,基于 EO 边缘函数搭建了一个博客网站样例,写一篇小小文章进行记录。
二、技术栈
2.1 Hono.js

Hono.js 是一个轻量、快速的 Edge Web 框架,适用于多种 JavaScript 运行时:Cloudflare Workers、Fastly Compute、Deno、Bun、Vercel、Netlify、AWS Lambda 等,同样也可以在 EO 边缘函数 Runtime 中运行起来。
在 EO 边缘函数中,最简单的 Hono 应用写法如下:
import { Hono } from 'hono'
const app = new Hono()

app.get('/', (c) => c.text('Hono!'))

app.fire();
2.2 Fauna

Fauna 作为 Cloud API 提供的分布式文档关系数据库。Fauna 使用 FQL 进行数据库查询(FQL: A relational database language with the flexibility of documents)。
因此,我准备将博客文章存放在 Fauna 中,在 Fauna JS Driver 的基础上,包装 RESTful API 供边缘函数调用。
注意:
- 目前 EO 边缘函数还不能完全支持 Fauna JS Driver,因此现阶段还不能直接使用 JS Driver 进行数据查询,需要将 Fauna API 服务搭建在其他 JS 环境中。
- EO 边缘函数后续将支持 KV,同时也会兼容 Fauna JS Driver 的写法,因此这里可以进行优化。
import { Client, fql } from 'fauna';
...

router.get('/', async c => {
  const query = fql`Blogs.all()`;
  const result = await (c.var.faunaClient as Client).query<Blog>(query);
  return c.json(result.data);
});
...
三、搭建博客
3.1 路由
博客网站的路由比较简单,可以直接使用 Hono.js 进行处理:
import { Hono } from "hono";

import { Page } from "./pages/page";
import { Home } from "./pages/home";

const app = new Hono();

...

app.get("/", async (c) => {
  const blogs = await getBlogList();

  return c.html(<Home blogs={blogs} />);
});

app.get("/blog/:id{[0-9]+}", async (c) => {
  const id = c.req.param("id");
  const blog = await getBlogInfo(id);

  if (!blog) return c.notFound();

  return c.html(<Page blog={blog} />);
});

app.fire();
3.2 页面
Hono.js 中,可以直接按照 jsx 的语法定义页面结构和样式:
import { DateTime } from "luxon";

import { Layout } from "./components/layout";

...

const Item = (props: { blog: Blog }) => {
  const { ts, id, title } = props.blog;

  const dt = DateTime.fromISO(ts.isoString);
  const formatDate = dt.toFormat("yyyy-MM-dd");

  return (
    <li>
      <section>
        <p style={{ fontSize: "14px", color: "gray" }}>{formatDate}</p>
        <a href={`/blog/${id}`}>{title}</a>
      </section>
    </li>
  );
};

const List = (props: { blogs: Blog[] }) => (
  <ul>
    {props.blogs.map((blog) => (
      <Item blog={blog} />
    ))}
  </ul>
);

export const Home = (props: { blogs: Blog[] }) => {
  const title = "Tomtomyang's Blog";
  return (
    <Layout title={title}>
      <header>
        <h1>{title}</h1>
      </header>
      <List blogs={props.blogs} />
    </Layout>
  );
};
详情页要比列表页稍微复杂一点,一方面需要将 markdown 文件转换,另一方面还需要计算生成文章目录:
import { parse } from "marked";
import { html, raw } from "hono/html";

import { DateTime } from "luxon";

import type { Blog } from "..";
import { Layout } from "./components/layout";
import { getRenderer } from "../utils/render";

const renderer = getRenderer();

const Toc = () => { ... };

const Info = (props: { author: string; time: string }) => {
  const { author, time } = props;

  const dt = DateTime.fromISO(time);
  const formatDate = dt.toFormat("yyyy-MM-dd hh:mm:ss");

  return (
    <div style={{ paddingBottom: "0.6em" }}>
      <span style={{ color: "gray" }}>{formatDate}</span>
      <span style={{ marginLeft: "10px" }}>{author}</span>
    </div>
  );
};

const Content = (props: { content: string }) => {
  return (
    <article style={{ fontSize: "16px" }}>
      {html`${raw(props.content)}`}
    </article>
  );
};

export const Page = (props: { blog: Blog }) => {
  const { title, author, content, ts } = props.blog;
  const parsedContent = parse(content, { renderer });

  return (
    <Layout title={title}>
      <header>
        <h1>{title}</h1>
      </header>
      <Info author={author} time={ts.isoString}></Info>
      <Content content={parsedContent} />
      <Toc content={parsedContent} />
    </Layout>
  );
};
3.3 缓存
在边缘构建站点的优势之一是对缓存的控制比较灵活,首先,我准备首先缓存 Fauna API 的响应结果:
首页展示所有文章列表,新增文章后,我需要在首页展示出来,因此列表接口我设置不缓存或者缓存时间很短:
export const fetchWithCache = async (url: string) => {
  try {
    return await fetch(url, {
      eo: {
        cacheTtlByStatus: {
          200: 24 * 60 * 60 * 1000,
        },
      },
    });
  } catch (err) {
    return new Response(`FetchWithCache Error: ${err.massage}`, {
      status: 500,
    });
  }
};
文章详情页展示文章的具体内容,我个人的习惯是一篇文章写完后,才进行发布,因此后续文章内容发生变动的概率较低,我选择缓存更长的时间:
export const fetchWithCache = async (url: string) => {
  try {
    return await fetch(url, {
      eo: {
        cacheTtlByStatus: {
          200: 7 * 24 * 60 * 60 * 1000,
        },
      },
    });
  } catch (err) {
    return new Response(`FetchWithCache Error: ${err.massage}`, {
      status: 500,
    });
  }
};
同时,文章详情页还有一个需要注意的点是,通过 API 获取到文章内容后,我还会计算生成 文章目录,文章内容不变,生成的文章目录肯定也不会变,因此这部分重复的计算也可以通过缓存解决掉,方式是使用边缘函数 Runtime 中的 Cache API,将 c.html(<Page blog={blog} />) 生成的 HTML 字符串进行缓存,这样就解决了 Toc 重复计算的问题:
app.get("/blog/:id{[0-9]+}", async (c) => {
  const id = c.req.param("id");

  const cache = caches.default;
  const cacheKey = getCacheKey(id);

  try {
    const cacheResponse = await cache.match(cacheKey);

    if (cacheResponse) {
      return cacheResponse;
    }

    throw new Error(
      `Response not present in cache. Fetching and caching request.`
    );
  } catch {
    const blog = await getBlogInfo(id);

    if (!blog) return c.notFound();

    const html = await c.html(<Page blog={blog} />);
    html.headers.append("Cache-Control", "s-maxage=xxxx");

    c.event.waitUntil(cache.put(cacheKey, html));

    return html;
  }
});
3.4 部署
使用 Tef-CLI 的 publish 命令,直接将开发好的代码部署到 EdgeOne 边缘节点上;或者可以将 dist/edgefunction.js 文件中的代码,粘贴到 EdgeOne 控制台 - 边缘函数 - 新建函数 编辑框中进行部署。
四、总结
经过上面的步骤,我的博客站点就搭建好了:
列表页:

详情页:
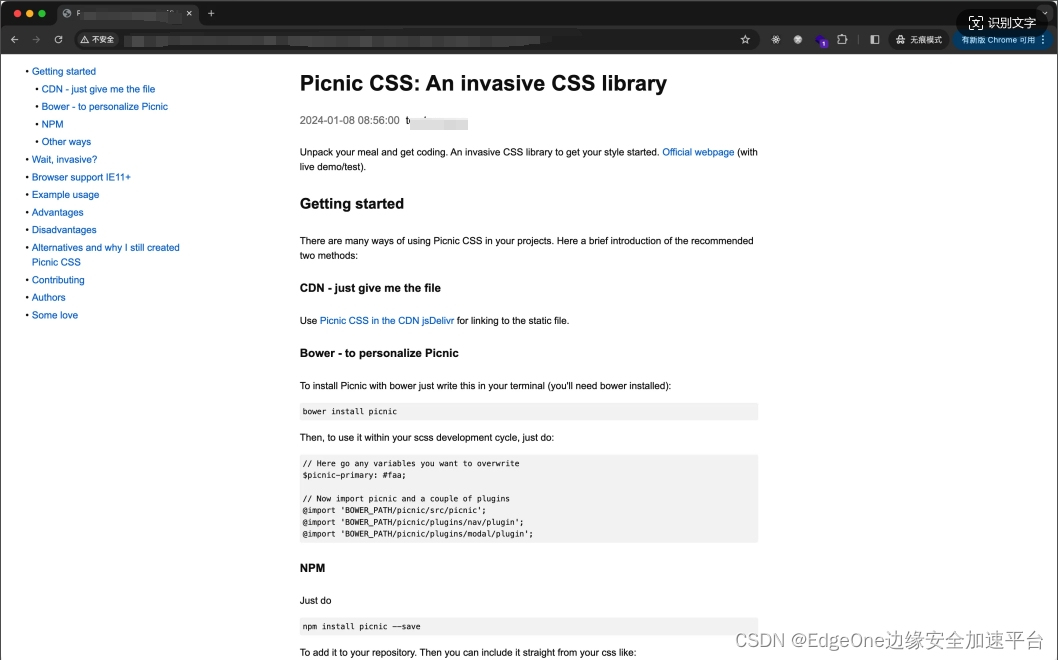
整体来看,在边缘节点上搭建一个博客站点,可以更灵活、更高效的利用和操作 CDN 缓存,对于不同类型的页面,我可以设置不同的缓存策略;边缘 Serverless + Cloud API 的部署方式,让我能足够方便的更新博客,后续随着 EO 边缘函数的不断迭代,这种玩法还有很大的升级空间。


 911
911

 被折叠的 条评论
为什么被折叠?
被折叠的 条评论
为什么被折叠?
 到【灌水乐园】发言


