


边缘提取用途
边缘提取通过检测图像中像素值的显著变化,识别出物体的轮廓。边缘通常对应于图像中亮度或颜色发生显著变化的区域。常用的边缘提取算法包括:
Sobel算子:利用水平和垂直方向上的梯度计算边缘。
Canny算子:综合考虑噪声抑制、梯度计算和边缘连接,广泛应用于边缘检测。
Laplacian算子:通过二阶导数计算边缘,对噪声较敏感。
Prewitt算子:类似于Sobel算子,但计算方式略有不同。
一般来说,直接用这些算子来提取边缘之前,也要对图像针对目标做一些增强,比如灰度均衡一下,或者做一些降噪等。
边缘检测代码
相比于其他博客中对于全图的边缘检测工作,本篇博客的代码主要是局部边缘提取,毕竟在一些大规模的图像里确实会有很多不想要的边缘,所以做了个锚定局部框的功能。
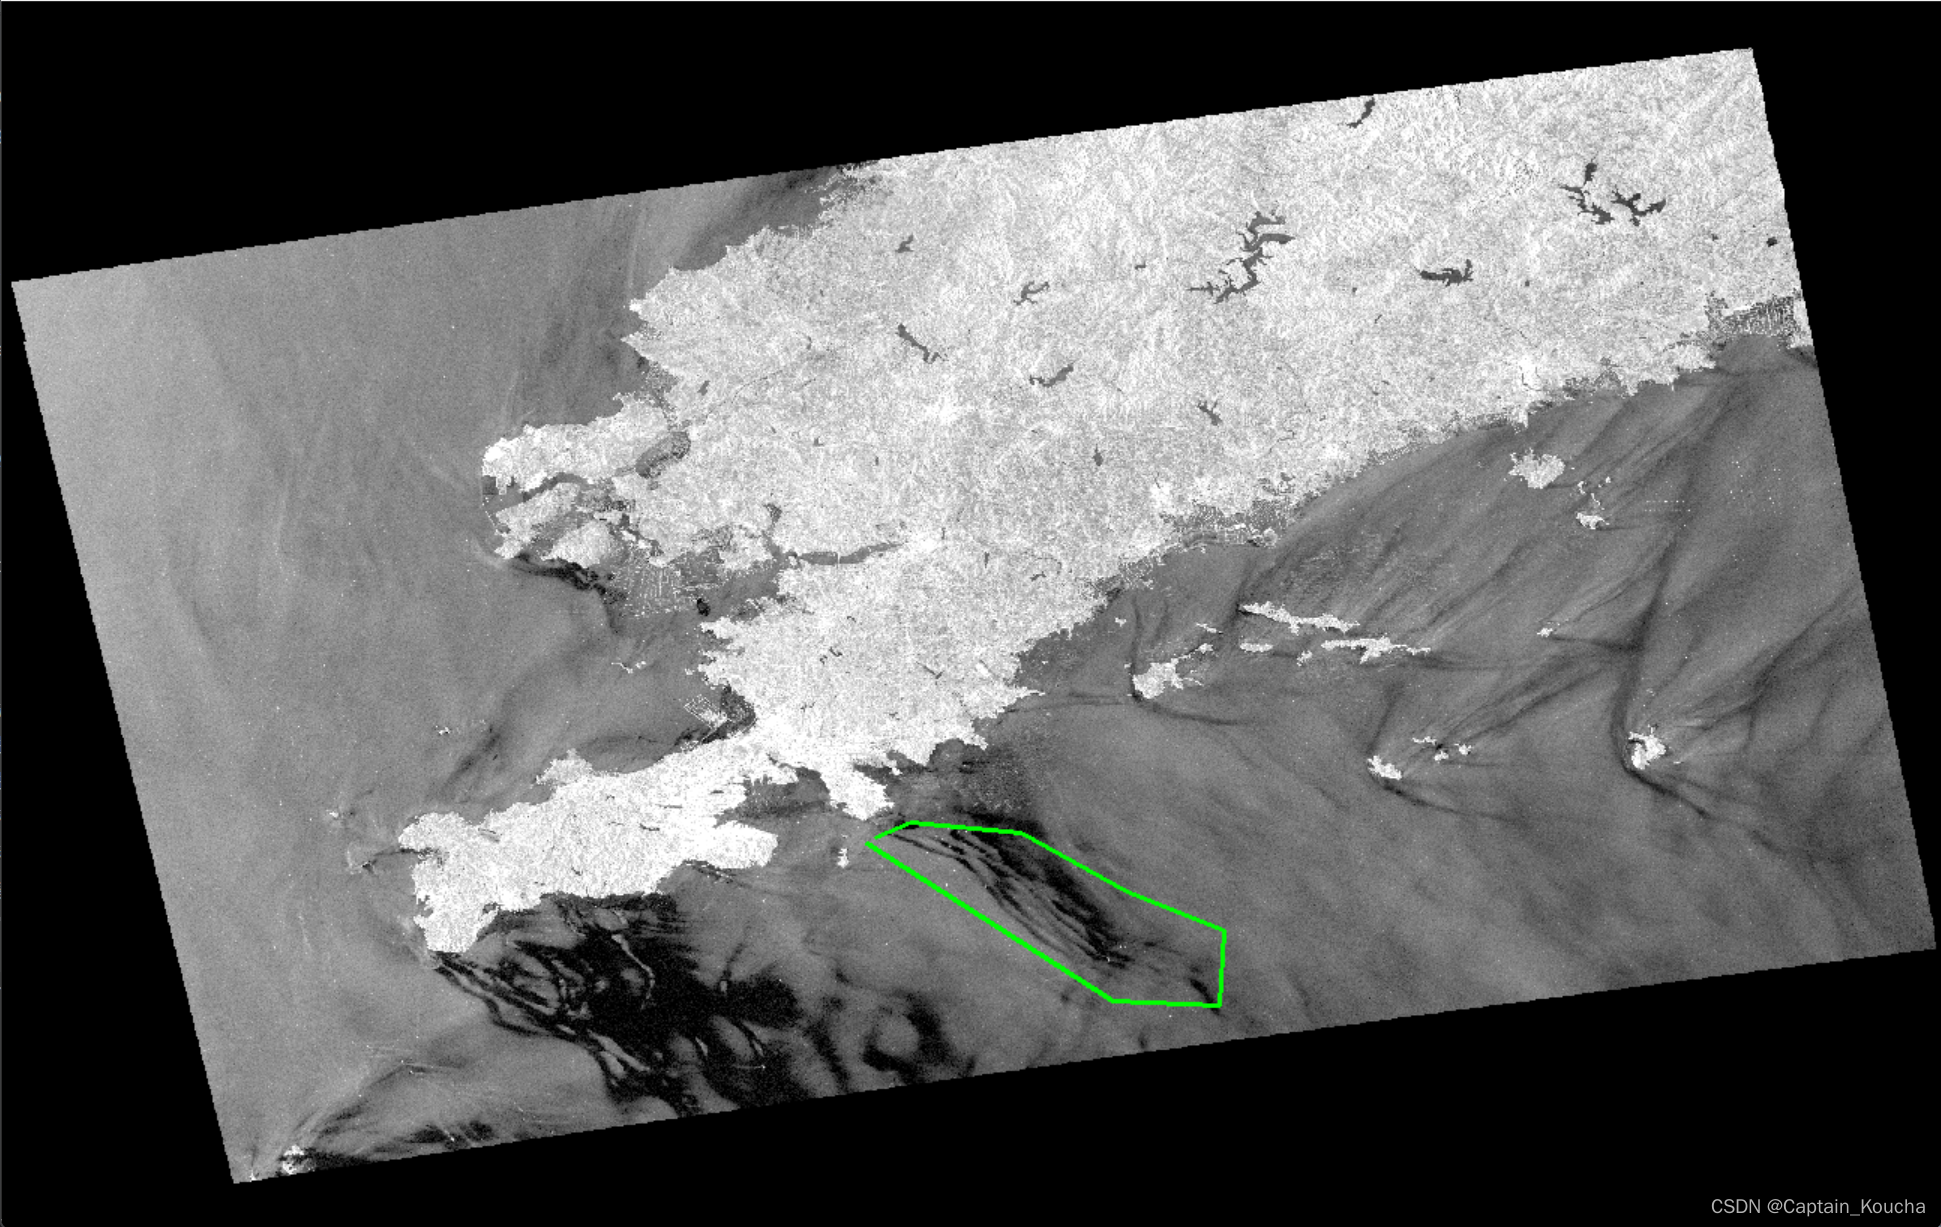
具体操作如下:打开一张图片(自己修改路径):
用鼠标点击拉到下一个控制点,最后差不多闭合就点回车确定区域(没做闭合判定,差不多围住就点回车就行了)。
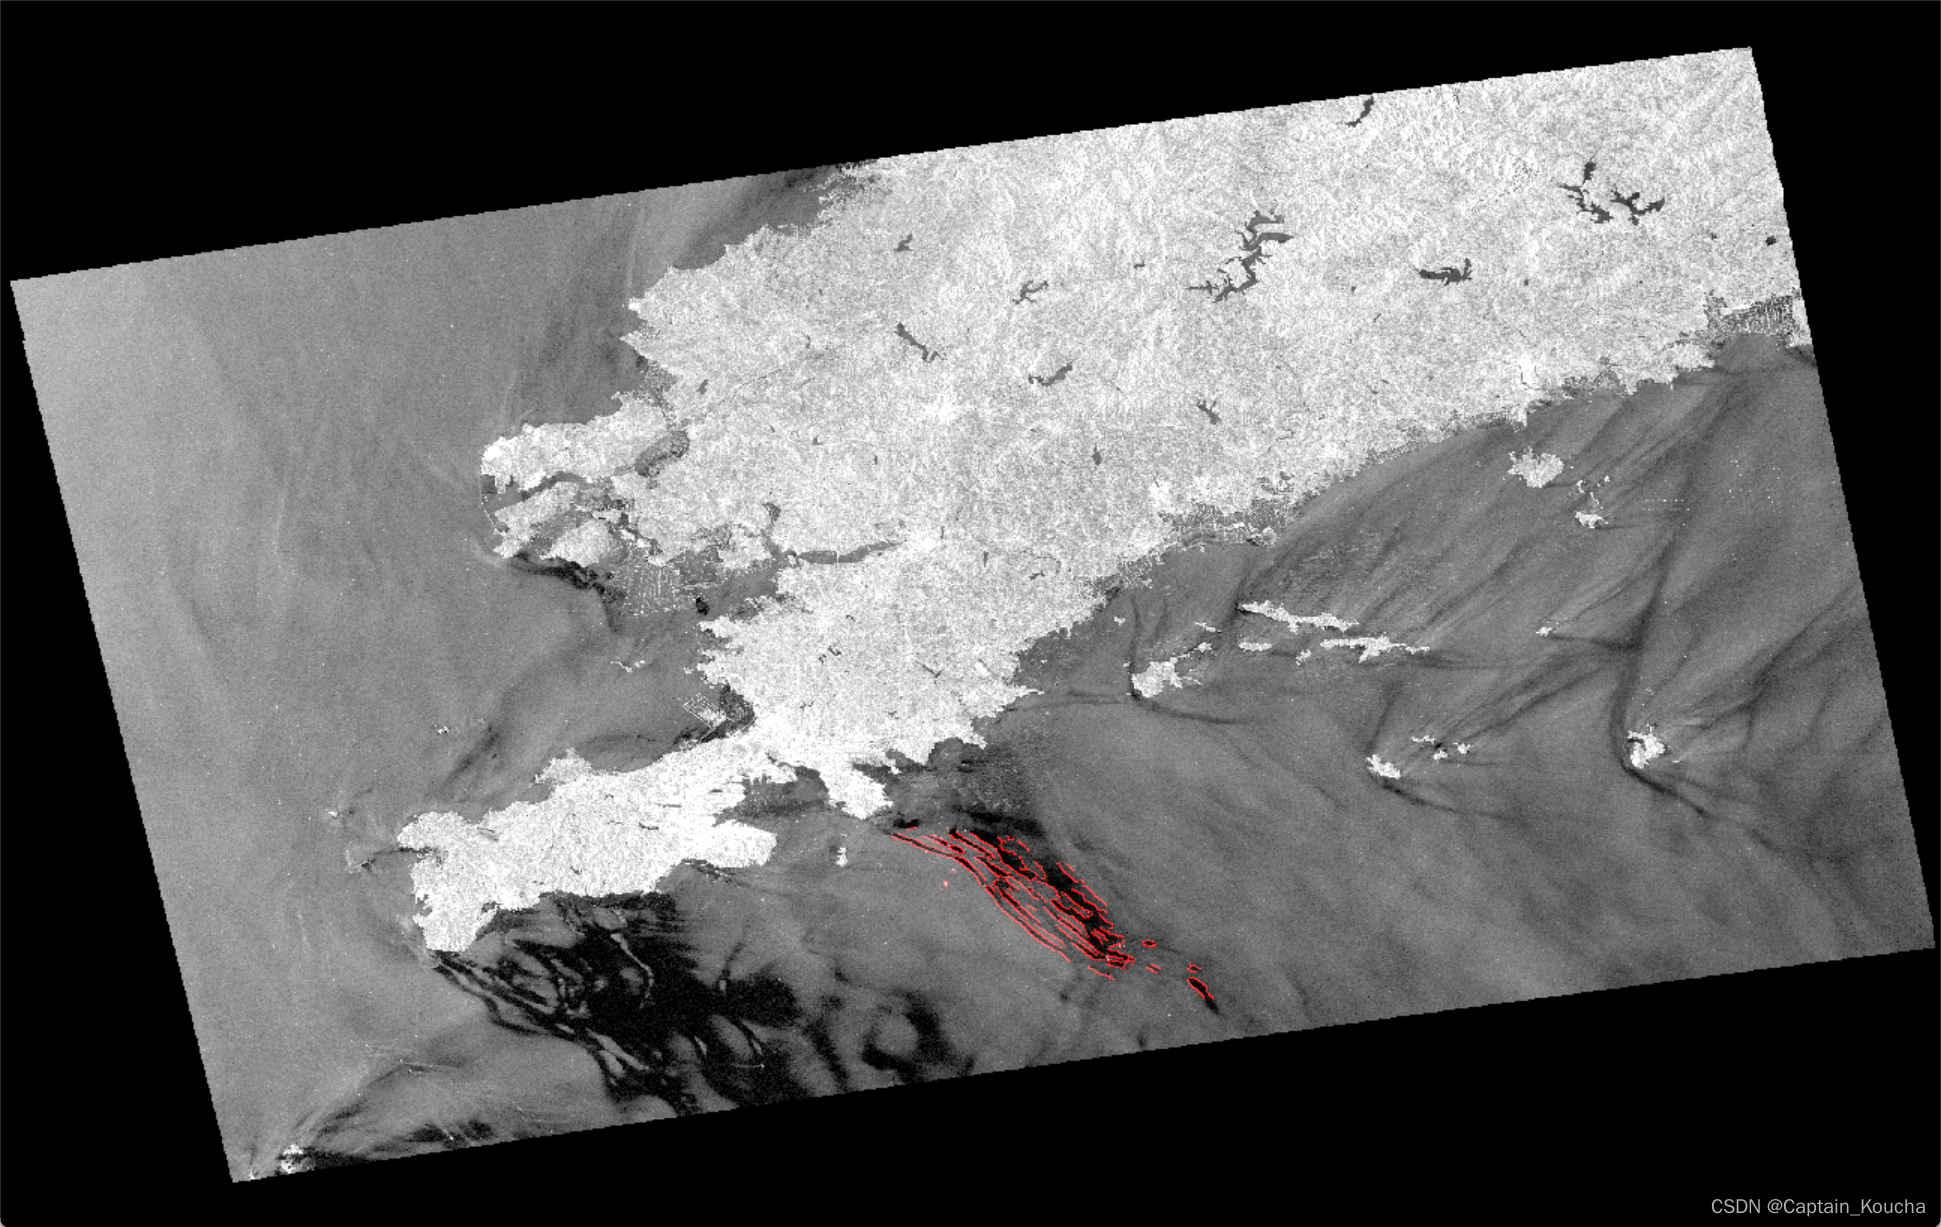
输出结果:
下面是代码:
import cv2
import numpy as np
import os


def select_roi(event, x, y, flags, param):
    global roi_pts, selecting, image_copy
    if event == cv2.EVENT_LBUTTONDOWN:
        if not selecting:
            selecting = True
            roi_pts = [(x, y)]
        else:
            roi_pts.append((x, y))
        cv2.circle(image_copy, (x, y), 3, (0, 255, 0), -1)
    elif event == cv2.EVENT_MOUSEMOVE and selecting:
        image_copy = image.copy()
        if len(roi_pts) > 0:
            cv2.polylines(image_copy, [np.array(roi_pts + [(x, y)])], False, (0, 255, 0), 2)
        cv2.imshow("Image", image_copy)
    elif event == cv2.EVENT_RBUTTONDOWN and selecting:
        selecting = False
        roi_pts.append(roi_pts[0])
        cv2.polylines(image_copy, [np.array(roi_pts)], True, (0, 255, 0), 2)
        cv2.imshow("Image", image_copy)


def preprocess_image(image, roi_mask):
    gray = cv2.cvtColor(image, cv2.COLOR_BGR2GRAY)
    blurred = cv2.GaussianBlur(gray, (5, 5), 0)
    preprocessed_image = cv2.bitwise_and(blurred, blurred, mask=roi_mask)
    return preprocessed_image


def detect_edges(preprocessed_image, roi_mask, roi_pts):
    edges = cv2.Canny(preprocessed_image, 72, 100)
    boundary_mask = np.zeros_like(roi_mask)
    cv2.polylines(boundary_mask, [np.array(roi_pts)], isClosed=True, color=255, thickness=5)
    edges[boundary_mask == 255] = 0

    return edges


def main():
    global roi_pts, selecting, image, image_copy
    roi_pts = []
    selecting = False

    image_path = 'path'
    image = cv2.imread(image_path)
    image_copy = image.copy()
    cv2.namedWindow("Image")
    cv2.setMouseCallback("Image", select_roi)

    while True:
        cv2.imshow("Image", image_copy)
        key = cv2.waitKey(1) & 0xFF
        if key == 13:  # Enter key
            break

    if len(roi_pts) > 2:
        roi_pts_array = np.array(roi_pts)
        roi_mask = np.zeros(image.shape[:2], dtype=np.uint8)
        cv2.fillPoly(roi_mask, [roi_pts_array], 255)

        preprocessed_image = preprocess_image(image, roi_mask)
        edges = detect_edges(preprocessed_image, roi_mask, roi_pts_array)

        edges_colored = cv2.cvtColor(edges, cv2.COLOR_GRAY2BGR)
        edges_colored[edges == 255] = [0, 0, 255]

        image_with_edges = cv2.addWeighted(image, 1, edges_colored, 1, 0)

        save_dir = 'processed_images'
        if not os.path.exists(save_dir):
            os.makedirs(save_dir)

        save_path = os.path.join(save_dir, 'image_with_edges2.png')
        cv2.imwrite(save_path, image_with_edges)
        cv2.imshow("Image with Edges", image_with_edges)
        cv2.waitKey(0)

    cv2.destroyAllWindows()


if __name__ == "__main__":
    main()
- 代码还包括图片保存的部分,注意修改路径。
- 在detect_edges里面设定阈值,来确定边缘检测的强度。


 1239
1239

 被折叠的 条评论
为什么被折叠?
被折叠的 条评论
为什么被折叠?
 到【灌水乐园】发言


