


目录
一.实验环境
需要2台主机并保证这两台主机是可以通信的,我们这里用的是red hat enterprise linux 7(以下简称rhel7)和 red hat enterprise linux 8(以下简称rhel8)两台虚拟机,其中对应的ip设置如下:
rhel7: 192.168.1.108
rhel8: 192.168.1.109
二.scp 命令
scp 本地文件 远程主机用户@远程主机ip:远程主机目录
scp 远程主机用户@远程主机ip:远程主机目录 本地文件
实验步骤:
1.在rhel7中建立实验素材
touch westos
mkdir westosdir

2.测试
设置免密登录
[root@rhel7_node1 Desktop]# ssh-keygen
Generating public/private rsa key pair.
Enter file in which to save the key (/root/.ssh/id_rsa):
Created directory '/root/.ssh'.
Enter passphrase (empty for no passphrase):
Enter same passphrase again:
Your identification has been saved in /root/.ssh/id_rsa.
Your public key has been saved in /root/.ssh/id_rsa.pub.
The key fingerprint is:
06:c2:36:fc:ac:57:02:97:9d:07:e2:53:aa:69:f4:0f root@rhel7_node1.westos.com
The key's randomart image is:
+--[ RSA 2048]----+
|      . o        |
|   o . * o       |
|    O B o .      |
|   o @ o .       |
|    + E S        |
|   . . *         |
|    . . .        |
|     .           |
|                 |
+-----------------+
[root@rhel7_node1 Desktop]# ssh-copy-id -i /root/.ssh/id_rsa.pub root@192.168.1.109
The authenticity of host '192.168.1.109 (192.168.1.109)' can't be established.
ECDSA key fingerprint is 42:c1:1b:5b:ee:e6:4c:4f:02:6a:ca:1d:e6:9d:9f:92.
Are you sure you want to continue connecting (yes/no)? yes
/usr/bin/ssh-copy-id: INFO: attempting to log in with the new key(s), to filter out any that are already installed
/usr/bin/ssh-copy-id: INFO: 1 key(s) remain to be installed -- if you are prompted now it is to install the new keys
root@192.168.1.109's password:

Number of key(s) added: 1

Now try logging into the machine, with:   "ssh 'root@192.168.1.109'"
and check to make sure that only the key(s) you wanted were added.
a)把本地文件复制到远程主机

注:-r表示复制目录 -q 表示传输文件时不显示进度
b)把远程文件复制到本地
scp root@192.168.1.109:/mnt/westos_rhel8 /rooot/Desktop

三.rsync命令
rsync 文件 远程用户@远程主机ip:远程主机目录
rsync 远程用户@远程主机ip:远程主机目录 文件路径
rsync
-r 复制目录
-l 复制链接
-p 复制权限
-t 复制时间戳
-o 复制拥有着
-g 复制拥有组
-D 复制设备文件

实验如下:
准备环境:


四.scp与 rsync的比较
制作脚本并执行后结果如下:

可见 scp三次执行时间几乎一致,rsync三次执行时间后两次远远小于第一次。
五. 文件的归档与压缩
1.文件归档
tar
c 创建
f 指定文件名称
x 解档
t 向归档文件中添加文件
--get 解档指定文件
--delete 删除指定文件
-C 指定解档路径
实验如下:

[root@rhel7_node1 Desktop]# tar tf etc.tar
etc/
etc/fstab
etc/crypttab
etc/mtab
etc/fonts/
etc/fonts/conf.d/
etc/fonts/conf.d/65-0-ttf-arphic-uming.conf
etc/fonts/conf.d/59-liberation-sans.conf
etc/fonts/conf.d/90-ttf-arphic-uming-embolden.conf
etc/fonts/conf.d/10-scale-bitmap-fonts.conf
etc/fonts/conf.d/65-0-madan.conf
etc/fonts/conf.d/20-unhint-small-vera.conf
etc/fonts/conf.d/65-0-lohit-kannada.conf
etc/fonts/conf.d/25-no-bitmap-fedora.conf
etc/fonts/conf.d/65-0-lohit-tamil.conf
etc/fonts/conf.d/25-unhint-nonlatin.conf
etc/fonts/conf.d/65-0-nhn-nanum-gothic.conf
etc/fonts/conf.d/30-metric-aliases.conf
etc/fonts/conf.d/30-urw-aliases.conf
etc/fonts/conf.d/40-nonlatin.conf
etc/fonts/conf.d/45-latin.conf


2.文件的压缩
zip
zip -r etc.tar.zip etc.tar zip格式压缩
unzip etc.tar.zip zip格式解压缩
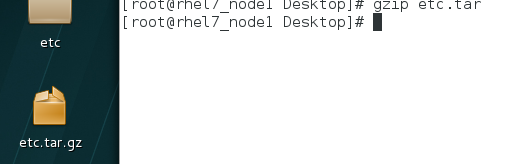
gzip
gzip etc.tar gzip格式压缩
gunzip etc.tar.gz gzip格式解压缩
bzip2
bzip2 etc.tar bzip2格式压缩
bunzip etc.tar.bz2 bzip2格式解压缩
xz
xz etc.tar xz格式压缩
xz etc.tar.xz xz格式解压缩

3.tar+压缩
gzip
tar zcf etc.tar.gz /etc
tar zxf etc.tar.gz
bzip2
tar jcf etc.tar.bz2 /etc
tar jxf etc.tar.bz2
xz
tar jcf etc.tar.xz /etc
tar jxf etc.tar.xz


 237
237


 被折叠的 条评论
为什么被折叠?
被折叠的 条评论
为什么被折叠?
 到【灌水乐园】发言


