


参考自阿里云搭建教程
Apache:Apache 2.4.6
MySQL版本:MySQL 14.14
PHP版本:PHP 7.0.33
安装LNMP环境
** 一、查看防火墙状态,然后关闭防火墙,关闭SELinux**
运行systemctl status firewalld命令查看当前防火墙的状态。
systemctl status firewalld
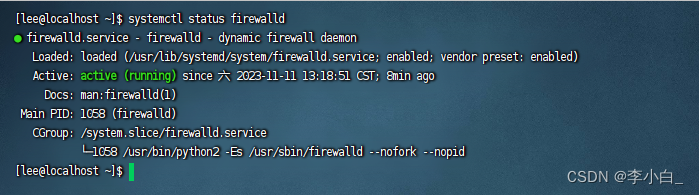
如果防火墙的状态参数是inactive,则防火墙为关闭状态。
如果防火墙的状态参数是active,则防火墙为开启状态。本示例中防火墙为开启状态,因此需要关闭防火墙。
关闭防火墙。如果防火墙为关闭状态可以忽略此步骤。
如果您想临时关闭防火墙,运行命令systemctl stop firewalld。
systemctl stop firewalld
如果您想永久关闭防火墙,运行命令systemctl disable firewalld。
systemctl disable firewalld
运行getenforce命令查看SELinux的当前状态。
getenforce
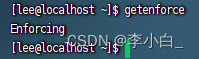
如果SELinux状态参数是Disabled,则SELinux为关闭状态。
如果SELinux状态参数是Enforcing,则SELinux为开启状态。本示例中SELinux为开启状态,因此需要关闭SELinux。
关闭SELinux。如果SELinux为关闭状态可以忽略此步骤。
如果您想临时关闭SELinux,运行命令setenforce 0。
setenforce 0
如果您想永久关闭SELinux,运行命令vim /etc/selinux/config编辑SELinux配置文件。
vim /etc/selinux/config
回车后,把光标移动到SELINUX=enforcing这一行,按i键进入编辑模式,修改为SELINUX=disabled,按Esc键,然后输入:wq并按Enter键以保存并关闭SELinux配置文件。 最后重启系统使设置生效。
二、开始安装LNMP环境
安装Apache
- 运行以下命令,安装Apache服务及扩展包。
sudo yum -y install httpd httpd-manual mod_ssl mod_perl

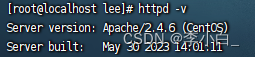
2. 运行以下命令,查看Apache的版本号。返回结果类似如下所示,表示Apache的版本号为2.4.6。
httpd -v
3.启动Apache服务并设置服务开机自启动。
sudo systemctl start httpd
sudo systemctl enable httpd
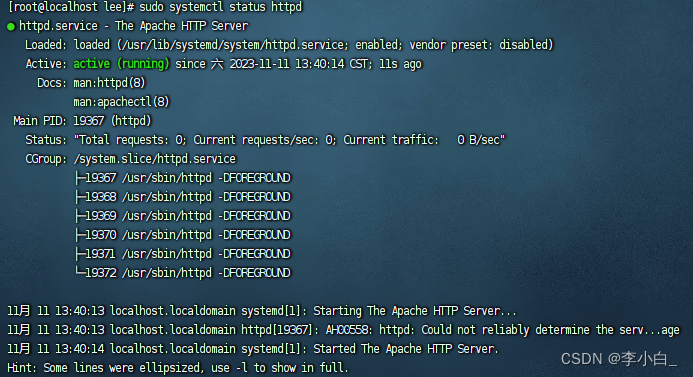
- 查看Apache状态。
sudo systemctl status httpd
安装MySQL
- 运行以下命令,更新YUM源。
wget http://dev.mysql.com/get/mysql57-community-release-el7-10.noarch.rpm
sudo yum install -y mysql57-community-release-el7-10.noarch.rpm
sudo yum install -y mysql-community-server --nogpgcheck
- 查看MySQL版本号。

- 启动MySQL并设置开机启动MySQL。
sudo systemctl start mysqld
sudo systemctl enable mysqld
sudo systemctl daemon-reload
- 获取MySQL的初始密码。
sudo grep "password" /var/log/mysqld.log

- 配置MySQL的安全性。
mysql_secure_installation
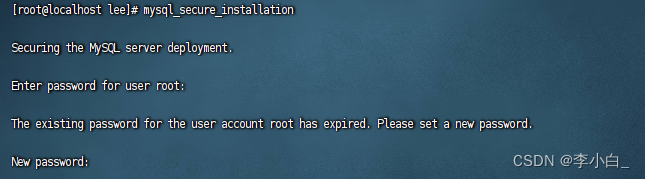
Enter password for user root: #输入上一步获取的root用户初始密码。
The existing password for the user account root has expired. Please set a new password.
New password: #输入新密码,长度为8至30个字符,必须同时包含大小写英文字母、数字和特殊符号。特殊符号可以是()` ~!@#$%^&*-+=|{}[]:;‘<>,.?/
Re-enter new password: #重复输入新密码。
The ‘validate_password’ plugin is installed on the server.
The subsequent steps will run with the existing configuration
of the plugin.
Using existing password for root.
Estimated strength of the password: 100
Change the password for root ? ((Press y|Y for Yes, any other key for No) :Y #按Y,并再次输入上步已设置的密码。
New password: #再次输入新密码。
Re-enter new password: #重复输入新密码。
Estimated strength of the password: 100
Do you wish to continue with the password provided?(Press y|Y for Yes, any other key for No) :Y #按Y使用新密码。
安装PHP
- 添加源并安装PHP和组件。
添加EPEL源
sudo yum install -y \
https://repo.ius.io/ius-release-el7.rpm \
https://dl.fedoraproject.org/pub/epel/epel-release-latest-7.noarch.rpm
添加Webtatic源
sudo rpm -Uvh https://mirror.webtatic.com/yum/el7/webtatic-release.rpm
安装PHP和组件
sudo yum -y install php70w-devel php70w.x86_64 php70w-cli.x86_64 php70w-common.x86_64 php70w-gd.x86_64 php70w-ldap.x86_64 php70w-mbstring.x86_64 php70w-mcrypt.x86_64 php70w-pdo.x86_64 php70w-mysqlnd php70w-fpm php70w-opcache php70w-pecl-redis php70w-pecl-mongodb
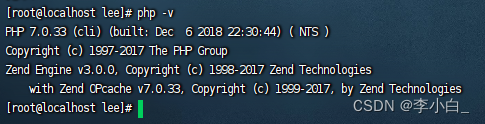
- 查看PHP版本。
php -v
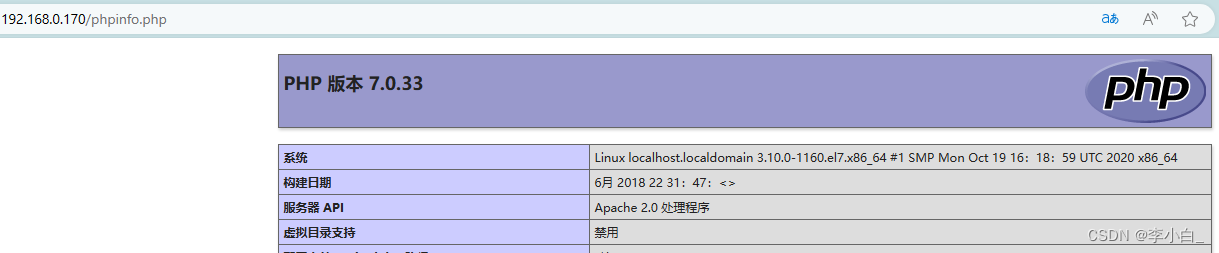
- 在Apache网站根目录创建测试文件。
sudo sh -c 'echo "<?php phpinfo(); ?>" > /var/www/html/phpinfo.php'
- 重启Apache服务。
sudo systemctl restart httpd
- 输入http://IP/phpinfo.php访问
http://192.168.0.170/phpinfo.php
安装phpMyAdmin
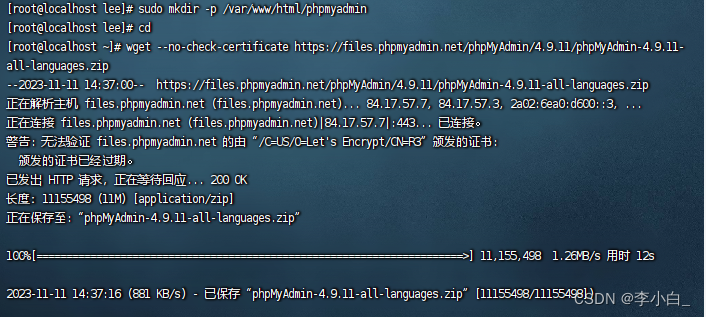
- 创建phpMyAdmin数据存放目录。
sudo mkdir -p /var/www/html/phpmyadmin
- 下载phpMyAdmin压缩包并解压。
cd
wget --no-check-certificate https://files.phpmyadmin.net/phpMyAdmin/4.9.11/phpMyAdmin-4.9.11-all-languages.zip
- 安装unzip工具并解压phpMyAdmin压缩包。
sudo yum install -y unzip
sudo unzip phpMyAdmin-4.9.11-all-languages
- 复制phpMyAdmin文件到准备好的数据存放目录。
sudo mv phpMyAdmin-4.9.11-all-languages/* /var/www/html/phpmyadmin
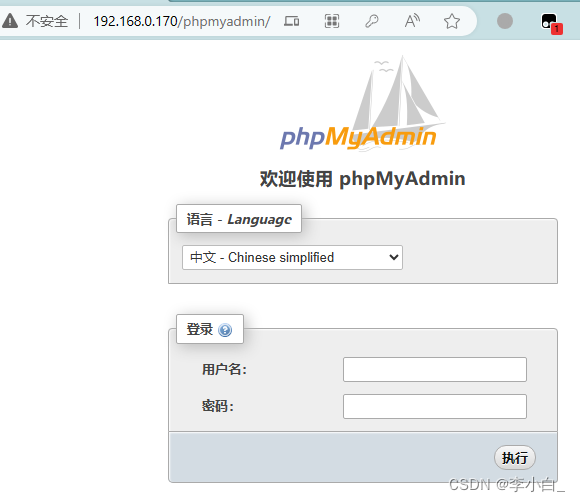
- 输入http://IP/phpmyadmin访问,输入MySQL账号密码登录
http://192.168.0.170/phpmyadmin/
开始安装WordPress
- 下载WordPress压缩包,Wordpress官网可以下载最新安装包
wget https://cn.wordpress.org/latest-zh_CN.zip
- 解压WordPress压缩包
unzip latest-zh_CN.zip
- 移动WordPress到Apache页面的目录
sudo mv wordpress/ /var/www/html/
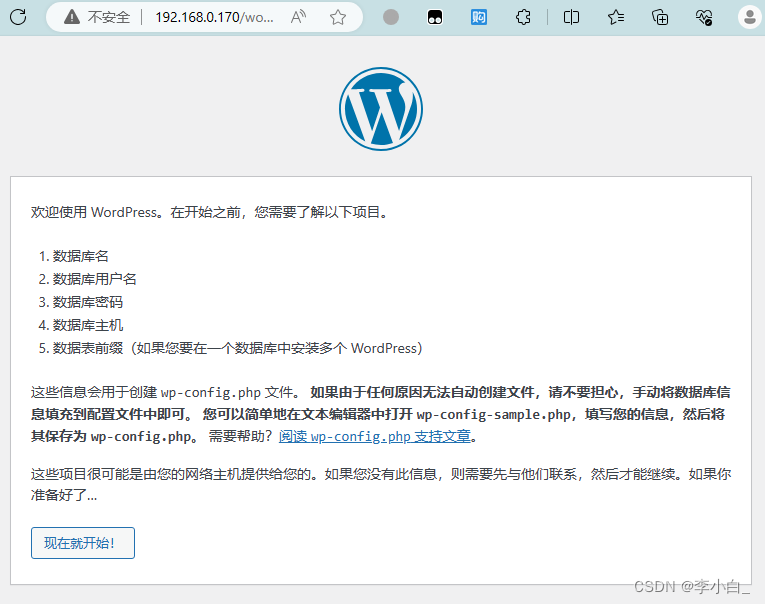
- 输入http://IP/wordpress/访问
http://192.168.0.170/wordpress/
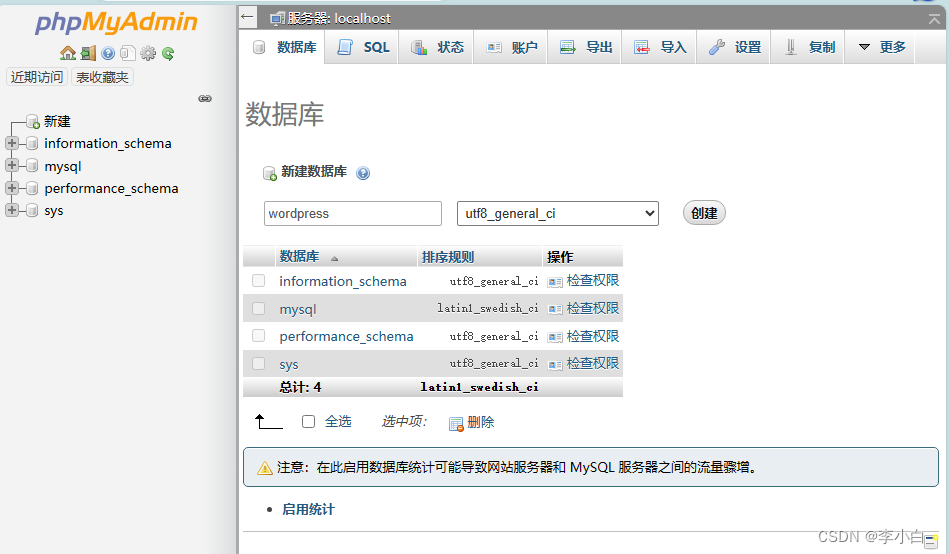
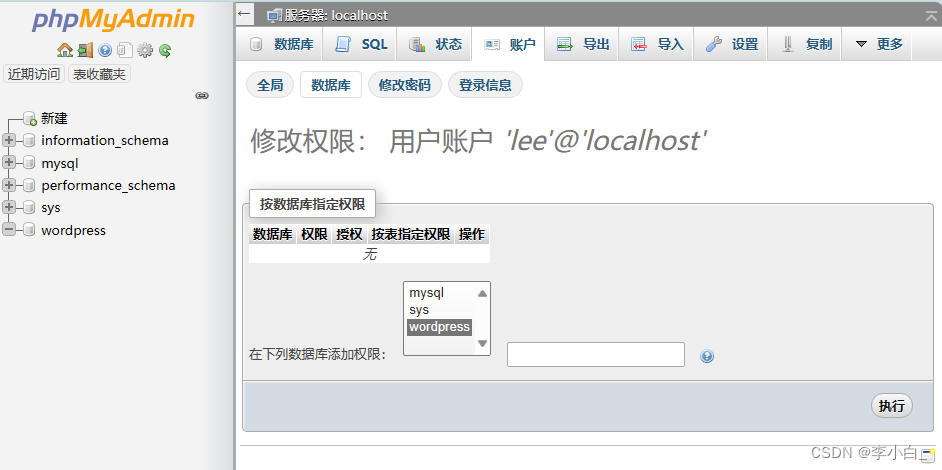
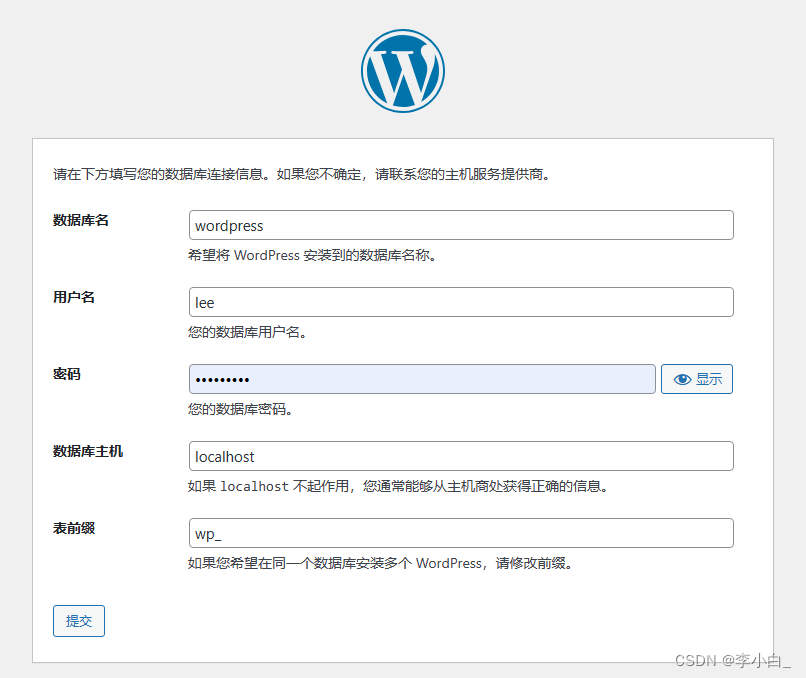
- 需要到phpmyadmin创建好数据库,把信息填入对应的位置
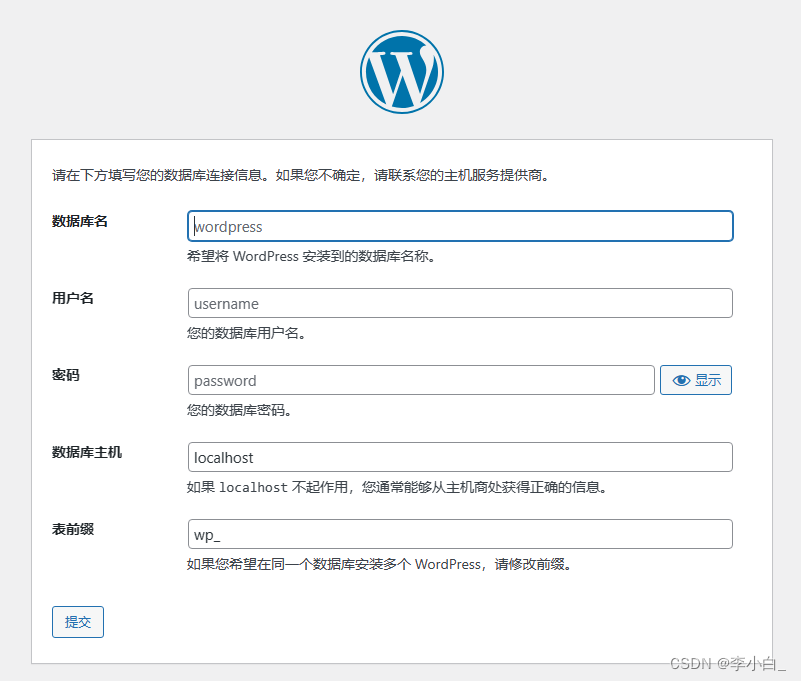
- 创建数据库
- 账户添加管理该数据库的权限
- WordPress设置填入对应的信息
- 出现下图信息,需要手动添加WordPress配置文件再安装
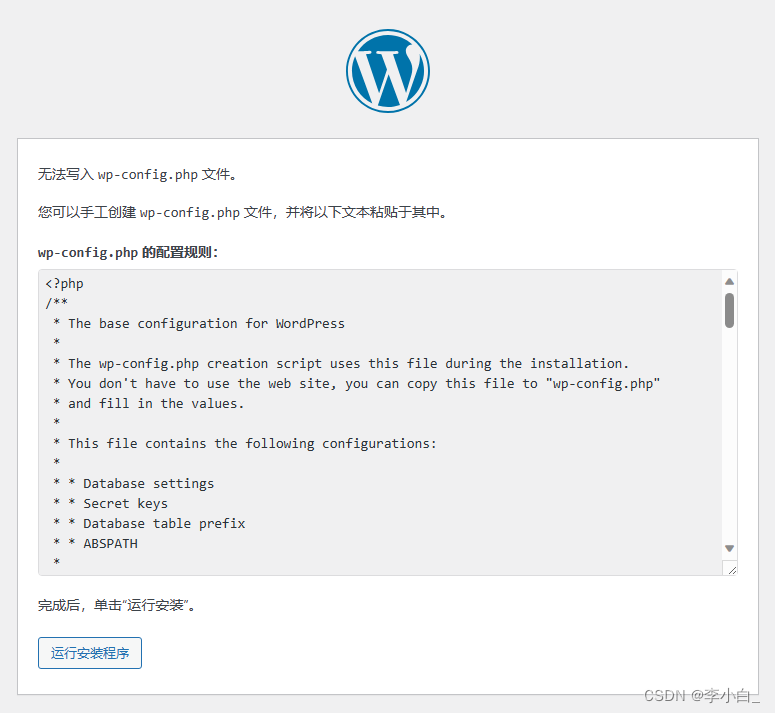
- 手动添加配置信息,切换到WordPress目录,创建配置文件
cd /var/www/html/wordpress/
vi wp-config.php
把上面图片框里的内容全复制粘贴进去,保存,退出,进入浏览器继续安装
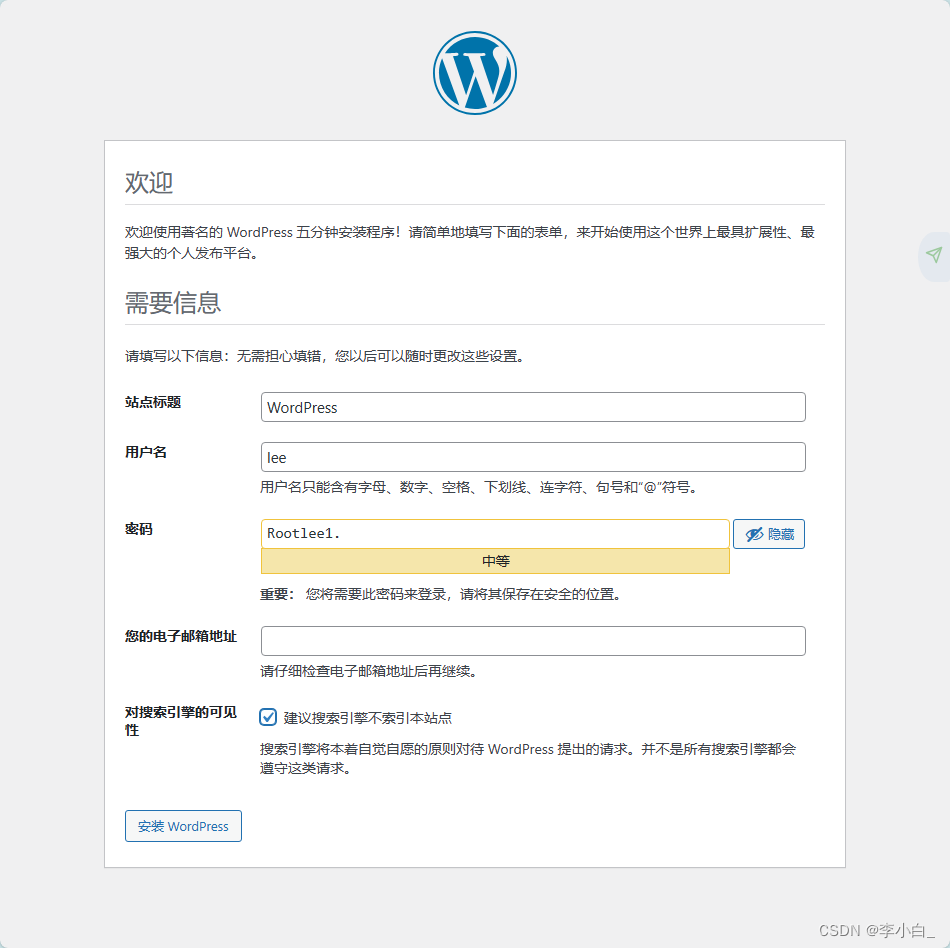
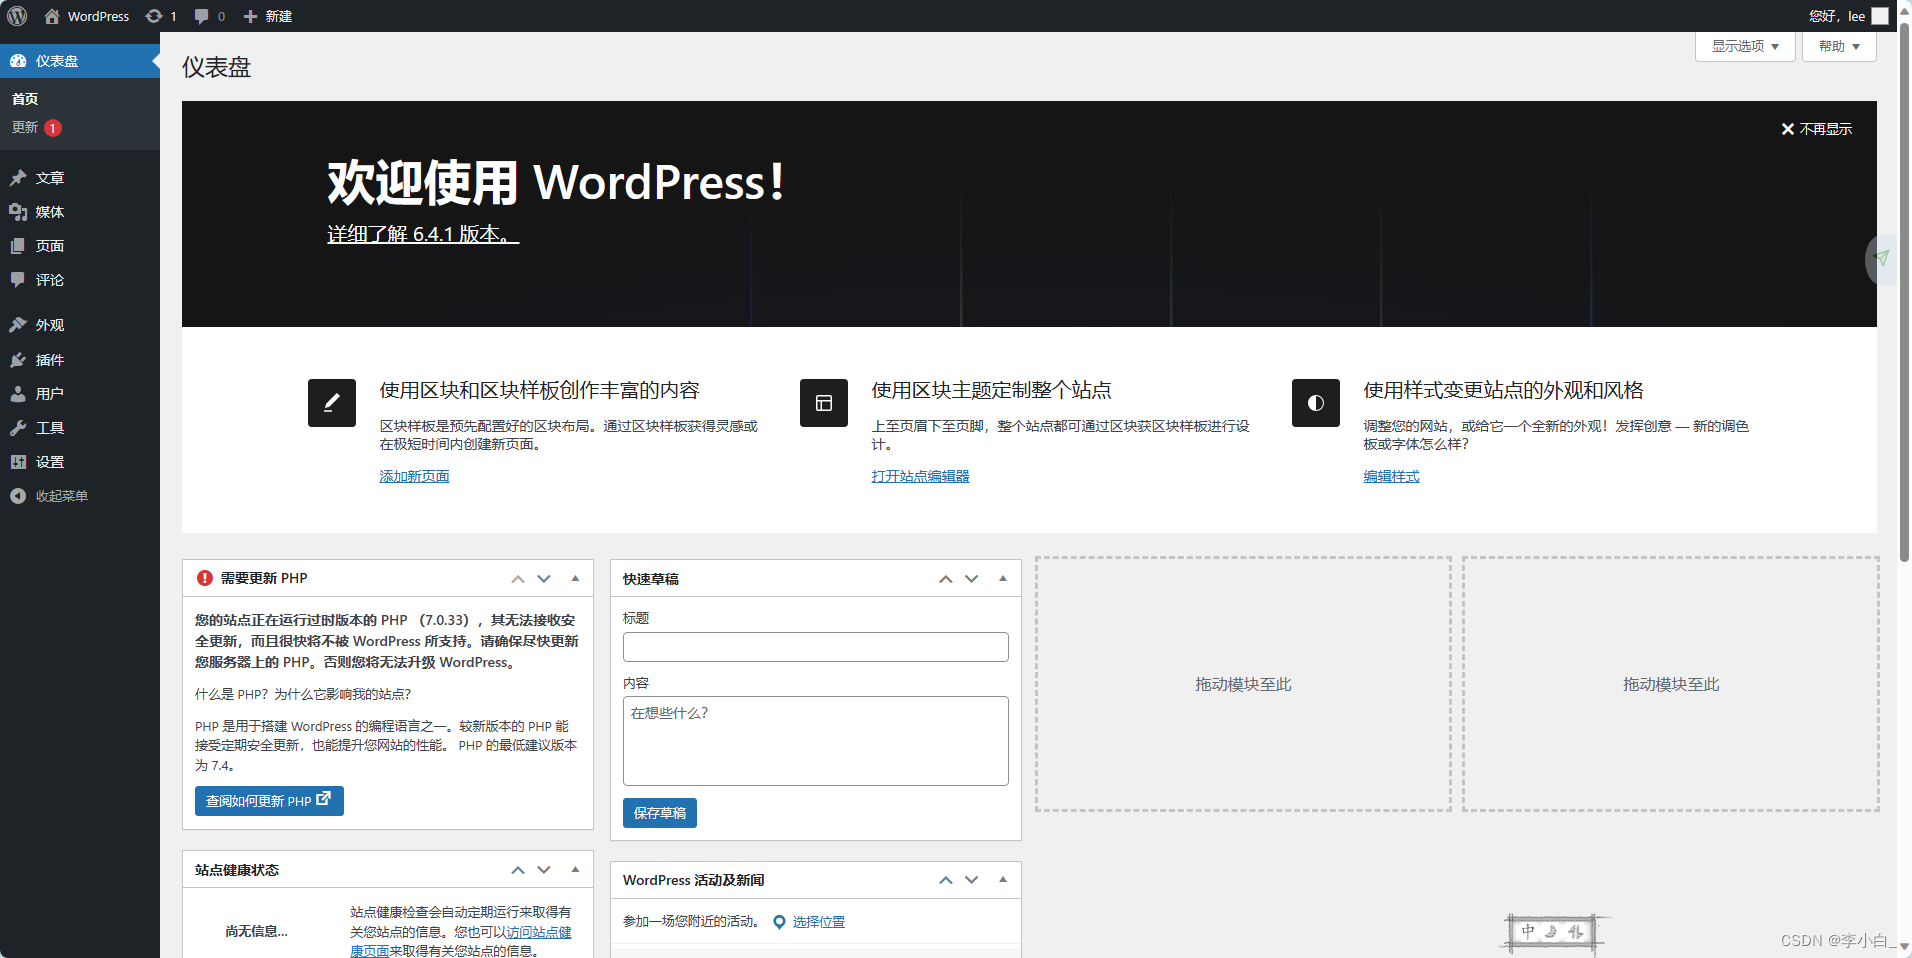
完成


 385
385


 被折叠的 条评论
为什么被折叠?
被折叠的 条评论
为什么被折叠?
 到【灌水乐园】发言


