


 文章展示了如何在JavaWeb应用中使用EasyUI的datagrid进行学生列表的展示和分页查询。通过Controller处理请求,将班级信息绑定到JSP页面,利用Ajax和时间戳防止请求缓存,实现动态加载和筛选功能。
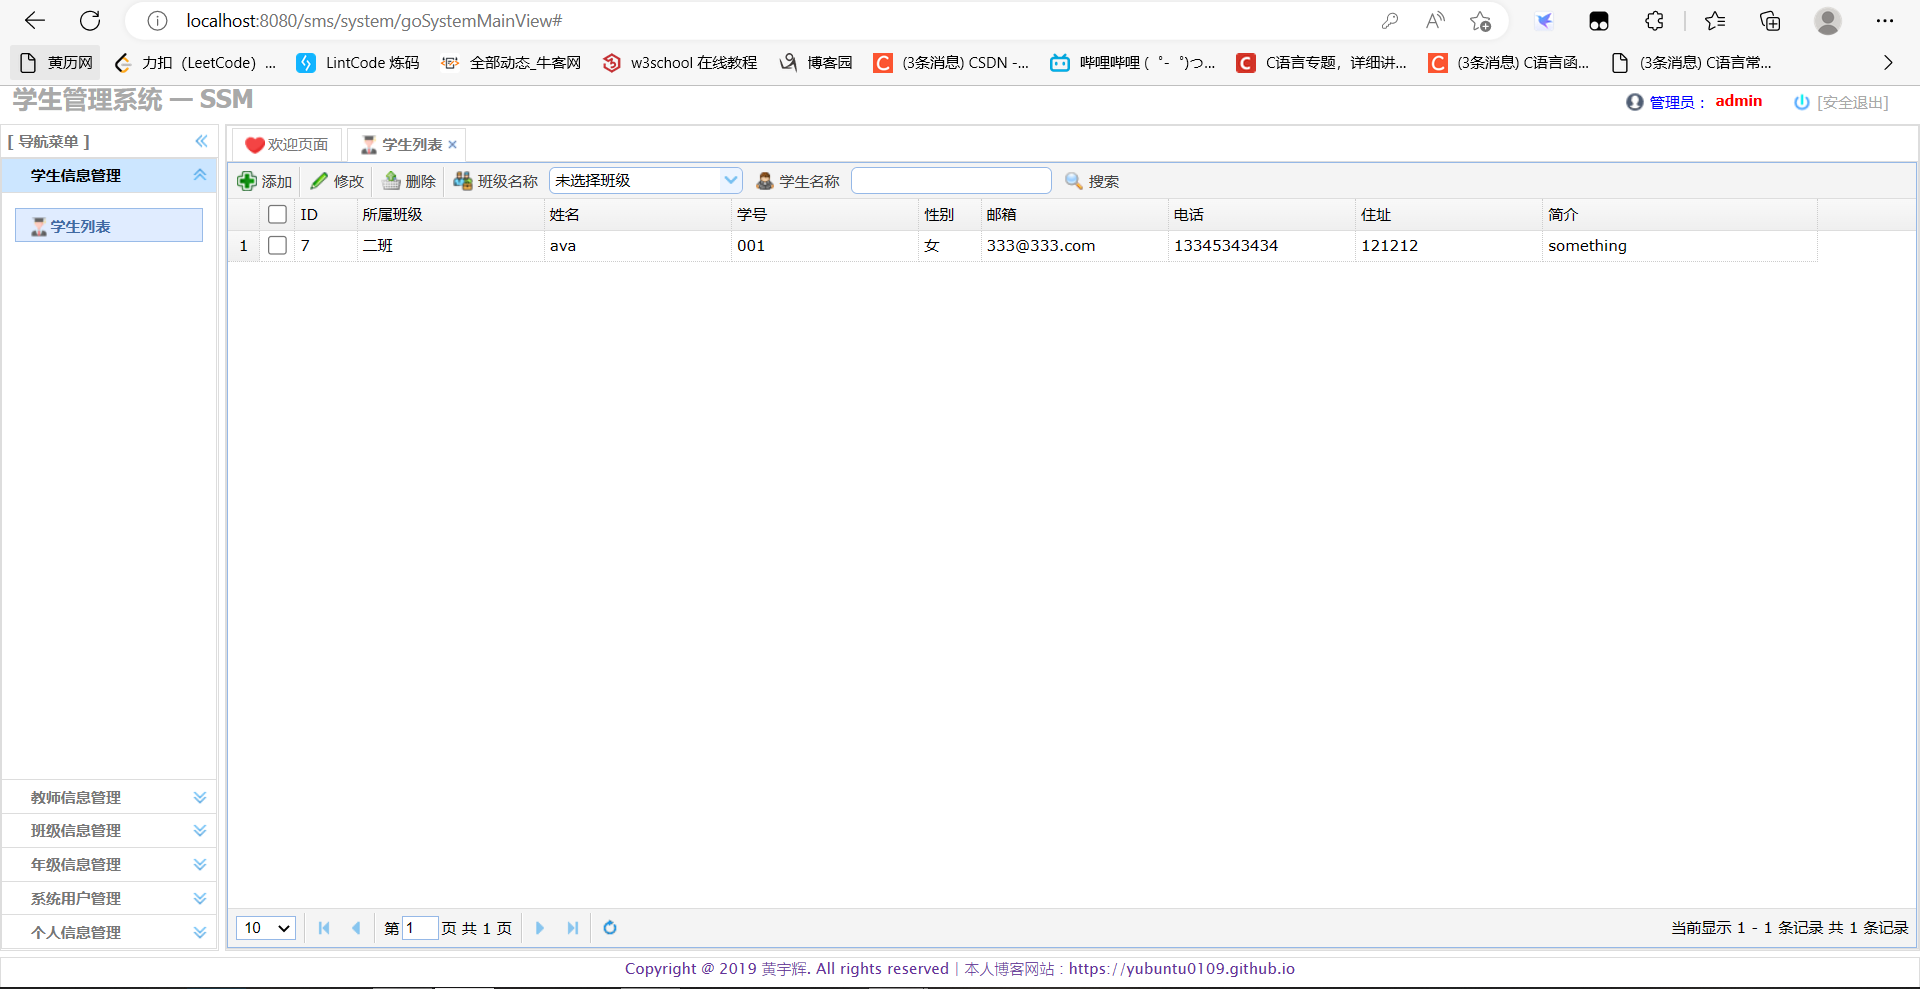
学生列表模块:
//设置系统功能菜单栏
var _menus = {
    "menus": [
        {
            "menuid": "1", "icon": "", "menuname": "学生信息管理",
            "menus": [
                {
                    "menuid": "21",
                    "menuname": "学生列表",
                    "icon": "icon-student",
                    "url": "../student/goStudentListView"
                }
            ]
        },
选择学生列表后转到/student/goStudentListView
@Controller
@RequestMapping("/student")
public class StudentController {

    /**
     * @description: 跳转到学生信息管理页面
     * @param: modelAndView
     * @date: 2019-06-16 10:59 AM
     * @return: org.springframework.web.servlet.ModelAndView
     */
    @GetMapping("/goStudentListView")
    public ModelAndView goStudentListView(ModelAndView modelAndView) {
        //向页面发送一个存储着Clazz的List对象
        // clazzService.selectAll() 查询所有班级信息列表(用于在学生管理页面中获取班级信息)
        modelAndView.addObject("clazzList", clazzService.selectAll()); // 绑定数据
        modelAndView.setViewName("student/studentList"); // 设置视图名
        return modelAndView;
    }
绑定的数据(clazzList)发送到student/studentList.jsp:
<select id="search-clazzname" style="width: 155px;" class="easyui-combobox" name="clazzname">
    <!-- 通过JSTL遍历显示年级信息,clazzList:为Contrller传递的来的,存储着Clazz的List对象 -->
    <option value="">未选择班级</option>
    <c:forEach items="${clazzList}" var="clazz">
        <option value="${clazz.name}">${clazz.name}</option>
    </c:forEach>
</select>
在studentList.jsp的DOM加载完成后执行回调函数:
$(function () {
    var table;
    //初始化datagrid
    $('#dataList').datagrid({ // easyUI的数据网格
        iconCls: 'icon-more',//图标
        border: true,
        collapsible: false,//是否可折叠
        fit: true,//自动大小
        method: "post",
        url: "getStudentList?t" + new Date().getTime(), // 发送请求getStudentList进行处理
        idField: 'id',
        singleSelect: false,//是否单选
        rownumbers: true,//行号
        pagination: true,//分页控件
        sortName: 'id',
        sortOrder: 'DESC',
        remoteSort: false,
        columns: [[
            {field: 'chk', checkbox: true, width: 50},
            {field: 'id', title: 'ID', width: 50, sortable: true},
            {field: 'clazz_name', title: '所属班级', width: 150},
            {field: 'name', title: '姓名', width: 150},
            {field: 'sno', title: '学号', width: 150},
            {field: 'gender', title: '性别', width: 50},
            {field: 'email', title: '邮箱', width: 150},
            {field: 'telephone', title: '电话', width: 150},
            {field: 'address', title: '住址', width: 150},
            {field: 'introducation', title: '简介', width: 220}
        ]],
        toolbar: "#toolbar"//工具栏
    });
...
在这里easyUI的数据网格插件对getStudentList发送请求:
url: "getStudentList?t" + new Date().getTime(),url后加“?t时间戳”是为了确保请求不会在它第一次被发送后即缓存,而是会在此方法每次被调用后重新创建和重发;此 URL 会由于时间戳的不同而稍微有些不同。这种技巧常被用于确保到脚本的 POST 每次都会实际生成新请求且 Web 服务器不会尝试缓存来自服务器的响应。(摘自(102条消息) 为什么要在http请求后加上时间戳_asd哈哈哈的博客-CSDN博客_接口请求中时间戳的作用)
分页查询student:
// StudentController.java
@PostMapping("/getStudentList")
@ResponseBody
public Map<String, Object> getStudentList(Integer page, Integer rows, String studentname, String clazzname) {

    //存储查询的studentname,clazzname信息
    Student student = new Student(studentname, clazzname);
    //设置每页的记录数
    PageHelper.startPage(page, rows);
    //根据班级与学生名获取指定或全部学生信息列表
    List<Student> list = studentService.selectList(student);
    //封装信息列表
    PageInfo<Student> pageInfo = new PageInfo<>(list);
    //获取总记录数
    long total = pageInfo.getTotal();
    //获取当前页数据列表
    List<Student> studentList = pageInfo.getList();
    //存储数据对象
    result.put("total", total);
    result.put("rows", studentList);

    return result;
}


 322
322

 被折叠的 条评论
为什么被折叠?
被折叠的 条评论
为什么被折叠?
 到【灌水乐园】发言


