vue使用el-upload实现formData文件上传功能

最开始单个文件上传 没用到element el-upload 组件
在这里插入图片描述
部分如下

    <el-dialog
      :title="showTitle"
      :visible="orderServiceShowDialog"
      top="8vh"
      @close="handleClose"
      @click.native="clickDialog"
      :before-close="beforeClose"
    >
      <el-form
        ref="orderService"
        :model="orderService"
        :rules="orderServiceRules"
        label-width="140px"
        style="width: 94%; margin-left: 10px"
      >
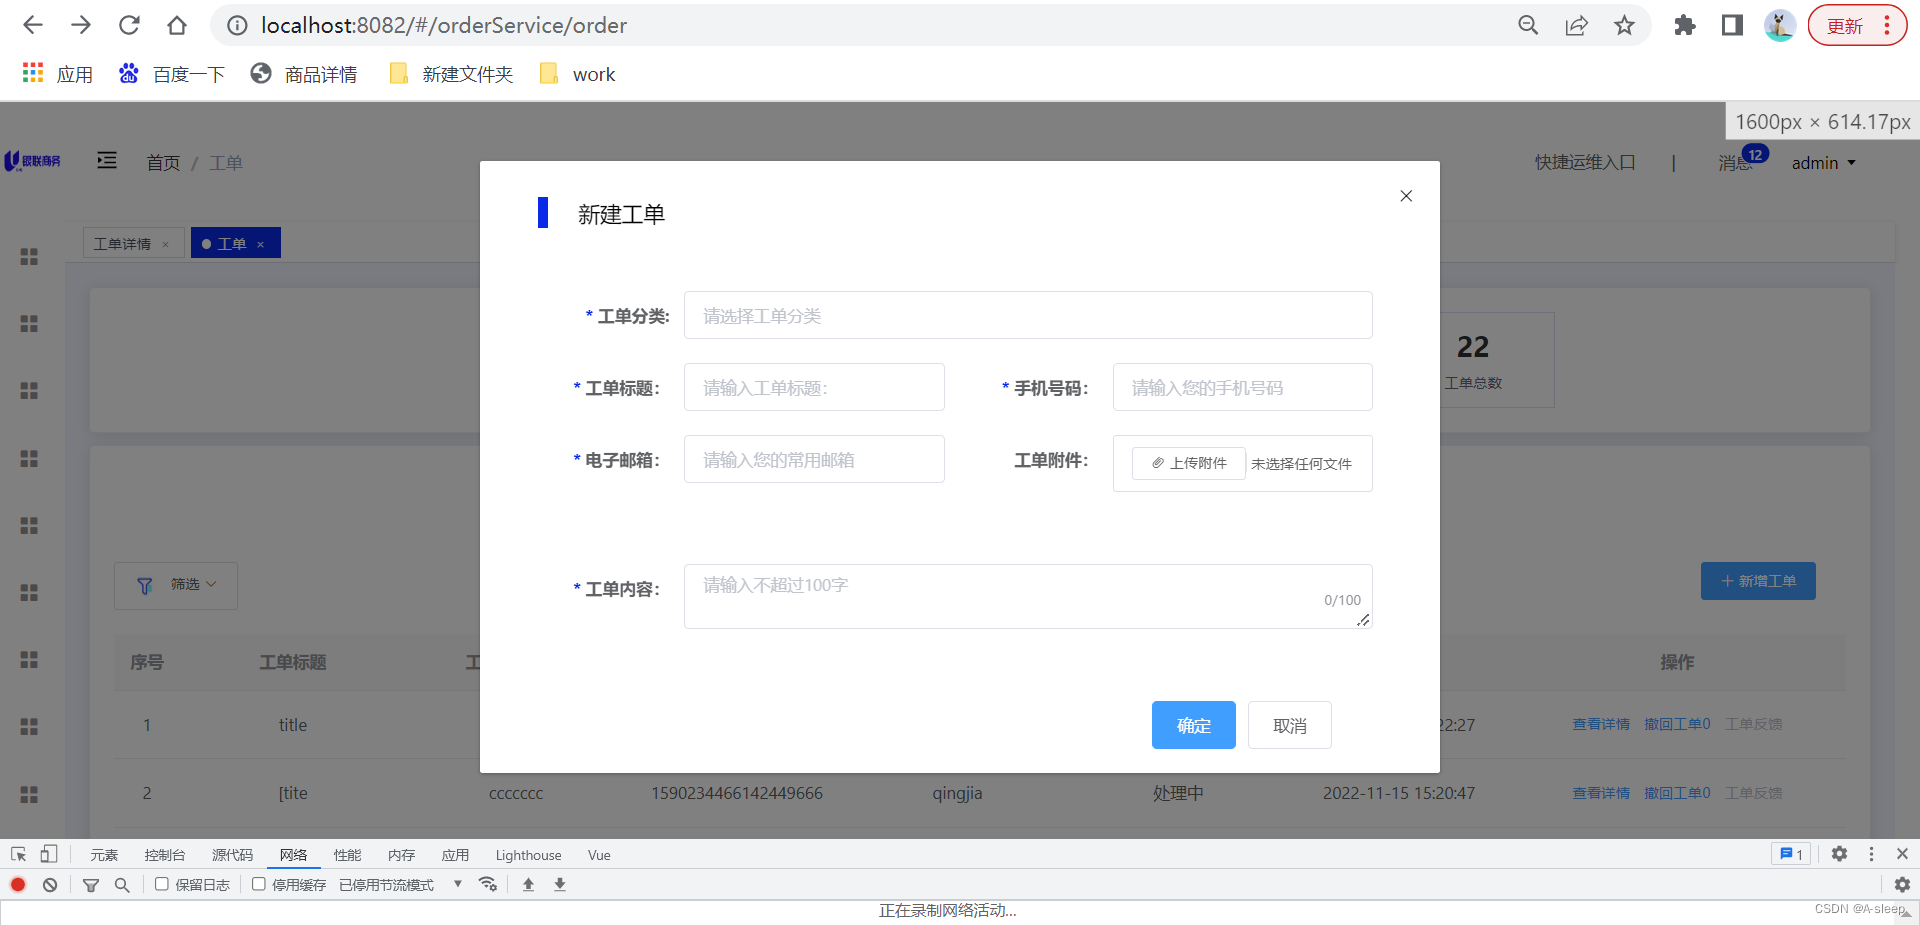
          <el-form-item label="工单分类:" prop="primaryClassification">
            <el-input
              :value="orderService.primaryClassification"
              style="width: 100%"
              placeholder="请选择工单分类"
              @click.native.stop="getcheckPrimaryAndSecondary"
            />
            <div v-if="ShowTree" class="tree-box">
              <el-tree
                v-loading="loading"
                :data="classifyList"
                :props="{ label: 'classifyName' }"
                @node-click="handleNodeClick"
              />
            </div>
          </el-form-item>
          ......
          //省略其他表单内容 只看附件的
            <el-form-item label="工单附件:" prop="file">
              <!-- 上传-->
              <el-button
                size="small"
                @click="$refs.fileRef.click()"
                style="width: 100%"
              >
                <el-button size="mini" style="position: relative; z-index: 1">
                  <i class="el-icon-paperclip"> 上传附件 </i>
                </el-button>
                <input ref="fileRef" type="file" class="file"
                @change="fileChange" enctype=“multipart/form-data” name="file"/>
              </el-button>
      </el-form>
      <template v-slot:footer>
        <el-button style="" type="primary" @click="onSubmit">确定</el-button>
        <el-button @click="handleClose">取消</el-button>
      </template>
 </el-dialog>

data(){
   
  • 0
    点赞
  • 0
    收藏
    觉得还不错? 一键收藏
  • 0
    评论
你可以使用 `el-upload` 组件来上文件,然后在上成功的回调函数中获取到文件对象,并将其递给后端。 以下是一个基本的示例: ```vue <template> <el-upload action="/api/upload" :on-success="handleSuccess" :before-upload="beforeUpload" > <el-button>上文件</el-button> </el-upload> </template> <script> export default { methods: { handleSuccess(response, file) { console.log('上成功', response, file) }, beforeUpload(file) { // 如果需要限制上文件类型,可以在这里进行判断 console.log('准备上', file) } } } </script> ``` 在以上示例中,`action` 属性指定了上文件的接口地址,`on-success` 属性指定了上成功后的回调函数,`before-upload` 属性指定了上前的回调函数。你需要根据自己的需求修改这些属性的值。 在 `handleSuccess` 回调函数中,你可以获取到后端返回的数据和上文件对象。你可以将文件对象递给后端,例如使用 `axios` 发送 POST 请求: ```js import axios from 'axios' handleSuccess(response, file) { console.log('上成功', response, file) const formData = new FormData() formData.append('file', file) axios.post('/api/upload-file', formData) .then(res => { console.log('后端返回数据', res.data) }) } ``` 在以上代码中,我们将文件对象添加到 `FormData` 对象中,并使用 `axios` 发送 POST 请求,将该 `FormData` 对象作为参数递给后端接口 `/api/upload-file`。你需要根据自己的接口地址和请求方式进行修改。

“相关推荐”对你有帮助么?

  • 非常没帮助
  • 没帮助
  • 一般
  • 有帮助
  • 非常有帮助
提交
评论
添加红包

请填写红包祝福语或标题

红包个数最小为10个

红包金额最低5元

当前余额3.43前往充值 >
需支付:10.00
成就一亿技术人!
领取后你会自动成为博主和红包主的粉丝 规则
hope_wisdom
发出的红包
实付
使用余额支付
点击重新获取
扫码支付
钱包余额 0

抵扣说明:

1.余额是钱包充值的虚拟货币,按照1:1的比例进行支付金额的抵扣。
2.余额无法直接购买下载,可以购买VIP、付费专栏及课程。

余额充值