


第一章 BIO、NIO、AIO介绍
背景
在java的软件设计开发中,通信架构是不可避免的,我们在进行不同系统或者不同进程之间的数据交互,或 者在高并发下的通信场景下都需要用到网络通信相关的技术,对于一些经验丰富的程序员来说,Java早期的网络通 信架构存在一些缺陷,其中最令人恼火的是基于性能低下的同步阻塞式的I/O通信(BIO),随着互联网开发下通 信性能的高要求,Java在2002年开始支持了非阴塞式的I/O通信技术(NIO)。大多数读者在学习网络通信相关技术的 时候,都只是接触到零碎的通信技术点,没有完整的技术体系架构,以至于对Java的通信场景总是没有清晰的解 决方案。本次课程将通过大量清晰直接的案例从最基础的BlO式通信开始介绍到NIO、AIO,读者可以清晰的了解到 阻塞、同步、异步的现象、概念和特征以及优缺点。本课程结合了大量的案例让读者可以快速了解每种通信架构的 使用。
第二章 Java的I/O演进之路
2.1 I/O模型基本说明
I/O模型:就是用什么样的通道或者说是通信模式和架构进行数据的传输和接收,很大程度上决定了程序通信的性能 , Java共支持3种网络编程的I/O模型:BlO. NIO. AlO实际通信需求下,要根据不同的业务场景和性能需求决定选择不同的I/O模型
2.2 I/O模型
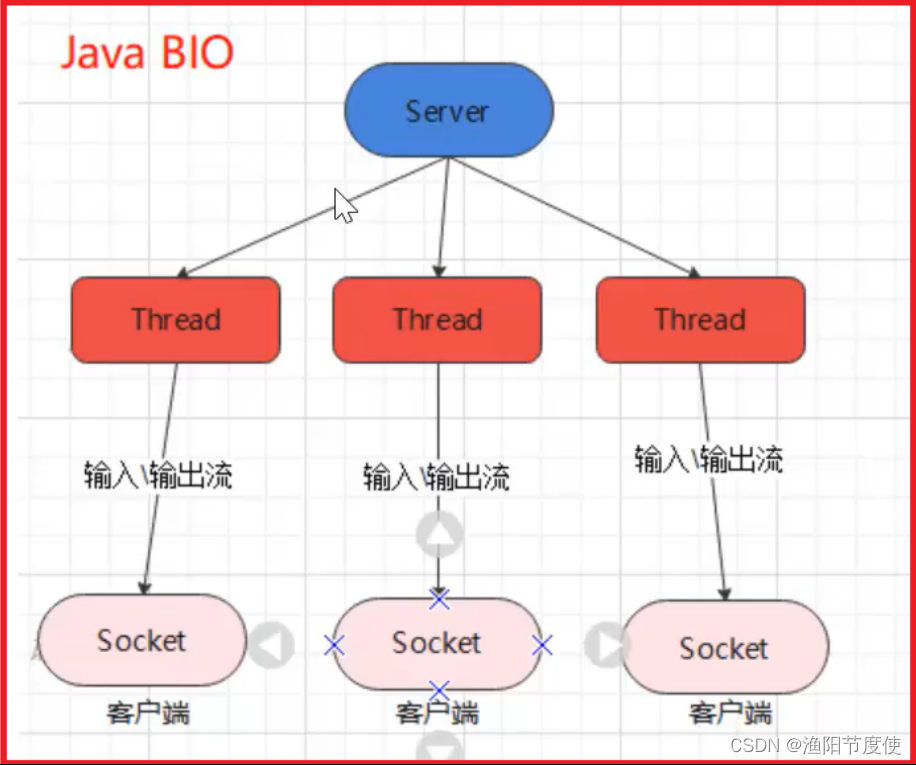
Java BIO
同步并阻塞(传统阻塞型),服务器实现模式为一个连接一个线程,即客户端有连接请求时服务器 端就需要启动一个线程进行处理,如果这个连接不做任何事情会造成不必要的线程开销【简单示意图 】
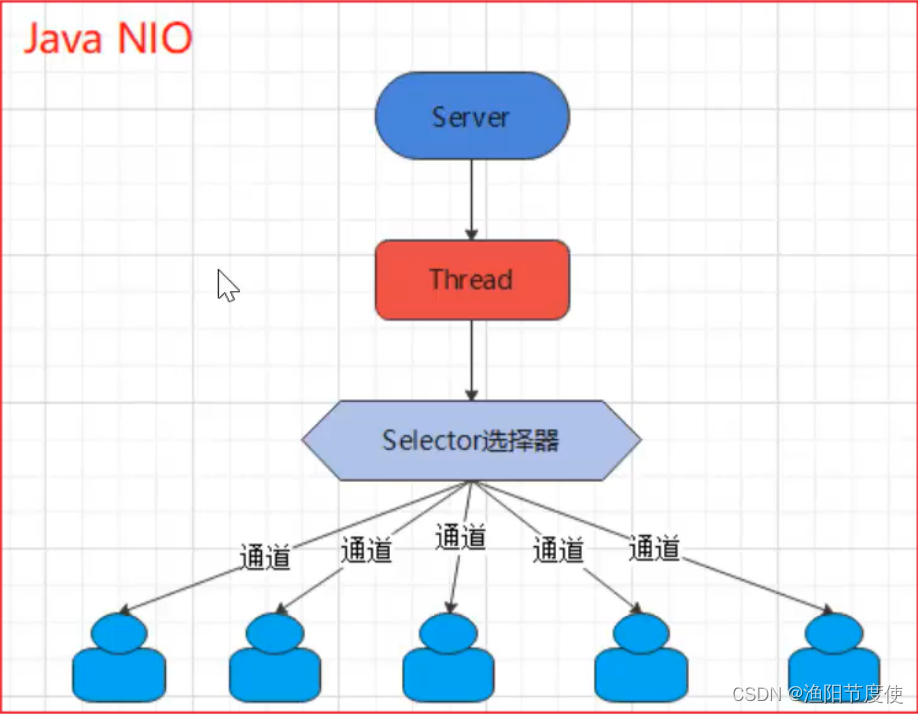
java NIO
Java NIO:同步非阻塞,服务器实现模式为一个线程处理多个请求(连接),即客户端发送的连接请求都会注册到多路复用器上,多路复用器轮询到连接有I/O请求就进行处理
java AIO
java A!O(NIO.2):异步异步非阻塞,服务器实现模式为一个有效请求一个线程,客户端的I/O请求都是由OS先完 成了再通知服务器应用去启动线程进行处理,一般适用于连接数较多且连接时间较长的应用
2.3 BIO、NIO、AIO适用场景分析
1、 BIO方式适用于连接数目比小且固定的架构,这种方式对服务器资源要求比较高,并发局限于应用中, jDK1.4以前的唯一选择,但程序简单易理解。(并发不是特别高的场景)
2、 NIO方式适用于连接数目多且连接比较短(轻操作)的架构,比如聊天服务器,弹幕系统,服务器间通讯等。 编程比较复杂,jDK1 .4开始支持。
3、 AIO方式使用于连接数目多且连接比较长(重操作)的架构,比如相册服务器,充分调用OS参与并发操作, 编程比较复杂,JDK7开始支持。
第三章 JAVA BIO深入剖析
3.1 Java BIO基本介绍
- Java BlO就是传锤的Java IO编程,其相关的类和接口在Java.io 包中
- BIO(blocking I/O)同步阻塞,服务器实现模式为一个连接一个线程,即客户端有连接请求时服务器端就需要启动一个线程进行处理,如果这个连接不做任何事情会造成不必要的线程开销,可以通过线程池机制改善 (实现多个客户连接服务器).
3.2 java BIO工作机制

3.3 传统的BIO编程实例回顾
网络编程的基本模型是Client/Server模型,也就是两个进程之间进行相互通信,其中服务端提供位置信(绑 定IP地址和端口),客户端通过连接操作向服务端监听的端口地址发起连接请求,基于TCP协议下进行三次握手连接,连接成功后,双方通过网络套接字(Socket)进行通信。
传统的同步阻塞模型开发中,服务端ServerSocket负责绑定IP地址,启动监听端口;客户端Socket负责发起 连接操作。连接成功后,双方通过输入和输出流进行同步阻塞式通信。
基于BIO模式下的通信,客户端-服务端是完全同步,完全藕合的。
客户端案例如下
public class Client {
    public static void main(String[] args) {
        try {
            //1.创建Socket对象请求服务端的连接
            Socket socket = new Socket("127.0.0.1", 9999);
            OutputStream outputStream = socket.getOutputStream();
            PrintStream printStream = new PrintStream(outputStream);
            printStream.println("hello world!服务端,你好");
            printStream.flush();
        } catch (IOException e) {
            e.printStackTrace();
        }
    }
}
服务端案例如下
public class Server {
    public static void main(String[] args) {
        try {
            //1.定义一个ServerSocket对象进行服务端的端口注册
            ServerSocket serverSocket = new ServerSocket(9999);
            //2. 监听客户端的Socket连接请求
            Socket socket = serverSocket.accept();
            //3.从socket管道中得到一个字节输入流对象
            InputStream inputStream = socket.getInputStream();
            //4.把字节输入流包装成一个缓存字符输入流
            BufferedReader bufferedReader = new BufferedReader(new InputStreamReader(inputStream));
            String msg ;
//            while ((msg = bufferedReader.readLine()) != null) {
//                System.out.println("服务端收到消息:" + msg);
//            }
            if ((msg = bufferedReader.readLine()) != null) {
                System.out.println("服务端收到消息:" + msg);
            }
        } catch (Exception e) {
            e.printStackTrace();
        }

    }
}
输出
服务端收到消息:hello world!服务端,你好
小结
- 在以上通信中,服务端会一直等待客户端的消息,如果客户端没有进行消息的发送,服务端将一直进入阻塞状态
- 同时服务端是按照行获取消息的,这意味育客户端也必须按照行进行消息的发送,否则服务端将进入等待消息的阻塞状态!
3.4 BIO模式下多发和多收消息
在上面的案例中,只能实现客户端发送消息,服务端接收消息, 并不能实现反复的收消息和反复的发消息,我们只需要在客户端案例中,加上反复按照行发送消息的逻辑即可! 案例代码如下:
客户端代码如下
public class Client {
    public static void main(String[] args) {
        try {
            //1.创建Socket对象请求服务端的连接
            Socket socket = new Socket("127.0.0.1", 9999);
            OutputStream outputStream = socket.getOutputStream();
            PrintStream printStream = new PrintStream(outputStream);
            Scanner scanner = new Scanner(System.in);
            while (true) {
                System.out.println("你好,请输入");
                String msg = scanner.nextLine();
                printStream.println(msg);
                printStream.flush();
            }
        } catch (IOException e) {
            e.printStackTrace();
        }
    }
}
服务端代码如下
public class Server {
    public static void main(String[] args) {
        try {
            //1.定义一个ServerSocket对象进行服务端的端口注册
            ServerSocket serverSocket = new ServerSocket(9999);
            //2. 监听客户端的Socket连接请求
            Socket socket = serverSocket.accept();
            //3.从socket管道中得到一个字节输入流对象
            InputStream inputStream = socket.getInputStream();
            //4.把字节输入流包装成一个缓存字符输入流
            BufferedReader bufferedReader = new BufferedReader(new InputStreamReader(inputStream));
            String msg ;
            while ((msg = bufferedReader.readLine()) != null) {
                System.out.println("服务端收到消息:" + msg);
            }
        } catch (Exception e) {
            e.printStackTrace();
        }

    }
}
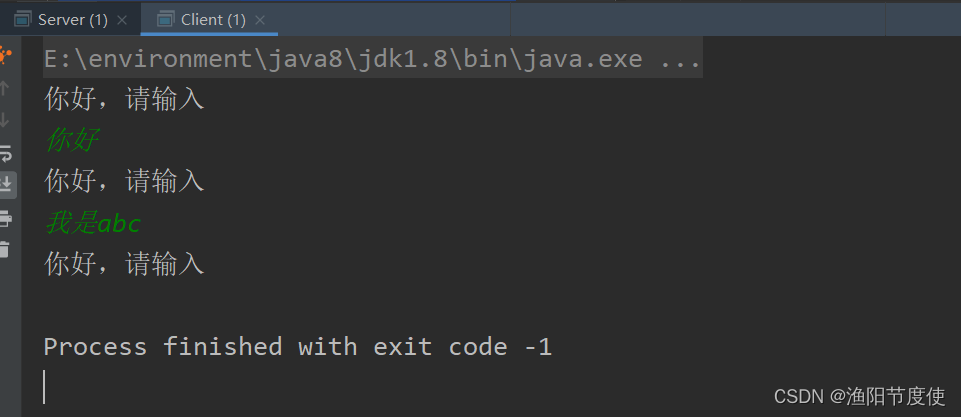
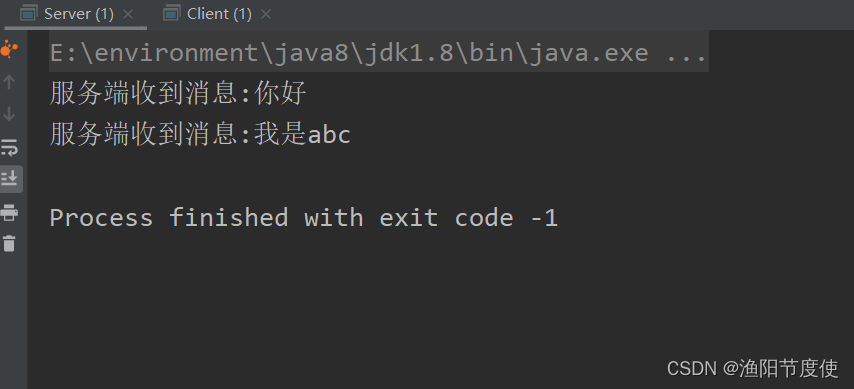
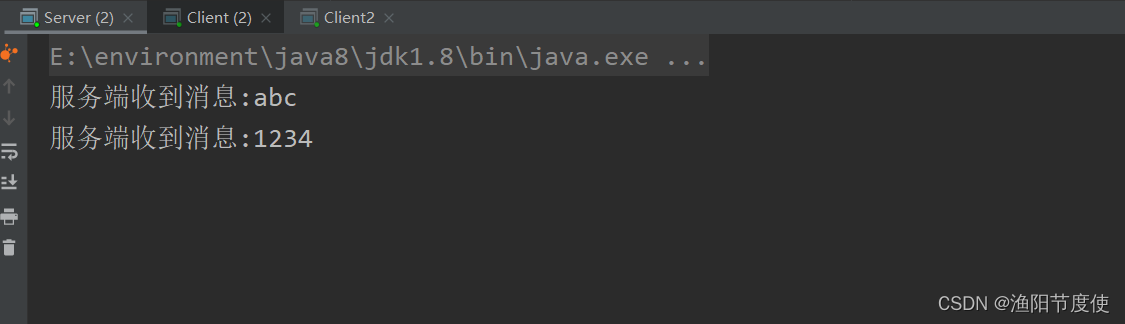
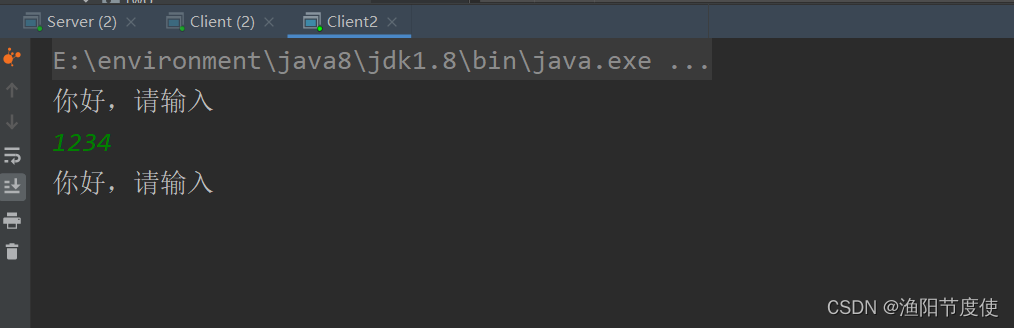
输出
3.5 BIO模式下接收多个客户端
概述
在上述的案例中,一个服务端只能接收一个客户端的通信请求,那么如果服务端需要处理很多个客户端的消 息通信请求应该如何处理呢,此时我们就需要在服务端引入线程了,也就是说客户端每发起一个请求,服务端就创 建一个新的线程来处理这个客户端的请求,这样就实现了一个客户端一个线程的模型,
图解模式如下

服务端案例代码
public class Server {
    public static void main(String[] args) {
        try {
            //1.注册端口
            ServerSocket serverSocket = new ServerSocket(9999);
            //2.定义一个死循环,负责不断的接收客户端的Socket的连接请求
            while (true) {
                Socket socket = serverSocket.accept();
                //3.创建一个独立的线程来处理与这个客户端的socket通信需求
                new ServerThreadReader(socket).start();
            }
        } catch (Exception e) {
            e.printStackTrace();
        }
    }
}
线程类
public class ServerThreadReader extends Thread{
    private Socket socket;

    public ServerThreadReader(Socket socket) {
        this.socket = socket;
    }

    @Override
    public void run() {
        try {
            //从socket对象中得到一个字节输入流
            InputStream inputStream = socket.getInputStream();
            //使用缓存字符输入流包装字节输入流
            BufferedReader bufferedReader = new BufferedReader(new InputStreamReader(inputStream));
            String msg ;
            while ((msg = bufferedReader.readLine()) != null) {
                System.out.println("服务端收到消息:" + msg);
            }
        } catch (IOException e) {
            e.printStackTrace();
        }
    }
}
客户端案例代码
public class Client {
public static void main(String[] args) {
try {
//1.创建Socket对象请求服务端的连接
Socket socket = new Socket("127.0.0.1", 9999);
OutputStream outputStream = socket.getOutputStream();
//2. 得到一个打印流
PrintStream printStream = new PrintStream(outputStream);
//3. 使用循环不断的发送消息给服务端接收
Scanner scanner = new Scanner(System.in);
while (true) {
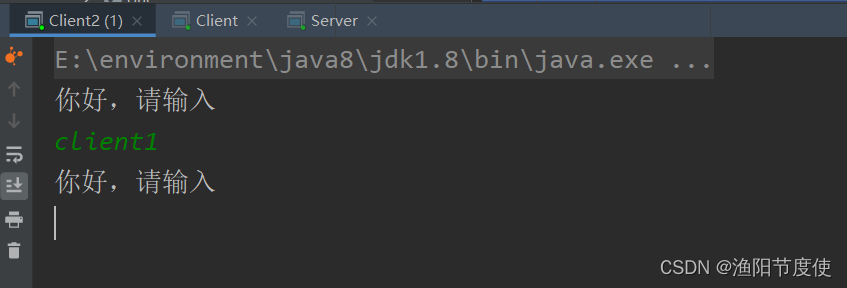
System.out.println("你好,请输入");
String msg = scanner.nextLine();
printStream.println(msg);
printStream.flush();
}
} catch (IOException e) {
e.printStackTrace();
}
}
}

小结
- 每个Socket接收到,都会创建一个线程,线程的竞争、切换上下文影响性能; ・
- 每个线程都会占用栈空间和CPU资源;
- 并不是每个socket都进行lO操作,无意义的线程处理;
- 客户端的并发访问增加时。服务端将呈现1:1的线程开销,访问量越大,系统将发生线程栈溢出,线程创建失败,最终导致进程宕机或者僵死,从而不能对外提供服务。
3.6 伪异步I/O编程
概述
在上述案例中:客户端的并发访问增加时。服务端将呈现1:1的线程开销,访问量越大,系统将发生线程栈溢出,线程创建失败,最终导致进程宕机或者僵死,从而不能对外提供服务。
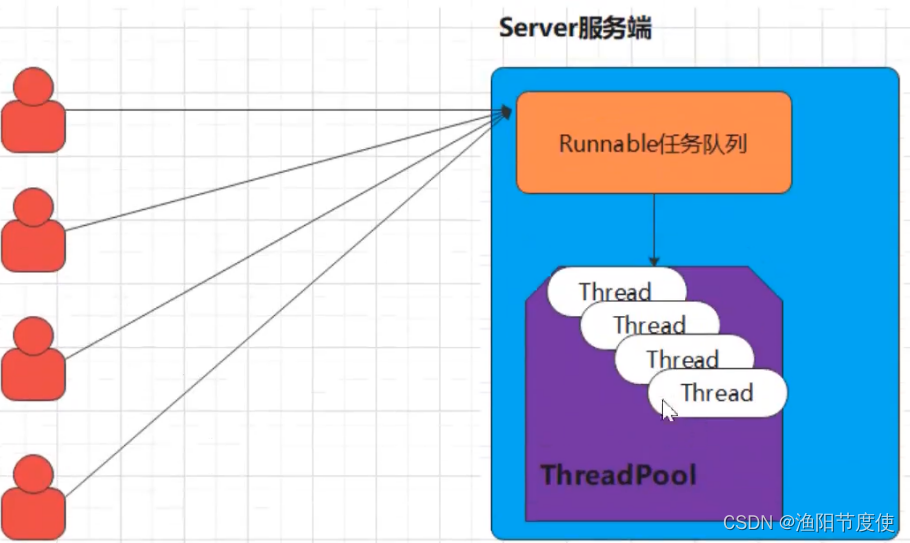
接下来我们采用一个伪异步I/O的通信框架,采用线程池和任务队列实现,当客户端接入时,将客户端的Socket封装成一个Task(该任务实现Java. lang. Runnable(线程任务接口)交给后端的线程池中进行处理。JDK的线程池维护一个消息队列和N个活跃的线程,对消息队列中Socket任务进行处理,由于线程池可以设置消息队列的大小和最大线程数,因此,它的资源占用是可控的,无论多少个客户端并发访问,都不会导致资源的耗尽和宕机
如下图所示:
客户端源码分析
public class Client {
    public static void main(String[] args) {
        try {
            //1.创建Socket对象请求服务端的连接
            Socket socket = new Socket("127.0.0.1", 9999);
            OutputStream outputStream = socket.getOutputStream();
            //2. 得到一个打印流
            PrintStream printStream = new PrintStream(outputStream);
            //3. 使用循环不断的发送消息给服务端接收
            Scanner scanner = new Scanner(System.in);
            while (true) {
                System.out.println("你好,请输入");
                String msg = scanner.nextLine();
                printStream.println(msg);
                printStream.flush();
            }
        } catch (IOException e) {
            e.printStackTrace();
        }
    }
}
线程池处理类
public class HandlerSocketServerPool {
    //1. 创建一个线程池的成员变量用于存储一个线程池对象
    private ExecutorService executorService;

    /**
     * 2.创建这个类的的对象的时候就需要初始化线程池对象
     * @param maxThreadNum
     * @param queueSize
     */
    public HandlerSocketServerPool(int maxThreadNum, int queueSize){
        executorService = new ThreadPoolExecutor(3,maxThreadNum,120,
                TimeUnit.SECONDS,new ArrayBlockingQueue<Runnable>(queueSize));
    }

    /**
     * 3.提供一个方法来提交任务给线程池的任务队列来暂存,等待线程池来处理
     * @param target
     */
    public void execute(Runnable target){
        executorService.execute(target);
    }
}
Socket任务类
public class ServerRunnableTarget implements Runnable{
    private Socket socket;

    public ServerRunnableTarget(Socket socket) {
        this.socket = socket;
    }

    @Override
    public void run() {
        try {
            //从socket对象中得到一个字节输入流
            InputStream inputStream = socket.getInputStream();
            //使用缓存字符输入流包装字节输入流
            BufferedReader bufferedReader = new BufferedReader(new InputStreamReader(inputStream));
            String msg ;
            while ((msg = bufferedReader.readLine()) != null) {
                System.out.println("服务端收到消息:" + msg);
            }
        } catch (Exception e) {
            e.printStackTrace();
        }
    }
}
服务端源码分析
public class Server {
    public static void main(String[] args) {
        try {
            //1.注册端口
            ServerSocket serverSocket = new ServerSocket(9999);
            //2.定义一个死循环,负责不断的接收客户端的Socket的连接请求
            //初始化一个线程池对象
            HandlerSocketServerPool pool = new HandlerSocketServerPool(3,10);
            while (true) {
                Socket socket = serverSocket.accept();
                //3.把socket对象交给一个线程池进行处理
                //把socket封装成一个任务对象交给线程池处理
                Runnable target = new ServerThreadReader(socket);
                pool.execute(target);
            }
        } catch (Exception e) {
            e.printStackTrace();
        }
    }
}
输出

小结
- 伪异步旧采用了线程池实现,因此避免了为每个请求创建一个独立线程造成线程资源耗尽的问题,但由于底层 依然是采用的同步阻塞模型,因此无法从根采上解决问题。
- 如果单个消息处理的缓慢,或者服务器线程池中的全部线程都被阻塞,那么后续socket的I/O消息都将在队列 中排队。新的Socket请求将被拒绝,客户端会发生大量连接超
3.7 基于BIO形式下的文件上传
目标
支持任意类型文件形式的上传
客户端开发
public class Client {
    public static void main(String[] args) {
        try {
            //1.请求与服务端的Socket连接
            Socket socket = new Socket("127.0.0.1", 8888);
            //2.把字节输出流包装成一个数据输出流(DataOutputStream可以做分段数据发送)
            DataOutputStream dataOutputStream = new DataOutputStream(socket.getOutputStream());
            //3.先发送上传文件的后缀给服务器
            dataOutputStream.writeUTF(".jpg");
            //4.把文件数据发送给服务端进行接收
            InputStream is = new FileInputStream("C:\\Users\\dell\\Desktop\\西湖\\31d4cb205e149f28ef649b9a7603b5de_small122004MXRWF1694665204.jpg");
            byte[] buffer = new byte[1024];
            int len;
            while((len=is.read(buffer))>0){
                dataOutputStream.write(buffer,0,len);
            }
            dataOutputStream.flush();
            socket.shutdownOutput();//通知服务端,我客户端这边的数据已经发送完毕了
        }catch (Exception e){
			e.printStackTrace();
        }
    }
}
服务端开发
public class Server {
    public static void main(String[] args) {
        try {
            ServerSocket serverSocket = new ServerSocket(8888);
            while (true) {
                Socket socket = serverSocket.accept();
                new ServerThreadReader(socket).start();
            }
        } catch (Exception e) {
            e.printStackTrace();
        }
    }
}
服务端线程处理类
public class ServerThreadReader extends Thread{
private Socket socket;
public ServerThreadReader(Socket socket) {
this.socket = socket;
}
@Override
public void run() {
try {
//1.得到一个数据输入流来读取客户端发送过来的数据
DataInputStream dis = new DataInputStream(socket.getInputStream());
//2.读取客户端发送过来的文件类型
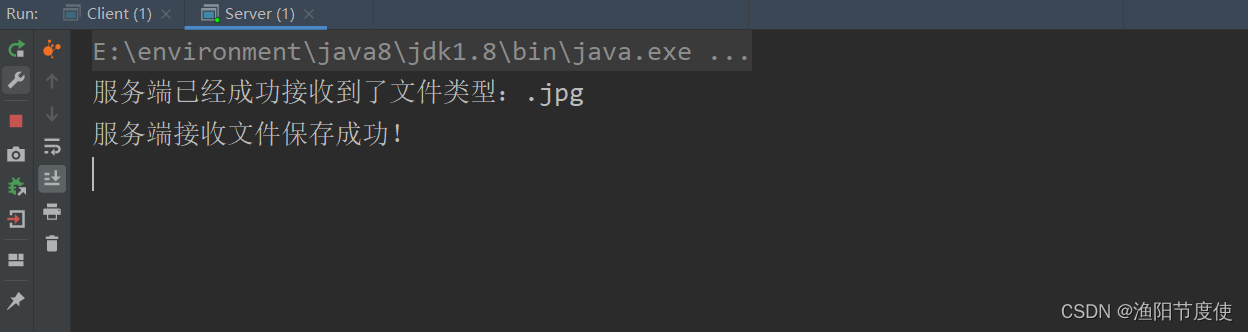
String suffix = dis.readUTF();
System.out.println("服务端已经成功接收到了文件类型:" + suffix);
//3.定义一个字节输出管道,负责把客户端发来的文件数据写出去
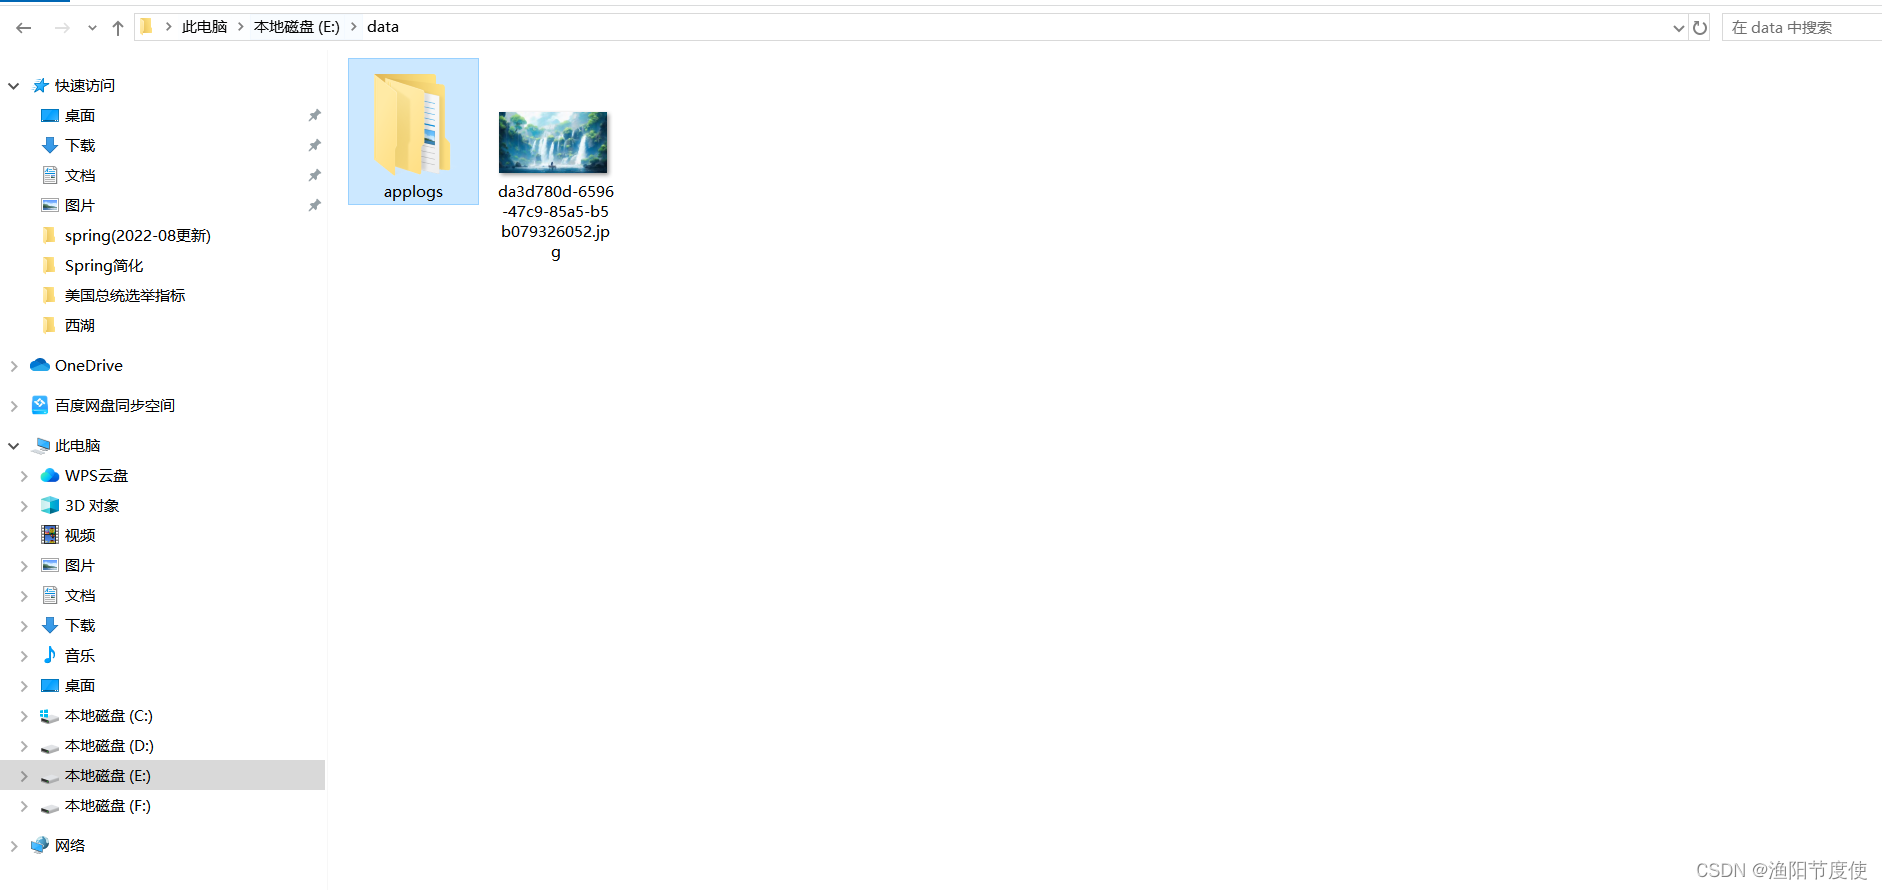
OutputStream os = new
FileOutputStream("E:\\data\\"
+ UUID.randomUUID().toString() + suffix);
//4.从数据输入流中读取文件数据,写出到字节输出流中去
byte[] buffer = new byte[1024];
int len;
while ((len = dis.read(buffer)) > 0){
os.write(buffer,0,len);
}
os.close();
System.out.println("服务端接收文件保存成功!");
} catch (IOException e) {
e.printStackTrace();
}
}
}
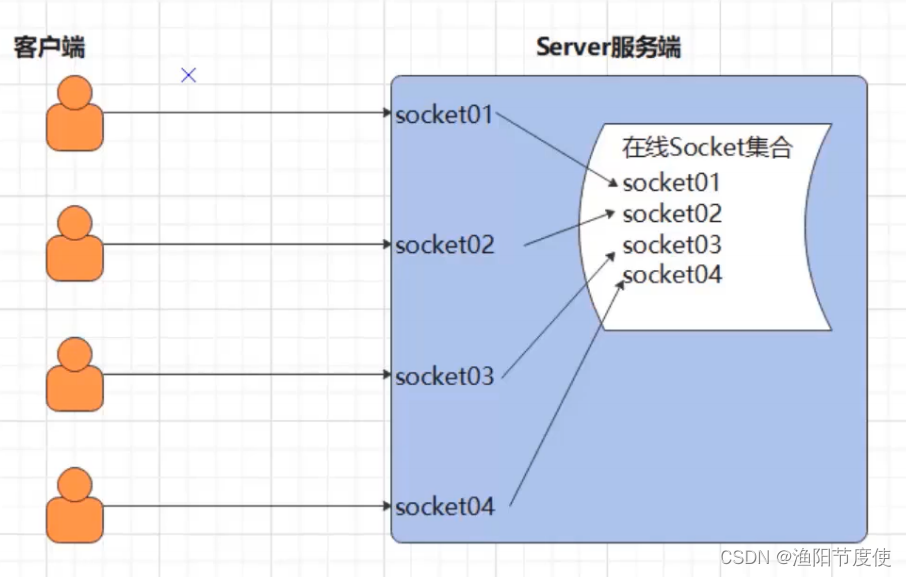
Java BIO模式下的端口转发思想
需求:需要实现一个客户端的消息可以发送给所有的客户端去接收。(群聊实现)
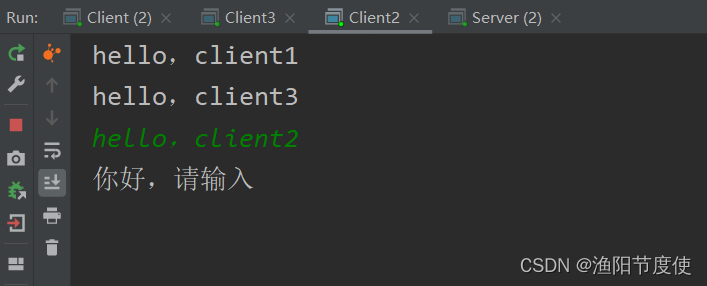
客户端开发
public class Client {
    public static void main(String[] args) {
        try {
            //1.请求与服务端的Socket连接
            Socket socket = new Socket("127.0.0.1", 8888);
            ClientReaderThread clientReaderThread = new ClientReaderThread(socket);
            clientReaderThread.start();

            while (true) {
                //发消息
                OutputStream outputStream = socket.getOutputStream();
                PrintStream printStream = new PrintStream(outputStream);
                //3. 使用循环不断的发送消息给服务端接收
                Scanner scanner = new Scanner(System.in);
                //System.out.print("client send message:");
                String msg = scanner.nextLine();
                printStream.println(msg);
                printStream.flush();
            }

        }catch (Exception e){
            e.printStackTrace();
        }
    }
}
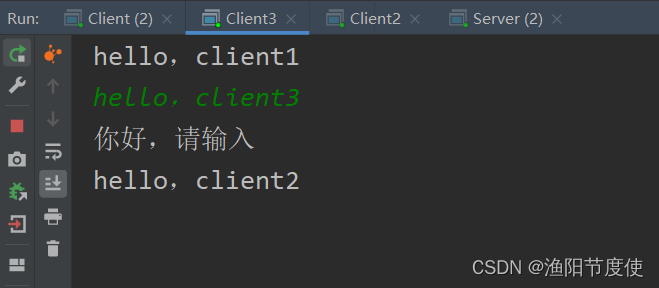
客户端线程处理类
public class ClientReaderThread extends Thread{
    private Socket socket;

    public ClientReaderThread(Socket socket) {
        this.socket = socket;
    }

    @Override
    public void run() {
        try {
            while (true) {
                InputStream inputStream = socket.getInputStream();
                BufferedReader bufferedReader = new BufferedReader(new InputStreamReader(inputStream));
                String msg;
                /*while ((msg=bufferedReader.readLine())!=null) {
                    System.out.println(msg);
                }*/
                if ((msg=bufferedReader.readLine())!=null) {
                    System.out.println(msg);
                }

            }
        } catch (IOException e) {
            e.printStackTrace();
        }
    }
}
服务端开发
public class Server {
    public static List<Socket> allSOcketOnLine = new ArrayList<>();
    public static void main(String[] args) {
        try {
            ServerSocket serverSocket = new ServerSocket(9999);
            while (true) {
                Socket socket = serverSocket.accept();
                //把登录的客户端socket存入到一个在线集合中去
                allSOcketOnLine.add(socket);
                //为当前登录成功的socket分配一个独立的线程来处理与之通信
                new ServerReaderThread(socket).start();
            }
        } catch (IOException e) {
            e.printStackTrace();
        }
    }
}
服务端线程处理类
public class ServerReaderThread extends Thread{
private Socket socket;
public ServerReaderThread(Socket socket) {
this.socket = socket;
}
@Override
public void run() {
try {
BufferedReader bufferedReader = new BufferedReader(new InputStreamReader(socket.getInputStream()));
String msg ;
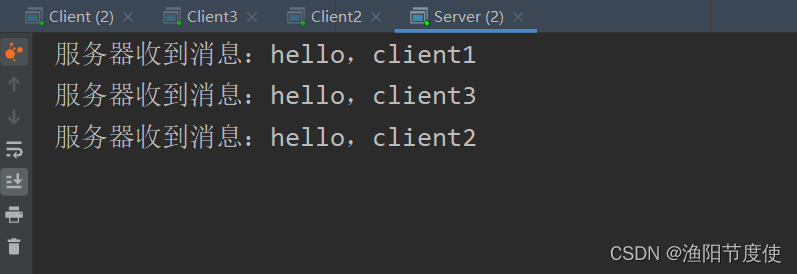
while ((msg=bufferedReader.readLine())!=null){
System.out.println("服务器收到消息:" + msg);
//2.服务端接收到了客户端的消息后,需要推送给所有的当前在线的socket
sendMsgToAllClient(msg,socket);
}
} catch (IOException e) {
e.printStackTrace();
System.out.println("当前有人下线了!");
//从在线socket集合中移除本socket
Server.allSOcketOnLine.remove(socket);
}
}
private void sendMsgToAllClient(String msg, Socket socket) throws IOException {
for (Socket sk : Server.allSOcketOnLine) {
if (socket!=sk) {
PrintStream printStream = new PrintStream(sk.getOutputStream());
printStream.println(msg);
printStream.flush();
}
}
}
}
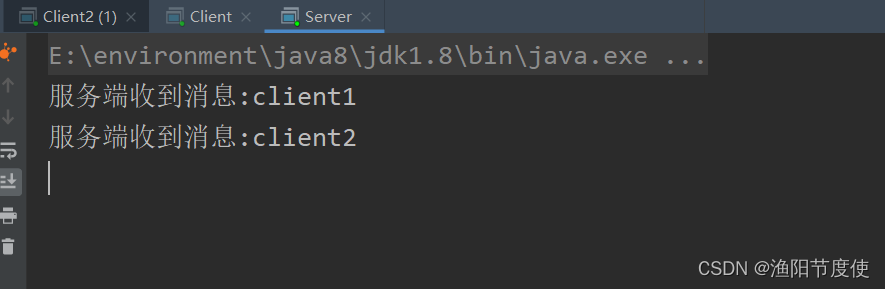
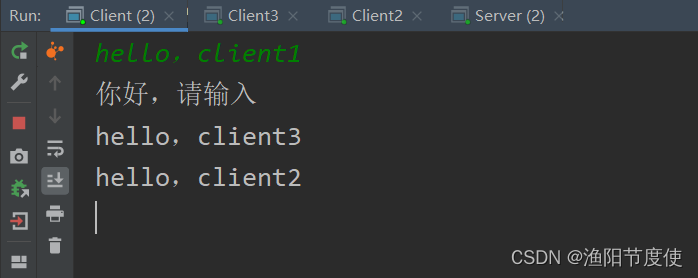
输出
3.9 基于BIO模式下即时通讯
基于BIO模式下的即时通信,我们需要解决客户端到客户端的通信,也就是需要实现客户端与客户端的
端口消息转发逻辑。
项目功能演示
功能清单简单说明:
1.客户端登录功能
- 可以启动客户端进行登录,客户端登录只需要输入用户名和服务端IP地址即可。
2.在线人数实时更新
- 客户端用户登录后,需要同步更新所有客户端的联系人信息栏。
3.离线人数更新
- 检测到有客户端下线后,需要同步更新所有客户端的联系人信息栏。
4.群聊
- 任意一个客户端的消息,可以推动给当前所有的客户端接收。
5.私聊
- 任意一个客户端消息,可以推动给当前所有客户端接收。
6.@消息
- 可以选择某个员工,然后发出的消息可以@该用户,但是其他所有人都能收到消息。
7.消息用户和消息时间点
- 服务端可以实时记录该用户的消息时间点,然后进行消息的多路转发或则选择。
第四章 JAVA NIO深入剖析
先来了解一下NIO的基本特点和使用
4.1 java NIO基本介绍
-
java NlO (New lO)也有人称之为java non-blocking IO是脚ava 1.4版本开始引入的一个新的IO API,可以 替代标准的ava lO API。 NIO与原来的IO有同样的作用和目的,但是使用的方式完全不同,NIO支持面向缓冲区的、基于通道的IO操作。NIO将以更加高效的方式进行文件的读写操作。NIO可以理解为非阻塞IO,传统的IO 的read和write只能阻塞执行,线程在读写期间不能干其他事情,比如调用socket. read()时,如果服务器一直没有数据传输过来,线程就一直阻塞,而NIO中可以配置socket为非阻塞模式。
-
NIO相关类都被放在java.nio包及子包下,并且对原」ava.io包中的很多类进行改写。
-
NIO有三大核心部分:Channel(通道),Buffer(缓冲区),Selector(选择器)
-
Java NIO的非阻塞模式,使一个线程从某通道发送请求或者读取数据,但是它仅能得到目前可用的数据;如 果目前没有数据可用时,就什么都不会获取,而不是保持线程阻塞,所以直至数据变的可以读取之前,该线程 可以继续做其他的事情。非阻塞写也是如此,一个线程请求写入一些数据到某通道,但不需要等待它完全写 入,这个线程同时可以去做别的事情。
-
通俗理解:NIO是可以做到用一个线程来处理多个操作的。假设有1000个请求过来,根据实际情况,可以分酉己 20或者80个线程来处理。不像之前的阻塞IO那样,非得分配1000个。
4.2 NIO和BIO的比较
- BlO以流的方式处理数据,而NIO以块的方式处理数据,块I/O的效率比流I/O高很多
- BlO是阻塞的,NIO则是非阴塞的
- BlO基于字节流和字符流进行操作,而NIO基于Channel(通道)和Buffer(缓冲区)进行操作,数据总是从通道 读取到缓冲区中,或者从缓冲区写入到通道中。Selector(选择器)用于监听多个通道的事件(比如:连接请 求,数据到达等),因此使用单个线程就可以监听多个客户端通道
| NIO | BIO |
|---|---|
| 面向缓存区(Buffer) | 面向流(Stream) |
| 非阻塞(Non Blocking IO) | 阻塞IO(Blocking IO) |
| 选择器(Selector) |
4.3 NIO三大核心原理示意图
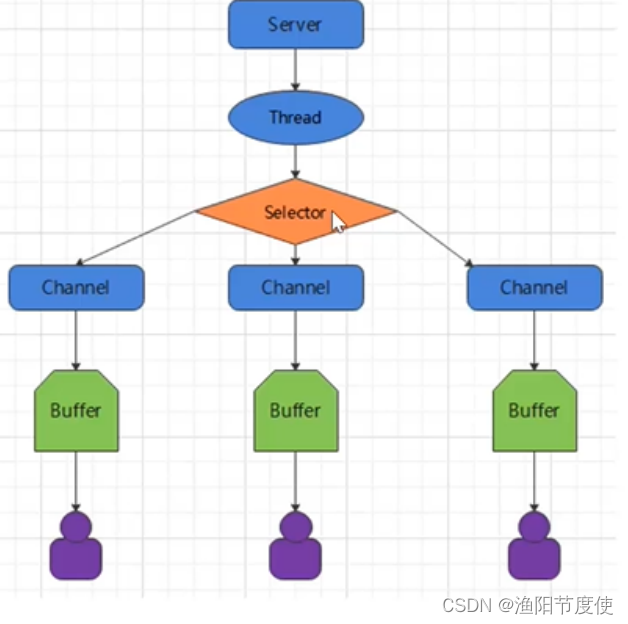
NIO有三大核心部分:Channel(通道),Buufer(缓存区),Selector(选择器)
Buffer缓存区
缓冲区本质上是一块可以写入数据,然后可以从中读取数据的内存。这块内存被包装成NIO Buffer对象,并提供了 一组方法,用来方便的访问该块内存。相比较直接对数组的操作,Buffer API更加容易操作和管理。
Channel通道
Java NIO的通道类似流,但又有些不同:既可以从通道中读取数据,又可以写数据到通道。但流的((input或 output)读写通常是单向的。通道可以非阻塞读取和写入通道,通道可以支持读取或写入缓冲区,也支持异步地读写。
Selector选择器
Selector是一个ava NIO组件,可以能够检查一个或多个NIO通道,并确定哪些通道已经准备好进行读取或写 入。这样,一个单独的线程可以管理多个channel,从而管理多个网络连接,提高效率
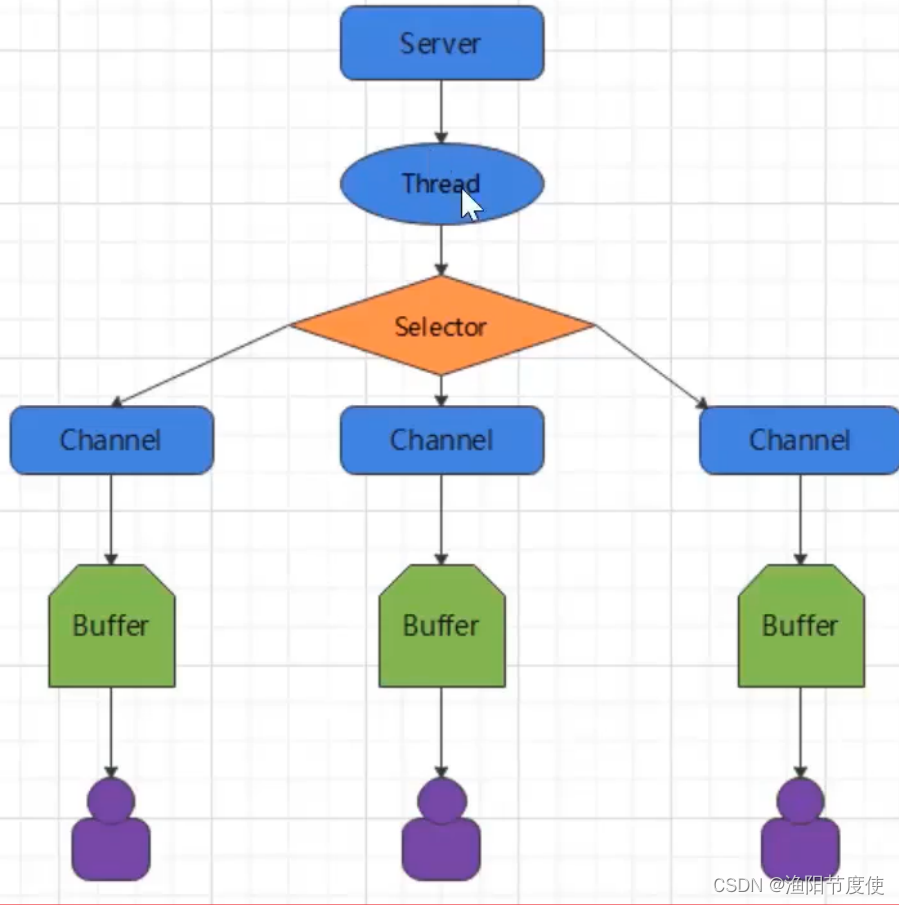
- 每个channel都会对应一个Buffer
- 一个线程对应Selector,一个Selector对应多个channel(连接)
- 程序切换到哪个channel是由事件决定的
- Selector会根据不同的事件,在各个通道上切换
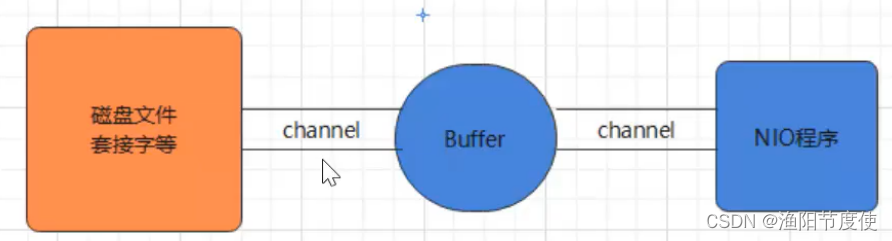
Buffer就是一个内存块,底层是一个数组- 数据的读取写入是通过Buffer完成的,BIO中要么是输入流,或者是输出流,不能双向,但是NIO的Buffer是可以读也可以写。
- Java NIO系统的核心在于:通道(Channel)和缓存区(Buffer)。通道表示打开到IO设备(例如:文件、套接字) 的连接。若需要使用NlO系统,需要获取用于连接IO设备的通道以及用于容纳数据的缓冲区。然后操作缓 冲区,对数据进行处理。简而言之,Channel负责传输,Buffer负责存取数据
4.4 NIO核心一:缓存区(Buffer)
缓存区(Buffer)
一个用于特定基本数据类型的容器。由Java.nio包定义的,所有缓冲区都是Buffer抽象类的子类.Java NIO中 的Buffer主要用于与NIO通道进行交互,数据是从通道读入缓冲区,从缓冲区写入通道中的
Buffer类及其子类
Buffer就像一个数组,可以保存多个相同类型的数据。根据数据类型不同,有以下Buffer常用子类:
- ByteBuffer
- CharBuffer
- ShortBuffer
IntBuffer - LongBuffer
- FloatBuffer
- DoubleBuffer
上述Buffer类 他们都采用相似的方法进行管理数据,只是各自管理的数据类型不同而已。都是通过如下方法获取一个Buffer对象:
static XxxBuffer allocate(int capacity):创建一个容量为capacity的XxxBuffer对象
缓存区的基本属性
Buffer中的重要概念:
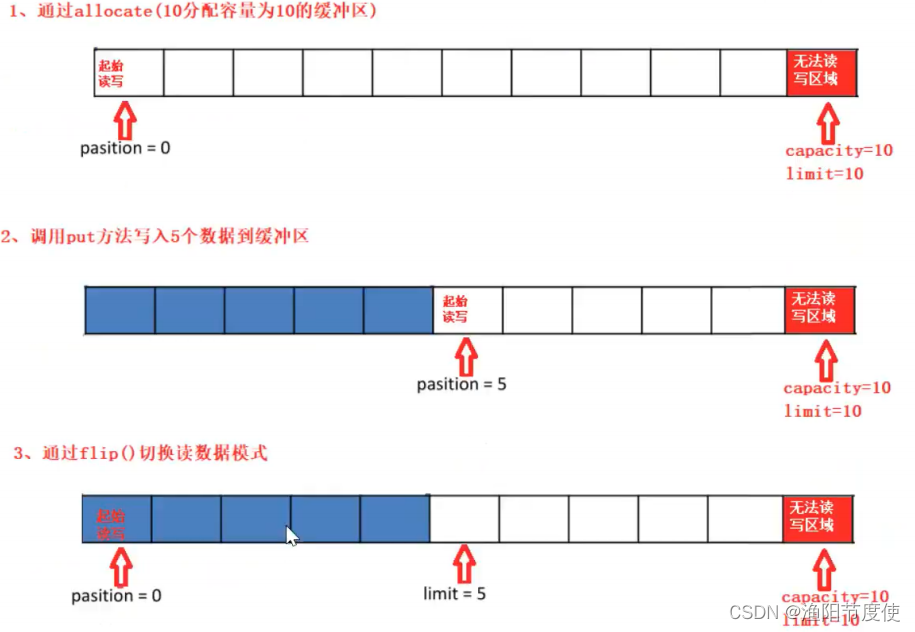
- 容量(capacity):作为一个内存块,Buffer具有一定的固定大小,也称为”容量”,缓冲区容量不能为负,并且 创建后不能更改。
- 限制(limit):表示缓冲区中可以操作数据的大小(limit后数据不能进行读写)。缓冲区的限制不能为负,并且不能大于其容量。
写入模式,限制等于buffer的容量。读取模式下,limit等于写入的数据量。 - 位置(position):下一个要读取或写入的数据的索引。缓’中区的位置不能为负,并且不能大于其限
制 - 标记(mark)与重置(reset):标记是一个索弓l,通过Buffer中的mark()方法指定Buffer中一个特定的 position,之后可以通过调用reset()方法恢复到这个position。标记、位置、限制、容量遵守以T不变式:0<=mark<=position<=limit<=capacity
- 图示:
Buffer常见方法
Buffer clear()清空缓冲区并返回对缓冲区的引用
Buffer flip()为将缓冲区的界限设置为当前位置,并将当前位置重置为0
int capacity()返回Buffer的capacity大小
boolean hasRemaining()判断缓冲区中是否还有元素
int limit()返回Buffer的界限(limit)的位置
Buffer limit(int n)将设置缓冲区界限为n,并返回一个具有新limit的缓冲区对象
Buffer mark()对缓冲区设置标记
int position()返回缓冲区的当前位置position
Buffer position(int n)将设置缓冲区的当前位置为n,并返回修改后的Buffer对象
int remaining()返回position和limit之间的元素个数
Buffer reset()将位置position转到以前设置的mark所在的位置
Buffer rewind();将位置设为为0.取消设置的mark
缓存区的数据操作
Buffer 所有子类提供了两个用于数据操作的方法:get() put()方法取获取Buffer中的数据
get()				:读取单个字节
get (byte[]dst)	:批量读取多个字节到dst中
get(int index)		:读取指定索引位置的字节(不会移动position)放到 入数据到Buffer中
put(byte b)			:将给定单个字节写入缓冲区的当前位置
put (byte[] src)	:将src中的字节写入缓存区的当前位置
put(int index,byte b)L将指定字节写入缓存区的索引位置(不会移动position)
使用Buffer读写数据一般遵循以下四个步骤:
- 1.写入数据到Buffer
- 2.调用flip()方法,转换为读取模式
- 3.从Buffer中读取数据
- 4.调用buffer.clear()方法或则buffer.compact()方法清除缓存区
案例演示
/**
* 目标:对缓存区Buffer的常用API进行案例实现
*/
public class BufferTest {
	@Test
	public void test01(){
		//1.分配一个缓存区,容量设置为10
		ByteBuffer buffer = ByteBuffer.allocate(10);
		System.out.println(buffer.position());//0
		System.out.println(buffer.limit());//10
		System.out.println(buffer.capacity());//10
		System.out.println("-----------------------");
		//put 往缓存区中添加数据
		String name = "yuyang";
		buffer.put(name.getBytes());
		System.out.println(buffer.position());//6
		System.out.println(buffer.limit());//10
		System.out.println(buffer.capacity());//10
		System.out.println("-----------------------");
		//3.flip() 为 将缓存区的界限设置为当前位置,并将当前位置设置为 0 可读模式
		buffer.flip();
		System.out.println(buffer.position());//0
		System.out.println(buffer.limit());//6
		System.out.println(buffer.capacity());//10
		System.out.println("-----------------------");
		//4. get数据的读取
		char ch = (char) buffer.get();
		System.out.println(ch);//y
		System.out.println(buffer.position());//1
		System.out.println(buffer.limit());//6
		System.out.println(buffer.capacity());//10
	}
	@Test
	public void test02(){
		//1.分配一个缓存区,容量设置为10
		ByteBuffer buffer = ByteBuffer.allocate(10);
		System.out.println(buffer.position());//0
		System.out.println(buffer.limit());//10
		System.out.println(buffer.capacity());//10
		System.out.println("-----------------------");
		String name = "yuyang";
		buffer.put(name.getBytes());
		System.out.println(buffer.position());//6
		System.out.println(buffer.limit());//10
		System.out.println(buffer.capacity());//10
		System.out.println("-----------------------");
		//2.clear 清楚缓存区中的数据
		buffer.clear();
		System.out.println(buffer.position());//0
		System.out.println(buffer.limit());//10
		System.out.println(buffer.capacity());//10
		System.out.println((char)buffer.get());//y 表明数据并没有清除 只是恢复了position的位置
		System.out.println("-----------------------");
		//3.定义一个缓存区
		ByteBuffer buf = ByteBuffer.allocate(10);
		String n = "yuyang";
		buf.put(n.getBytes());
		buf.flip();
		//读取数据
		byte[] b = new byte[2];
		buf.get(b);
		String rs = new String(b);
		System.out.println(rs);//yu
		System.out.println(buf.position());//2
		System.out.println(buf.limit());//6
		System.out.println(buf.capacity());//10
		System.out.println("-----------------------");
		buf.mark();//标记此刻这个位置:2
		byte[] b2 = new byte[4];
		buf.get(b2);
		System.out.println(new String(b2));//yang
		System.out.println(buf.position());//6
		System.out.println(buf.limit());//6
		System.out.println(buf.capacity());//10
		System.out.println("-----------------------");
		buf.reset();//回到标记位置 2
		if(buf.hasRemaining()){
			System.out.println(buf.remaining());//4
		}
	}
}
直接与非直接缓存区
什么是直接内存与非直接内存
根据官方文档的描述:
byte buffer。可以是两种类型,一种是基于直接内存(也就是非堆内存);另一种是非直接内存(也就是堆内存)。对于直接内存来说,JVM将会在IO操作上具有更高的性能,因为它直接作用于本地系统的IO操作。而非直接 内存,也就是堆内存中的数据,如果要作IO操作,会先从本进程内存复制到直接内存,再利用本地IO处理。
从数据流的角度,非直接内存是下面这样的作用链:
本地IO—>直接内存—>非直接内存—>直接内存—>本地IO
而直接内存是:
本地IO—>直接内存—>本地IO
很明显,在做IO处理时,比如网络发送大量数据时,直接内存会具有更高的效率。直接内存使用allocateDirect创建,但是它比申请普通的堆内存需要耗费更高的性能。不过,这部分的数据是在JVM之外的,因此它不会占用应用 的内存。所以呢,当你有很大的数据要缓存,并且它的生命周期又很长,那么就比较适合使用直接内存。只是一般 来说,如果不是能带来很明显的性能提升,还是推荐直接使用堆内存。字节缓冲区是直接缓冲区还是非直接缓冲区 可通过调用其isDirect()方法来确定。
@Test
public void test03(){
	//创建一个非直接内存的缓存区(堆内存)
	ByteBuffer buffer = ByteBuffer.allocate(1024);
	//buffer.isDirect()用于判断是否为直接内存
	System.out.println(buffer.isDirect());
	System.out.println("----------------");
	//创建一个直接内存的缓存区(非堆内存)
	ByteBuffer buffer2 = ByteBuffer.allocateDirect(1024);
	System.out.println(buffer2.isDirect());
}

输出:
false
----------------
true
直接内存的使用场景
- 1 有很大的数据需要存储,他的生命周期又很长
- 2 适合频繁的IO操作,比如网络并发场景
4.5 BIO核心二:通道(Channel)
通道Channel概述
通道(Channel):由java.nio.channels包定义的。Channel表示IO源与目标打开的连接。Channel类似于传统的“流”。只不过Channel本身不能直接访问数据,Channel只能与Buffer进行交互。
1、NIO的通道类似于流,但有些区别如下
- 通道可以同时进行读写,而流只能读或者只能写
- 通道可以实现异步读写数据
- 通道可以从缓冲读数据,也可以写数据到缓冲
2、BlO中的stream是单向的,例如FilelnputStream对象只能进行读取数据的操作,而NIO中的通道(Channel)是双向的,可以读操作,也可以写操作。
3、Channel在NIO中是一个接口
public interface Channel extends Closeable()
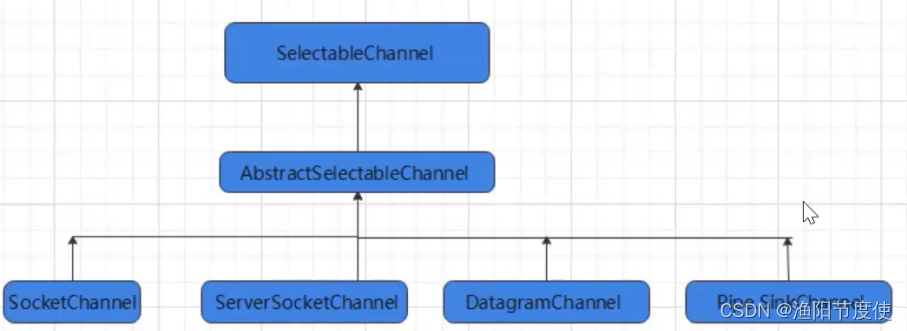
常用的Channel实现类
- FileChannel:用于读取、写入、映射和操作文件的通道
- DatagramChannel:通过UDP读写网络中的数据通道
- SocketChannel:通过TCP读写网络中额数据
- ServerSocketChannel:可以监听新进来的TCP连接,对每一个新进来的连接都会创建一个SocketChannel。【ServerSocketChannel类似ServerSocket,SocketChannel类似Socket】
FileChannel类
获取通道的一种方式是对支持通道的对象调用getChannel()方法。支持通道的类如下:
- FileInputStream
- FileOutputStream
- RandomAccessFile
- DatagramSocket
- Socket
- ServerSocket
获取通道的其他方式是使用Files类的静态方法newByteChannel()获取字节通道。或通过通道的静态方法open()打开并返回指定通道
FileChannel的常用方法
int read(ByteBuffer dst) 从Channel当中读取数据至ByteBuffer
long read(ByteBuffer[] dsts)将channel当中的数据“分散”至ByteBuffer[]
int write(Bytesuffer src)将ByteBuffer当中的数据写入到Channel
long write(ByteBuffer[] srcs)将Bytesuffer[]当中的数据“聚集”到Channel
long position()返回此通道的文件位置
FileChannel position(long p)设置此通道的文件位置
long size()返回此通道的文件的当前大小
FileChannel truncate(long s)将此通道的文件截取为给定大小
void force(boolean metaData)强制将所有对此通道的文件更新写入到存储设备中
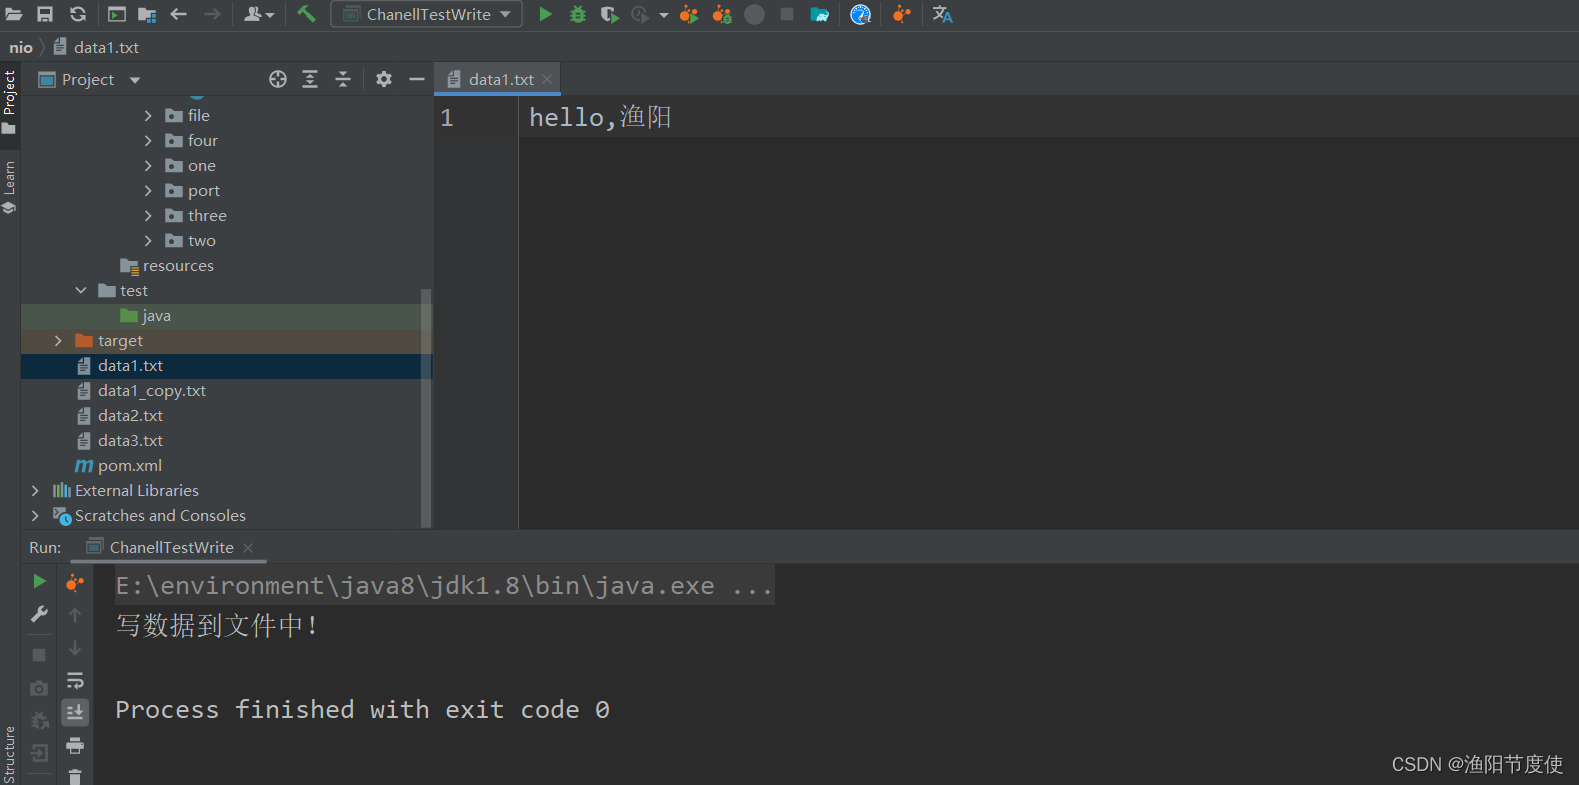
案例1-本地文件写数据
public class ChanellTestWrite {
    public static void main(String[] args) {
        try {
            //1.字节输出流通向目标文件
            FileOutputStream fileOutputStream = new FileOutputStream("data1.txt");
            //2.得到字节输出流对应的通道Channel
            FileChannel channel = fileOutputStream.getChannel();
            //3.分配缓存区
            ByteBuffer buffer = ByteBuffer.allocate(1024);
            buffer.put("hello,yuyang".getBytes(StandardCharsets.UTF_8));
            //4.把缓存区切换为写模式
            buffer.flip();
            channel.write(buffer);
            channel.close();
            System.out.println("写数据到文件中!");

        } catch (Exception e) {
            e.printStackTrace();
        }
    }
}
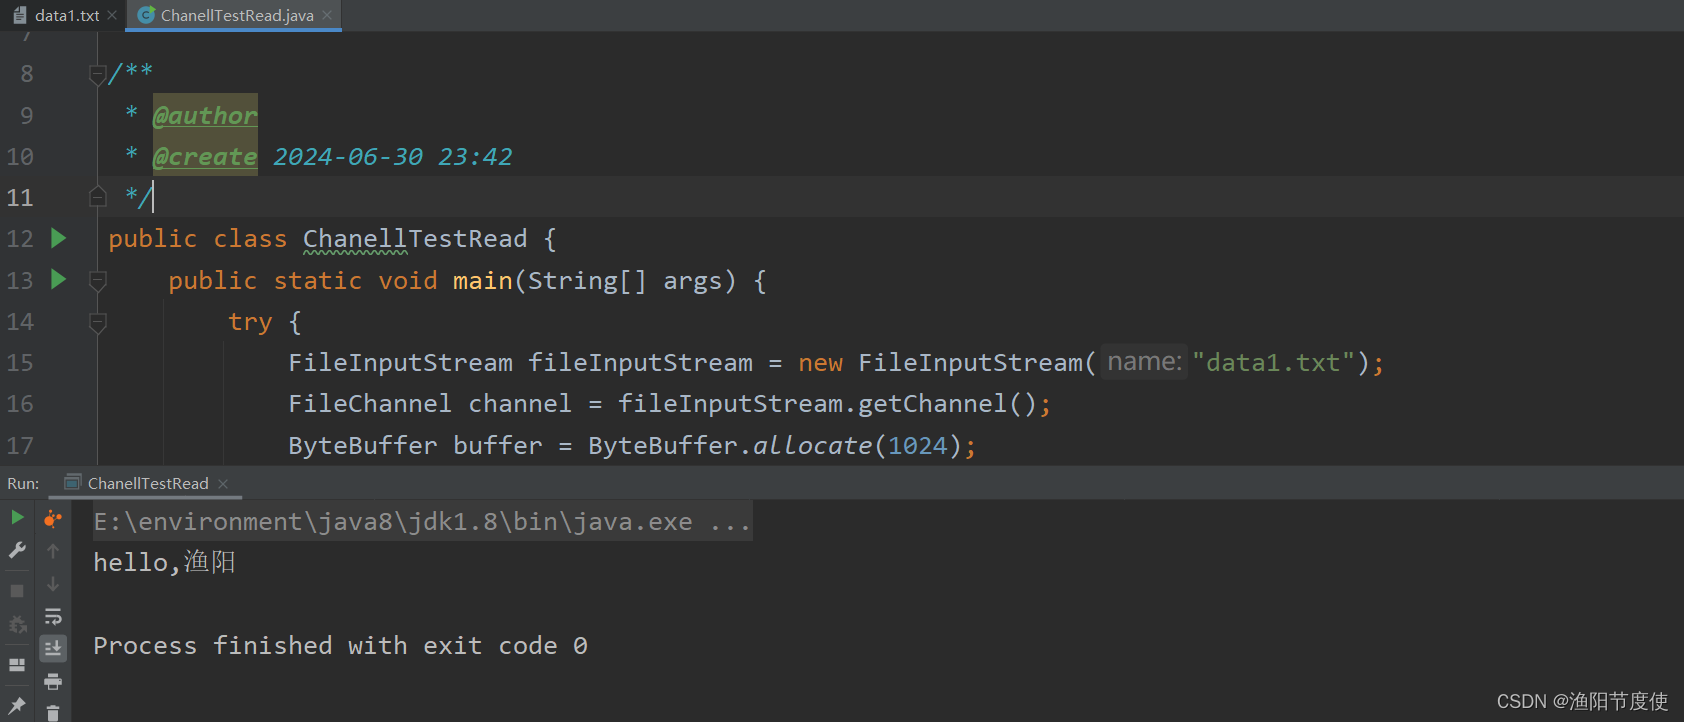
案例2-本地文件读数据
public class ChanellTestRead {
    public static void main(String[] args) {
        try {
            FileInputStream fileInputStream = new FileInputStream("data1.txt");
            FileChannel channel = fileInputStream.getChannel();
            ByteBuffer buffer = ByteBuffer.allocate(1024);
            channel.read(buffer);
            buffer.flip();
            String str = new String(buffer.array(), 0, buffer.remaining());
            System.out.println(str);
        } catch (Exception e) {
            e.printStackTrace();
        }
    }
}
输出:
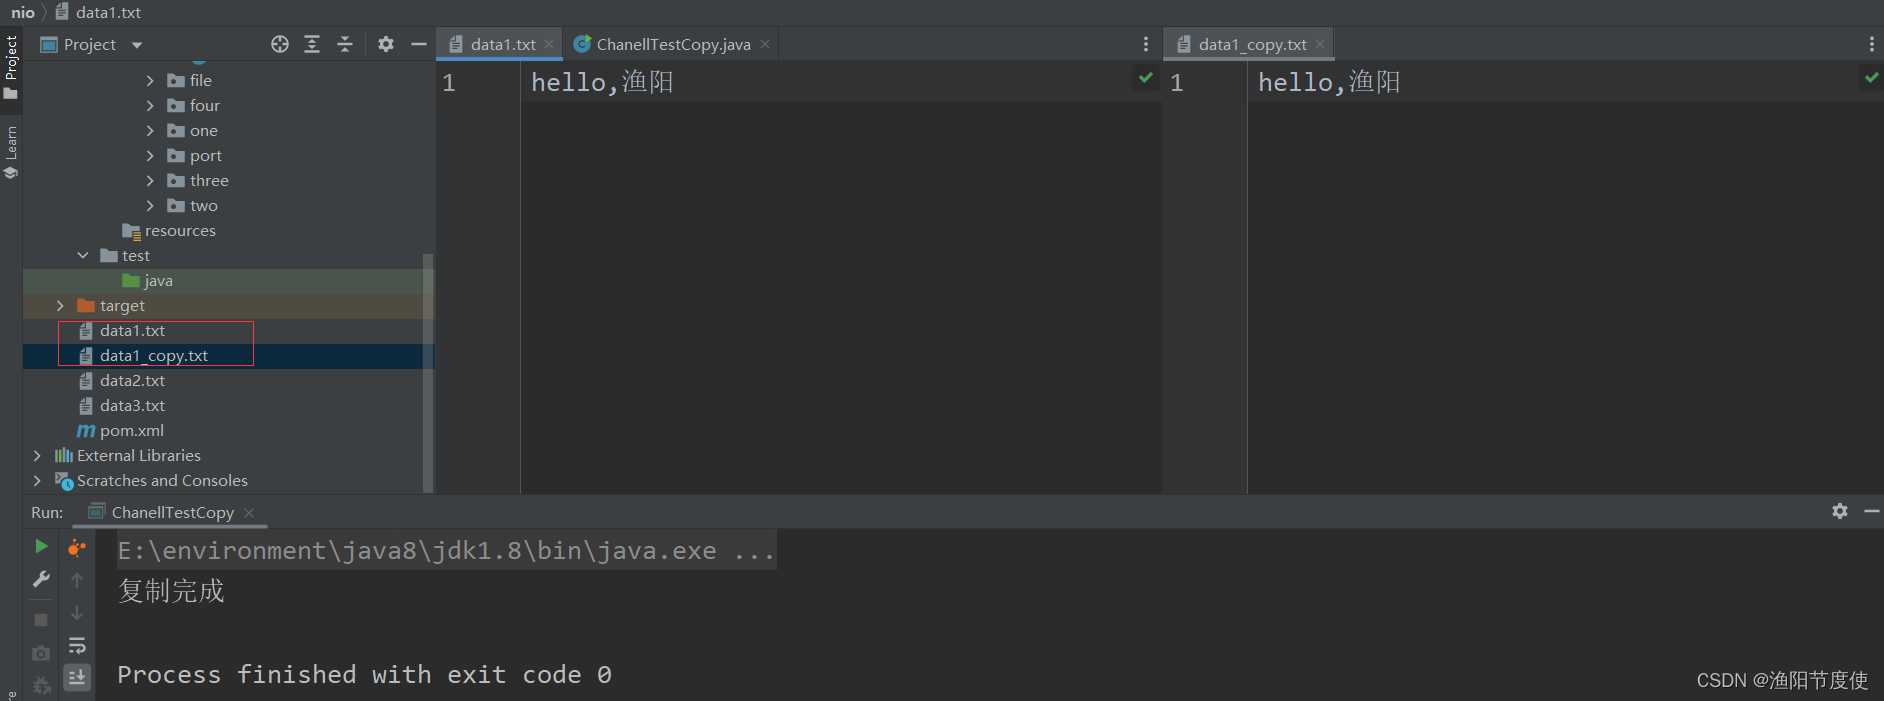
案例3-使用Buffer完成文件复制
public class ChanellTestCopy {
    public static void main(String[] args) {
        try {
            //源文件
            File srcFile = new File("data1.txt");
            File destFile = new File("data1_copy.txt");
            //得到一个字节输出流、字节输入流
            FileInputStream fis = new FileInputStream(srcFile);
            FileOutputStream fos = new FileOutputStream(destFile);
            //得到文件通道
            FileChannel fisChannel = fis.getChannel();
            FileChannel fosChannel = fos.getChannel();
            //分配缓存区
            ByteBuffer buffer = ByteBuffer.allocate(1024);
            while (true){
                //必须先清空缓存区然后再写入数据到缓存区
                buffer.clear();
                //开始读取一次数据
                int flag = fisChannel.read(buffer);
                if(flag == -1){
                    break;
                }
                //已经读取了数据,把缓存区的模式切换为可读模式
                buffer.flip();
                //把数据写出到
                fosChannel.write(buffer);
            }
            fisChannel.close();
            fosChannel.close();
            System.out.println("复制完成");
        } catch (Exception e) {
            e.printStackTrace();
        }
    }
}
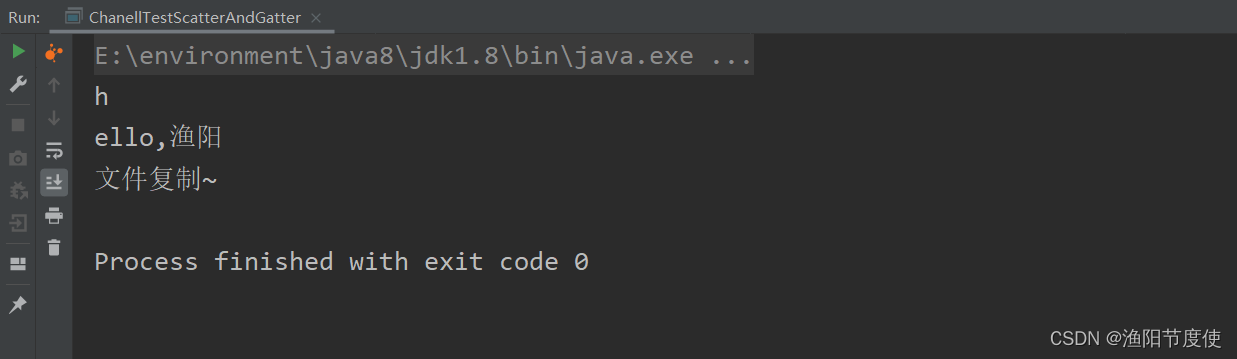
案例4-分散(Scatter)和聚集(Gatter)
分散读取(Scatter):是指把Channel通道的数据读取入到多个缓存区中去
聚集写入(Gathering):是指将多个Buffer中的数据聚集到Channel。
public class ChanellTestScatterAndGatter {
    public static void main(String[] args) {
        try {
            //1.字节输入管道
            FileInputStream is = new FileInputStream("data1.txt");
            FileChannel isChannel = is.getChannel();
            //2.字节输出管道
            FileOutputStream os = new FileOutputStream("data2.txt");
            FileChannel osChannel = os.getChannel();
            //3.定义多个缓存区做数据分散
            ByteBuffer buffer1 = ByteBuffer.allocate(1);
            ByteBuffer buffer2 = ByteBuffer.allocate(1024);
            ByteBuffer[] buffers = {buffer1,buffer2};
            //4.从通道中读取数据分散到各个缓存区
            isChannel.read(buffers);
            //5.从每个缓存区中查询是否有数据读取到了
            for(ByteBuffer buffer : buffers){
                buffer.flip();//切换到读数据模式
                System.out.println(new String(buffer.array(),0,buffer.remaining()));
            }
            //6.聚集写入到通道
            osChannel.write(buffers);
            isChannel.close();
            osChannel.close();
            System.out.println("文件复制~");
        } catch (Exception e) {
            e.printStackTrace();
        }
    }
}
输出:
案例5-transferForm()
从目标通道中去复制原通道数据
public class ChanellTestTransferForm {
    public static void main(String[] args) {
        try {
            //1.字节输入管道
            FileInputStream is = new FileInputStream("data1.txt");
            FileChannel isChannel = is.getChannel();//原通道
            //2.字节输出管道
            FileOutputStream os = new FileOutputStream("data2.txt");
            FileChannel osChannel = os.getChannel();//目标通道
            //3.复制数据
            osChannel.transferFrom(isChannel,isChannel.position(),isChannel.size());

            isChannel.close();
            osChannel.close();
            System.out.println("复制完成!");
        } catch (Exception e) {
            e.printStackTrace();
        }
    }
}
案例6-transferTo()
把原通道数据复制到目标通道
public class ChanellTestTransferForm {
    public static void main(String[] args) {
        try {
            //1.字节输入管道
            FileInputStream is = new FileInputStream("data1.txt");
            FileChannel isChannel = is.getChannel();//原通道
            //2.字节输出管道
            FileOutputStream os = new FileOutputStream("data2.txt");
            FileChannel osChannel = os.getChannel();//目标通道
            //3.复制数据
            //osChannel.transferFrom(isChannel,isChannel.position(),isChannel.size());
            isChannel.transferTo(isChannel.position(),isChannel.size(),osChannel);

            isChannel.close();
            osChannel.close();
            System.out.println("复制完成!");
        } catch (Exception e) {
            e.printStackTrace();
        }
    }
}
4.6 NIO核心三:选择器(Selector)
选择器(Selector)概述
选择器(Selector)是SeIectabIeC hannIe对象的多路复用器,Selector可以同时监控多个SelectableChannel 的IO状况,也就是说,利用Selector可使一个单独的线程管理多个Channel。
Selector是非阻塞IO的核心
- java的NIO,用非阻塞的IO方式。可以用一个线程,处理多个的客户端连接,就会使用到Selector(选择器)
- Selector能够检测多个注册的通道上篡若有事件发生(注意:多个Channel以事件的方式可以注册到同一个 Selector),如果有事件发生,便获取事件然后针对每个事件进行相应的处理。这样就可以只用一个单线程去管 理多个通道,也就是管理多个连接和请求。
- 只有在连接/通道真正有读写事件发生时,才会进行读写,就大大地减少了系统开销,并且不必为每个连接都 创建一个线程,不用去维护多个线程 避免了多线程之间的上下文切换导致的开销
选择器(Selector)的应用
创建Selector:通过Selector.open()方法创建一个Selector。
Selector selector = Selector.open();
向选择器注册通道:SelectableChannel.register(Selector sel,int ops);
//1.获取通道
ServerSocketChannel ssChannel = ServerSocketChannel.open();
//2.切换非阻塞模式
ssChannel.configureBlocking(false);
//3.绑定连接
ssChannel.bind(new InetSocketAddress(9898));
//4.获取选择器
Selector selector = Selector.open();
//5.将通道注册到选择器上,并且指定“监听接收事件”
ssChannel.register(select,SelectionKey.OP_ACCEPT);
当调用register(Selector sel, mt ops)将通道注册选择器时,选择器对通道的监听事件,需要通过第二个参数。ops指定。可以监听的事件类型(用可使用Selection Key的四个常量表示):
- 读:SelectionKey.OP_READ (1)
- 写:SelectionKey.OP_WRITE (4)
- 连接:SelectionKey.OP_CONNECT (8)
- 接收:SelectionKey.OP_ACCEPT (16)
- 若注册时不止监听一个事件,则可以使用‘位或”操作符连接。
int interestSet = selectionKey.OP_READ | SelectionKey.OP_WERITE
4.7 NIO非阻塞式网络通信原理分析
Selector示意图和特点说明
Selector可以实现:一个I/O线程可以并发处理N个客户端连接和读写操作,这从根本上解决了传统同步阻塞I/O一连接一线程模型,架构的性能、弹性伸缩能力和可靠性都得到了极大的提升。
服务端流程
- 1、当客户端连接服务端时,服务端会通过ServerSocketChannel得到SocketChannel:获取通道
ServerSocketChannel ssChannel = ServerSocketChannel.open();
- 2、切换非阻塞模式
ssChannel.configureBlocking(false);
- 3、绑定连接
ssChannle.bind(new InetSocketAddress(9999))
- 4、获取选择器
Selector selector = Selector.open()
- 5、将通道注册到选择器上,并且指定“监听接收事件”
ssChannel.register(selector,SelectionKey.OP_ACCEPT);
- 6、轮询式的获取选择器上已经“准备就绪”的事件
//轮询式的获取选择器上已经“准备就绪”的事件
while(selector.select() > 0){
	System.out.println("轮一轮");
	//7. 获取当前选择器中所有注册的“选择键(已就绪的监听事件)“
	Iterator<SelectionKey> it = selector.selector.selectedKeys().iterator();
	while(it.hasNext()){
		//8.获取准备”就绪“的事件
		SelectionKey sk = it.next();
		//9.判断具体是什么事件准备就绪
		if(sk.isAcceptable()){
			//10.若”接收就绪“,获取客户端连接
			SocletChannel sChannel = ssChannel.accept();
			//11.切换非阻塞模式
			sChannel。configure Blocking(fales);
			//12.将该通道注册到选择器上
			sChannel.register(selector,SelectionKey.OP_READ);
		}else if(sk.isReadable()){
			//13.获取当前选择器上”读就绪“状态的通道
			SocketChannle sChannel = (SocketChannel)sk.channel();
			//14.读取数据
			ByteBuffer buf = ByteBuffer.allocate(1024);
			int len = 0;
			while((len = sChannel.read(buf)) > 0){
				buf.flip();
				System.out.println()new String(buf.array(),0,len);
				buf.clear();
			}
		}
	//15.取消选择键SelectionKey
	it.remove();
	}
}
4.8 NIO非阻塞式网络通信入门案例
需求:服务端接收客户端的连接请求,并接收多个客户端发送过来的事件
代码案例
/**
* 目标:NIO非阻塞通信下的入门案例:服务端开发
*/
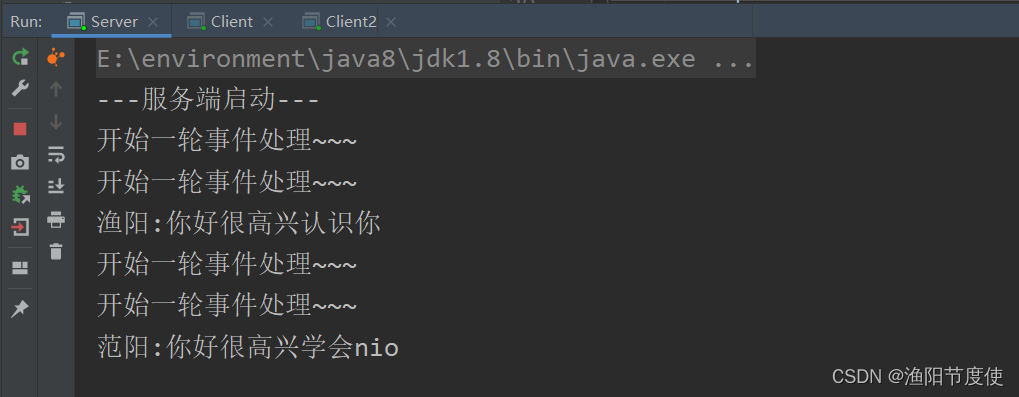
public class Server {
public static void main(String[] args) throws Exception {
//1.获取通道
ServerSocketChannel socketChannel = ServerSocketChannel.open();
//2.切换为非阻塞模式
socketChannel.configureBlocking(false);
//3.绑定连接的端口
socketChannel.bind(new InetSocketAddress(9999));
//4.获取选择器
Selector selector = Selector.open();
//5.将通道都注册到选择器上去,并且开始指定监听接收事件
socketChannel.register(selector,SelectionKey.OP_ACCEPT);
//6.使用Selector选择器轮询已经就绪好的事件
while (selector.select()>0){
System.out.println("开始一轮事件处理~~~");
//7.获取选择器中的所有注册的通道中已经就序好的事件
Iterator<SelectionKey> iterator = selector.selectedKeys().iterator();
//8.开始遍历这些准备好的事件
while (iterator.hasNext()) {
//提取当前这个事件
SelectionKey selectionKey = iterator.next();
//9.判断这个事件具体是什么事件
if (selectionKey.isAcceptable()) {
//10.直接获取当前接入的客户端通道
SocketChannel channel = socketChannel.accept();
//11.将客户端通道也设置为非阻塞式的
channel.configureBlocking(false);
//12.将客户端通道也注册到选择器Selector上
channel.register(selector,SelectionKey.OP_READ);
}else if(selectionKey.isReadable()){
//13.获取当前选择器上的“读就绪事件”
SocketChannel channel = (SocketChannel) selectionKey.channel();
//14.开始读取数据
ByteBuffer buffer = ByteBuffer.allocate(1024);
int len = 0;
if ((len=channel.read(buffer))>0) {
buffer.flip();
System.out.println(new String(buffer.array(), 0, buffer.remaining()));
buffer.clear();
}
}
//处理完毕当前事件后,需要移除掉当前事件.否则会重复处理
iterator.remove();
}
}
}
}
/**
* 目标:客户端案例实现-基于NIO非阻塞通信
*/
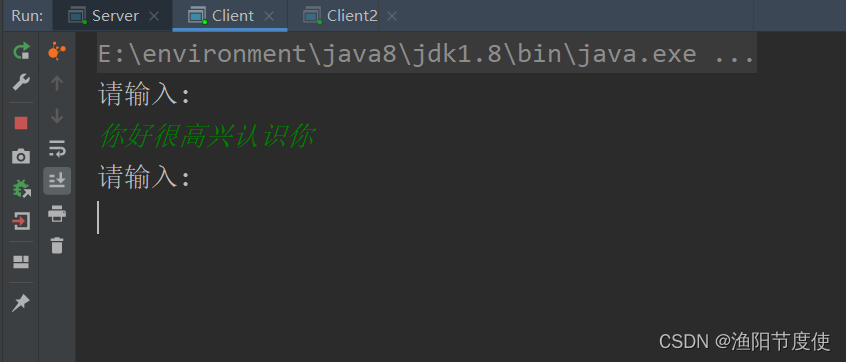
public class Client {
public static void main(String[] args) throws Exception {
//1.获取通道
SocketChannel socketChannel = SocketChannel.open(new InetSocketAddress("127.0.0.1",9999));
//2.切换为非阻塞模式
socketChannel.configureBlocking(false);
//3.分配指定缓存区大小
ByteBuffer byteBuffer = ByteBuffer.allocate(1024);
//4.发送数据给服务端
Scanner scanner = new Scanner(System.in);
while (true) {
System.out.println("请输入:");
String msg = scanner.nextLine();
byteBuffer.put(("渔阳:"+msg).getBytes(StandardCharsets.UTF_8));
byteBuffer.flip();
socketChannel.write(byteBuffer);
byteBuffer.clear();
}
}
}
输出:

4.9 NIO网络编程应用实例-群聊系统
目标
需求:进一步理解NIO非阻塞网络编程机制,实现多人群聊
- 编写一个NIO群聊系统,实现客户端与客户端的通信需求(非阻塞)
- 服务器端:可以监测用户上线,离线,并实现消息转发功能
- 客户端:通过channel可以无阻塞发送消息给其他所有客户端用户,同时可以接受其它客户端用户通过服务端转发来的消息
服务端代码实现
/**
* 目标:服务端群聊系统实现
*/
public class Server {
private Selector selector;
private ServerSocketChannel serverSocketChannel;
public static final int PORT = 9999;
public Server() {
try {
//1.创建选择器
selector = Selector.open();
//2.获取通道
serverSocketChannel = ServerSocketChannel.open();
//3.切换为非阻塞模式
serverSocketChannel.configureBlocking(false);
//4.绑定连接的端口
serverSocketChannel.bind(new InetSocketAddress(PORT));
//5.将通道都注册到选择器上去,并且开始指定监听接收事件
serverSocketChannel.register(selector,SelectionKey.OP_ACCEPT);
} catch (IOException e) {
e.printStackTrace();
}
}
//接收当前客户端的信息,转发给其他全部客户端通道
private void readClientData(SelectionKey selectionKey){
SocketChannel channel = null;
try {
//直接得到当前客户端通道
channel = (SocketChannel) selectionKey.channel();
//创建缓存区对象,开始接收客户端通道的数据
ByteBuffer byteBuffer = ByteBuffer.allocate(1024);
int count = channel.read(byteBuffer);
if (count>0) {
byteBuffer.flip();
//提取读取到的信息
String msg = new String(byteBuffer.array(), 0, byteBuffer.remaining());
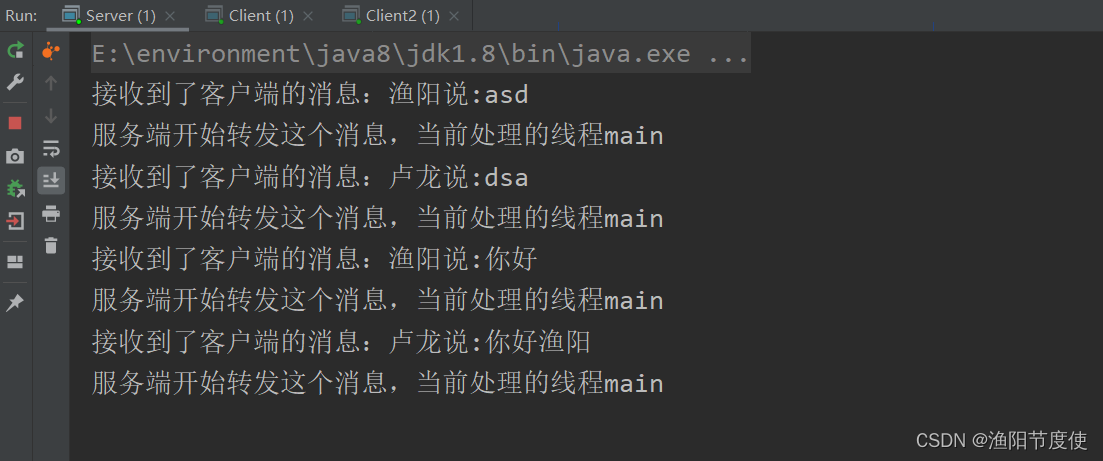
System.out.println("接收到了客户端的消息:" + msg);
//把这个消息推送给全部客户端接收
sendMsgToAllClient(msg,channel);
}
} catch (Exception e) {
try {
System.out.println("有人离线了:" + channel.getRemoteAddress());
//当前客户端离线
selectionKey.cancel();
//取消注册
serverSocketChannel.close();
} catch (IOException ex) {
ex.printStackTrace();
}
}
}
//把当前客户端的消息推送给当前全部在线注册的channel
private void sendMsgToAllClient(String msg, SocketChannel socketChannel) throws IOException {
System.out.println("服务端开始转发这个消息,当前处理的线程" +
Thread.currentThread().getName());
for (SelectionKey selectedKey : selector.keys()) {
Channel channel = selectedKey.channel();
//不要把消息发给自己
if (channel instanceof SocketChannel &&channel!=socketChannel) {
ByteBuffer byteBuffer = ByteBuffer.wrap(msg.getBytes(StandardCharsets.UTF_8));
((SocketChannel) channel).write(byteBuffer);
}
}
}
public static void main(String[] args) {
Server server = new Server();
server.listen();
}
//监听
public void listen(){
//System.out.println("监听线程:" + Thread.currentThread().getName());
try {
while (selector.select() > 0) {
//a.获取选择器中所有注册通道的就绪事件
Iterator<SelectionKey> iterator = selector.selectedKeys().iterator();
//b.开始遍历这个事件
while (iterator.hasNext()) {
//提取这个事件
SelectionKey selectionKey = iterator.next();
//c.判断这个事件
if (selectionKey.isAcceptable()) {
//客户端接入请求
//获取当前客户端通道
SocketChannel socketChannel = serverSocketChannel.accept();
//注册成非阻塞模式
socketChannel.configureBlocking(false);
//注册给选择器,监听读数据的事件
socketChannel.register(selector,SelectionKey.OP_READ);
}else if (selectionKey.isReadable()){
//处理这个客户端的消息,接收它,然后实现转发逻辑
readClientData(selectionKey);
}
//处理完毕之后,需要移除当前事件
iterator.remove();
}
}
} catch (IOException e) {
e.printStackTrace();
}
}
}
客户端代码实现
/**
* 目标:客户端代码逻辑的实现
*/
public class Client {
//1.定义客户端相关属性
private Selector selector;
public static final int PORT = 9999;
private SocketChannel socketChannel;
//2.初始化客户端信息
public Client() {
try {
//a.创建选择器
selector = Selector.open();
//b.连接服务器
socketChannel = SocketChannel.open(new InetSocketAddress("127.0.0.1",PORT));
//c.设置非阻塞模式
socketChannel.configureBlocking(false);
socketChannel.register(selector,SelectionKey.OP_READ);
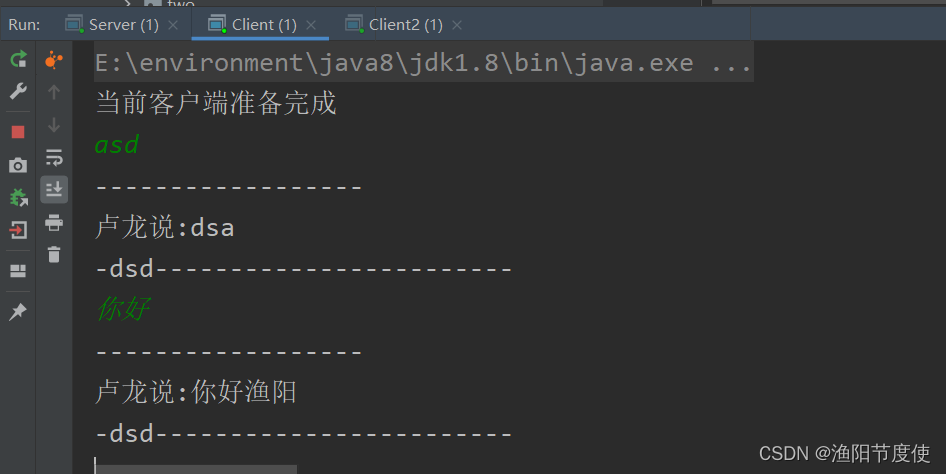
System.out.println("当前客户端准备完成");
} catch (IOException e) {
e.printStackTrace();
}
}
public static void main(String[] args) {
Client client = new Client();
//定义一个线程,专门负责监听服务端发送过来的读消息事件
new Thread(()->{
client.readInfo();
}).start();
//发消息
Scanner scanner = new Scanner(System.in);
while (scanner.hasNextLine()) {
System.out.println("------------------");
String nextLine = scanner.nextLine();
client.sendToServer(nextLine);
}
}
private void sendToServer(String msg){
try {
socketChannel.write(ByteBuffer.wrap(("渔阳说:"+msg).getBytes(StandardCharsets.UTF_8)));
} catch (IOException e) {
e.printStackTrace();
}
}
private void readInfo(){
try {
//if(selector.select() > 0){
while (selector.select() > 0) {
Iterator<SelectionKey> iterator = selector.selectedKeys().iterator();
while (iterator.hasNext()) {
SelectionKey selectionKey = iterator.next();
if (selectionKey.isReadable()) {
SocketChannel channel = (SocketChannel) selectionKey.channel();
ByteBuffer byteBuffer = ByteBuffer.allocate(1024);
channel.read(byteBuffer);
System.out.println(new String(byteBuffer.array(), 0, byteBuffer.remaining()));
System.out.println("-dsd------------------------");
}
iterator.remove();
}
}
} catch (IOException e) {
e.printStackTrace();
}
}
}

BIO、NIO、AIO课程总结
BIO、NIO、AIO:
- Java BlO:同步并阻塞,服务器实现模式为一个连接一个线程,即客户端有连接请求时服务器端就需要启动 一个线程进行处理,如果这个连接不做任何事情会造成不必要的线程开销,当然可以通过线程池机制改善。
- Java NIO:同步非阻塞,服务器实现模式为一个请求一个线程,即客户端发送的连接请求都会注册到多路复用器上,多路复用器轮询到连接有I/O请求时才启动一个线程进行处理。
- Java AIO(N 10.2):异步非阻塞,服务器实现模式为一个有效请求一个线程,客户端的I/O请求都是由OS先完成了再通知服务器应用去启动线程进行处理。
BIO、NIO、AIO适用场景分析:
-
BlO方式适用于连接数目比较小且固定的架构,这种方式对服务器资源要求比较高,并发局限于应用中, JDK1.4以前的唯一选择,但程序直观简单易理解。
-
NIO方式适用于连接数目多且连接比较短(轻操作)的架构,比如聊天服务器,并发局限于应用中,编程比较 复杂,JDK1 .4开始支持。
-
AlO方式使用于连接数目多且连接比较长(重操作)的架构,比如相册服务器,充分调用OS参与并发操作,编 程比较复杂,JDK7开始支持。


 757
757


 被折叠的 条评论
为什么被折叠?
被折叠的 条评论
为什么被折叠?
 到【灌水乐园】发言


