


Install sharelatex on virtual machine
标签(空格分隔): Project
Install OS and bulid the user
After build CentOS-6.5(x64) on the virtual machine, I add a user by input
$ useradd
And then change its password by input
$ passwd <username>
You can use very simple password by
# sudo passwd myusername
Changing password for user myusername.
New password:
Retype new password:
passwd: all authentication tokens updated successfully.
Set user to get the root authority
There are many kinds of way to do it, here we choose one. Edit the /etc/sudoers, find the sentence of root and add a line blow:
## Allow root to run any commands anywhere
root ALL=(ALL) ALL
<username> ALL=(ALL) ALL
Then it will get the root authority. Other ways see here.
Switch user
How about using the su command?
$ whoami
user1
su−user2Password:
whoami
user2
$ exit
logout
If you want to log in as root, there’s no need to specify username:
$ whoami
user1
su−Password:
whoami
root
$ exit
logout
Generally, you can use sudo to launch a new shell as the user you want; the -u flag lets you specify the username you want:
$ whoami
user1
sudo−uuser2zsh
whoami
user2
Begin to build the environment
Operating the system by XShell
Check the IP address of the virtual machine by
# ip addr show
And then I connect the virtual machine via XShell by the IP address.
Install the EPEl Libray
Follow the process docs online first, I should install Docker on the computer, because I’m not the root user now, input
$ su -
To get the access, and then
$ sudo yum install docker-io
Here we need network access.
However here we need EPEL(Extra Packages for Enterprise Linux) software library on the computer, so I search the Internet, first I need use wget to download the files and use RPM to install the EPEl Libray(root user needed).
$ wget http://download.fedoraproject.org/pub/epel/6/x86_64/epel-release-6-8.noarch.rpm

$ rpm -ivh epel-release-6-8.noarch.rpm
To test the EPEl Libray, input
$ yum repolist
Install Docker
Following the above, install the docker-io kits by
$ sudo yum install docker-io
After install the Docker, we must start the service to use it by
$ sudo service docker start
You can stop|start|restart docker using the init script.
$ sudo /etc/init.d/docker restart
If we want Docker to start when you start the boot, use
$ sudo chkconfig docker on
Add group to docker
To create the docker group and add your user:
Log into Centos as a user with sudo privileges.
Create the docker group and add your user.
sudo usermod -aG docker your_username
Log out and log back in.
This ensures your user is running with the correct permissions.
Verify your work by running docker without sudo.
$ docker run hello-world
Use Docker
(To be reconfirmated)To get the latest stable CentOS official image edition from Docker Hub, use $ sudo docker pull centos, Because I’m using CentOS 6.5, so I shall use
$ sudo docker pull centos:centos6
Install and run ShareLaTeX Community Edition by Docker
I have prepared the Docker above, here we begin to install ShareLaTex. The recommended way to install and run ShareLaTeX Community Edition is via Docker:
$ docker run -d \
-v ~/sharelatex_data:/var/lib/sharelatex \
-p 5000:80 \
--name=sharelatex \
sharelatex/sharelatex
Here I get the output:
cannot connect to the docker daemon, is docker-d running on this host?
So I try to restart the system, but it doesn’t work, so I search the stackoverflow, a guy said:
I ran into this at work this week (also on RHEL6.5). I believe the lib-device-mapper that you have isn’t exporting a symbol (“Base”) that Docker needs. I solved this by upgrading lib-device-mapper to version 1.02.90.
You may have to enable the public_ol6_latest repo in order to get this package.
sudo yum-config-manager --enable public_ol6_latest
And then install the package:
sudo yum install device-mapper-event-libs
However, it doesn’t work, after some time I realize that here I need reboot the system.
Then I try again, but this time I make the command shorter by remove the “\” and begin with the “sudo” command:
$ sudo docker run -d -v ~/sharelatex_data:/var/lib/sharelatex -p 5000:80 --name=sharelatex sharelatex/sharelatex
It tooks a lot of time for downloading.
Here I got error each time I tried, so I tried another way.
Restart the project
After a lot of failures, I read the official teaching doc again, now I decide to bulid the Dependencies I need first.
- Node.js 0.10.x. We recommend that you use nvm to install it.
- The grunt command line tools (Run npm install -g grunt-cli to install them)
- A local instance of Redis (version 2.6.12 or later) and MongoDB running on their standard ports.
- TeXLive 2013 or later with the latexmk program installed.
Install Node.js
Fristly, I tried to install Node.js.Installing Node.js via package manager
$ curl https://raw.githubusercontent.com/creationix/nvm/v0.30.2/install.sh | bash
Then edit ~/.bash_profile file as follows:
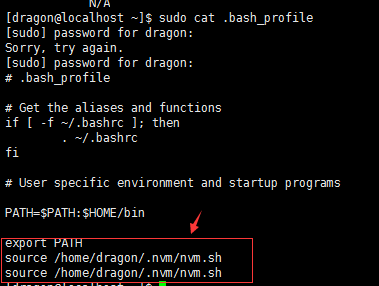
Then
source ~/.bash_profile
After that install the grunt command line tools. Before this I need install NPM by
curl http://npmjs.org/install.sh | sh
(For more details click here: NVM)
But it doesn’t work, so try
$ curl -O -L https://npmjs.org/install.sh
It also causes error, then I try
$ sudo yum install npm
It works! Then I install the grunt.
npm install -g grunt-cli
Basic build system
Make sure that you’ve got the basic development tools installed like git and make:
$ sudo yum update
$ sudo yum install git build-essential curl python-software-properties zlib1g-dev zip unzip
Install Redis
Download, extract and compile Redis with:
$ wget http://download.redis.io/releases/redis-3.0.7.tar.gz
tarxzfredis−3.0.7.tar.gz
cd redis-3.0.7
$ make
The binaries that are now compiled are available in the src directory. Run Redis with:
$ src/redis-server
Install Aspell
Aspell is a nice stable bit of software so can be got directly from CentOS’s repositories:
$ sudo yum install aspell
There are lots of additional dictionaries available, which can be listed with:
$ yum search aspell | grep aspell
Until here, we’ve got all the dependencies installed, we will have look at:
Production Installation Instructions
Restart the project again
Today I decide to check the details of the project, and review the process I build the system. Here I read a web page about Install sharelatex on CentOS. He said “The best way to install ShareLaTex on any platform is to use their Docker image” via
docker run -d \
-v ~/sharelatex_data:/var/lib/sharelatex \
--name=sharelatex \
-p 3000:80 \
sharelatex/sharelatex
But each time I tried it, some error occurs which leaded to installation failure. So I read the page dependencies, here I notice that I need to install a lot of package first, here I update the system
$ sudo yum update
It takes me about a hour to complete all the more than 500 files to download and install.
Then use this to install some softwares needed.
$ sudo yum install git build-essential curl python-software-properties zlib1g-dev zip unzip
Then I try to install sharelatex via docker again by(Following the steps written in Install sharelatex using docker)
$ git clone https://github.com/sharelatex/sharelatex-docker-image.git
cdsharelatex−docker−image
sudo docker build -t sharelatex/sharelatex .
$ vi /etc/yum.repos.d/mongodb-enterprise.repo
Add this to the head of the file
[mongodb-enterprise]
name=MongoDB Enterprise Repository
baseurl=https://repo.mongodb.com/yum/redhat/$releasever/mongodb-enterprise/stable/$basearch/
gpgcheck=0
enabled=1
Then
$ sudo yum install -y mongodb-enterprise
Here I get error

Install redis
wget http://download.redis.io/releases/redis-3.0.1.tar.gz
tar xzf redis-3.0.1.tar.gz
cd redis-3.0.1
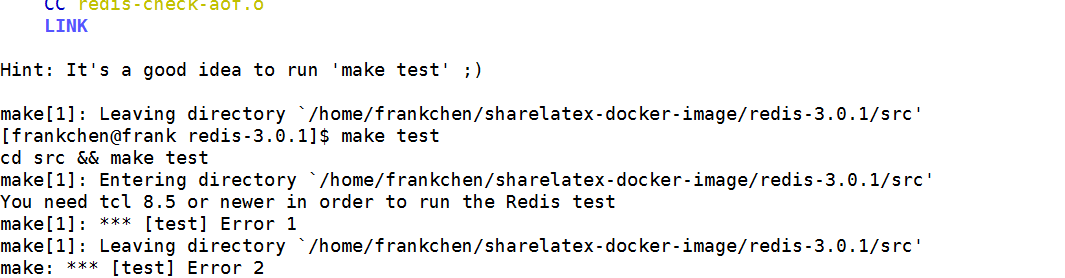
make
make test
Here I get another error
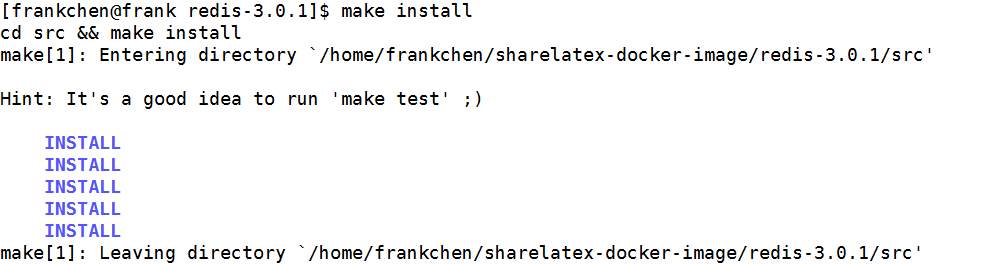
make install
Then
docker run -d \
  -v ~/sharelatex_data:/var/lib/sharelatex \
  -p 8080:80 \
  --name=sharelatex \
  sharelatex/sharelatex
Here I get

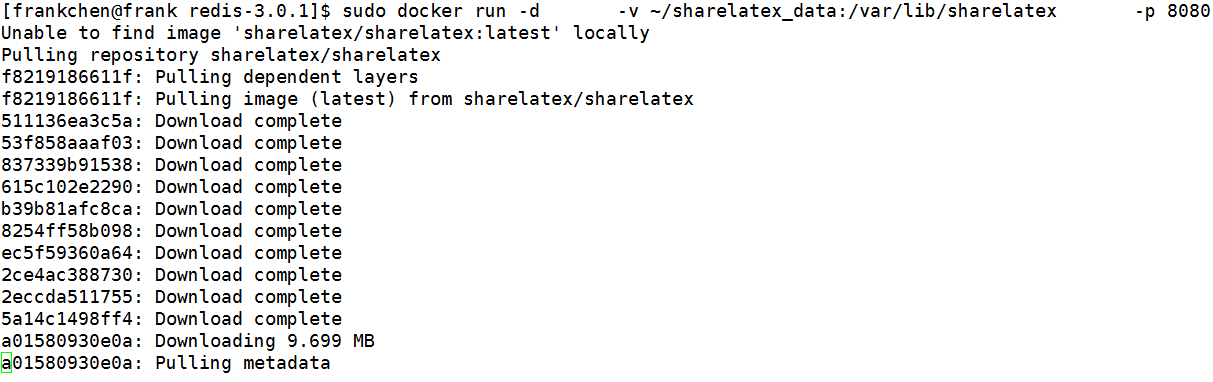
I try
sudo docker run -d \
  -v ~/sharelatex_data:/var/lib/sharelatex \
  -p 8080:80 \
  --name=sharelatex \
  sharelatex/sharelatex
Here I get
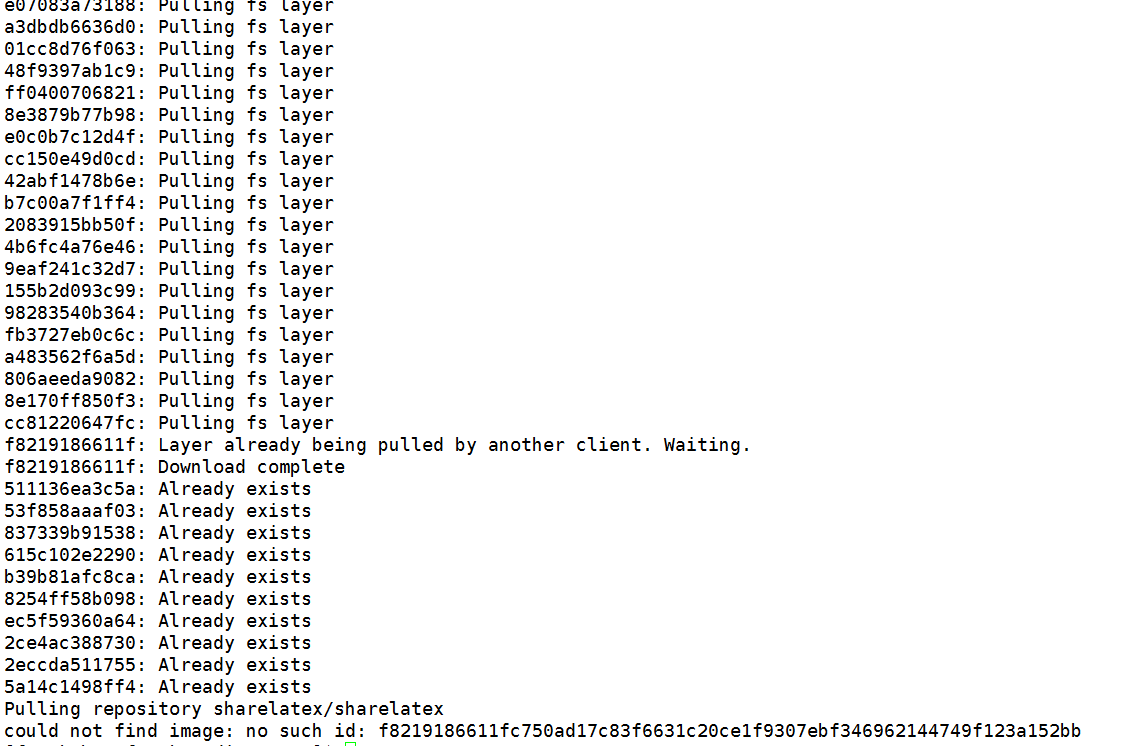
I try the command again, and get
Until now I have no new idea for the project.
Install the Texlive
After check some dependences needed for the project, I realize that I haven’t installed the Texlive. From here we can get details for the installation and configuration Linux下安装TeXLive 2015.
Important steps are as follows:
1.Mount the ISO image(changing the working directory to the place where the ISO image located needed)
$ su
# mount -o loop texlive2015.iso  /mnt/
# cd /mnt
# ./install-tl
Here we input I to install it directly.
2.Changing the PATH
Add this to the current user’s ~/.bashrc
# TeX Live 2015
export MANPATH=${MANPATH}:/usr/local/texlive/2015/texmf-dist/doc/man
export INFOPATH= INFOPATH:/usr/local/texlive/2015/texmf−dist/doc/infoexportPATH= {PATH}:/usr/local/texlive/2015/bin/x86_64-linux
3.Unmont the ISO image
$ cd
$ sudo umount /mnt/
[15net/20160228213430375


 1311
1311


 被折叠的 条评论
为什么被折叠?
被折叠的 条评论
为什么被折叠?
 到【灌水乐园】发言


