


实验环境
某公司在深圳、北京两地各放置了---台网站服务器,分别应对南北大区内不断增长的客户访问需求.两台服务器的网站文档必须保持--致,如图12.3所示,同步链路已通过VPN专用线路实现。

需求描述
1,服务器A(北京〉作为rsync发起端,目录/var /www / html作为原始位置。
2,服务器B(深圳)作为远程rsync服务器,目录/var /www/html 作为目标位置。
3,结合inotify机制实现触发式的上行同步,保持两个站点的网页文档一致。
推荐步骤
1,配置rsync服务器〈深圳.服务器B)。
2,通过inotify机制实现实时同步(北京,服务器A)。
[root@Linux01 ~]# vim /etc/rsyncd.conf


uid = nobody
gid = nobody
use chroot = yes         //紧固在源目录
address = 192.168.9.30     //监听地址  (本机地址)
port 873              //监听端口
log file = /var/log/rsyncd.log    //日记文件位置
pid file = /var/run/rsyncd.pid  //存放进程ID 的文件位置
hosts allow = 192.168.9.0/24       //允许访问的客户机地址
[wwwroot]     //共享模块名称
        path = /var/www/html     //源目录的实际路径
        comment = http Doc     //描述信息
        read only = yes    //是否为只读
        dont compress = *.gz *.bz2 *.zip *.rar    //同步时不在压缩的文件类型
        auth users = backuper     //授权账户
        secrets file = /etc/rsyncd_users.db   //存放账户信息的数据文件
为备份账户创建数据文件。
根据上--步的设置,创建账号数据文件,添加一行用户记录,以冒号分隔,用户名称为“backuper" .,密码为“qwe123”。由于账号信息采用明文存放,因此应调整文件权限,避免账号信息泄露。
[root@Linux01 ~]# vim /etc/rsyncd_users.db


backuper:qwe@123


[root@Linux01 ~]# chmod 600 /etc/rsyncd_users.db
查询权限

启动 rsync 服务

[root@Linux01 ~]# rsync --daemon
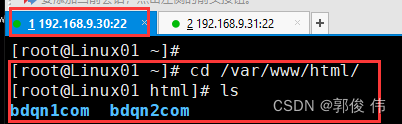
在服务器 (同步源 192.168.9.30)查看里面有什么文件
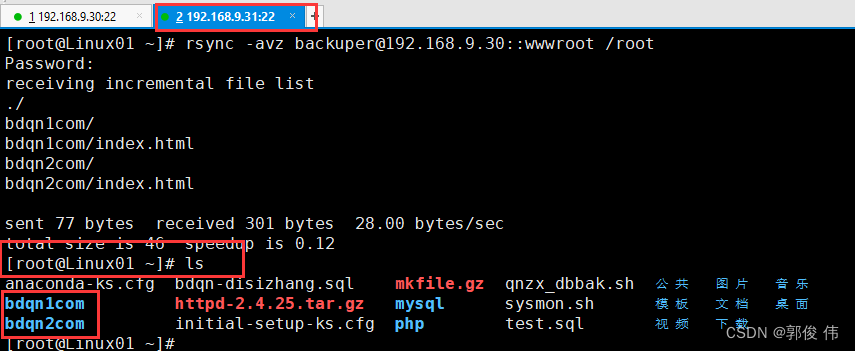
在发起端(192,。168.9.31)将指定的资源下载到本地 、root 目录下进行备份
[root@Linux01 ~]# rsync -avz backuper@192.168.9.30::wwwroot /root
备份结果
调整inotify 内核参数
在Lirux内核中.默认的inotify机制提供了三个调控参数:max_queue_events , max_user_instances,max_user_watches,分别表示监控事件队列(16 384)、最多监控实例数(128)、每个实例最多监控文件数〈8192)。
查看监控的参数

[root@Linux01 ~]# cat /proc/sys/fs/inotify/max_queued_events
16384
[root@Linux01 ~]# cat /proc/sys/fs/inotify/max_user_instances
128
[root@Linux01 ~]# cat /proc/sys/fs/inotify/max_user_watches
8192
当要监控的目录.文件数量较多或者变化较频繁时,建议加大这三个参数的值。例如,可直接修改/etc/sysctl , conf配置文件.将管理队列设为32768,实例数设为1024.监控数设为1048576,通常情况下,监控数所设的值建议大于监控目标的总文件数。
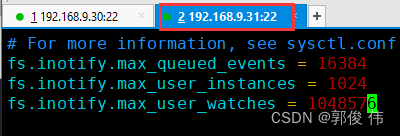
[root@Linux01 ~]# vim /etc/sysctl.conf


fs.inotify.max_queued_events = 16384
fs.inotify.max_user_instances = 1024
fs.inotify.max_user_watches = 1048576


[root@Linux01 ~]# sysctl -p   //更新数据
去FTP 拿一个 inotify-tools 软件

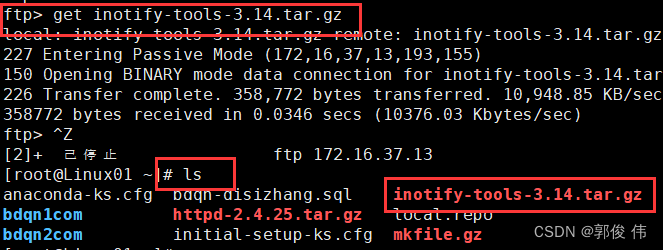
[root@Linux01 ~]# tar zxf inotify-tools-3.14.tar.gz

[root@Linux01 ~]# cd inotify-tools-3.14/
[root@Linux01 inotify-tools-3.14]# ./configure

[root@Linux01 inotify-tools-3.14]# make

[root@Linux01 inotify-tools-3.14]# make  install
以监控网站目录/var/www /html为例,可以先执行“inotifywait”命令,然后在另--个终端向/var/www/html目录下添加文件、移动文件.跟踪屏幕输出结果。其中,选项“--e”用来指定要监控哪些事件,选项“-m”表示持续监控,选项“一r”表示递归整个目录,选项“-q”简化输出信息。
192.168.9.30 配置  (开两个窗口)

第一个窗口
[root@Linux01 ~]# inotifywait -mrq -e modify,create,move,delete /var/www/html


第二个窗口
[root@Linux01 ~]# cd /var/www/html/
[root@Linux01 html]# echo aaaa >> test.html

[root@Linux01 html]# ls
bdqn1com  bdqn2com  test.html

[root@Linux01 html]#  rm -rf test.html
[root@Linux01 html]# touch abc.txt
[root@Linux01 html]# mv abc.txt /opt/

[root@Linux01 ~]# mkdir /myweb   //创建 myweb 文件夹
在第二个窗口修改 或者删除东西 第一个窗口可以实时监控

编写触发式同步脚本
[root@Linux01 ~]# vim /opt/inotify_rsync.sh


#!/bin/bash
INOTIFY_CMD="inotifywait -mrq -e modify,create,move,delete /var/www/html"
RSYNC_CMD="rsync -rav /var/www/html root@192.168.9.31:/myweb"
$INOTIFY_CMD | while reab DIRECTORY EVENT FILE
                        //一旦读取到 $INOTIFY_CMD 命令的输出结果就执行 do 后面的语句
do
    $RSYNC_CMD
done


[root@Linux01 ~]# chmod +x /opt/inotify_rsync.sh    //给一个执行权限

[root@Linux01 ~]# echo '/opt/inotify_rsync.sh' >> /etc/rc.local


 2450
2450


 被折叠的 条评论
为什么被折叠?
被折叠的 条评论
为什么被折叠?
 到【灌水乐园】发言


