


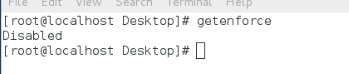
首先关闭selinux
	getenforce	查看selinux状态
	需要是disabled
1.apache
企业中常用的web服务 , 用来提供http:// (超文本传输协议)
2.apache 的安装部署(yum 安装要有能使用的yum源)
yum install httpd -y 安装apache
yum install httpd-manual -y 安装apache的手册
systemctl start httpd 打开httpd服务
systemctl enable httpd 设置开机启动
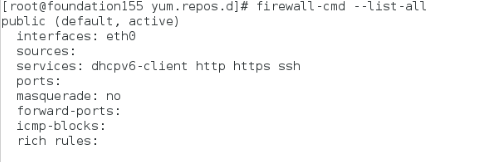
firewall-cmd --permanent --add-service=http 将http添加到火墙信任
firewll-cmd --reload 重启火墙服务
firewll-cmd --list-all 查看火墙添加的信任
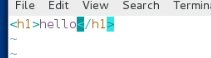
/var/www/html apache根目录,默认发布目录
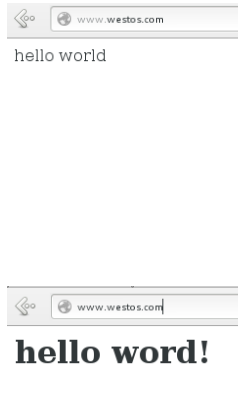
vim /var/www/html/index.html apache的默认发布文件
<h1>hello</h1> <h1>apache的显示内容</h1>
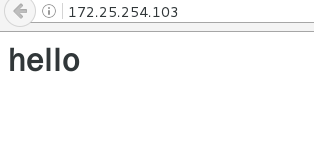
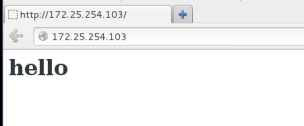
测试
http://172.25.254.103 (安装http的主机ip)
http://172.25.254.103/manual/ apache手册

#####################################
3.apache的基础信息
#主配置目录: /etc/httpd/conf
#主配置文件: /etc/httpd/conf/httpd.conf
#子配置目录: /etc/httpd/conf.d/
#子配置文件: /etc/httpd/conf.d/.conf
#默认发布目录: /var/www/html/
#默认发布文件: index.html
#默认端口: 80
#默认安全上下文: httpd_sys_content_t
#程序开启默认用户: apache
#apache日志: /etc/httpd/logs/
##############################
4.修改默认端口:
	vim /etc/httpd/conf/httpd.conf
	43 Listen 8080		修改默认端口为8080

	firewall-cmd --permanent --add-port=8080/tcp
								8080端口添加火墙信任
	firewall-cmd --reload
	systemctl restatr httpd

测试:
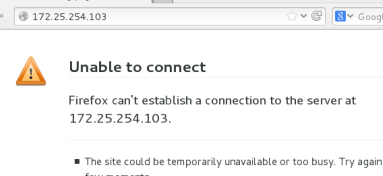
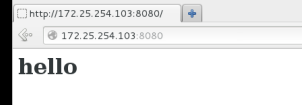
浏览器用80端口和8080端口分别打开(8080可用,80不可用)
http://172.25.254.103:80
http://172.25.254.103:8080
####################################
5.修改默认发布文件:
默认发布文件就是访问apache时没有指定文件名时默认访问的文件
这个文件可以指定多个,有访问顺序
实验之前修改回80端口
vim /etc/httpd/conf/httpd.conf
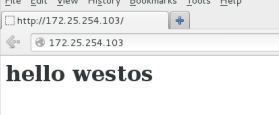
164 DirectoryIndex westos index.html 当westos不存在时访问index.html

		vim /car/www/html/westos
		<h1>hello westos</h1>
测试:浏览器输入
http://172.25.254.103 默认看的是westos内容
	rm -fr /var/www/html/westos			删除westos
	配置文件不做修改,在没有westos的时候默认读取index.html内容
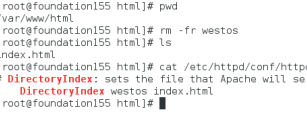
测试:浏览器访问http://172.25.254.103
看到的是index.html内容
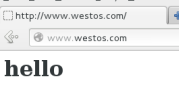
修改默认发布目录:
	vim /etc//httpd/conf/httpd.conf

	120 DocumentRoot "/westos/html"			修改默认发布目录为/westos/html
	121 <Directory "/westos/html">
	122		Require all granted				接收所有的访问请求
	123</Directory>
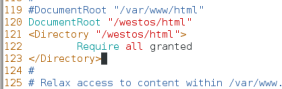
	mkdir -p /westos/html
	vim /westos/html/hello
	<h1>hello</h1>

	systemctl restart httpd
测试:
在浏览器访问 http://172.25.254.103 看到的是/westos/html/hello的内容

########################################
6.访问控制
#####访问黑白名单
	vim /etc/httpd/conf/httpd.conf
	120 <Directory "/var/www/html/westos">
	121		Order Allow,Deny			顺序,先读allow,再读deny
	122		Allow form All
	123		Denyfrom 172.25.254.3		先读allow,读到deny会覆盖allow
	124</Directory>

	systemctl restarthttpd
测试:在ip是172.25.254.3主机上访问172.25.254.103
####指定用户访问
	htpasswd -cm userfile user1		第一次生成文件时加-c参数
	htpasswd -m userfile user2			第二次不加,加-c会覆盖第一次生成的文件
	cat userfile

vim /etc/httpd/conf/httpd.conf 编辑配置文件
测试:在浏览器访问 172.25.254.103

登陆用户成功即可访问
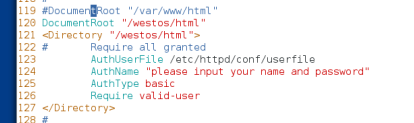
#######用户登陆的设置
	vim /etc/httpd/conf/httpd.conf

	<Directory "/westos/html">
	AuthUserFile	/etc/httpd/conf/userfile	允许本地用户登陆访问
	AuthType	basic				加密方式
	AuthName	"Please input your name and password!!!"	登陆时所看见的信息
	Require user	user1			允许登陆的用户

	Require		valid-user			允许所有的本地用户
	</Directory>
########虚拟化######
在www.baidu.com下有
news.baidu.com
tieba.baidu.com等
创建自己的网址
	cd /etc/httpd/conf.d/                   在该目录下建立虚拟httpd配置文件
	vim default.conf                        默认发布文件指向

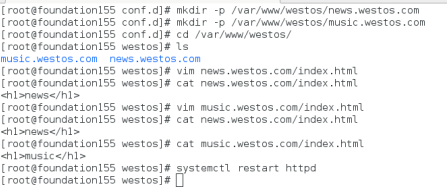
mkdir -p /var/www/westos/news.westos.com
建立news配置指向发布目录news.westos.com
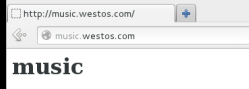
mkdir -p /var/www/westos/music.westos.com
建立music配置指向发布目music.westos.com
cd /var/www/westos/ 切换到默认发表目录
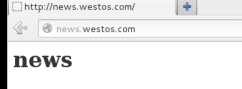
vim news.westos.com/index.html 编辑news默认发布文件
<h1>news</h1>
vim music.westos.com/index.html 编辑spots默认发布文件
<h1>music</h1>
systemctl restart httpd 重启httpd服务
测试
在测试主机
	vim /etc/hosts                            本地解析
	172.25.254.103 www.westos.com news.westos.com music.westos.com
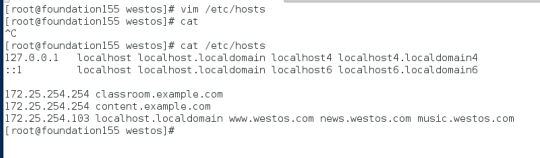
分别访问三个域名
########php+cgi####
使apache支持php
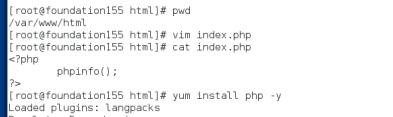
	vim /var/www/html/index.php
	<?php
    		phpinfo();
	?>

	yum install php -y

	systemctl restart httpd
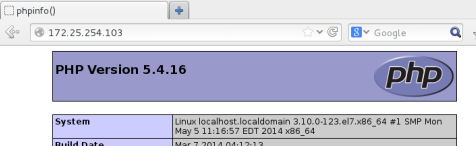
测试:
访问172.25.254.103看到的是php默认页面
###cgi
	mkdir /var/www/html/cgi
	cd /var/www/html/cgi

	vim index.cgi
	#!/usr/bin/perl
	print "Content-type: text/html\n\n";
	print `date`;

	chmod 775 index.cgi

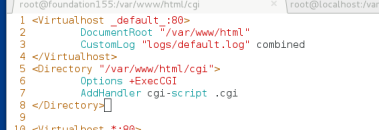
	vim /etc/httpd/conf.d/default.conf

	<VirtualHost _default_:80>
    			DocumentRoot    /var/www/html
    			CustomLog       logs/default.log combined
	</VirtualHost>
	<Directory "/var/www/html/cgi">
	Options +ExecCGI
	AddHandler cgi-script .cgi
	</Directory>
systemctl restart httpd
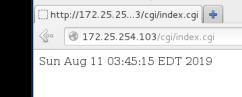
测试: 在浏览器中访问172.25.254.103/cgi/index.cgi
能看见日期
##########apache的ssl
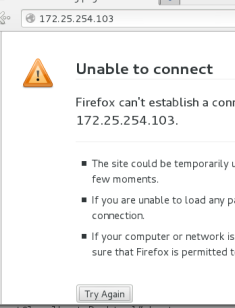
之前只能使用http访问,https不能
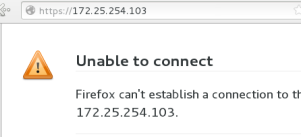
	yum install -y mod_ssl

	systemctl restart httpd

	再次访问https://172.25.254.103就会变成没有认证而不是没有该地址
#####自签名证书
	yum install -y crypto-utils

	genkey www.westos.com			执行此命令后会进入以下界面(tab切换选项,enter确认选择)


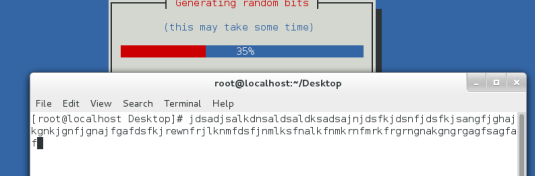
读条过程是在生成加密字符,所以敲击键盘可以加快进度(俩个读条)


修改自己想要的信息,然后下一步


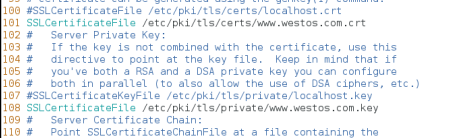
	vim /etc/httpd/conf.d/ssl.conf

	101 SSLCertificateFile /etc/pki/tls/certs/www.westos.com.crt
	加密的证书
	108 SSLCertificateKeyFile /etc/pki/tls/private/www.westos.com.key
	加密的密钥
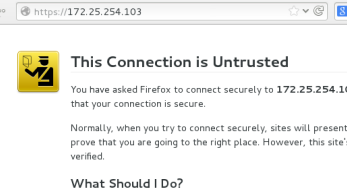
systemctl restart httpd
测试:打开https://172.25.254.103


看到的是刚刚自签证书的信息
####网页重写#######
apache的重定向:访问http://172.25.254.103时会强制性重定向到https://172.25.254.103
cd /etc/httpd/conf.d/
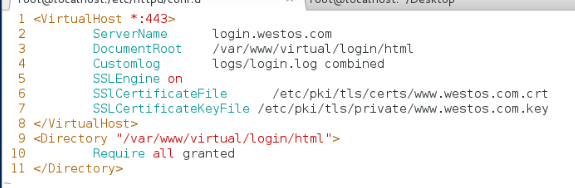
vim login.conf
<VirtualHost *:443>
ServerName login.westos.com
DocumentRoot /var/www/virtual/login/html
CustomLog logs/login.log combined
SSLEngine on
SSLCertificateFile /etc/pki/tls/certs/www.westos.com.crt
SSLCertificateKeyFile /etc/pki/tls/private/www.westos.com.key
</VirtualHost>
<Directory "/var/www/virtual/login/html">
Require all granted
</Directory>
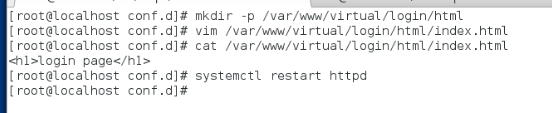
	mkdir -p /var/www/virtual/login/html

	vim /var/www/virtual/login/html/index.html

	<h1>login page</h1>

	systemctl restart httpd
	vim login.conf

	<VirtualHost *:80>
	        ServerName      login.westos.com
	        RewriteEngine   On
	        RewriteRule     ^(/.*)$ https://%{HTTP_HOST}$1 [redirect=301]
	</VirtualHost>


	 ^(/.*)$  表示客户在浏览器中输入的所有字符

	$1表示……(/。*)$的值
	redirect=301表示转换是永久的
	%{HTTP_HOST}表示客户请求主机

	vim /etc/hosts
	172.25.254.103		login.westos.com

	systemctl restart httpd
测试:
访问浏览器www.westos.com和login.westos.com得到一样的显示
########WSGI#######
tomcat jboss 中间件
lamp php per; python apache支持的语言
LAMP = Linux + Apache + Mysql + Php/Perl/Python
	mkdir /var/www/wsgi									创建一个wsgi的默认目录

	vim /etc/httpd/conf.d/vhost.conf				编辑配置文件
	<VirtualHost *:80>									所有用户通过80端口访问
				ServerName www.westoswsgi.com
				WSGIScriptAlias /var/www/wsgi/script.wsgi		wsgi访问的文件
	</VirtualHost>


	yum insatll mod_wsgi -y						安装wsgi的插件

	systemctl restart httpd							重启httpd使apache加载插件

	mv script.wsgi /var/www/wsgi/

	在测试主机 vim /etc/hosts
	172.25.254.103	www.westoswsgi.com
测试:在编辑了解析的主机浏览器中输入 www.westoswsgi.com
##########缓存############
cdn加速
三层加速
#1)正向代理 客户主动访问的代理,由代理去找客户需要的
yum install squid -y 安装squid
Squid是一种用来缓冲Internet数据的软件。它接受来自人们需要下载的目标(object)的请求并适当地处理这些请求。比如我们的电脑A不能上网,但是另一台主机B可以上网,我们是不是可以将B作为我们的代理服务器,让B将访问的页面缓存下来,这样我们去访问B的缓存,这是所谓的翻墙。
		vim /etc/squid/squid.conf

		56 http_access allow all				允许所有人访问squid
		62 cache_dir ufs /var/spool/squid 100 16 256		缓存目录

		cd /var/spool/squid			查看缓存目录期内有16个一级目录,每个里面有256个二级目录

		systemctl stop firewall
测试:一台真机开两台虚拟机,真机上搭建http服务且网段为172.25.254.0,虚拟机desktop配置双网卡网段分别为172.25.254.0 172.25.3.0,且配置squid缓存服务,虚拟机server网段在172.25.3.0。
现在虚拟机desktop可以访问真机的网页,但是server不可以,所以让server以desktop为http代理即可访问主机的网页。
现在在虚拟server的浏览器设置如下


然后清理浏览器缓存,在重新访问172.25.254.3

#2)反向代理 代理主动把客户需要的送过来
做反向代理之前,最好重制保持环境纯净
因为刚才squid的端口号可是3128,而http是80,客户访问的时候可不懂什么端口,所以需要设置squid的端口为80,而apache也是80,所以需要卸载apache。
		yum install squid -y

		 vim /etc/squid/squid.conf
		56	http_access allow all
		59	http_port 80 vhost vport
		62	cache_dir ufs /var/spool/squid 100 16 256
		63	cache_peer 172.25.254.3 parent 80 0 no-query

		systemctl restart squid

		netstat -antlupe | grep squid 查看是否是80端口
		firewall-cmd --permanent --add-service=http
		firewall-cmd --permanent --add-service=https
		firewall-cmd --reload

		用真机去访问172.25.3.10可以进去但是出现错误,因为没有找的资源
		vim /etc/squid/squid.conf
		cache_peer 172.25.254.3 parent 80 0   proxy-only  指向有资源的主机

		systemctl restart squid
测试:在server上访问172.25.3.10(desktop的ip)

多个服务器均摊轮询
即访问同一个地址时,由服务器A和服务器B轮换访问
		vim /etc/squid/squid.conf

60 cache_peer 172.25.254.3 parent 80 0 no-query originserver round-robin name=web1
61 cache_peer 172.25.254.4 parent 80 0 no-query originserver round-robin name=web2
62 cache_peer_domain web1 web2 www.westos.com web1 web2
访问域名时分别访问web1和web2
在61和62后面可以加参数weight=2意为轮询次数,放在web1后面就是访问俩次web1轮到一次web2
systemctl restart squid
在测试主机: vim /etc/hosts
172.25.254.3 www,westos,com
在web1和web2分别编辑不同内容,访问www.westos.com然后刷新,一次显示web1,一次显示web2
########论坛的搭建########:
使用Discuz论坛模板。前端后台都已写好。
关闭squid和selinux
	systemctl stop squid
	systemctl mask squid
	getenforce

	yum install httpd -y
	cd /var/www/html

	wget ftp://172.25.254.250/pub/Discuz_x3.2 SC_UTF8.zip		下载论坛模版

	unzip Discuz_x3.2 SC_UTF8.zip		根据压缩包zip,解压压缩包
	rm -fr Discuz_x3.2 SC_UTF8.zip		删除被解压过的压缩包
	ls			查看解压出来的文件

	cd readme/
	ls
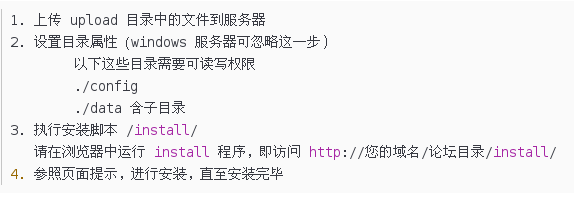
	cd ..						返回上级目录
	cd upload/			按上图要求去修改权限
	ls
	chmod o+w ./config/ -R
	chmod o+w ./data/ -R

	yum install php -y					论坛是php写的,需要下载php插件使apache能正常显示论坛

	systemctl restart httpd

	yum install mariadb-server -y
上面操作完成后,就可以进入upload路径进行安装


如果有这样的问题出现,无法继续安装,按报错解决问题即可
错误解决完毕后,重新进入安装过程

就搭建好了属于自己的论坛


 222
222


 被折叠的 条评论
为什么被折叠?
被折叠的 条评论
为什么被折叠?
 到【灌水乐园】发言


