


仰望天空,脚踏实地!
在上面两讲中学习了OkHttp的使用,OkHttp还是很强大的。
OkHttp下载文件并带进度条
OkHttp上传文件到服务器并带进度
而本人更喜欢Retrofit+OkHttp结合来实现网络请求,Retrofit使用注解,更加清晰与明了。下面用Retrofit实现简单的Get与Post请求。
一、服务器端
新建OkHttpServer服务器项目,Tomcat服务器具体配置可以参考搭建本地Tomcat服务器及相关配置 。在项目下新建PostAndGetServlet:最后启动服务器。
@WebServlet("/PostAndGetServlet")
public class PostAndGetServlet extends HttpServlet {
    private static final long serialVersionUID = 1L;

    /**
     * @see HttpServlet#HttpServlet()
     */
    public PostAndGetServlet() {
        super();
        // TODO Auto-generated constructor stub
    }

    /**
     * @see HttpServlet#doGet(HttpServletRequest request, HttpServletResponse response)
     */
    protected void doGet(HttpServletRequest request, HttpServletResponse response) throws ServletException, IOException {
        System.out.println("doGet");
        String userName = request.getParameter("username");
        String password = request.getParameter("password");
        System.out.println("userName=="+userName+"==password=="+password);
        response.setCharacterEncoding("UTF-8");
        PrintWriter writer = response.getWriter();
        writer.print("Get收到信息");
    }

    /**
     * @see HttpServlet#doPost(HttpServletRequest request, HttpServletResponse response)
     */
    protected void doPost(HttpServletRequest request, HttpServletResponse response) throws ServletException, IOException {
        System.out.println("doPost");
        String userName = request.getParameter("username");
        String password = request.getParameter("password");
        System.out.println("userName=="+userName+"==password=="+password);
        try {
            Thread.sleep(5000);
        } catch (InterruptedException e) {
            // TODO Auto-generated catch block
            e.printStackTrace();
        }
        response.setCharacterEncoding("UTF-8");
        PrintWriter writer = response.getWriter();
        writer.print("Post收到信息");
    }

}
二、Android端
1.build.gradle引入相应的jar包
  compile fileTree(dir: 'libs', include: ['*.jar'])
    compile 'com.android.support:appcompat-v7:24.1.1'
    testCompile 'junit:junit:4.12'
    compile files('libs/gson-2.4.jar')
    compile 'com.squareup.retrofit2:converter-gson:2.1.0'
    compile 'com.squareup.retrofit2:retrofit:2.1.0'
    compile 'com.squareup.retrofit2:converter-scalars:2.0.0'
    compile 'io.reactivex:rxjava:1.1.0'
    compile 'io.reactivex:rxandroid:1.1.0'
    compile 'com.squareup.retrofit2:adapter-rxjava:2.0.0-beta4'
2.在layout文件中增加两个按钮:
   <Button
        android:id="@+id/refrofit_get"
        android:layout_width="match_parent"
        android:layout_height="wrap_content"
        android:text="GET_TEST" />


    <Button
        android:id="@+id/refrofit_post"
        android:layout_width="match_parent"
        android:layout_height="wrap_content"
        android:text="POST_TEST" />
在Activity中实例化两个按钮,并设置点击事件。代码就不贴了。
3.新建RetrofitUtil类,编写以下两个方法:
public class RetrofitUtil {

//电脑端cmd输入ipconfig获取ip
   public static String baseUrl = "http://192.168.0.100:8080/OkHttpServer/";

   public static  Retrofit.Builder retrofitBuilder = new Retrofit.Builder()
           .addCallAdapterFactory(RxJavaCallAdapterFactory.create())
    //返回string类型,如果返回的是json类型:addConverterFactory(GsonConverterFactory.create())
        .addConverterFactory(ScalarsConverterFactory.create())
           .baseUrl(baseUrl);


    private static OkHttpClient okHttpClient = new OkHttpClient.Builder().connectTimeout(10000, TimeUnit.MILLISECONDS)
            .readTimeout(10000,TimeUnit.MILLISECONDS)
            .writeTimeout(10000,TimeUnit.MILLISECONDS).build();

//get请求
    public static void testGet(){
        InterfaceRetrofit.GetPetrofit getPetrofit = retrofitBuilder.build().create(InterfaceRetrofit.GetPetrofit.class);
        getPetrofit.getTest("xiaohong","123").enqueue(new Callback<String>() {
            @Override
            public void onResponse(Call<String> call, Response<String> response) {

                Log.i("test",response.body().toString());
            }

            @Override
            public void onFailure(Call<String> call, Throwable t) {

            }
        });
    }

//post请求
    public static void testPost(){
        InterfaceRetrofit.PostRetrofit postRetrofit = retrofitBuilder.build().create(InterfaceRetrofit.PostRetrofit.class);
        postRetrofit.postTest("xiaoqing","456").enqueue(new Callback<String>() {
            @Override
            public void onResponse(Call<String> call, Response<String> response) {
                Log.i("test",response.body().toString());
            }

            @Override
            public void onFailure(Call<String> call, Throwable t) {

            }
        });
    }
}
4.Retrofit的调用是通过接口实现的,上面的get与post请求也是,相应接口如下:
public interface InterfaceRetrofit {

    public interface GetPetrofit {
        @GET("PostAndGetServlet")
        Call<String> getTest(@Query("username") String username, @Query("password") String password);
    }


    public interface PostRetrofit{
        @FormUrlEncoded
        @POST("PostAndGetServlet")
        Call<String> postTest(@Field("username") String username, @Field("password")String password);
    }
}
5.为两个按钮添加点击事件,分别添加以上两个方法。最后别忘了相应的权限:
<uses-permission android:name="android.permission.INTERNET"/>6.Android 端相关log:
07-03 20:41:07.772 25048-25048/com.huang.retrofit I/test: Get收到信息
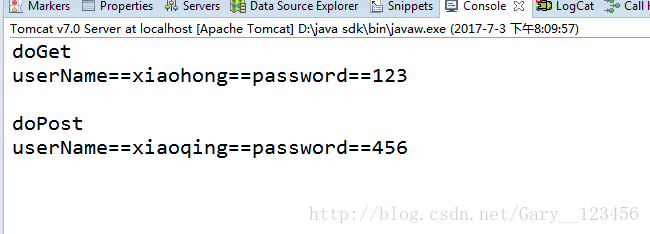
07-03 20:41:16.952 25048-25048/com.huang.retrofit I/test: Post收到信息服务器端log:


 533
533

 被折叠的 条评论
为什么被折叠?
被折叠的 条评论
为什么被折叠?
 到【灌水乐园】发言


