


克隆羊问题
需求:当前有一个实体Sheep,需要创建出与当前实体属性完全相同的实体。
@Setter
@Getter
@NoArgsConstructor
@AllArgsConstructor
public class Sheep{

    private String name;

    private Integer age;

    private Color color;

	@Override
    public String toString() {
        return "Sheep{" +
                "name='" + name + '\'' +
                ", age=" + age +
                ", color=" + color +
                '}';
    }
}
直接写法
public static void main(String[] args) {
		// 构造出实体
        Sheep tom = new Sheep("Tom", 18, Color.WHITE);
        System.out.println(tom.toString());
        // 使用tom 实体的属性构造出新的实体
        Sheep tom1 = new Sheep(tom.getName(), tom.getAge(), tom.getColor());
        System.out.println(tom.toString());
        System.out.println("tom1 hashCode :" + tom1.hashCode());
        System.out.println("tom  hashCode :" + tom.hashCode());
    }
运行结果
Sheep{name='Tom', age=18, color=java.awt.Color[r=255,g=255,b=255]}
Sheep{name='Tom', age=18, color=java.awt.Color[r=255,g=255,b=255]}
tom1 hashCode : 1023487453
tom  hashCode : 1865127310
// hashCode 不一致是两个不同的对象
直接写法的优缺点分析:
1、写法简单、比较好理解
2、在创建新的对象的时候,总是需要重新获取原始对象的属性,如果创建的对象比较复杂,代码冗余程度大、可维护性降低。
3、总是需要重新初始化对象,而不是动态的获取对象的运行时状态,不够灵活。
原型模式
改进思路
Java中的Object类是所有对象的基类,Object类提供了一个clone()方法,该方法可以将一个对象复制,但是需要实现clone方法的Java类都必须实现一个接口(否则会抛出CloneNotSupportedException异常),该接口表示Java类能够复制且具有复制的能力 => 原型模式。
代码改进
public class Sheep implements Cloneable {

    private String name;

    private Integer age;

    private Color color;

    @Override
    protected Sheep clone() throws CloneNotSupportedException {
        return (Sheep) super.clone();
    }

    @Override
    public String toString() {
        return "Sheep{" +
                "name='" + name + '\'' +
                ", age=" + age +
                ", color=" + color +
                '}';
    }
}
测试代码与测试结果
	@Test
    public void test2() throws Exception {
        Sheep tom = new Sheep("Tom", 18, Color.WHITE);
        Sheep clone = tom.clone();
        System.out.println(tom.toString());
        System.out.println(clone.toString());
        System.out.println(tom.hashCode());
        System.out.println(clone.hashCode());
    }
    // Sheep{name='Tom', age=18, color=java.awt.Color[r=255,g=255,b=255]}
	// Sheep{name='Tom', age=18, color=java.awt.Color[r=255,g=255,b=255]}
	// 920011586
	// 968514068
原型模式在Spring中的使用
代码
package com.example.pattern.prototype;

import org.junit.Test;
import org.springframework.context.ApplicationContext;
import org.springframework.context.annotation.AnnotationConfigApplicationContext;
import org.springframework.context.annotation.Scope;
import org.springframework.stereotype.Component;

/**
 * @author zjt
 * @date 2020-12-09
 */
@Component
@Scope("prototype") // 表示开启原型模式
public class Monster {

    private Integer id = 1;

    private String name = "Jerry";

    @Test
    public void test3() {
        ApplicationContext context = new AnnotationConfigApplicationContext(Monster.class);
        Monster monster = context.getBean(Monster.class);
        System.out.println(monster);
        System.out.println(monster.hashCode());

        Monster monster1 = context.getBean(Monster.class);
        System.out.println(monster1);
        System.out.println(monster1.hashCode());
        // 运行结果
        // com.example.pattern.prototype.Monster@72c8e7b
        // 120360571
        // com.example.pattern.prototype.Monster@4d14b6c2
        // 1293203138
    }

}
代码追踪
......
	else if (mbd.isPrototype()) {
	// It's a prototype -> create a new instance.
		Object prototypeInstance = null;
		try {
				beforePrototypeCreation(beanName);
				// 返回的原型实例 具体实现过程在createBean()方法中
				prototypeInstance = createBean(beanName, mbd, args);
			}
		finally {
				afterPrototypeCreation(beanName);
				}
		bean = getObjectForBeanInstance(prototypeInstance, name, beanName, mbd);
	}
......
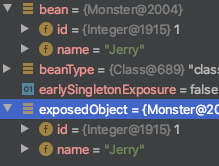
Spring 是通过反射操作获取Bean
浅拷贝与深拷贝
代码追加,在Sheep类中添加一个新的属性,Sheep
@Setter
@Getter
@NoArgsConstructor
@AllArgsConstructor
public class Sheep implements Cloneable {

    private String name;

    private Integer age;

    private Color color;

    private Sheep friend;


    @Override
    protected Sheep clone() throws CloneNotSupportedException {
        return (Sheep) super.clone();
    }

    @Override
    public String toString() {
        return "Sheep{" +
                "name='" + name + '\'' +
                ", age=" + age +
                ", color=" + color +
                '}';
    }

}
测试代码
@Test
    public void test1() throws Exception {
        Sheep jerry = new Sheep("Jerry", 18, Color.WHITE, null);
        Sheep tom = new Sheep("Tom", 18, Color.WHITE, jerry);
        Sheep clone = tom.clone();
        System.out.println(tom.toString() + "," + tom.getFriend().hashCode());
        System.out.println(tom.hashCode());
        System.out.println(clone.toString() + "," + clone.getFriend().hashCode());
        System.out.println(clone.hashCode());
        // 运行结果
        // Sheep{name='Tom', age=18, color=java.awt.Color[r=255,g=255,b=255]},920011586
        // 968514068
        // Sheep{name='Tom', age=18, color=java.awt.Color[r=255,g=255,b=255]},920011586
        // 1360767589
    }
代码测试中发现,克隆时,非基础数据类型数据拷贝,直接进行了引用传递。
浅拷贝的基本介绍
1、对于数据类型是基本数据类型的成员变量,浅拷贝会直接进行值传递,也就是将该属性值复制一份给新的对象。
2、对于数据类型是引用数据类型的成员变量,比如说成员变量是某个数组、类对象等等,浅拷贝只会进行引用传递,也就只是将成员变量的引用值(内存地址)复制一份给新的对象。实际上两个对象的该成员都指向同一个实例。在这种情况下,在一个对象中修改该成员变量会直接影响到另一个对象的对应成员变量的值。
深拷贝的基本介绍
1、复制对象的所有基本数据类型的成员变量值。
2、为所有引用数据类型的成员变量申请存储空间,并复制每个引用数据类型成员变量所引用的对象,直到该对象可达的所有对象。也就是说,对象进行深拷贝要对整个对象进行拷贝。
3、深拷贝的实现方式 :1: 重写clone方法来实现深拷贝;2:通过对象序列化实现深拷贝。
Spring的原型模式使用的是深拷贝
package com.example.pattern.prototype;

import lombok.Getter;
import org.junit.Test;
import org.springframework.context.ApplicationContext;
import org.springframework.context.annotation.AnnotationConfigApplicationContext;
import org.springframework.context.annotation.Scope;
import org.springframework.stereotype.Component;

import java.awt.*;

/**
 * @author zjt
 * @date 2020-12-09
 */
@Component
@Scope("prototype") // 表示开启原型模式
@Getter
public class Monster {

    private Integer id = 1;

    private String name = "Jerry";

    private Sheep sheep = new Sheep("Jack", 10, Color.BLUE, null);

    @Test
    public void test3() {
        ApplicationContext context = new AnnotationConfigApplicationContext(Monster.class);
        Monster monster = context.getBean(Monster.class);
        System.out.println(monster);
        System.out.println(monster.hashCode());
        System.out.println("monster sheep 的 hashCode " + monster.getSheep().hashCode());

        Monster monster1 = context.getBean(Monster.class);
        System.out.println(monster1);
        System.out.println(monster1.hashCode());
        System.out.println("monster1 sheep 的 hashCode " + monster1.getSheep().hashCode());

        // 运行结果
        // com.example.pattern.prototype.Monster@56528192
        // 1448247698
        // monster sheep 的 hashCode 1846406218
        // com.example.pattern.prototype.Monster@96def03
        // 158199555
        // monster1 sheep 的 hashCode 1556995360
    }

}
实现深拷贝的两种方式
@Getter
@Setter
@NoArgsConstructor
@AllArgsConstructor
public class DeepTarget implements Serializable, Cloneable {

    private String name;

    private DeepPrototype prototype;

    @Override
    protected DeepTarget clone() throws CloneNotSupportedException {
        DeepTarget clone = (DeepTarget) super.clone();
        if (null != prototype) {
            clone.prototype = prototype.clone();
        }
        return clone;
    }
}
@Getter
@Setter
@NoArgsConstructor
@AllArgsConstructor
public class DeepPrototype implements Serializable, Cloneable {

    private String name;

    private DeepTarget target;

    // 深拷贝方式一 使用克隆方法 循环引用 导致 StackOverflowError
    @Override
    protected DeepPrototype clone() throws CloneNotSupportedException {
        DeepPrototype clone = (DeepPrototype) super.clone();
        if (null != this.target) {
            clone.target = target.clone();
        }
        return clone;
    }

    // 深拷贝方式二 通过对象的序列化实现
    public DeepPrototype deepClone() {
        // 创建流对象
        ByteArrayInputStream bis = null;
        ByteArrayOutputStream bos = null;
        ObjectInputStream ois = null;
        ObjectOutputStream oos = null;
        try {
            // 序列化
            bos = new ByteArrayOutputStream();
            oos = new ObjectOutputStream(bos);
            oos.writeObject(this); // 将当前对象作为一个整体,以对象流的方式输出
            // 反序列化
            bis = new ByteArrayInputStream(bos.toByteArray()); // 读入
            ois = new ObjectInputStream(bis);
            return (DeepPrototype) ois.readObject();
        } catch (Exception e) {
            e.printStackTrace();
            return null;
        } finally {
            try {
                if (null != bis) {
                    bis.close();
                }
                if (null != bos) {
                    bos.close();
                }
                if (null != ois) {
                    ois.close();
                }
                if (null != oos) {
                    oos.close();
                }
            } catch (IOException e) {
                e.printStackTrace();
            }
        }
    }

}
测试结果,因为两个类互相引用对方,所以方式一肯定会出错,但是以流的方式拷贝,不会出现第一种方式的问题。
    public static void main(String[] args) throws Exception {
        DeepPrototype prototype = new DeepPrototype();
        prototype.setName("原型");
        DeepTarget target = new DeepTarget();
        target.setName("目标");
        prototype.setTarget(target);
        target.setPrototype(prototype); // 使用方式一,注释掉这一行,不要让两个方法互相调用

//        DeepPrototype clone = prototype.clone();
//        System.out.println(clone.getTarget().hashCode());
//        DeepPrototype clone1 = prototype.clone();
//        System.out.println(clone1.getTarget().hashCode());

        DeepPrototype clone = prototype.deepClone();
        System.out.println(clone.getName() + clone.getTarget().hashCode());
        DeepPrototype clone1 = prototype.deepClone();
        System.out.println(clone1.getName() + clone1.getTarget().hashCode());

        // 测试结果
        // 原型 517938326
        // 原型 914424520

    }
原型模式注意事项和细节
1、创建新的对象比较复杂时,可以利用原型模式简化对象的创建过程,同时也在一定程度上提高了效率。
2、不用重新初始化对象,而是动态的获取对象的运行时状态。
3、如果原始对象发生变化(增加或者减少属性),其克隆的对象也会发生相应的变化,无需修改代码。
4、在实现深度克隆时,代码可能比较复杂。
缺点
需要为每一个类配备一个克隆方法,这对于全新的类来说不是很难,但是对已有的类进行改造时,需要修改其源代码,违背了OCP原则。


 被折叠的 条评论
为什么被折叠?
被折叠的 条评论
为什么被折叠?
 到【灌水乐园】发言


