


1.Cobbler介绍
Cobbler是一个Linux服务器安装的服务,可以通过网络启动(PXE)的方式来快速安装、重装物理服务器和虚拟机,同时还可以管理DHCP,DNS等。
Cobbler可以使用命令行方式管理,也提供了基于Web的界面管理工具(cobbler-web),还提供了API接口,可以方便二次开发使用。
Cobbler集成的服务:
PXE服务支持
DHCP服务管理
DNS服务管理(可选bind,dnsmasq)
电源管理
Kickstart服务支持
YUM仓库管理
TFTP(PXE启动时需要)
Apache(提供kickstart的安装源,并提供定制化的kickstart配置)
2.系统环境准备
    cat /etc/redhat-release
    CentOS release 6.7 (Final)
    uname -r
	2.6.32-573.el6.x86_64
	getenforce
	/etc/init.d/iptables status
	hostname -I
	10.0.0.7
#配置阿里云的epel源
	wget -O /etc/yum.repos.d/epel.repo http://mirrors.aliyun.com/repo/epel-6.repo
#关闭selinux
    setenforce 0
    sed -i 's#SELINUX=enforcing#SELINUX=disabled#g' /etc/selinux/config
    reboot
#关闭防火墙
	/etc/init.d/iptables stop
3.安装cobbler以及相关软件,cobbler配置
yum install cobbler cobbler-web dhcp tftp-server pykickstart httpd xinetd -y
#出现报错
Error: Package: cobbler-web-2.6.11-7.git95749a6.el6.noarch (epel)Requires: Django >= 1.4
#解决办法
cd /usr/local/src/
yum install python-simplejson -y
wget https://kojipkgs.fedoraproject.org//packages/Django14/1.4.14/1.el6/noarch/Django14-1.4.14-1.el6.noarch.rpm
rpm -ivh Django14-1.4.14-1.el6.noarch.rpm
#再次安装
yum install cobbler cobbler-web dhcp tftp-server pykickstart httpd xinetd -y
#启动
/etc/init.d/httpd start
/etc/init.d/cobblerd start
cobbler check
#如有报错,可以重启cobbler,因为依赖包安装先后顺序,也有可能是selinux导致
cobbler check
The following are potential configuration items that you may want to fix:
1 : The 'server' field in /etc/cobbler/settings must be set to something other than localhost, or kickstarting features will not work. This should be a resolvable hostname or IP for the boot server as reachable by all machines that will use it.
2 : For PXE to be functional, the 'next_server' field in /etc/cobbler/settings must be set to something other than 127.0.0.1, and should match the IP of the boot server on the PXE network.
3 : some network boot-loaders are missing from /var/lib/cobbler/loaders, you may run 'cobbler get-loaders' to download them, or, if you only want to handle x86/x86_64 netbooting, you may ensure that you have installed a *recent* version of the syslinux package installed and can ignore this message entirely. Files in this directory, should you want to support all architectures, should include pxelinux.0, menu.c32, elilo.efi, and yaboot. The 'cobbler get-loaders' command is the easiest way to resolve these requirements.
4 : change 'disable' to 'no' in /etc/xinetd.d/rsync
5 : debmirror package is not installed, it will be required to manage debian deployments and repositories
6 : The default password used by the sample templates for newly installed machines (default_password_crypted in /etc/cobbler/settings) is still set to 'cobbler' and should be changed, try: "openssl passwd -1 -salt 'random-phrase-here' 'your-password-here'" to generate new one
7 : fencing tools were not found, and are required to use the (optional) power management features. install cman or fence-agents to use them
Restart cobblerd and then run 'cobbler sync' to apply changes.
#第1步+第2步
vim /etc/cobbler/settings
server: 10.0.0.7
next_server: 10.0.0.7
manage_dhcp: 1
##快速更改命令
sed -i 's#server: 127.0.0.1#server: 10.0.0.7#g' /etc/cobbler/settings
sed -i 's#next_server: 127.0.0.1#next_server: 10.0.0.7#g' /etc/cobbler/settings
sed -i 's#manage_dhcp: 0#manage_dhcp: 1#g' /etc/cobbler/settings
#第3步
cobbler get-loaders
#第4步
vim /etc/xinetd.d/rsync
disable = no
##快速更改命令
sed -i 's/disable.*yes$/disable = no/g' /etc/xinetd.d/rsync
#重启xinetd
/etc/init.d/xinetd restart
vim /etc/xinetd.d/tftp
disable = yes
##快速更改命令
sed -i 's/disable.*yes$/disable = no/g' /etc/xinetd.d/tftp
\cp /usr/share/doc/dhcp-4.1.1/dhcpd.conf.sample /etc/dhcp/dhcpd.conf
cat >> /etc/dhcp/dhcpd.conf <<EOF
subnet 10.0.0.0 netmask 255.255.255.0 {
range dynamic-bootp 10.0.0.100 10.0.0.200;
option subnet-mask 255.255.255.0;
next-server 10.0.0.7;
filename "pxelinux.0";
}
EOF
#重启dhcp
/etc/init.d/dhcpd start
#第6步
[root@linux-node1 src]# openssl passwd -1 -salt 'zhou' '123456'
$1$zhou$WwY0CcOpokzB5nsQz4A9D0
vim /etc/cobbler/settings
default_password_crypted: "$1$zhou$WwY0CcOpokzB5nsQz4A9D0"
##快速更改命令
sed -i 's/^default_password_crypted.*\"$/default_password_crypted: "$1$zhou$WwY0CcOpokzB5nsQz4A9D0"/g' /etc/cobbler/settings
##选做第5步,第7步
yum install -y debmirror yum-utils fence-agents
####################cobbler管理dhcp####################
vim /etc/cobbler/dhcp.template
#修改这部分,其余默认
subnet 10.0.0.0 netmask 255.255.255.0 {
option routers 10.0.0.2;
option domain-name-servers 10.0.0.2;
option subnet-mask 255.255.255.0;
range dynamic-bootp 10.0.0.100 10.0.0.200;
#修改完成后,执行
cobbler sync
#cobbler日志
cd /var/log/cobbler
#导入文件
mount /dev/cdrom /mnt/
cobbler import --path=/mnt/ --name=CentOS-7.5-x86_64 --arch=x86_64
#导入文件存放位置
cd /var/www/cobbler/ks_mirror/
CentOS-7.5-x86-64-x86-64/ config/
#KS文件存放位置
vim /var/lib/cobbler/kickstarts/CentOS-7.5-x86_64.cfg
#Kickstart
#platform=x86,AMD64,or Intel EM64T
#System language
lang en_US
#System keyboard
keyboard us
#System timezone
timezone Asia/Shanghai
#Root password
rootpw --iscrypted $default_password_crypted
#Use text mode install
text
#Install OS instead of upgrade
install
#Use NFS installation Media
url --url=$tree
#url --url=http://192.168.56.11/CentOS-7.1-x86_64
#System bootloader configuration
bootloader --location=mbr
#Clear the Master Boot Record
zerombr
#Partition clearing information
clearpart --all --initlabel
#Disk partitioning information
part /boot --fstype xfs --size 1024 --ondisk sda
part swap --size 16384 --ondisk sda
part / --fstype xfs --size 1 --grow --ondisk sda
#System authorization information
auth --useshadow --enablemd5
#Network information
$SNIPPET('network_config')
#network --bootproto=dhcp --device=eth0 --onboot=on
# Reboot after installation
reboot
#Firewall configuration
firewall --disabled
#SELinux configuration
selinux --disabled
#Do not configure XWindows
skipx
%pre
$SNIPPET('log_ks_pre')
$SNIPPET('kickstart_start')
$SNIPPET('pre_install_network_config')
# Enable installation monitoring
$SNIPPET('pre_anamon')
%end
#Package install information
%packages
@ base
@ core
tree
sysstat
iptraf
ntp
lrzsz
ncurses-devel
openssl-devel
zlib-devel
OpenIPMI-tools
mysql
nmap
screen
%end
%post
systemctl disable postfix.service
%end
#查看编辑cobbler配置文件帮助
cobbler profile edit --help
#指定ks文件读取位置
cobbler profile edit --name=CentOS-7.5-x86_64 --kickstart=/var/lib/cobbler/kickstarts/CentOS-7.5-x86_64.cfg
#将centos7.x版本的网卡名称标准化为eth0
cobbler profile edit --name=CentOS-7.5-x86_64 --kopts='net.ifnames=0 biosdevname=0'
#检查
cobbler report
#cobbler 刷新
cobbler sync
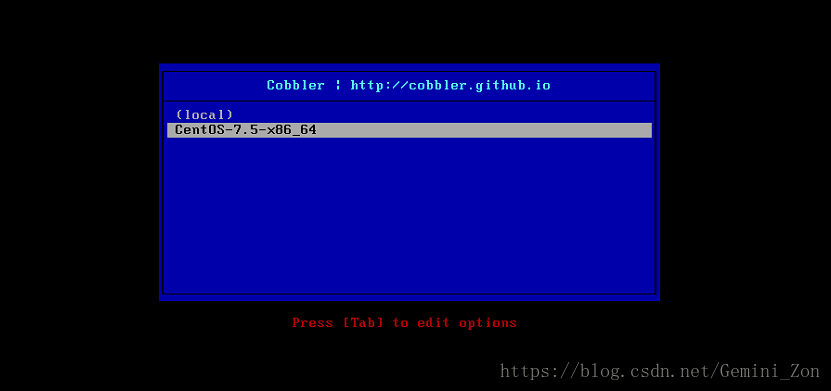
#这里可以新建虚拟机,开机后会有选择框,选择CentOS-7.5-x86_64后即将自动安装,记住新建虚拟机内存2G,不然报错
#通过mac地址指定IP直接安装,不用去手动选择
    cobbler system add --name=test01 --mac=00:50:56:31:FA:8E --profile=CentOS-7.5-x86_64 --ip-address=10.0.0.111 --subnet=255.255.255.0 --gateway=10.0.0.2 --interface=eth0 --static=1 --hostname=zon01 --name-servers="223.5.5.5"

#cobbler web生产文件位置
    vim /etc/httpd/conf.d/cobbler_web.conf
    https://10.0.0.7/cobbler_web
    cd /etc/cobbler/


 785
785


 被折叠的 条评论
为什么被折叠?
被折叠的 条评论
为什么被折叠?
 到【灌水乐园】发言


