


目录
对于常用Github的用户来说,经常有一些自动化的需求。比如监控某些项目的更新情况并实时拉取,比如监控github全网上传的代码是否携带了公司的APIKEY,SECRETKEY等…
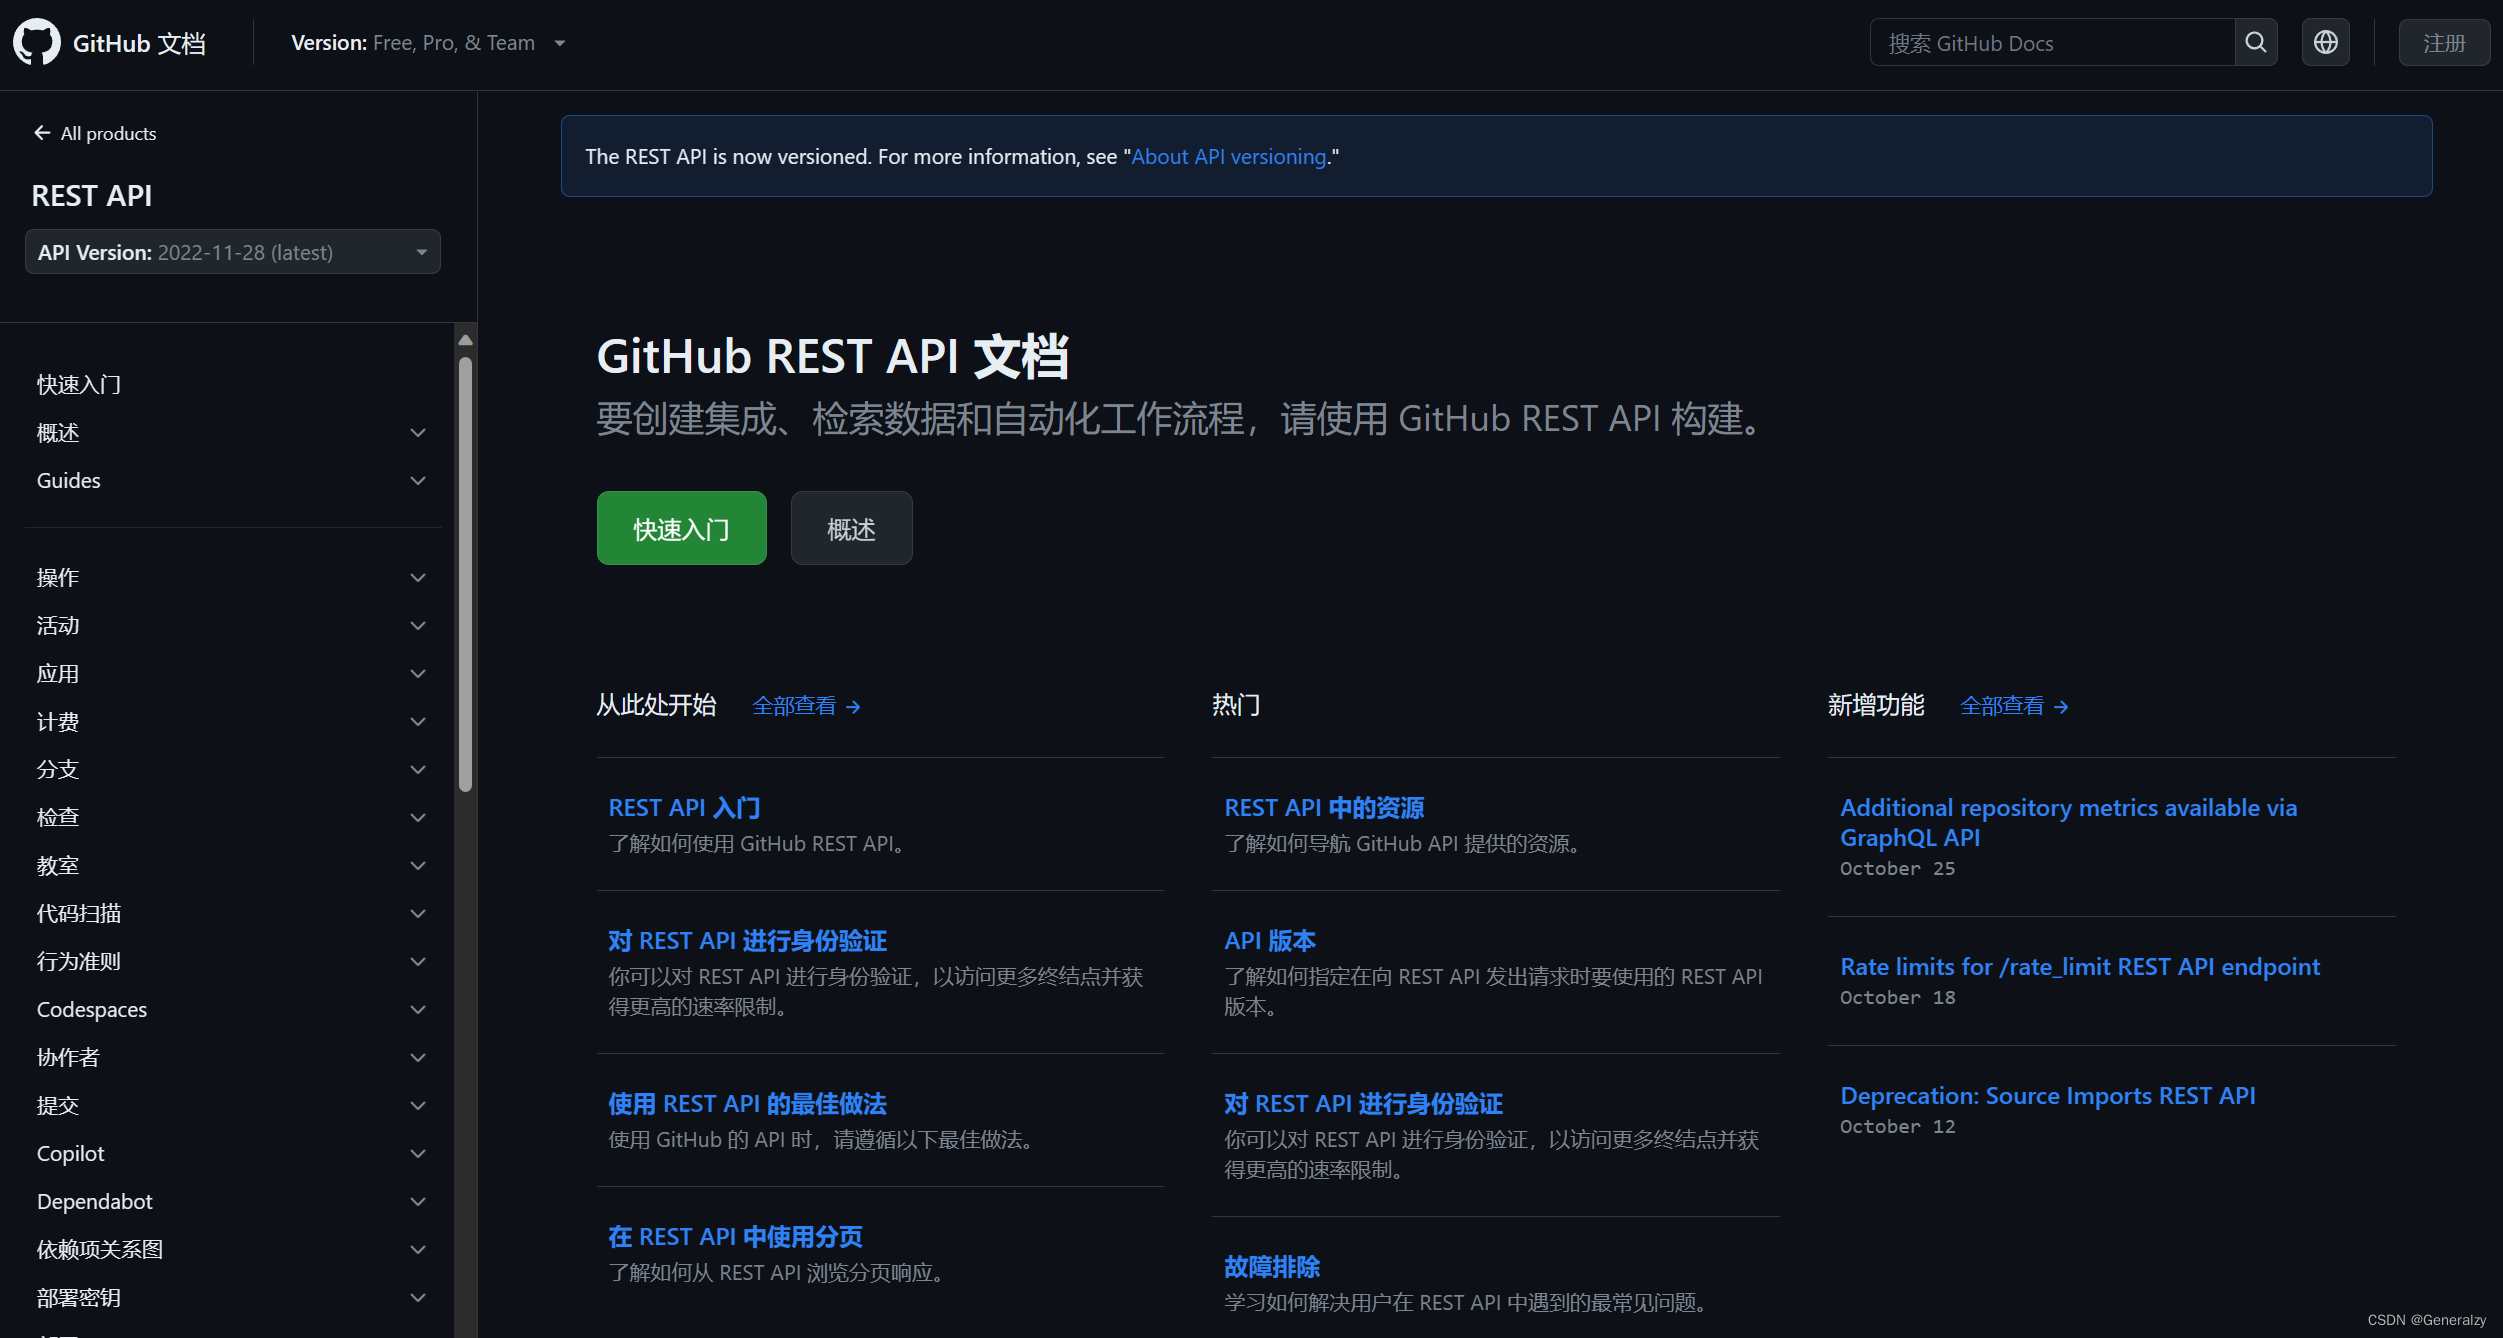
github开放平台
github平台也提供了自己的REST API文档:https://docs.github.com/zh/rest?apiVersion=2022-11-28
接口限流
GitHub API 响应会对速率限制进行分类,主要分为:
-
core对象提供 REST API 中所有非搜索相关资源的速率限制状态。 -
search对象提供用于搜索的 REST API 的速率限制状态(代码搜索除外)。 有关详细信息,请参阅“搜索”。 -
code_search对象提供用于搜索代码的 REST API 的速率限制状态。 有关详细信息,请参阅“搜索”。 -
graphql对象提供 GraphQL API 的速率限制状态。 -
integration_manifest对象提供POST /app-manifests/{code}/conversions操作的速率限制状态。 有关详细信息,请参阅“从清单注册 GitHub 应用”。 dependency_snapshots对象提供将快照提交到依赖项关系图的速率限制状态。 有关详细信息,请参阅“依赖项关系图”。-
code_scanning_upload对象提供用于将 SARIF 结果上传到代码扫描的速率限制状态。 有关详细信息,请参阅“将 SARIF 文件上传到 GitHub”。 -
actions_runner_registration对象提供在 GitHub Actions 中注册自托管运行器的速率限制状态。 有关详细信息,请参阅“自托管运行程序”。
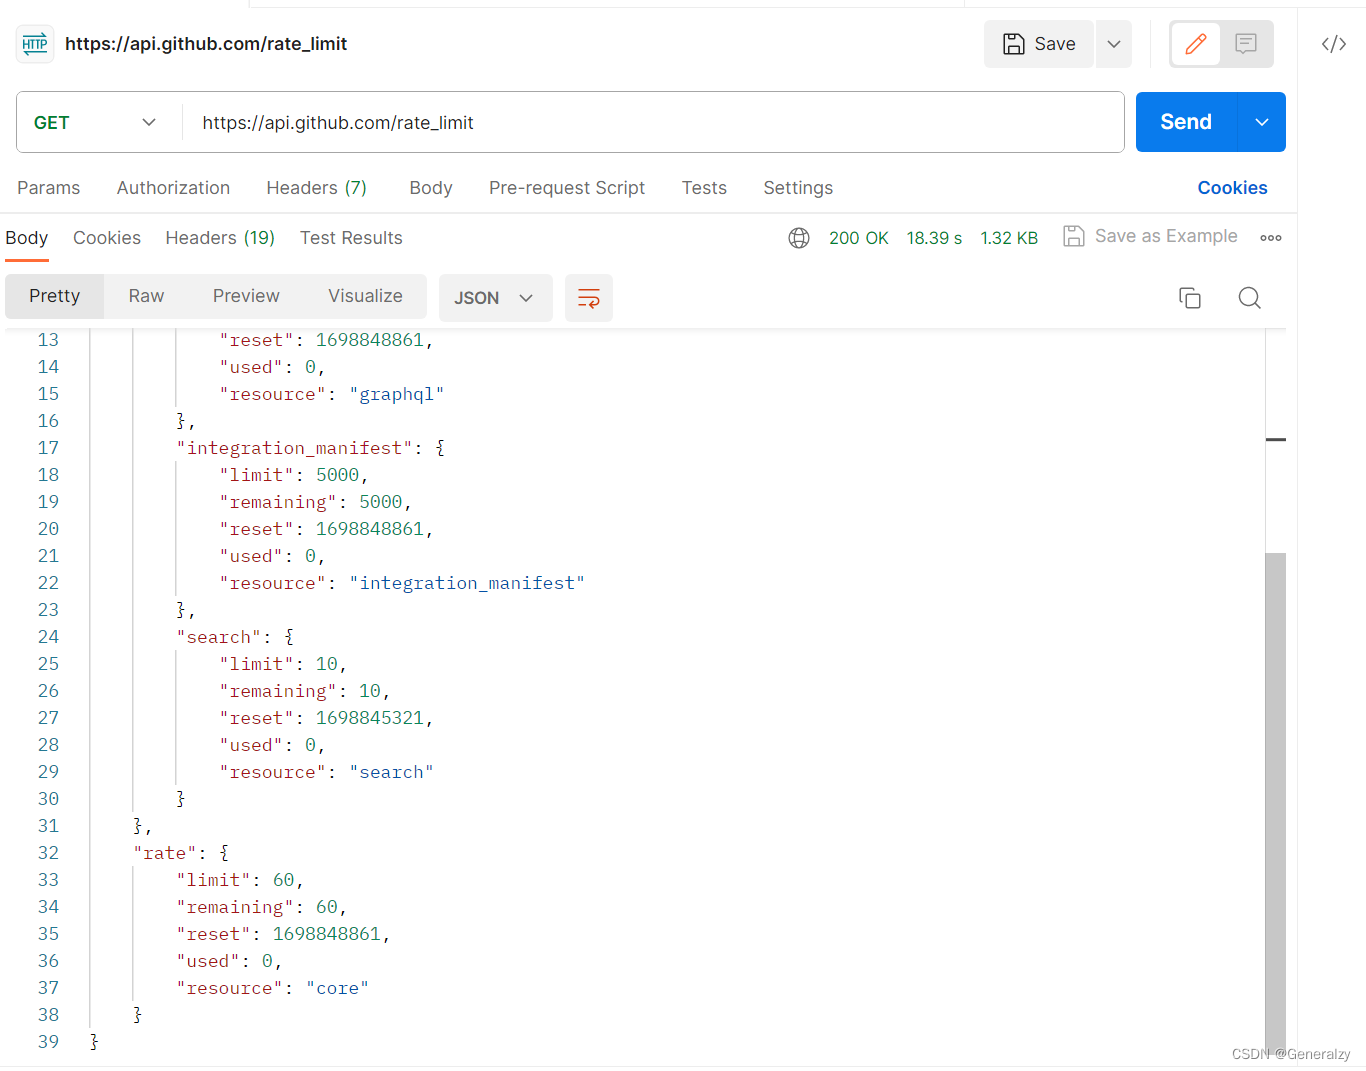
只需要GET请求:https://api.github.com/rate_limit即可查看限流
请求头里面不携带token,则显示匿名用户的配置:
获取token需要到开发者配置中生成Token
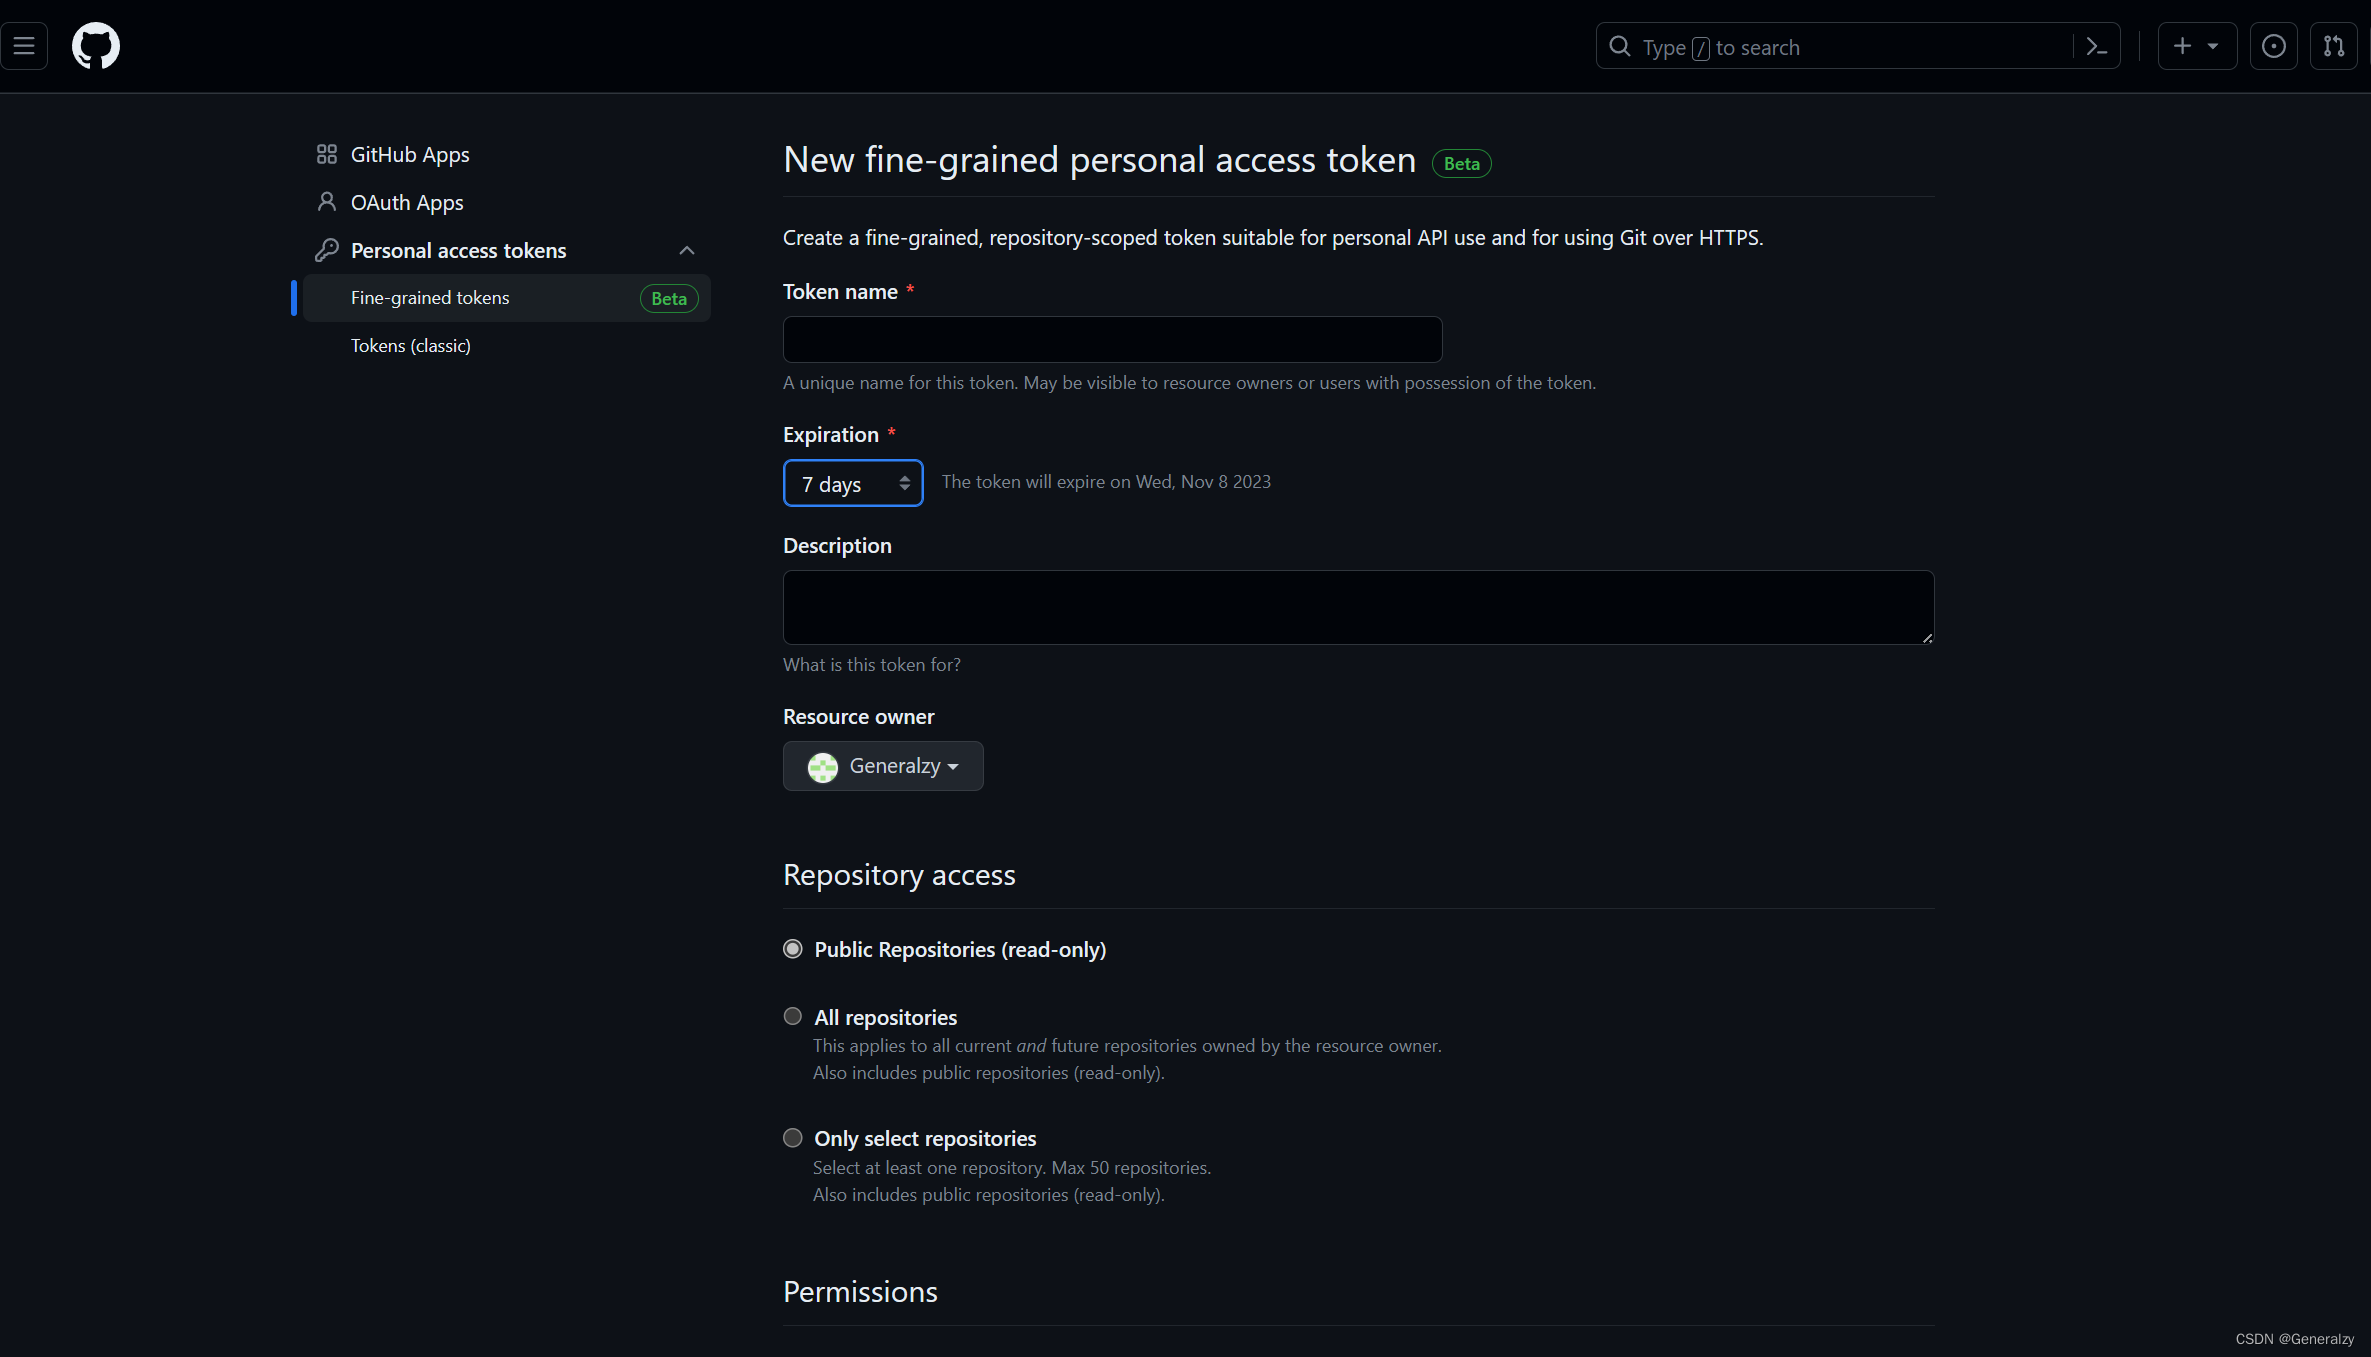
然后在请求头里携带即可:

格式:Bearer <YOUR-TOKEN>

调用git命令
python
与github交互,除了使用rest api外,还可以通过调用git客户端来进行交互。
在Python中,有几个库可以用于操作Git:
-
GitPython: GitPython 是一个强大的Python库,它允许你在Python程序中直接与Git仓库进行交互。它提供了一个高级接口,可以执行各种Git操作,如克隆仓库、提交更改、创建分支等等。
官方网站:https://gitpython.readthedocs.io/
安装方法:
pip install gitpython示例用法:
from git import Repo # 克隆仓库 repo = Repo.clone_from('https://github.com/username/repo.git', '/path/to/destination') # 获取当前分支 current_branch = repo.active_branch # 提交更改 repo.index.add(['file1', 'file2']) repo.index.commit('Commit message') # 创建分支 new_branch = repo.create_head('new_branch') # 等等... -
GitDB: GitDB 是一个用于读取Git仓库中的对象(commit、tree、blob等)的库。它是GitPython的底层依赖库之一。
官方网站:https://gitdb.readthedocs.io/
安装方法:
pip install gitdb -
Pygit2: Pygit2 是一个用于直接访问libgit2库的Python绑定,libgit2是一个纯C实现的Git库。它提供了高性能的Git操作,但相对于GitPython来说,它的接口可能更底层一些。
安装方法:
pip install pygit2示例用法:
import pygit2

repo = pygit2.Repository('/path/to/repository')

# 获取提交记录
commits = list(repo.walk(repo.head.target, pygit2.GIT_SORT_TIME))

# 提交更改
index = repo.index
index.add('file1')
tree = index.write_tree()
author = pygit2.Signature('Your Name', 'you@example.com')
committer = pygit2.Signature('Your Name', 'you@example.com')
commit = repo.create_commit('HEAD', author, committer, 'Commit message', tree, [repo.head.target])

# 等等...
subprocess调用git
import subprocess

# 仓库的ssh_url
ssh_url = "git@github.com:Generalzy/go-csv.git"

# 拉取仓库
subprocess.run(["git", "clone", ssh_url, "-b", "master"], shell=True)
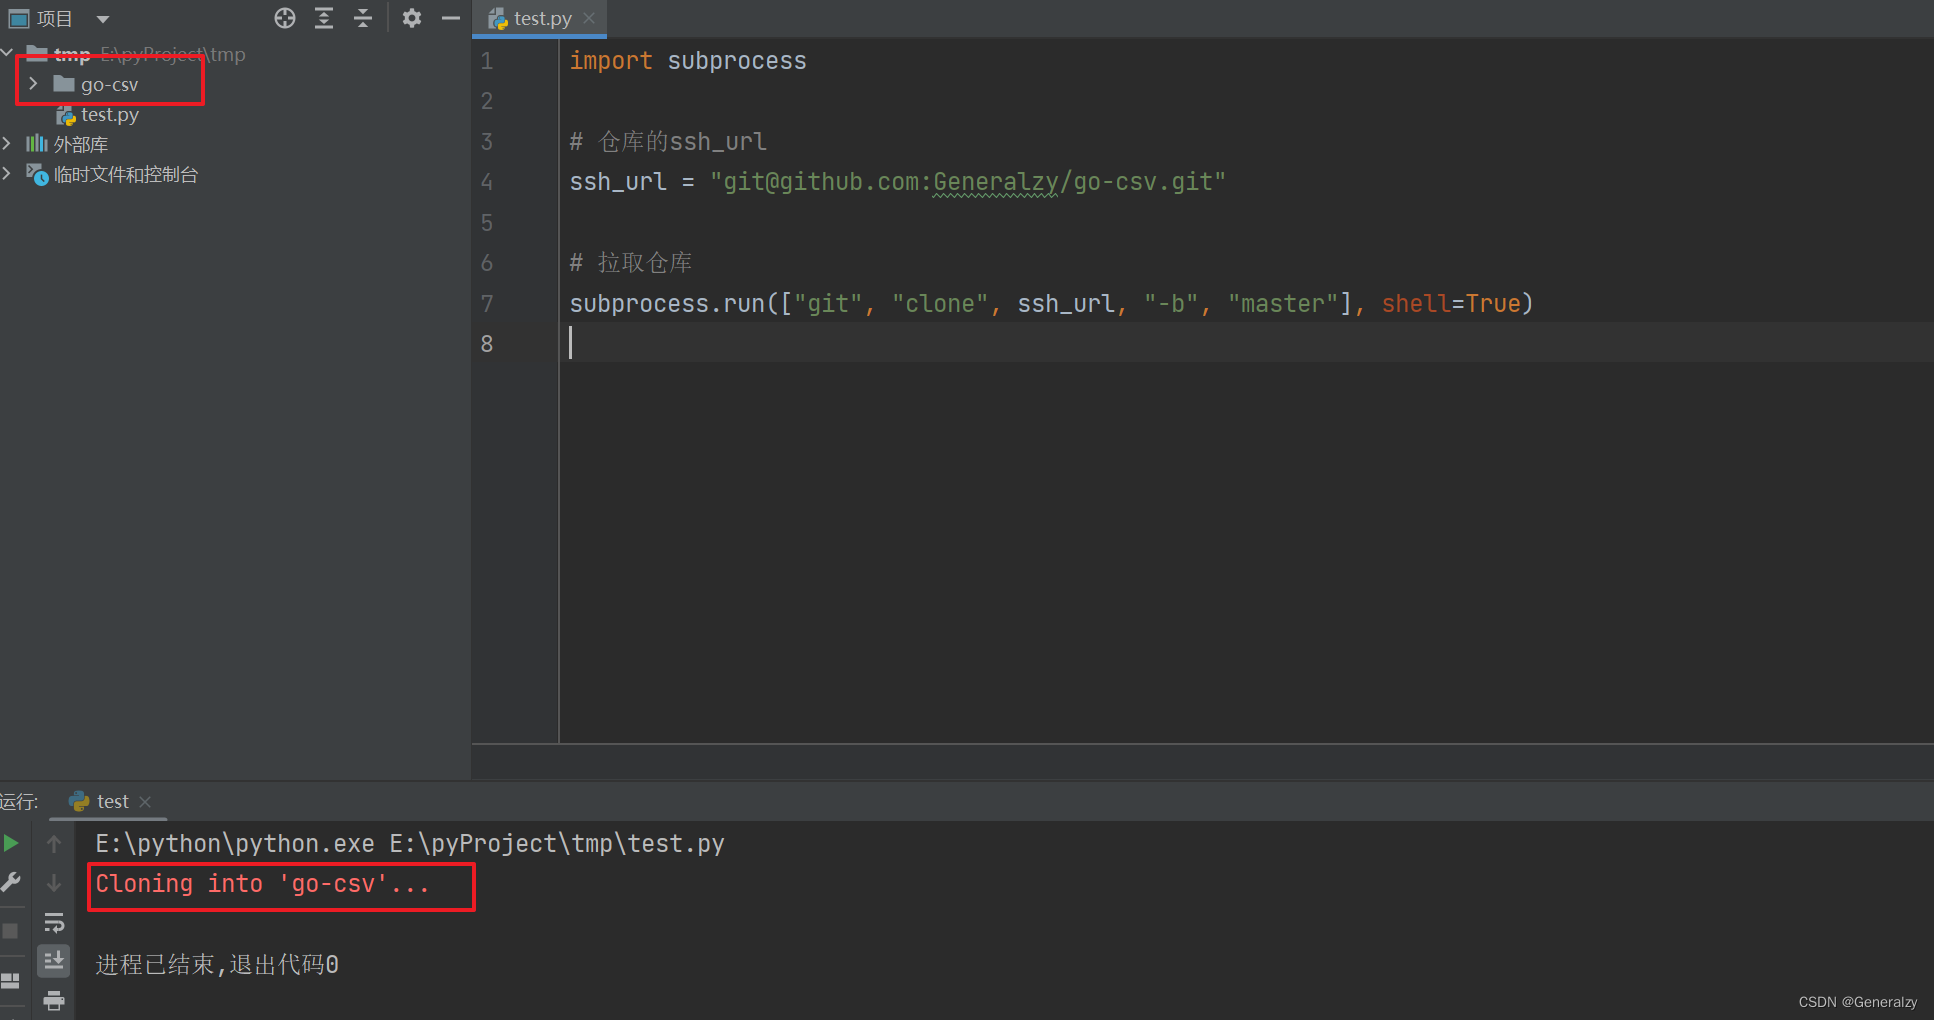
如同手敲git命令一般,就clone到了仓库的代码。
对于仓库的拉取,也是一样的道理
# pull
subprocess.run(["cd", "go-csv", "&&", "git", "pull", "origin", "master"], shell=True)
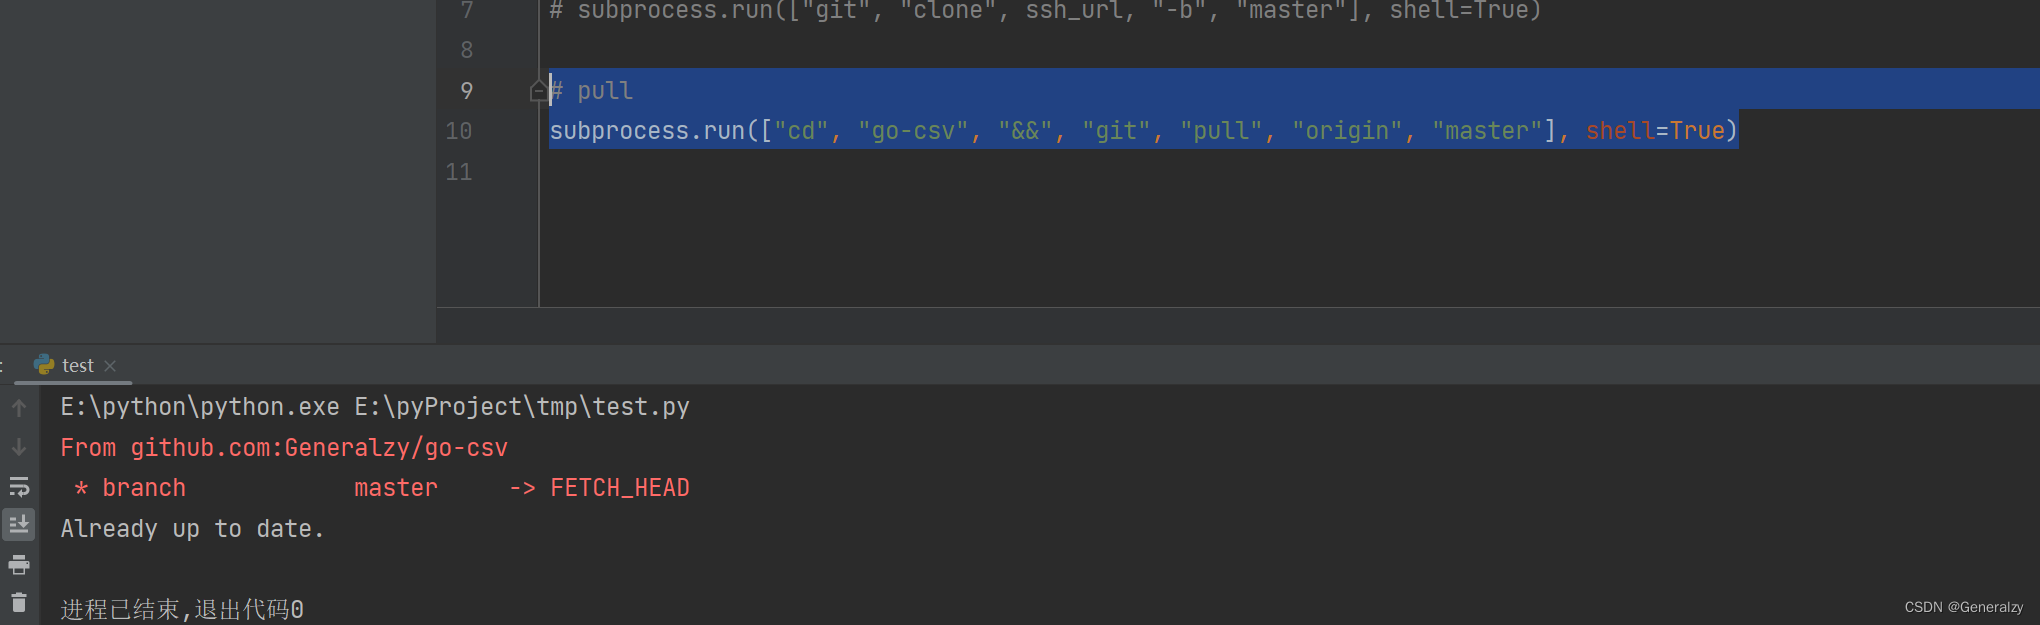
也可以把操作封装到lua,shell,exe等文件进行调用,不再赘述。
三方库——gitPython
gitpython 是一个用于操作Git版本控制系统的Python库。它提供了一个Pythonic的API,可以让你在Python中轻松地执行各种Git操作,例如克隆仓库、提交代码、分支管理等。
以下是一些 gitpython 的基本用法和功能:
-
克隆仓库:
from git import Repo repo_url = "https://github.com/username/repository.git" local_path = "/path/to/local/repository" repo = Repo.clone_from(repo_url, local_path) -
打开现有仓库:
from git import Repo local_path = "/path/to/local/repository" repo = Repo(local_path) -
获取仓库信息:
repo_url = repo.remote().url branch_name = repo.active_branch.name -
查看当前分支的提交历史:
for commit in repo.iter_commits(): print(f"{commit.hexsha} {commit.message}") -
提交代码:
index = repo.index index.add(["file1.txt", "file2.txt"]) index.commit("Commit message") -
创建和切换分支:
branch = repo.create_head("new_branch") repo.head.reference = branch -
拉取最新代码:
origin = repo.remotes.origin origin.pull() -
推送本地分支到远程:
origin = repo.remotes.origin origin.push() -
查看未提交的更改:
untracked_files = repo.untracked_files modified_files = [item.a_path for item in repo.index.diff(None)] -
检查是否存在未提交的更改:
has_uncommitted_changes = repo.is_dirty(untracked_files=True)
gitpython 提供了许多方便的方法和属性,使得在Python中进行Git操作变得简单而直观。
更多关于 gitpython 的详细信息,可以查阅官方文档:https://gitpython.readthedocs.io。
go
Go语言中有许多用于操作GitHub的包或库,它们提供了与GitHub API 交互的功能,可以用于创建、读取、更新和删除GitHub仓库,管理问题、拉取请求等等。
以下是一些常用的Go语言库,可以用于与GitHub进行交互:
-
go-github: 这是一个由 GitHub 提供的官方 Go 语言库,用于访问 GitHub API。它提供了与 GitHub API 交互的功能,包括创建仓库、管理问题、处理拉取请求等。
-
go-git: 这是一个纯Go实现的Git库,可以用于在Go程序中执行Git操作,包括克隆仓库、提交更改等。虽然它不是直接用于操作GitHub API,但可以在本地操作Git仓库后再与GitHub进行交互。
-
gh: 这是一个命令行工具和Go库,用于与GitHub进行交互。它提供了一个简单的命令行界面,可以用于执行各种GitHub操作。
-
github.com/google/go-github/github: 这是 go-github 库的一部分,提供了对 GitHub API 的类型定义,可以在你的Go程序中使用这些类型来与GitHub API进行交互。
exec.Command调用git
如果只需要执行一些简单的git操作,完全可以使用exec去操作git工具进而达到操作git仓库,如gitlab,github的目的,以下给出一个简单封装:
package main

import (
	"os"
	"os/exec"
)

func GitCommand(args ...string) error {
	// 限制命令为git
	cmd := exec.Command("git", args...)
	// 将结果输出到终端
	cmd.Stdout = os.Stdout
	cmd.Stderr = os.Stderr
	// 执行
	return cmd.Run()
}

// Clone 克隆远程分支(remoteBranch)到本地指定位置
func Clone(ssh, remoteBranch, local string) error {
	return GitCommand("clone", ssh, local, "-b", remoteBranch)
}

func Add(local string, regex string) error {
	if regex == "" {
		regex = "."
	}
	return GitCommand("add", "-C", local, "add", regex)
}

func Commit(local string, commit string) error {
	return GitCommand("commit", "-C", local, "-m", commit)
}

func Push(local string, remoteBranch string, localBranch string) error {
	if remoteBranch != localBranch {
		if err := GitCommand("checkout", "-C", local, "-b", remoteBranch); err != nil {
			return err
		}
	}

	return GitCommand("push", "-C", local, "origin", remoteBranch)
}
以上代码也有一定缺陷,提交到分支的代码会显示全部都改动了。但放到compare beyond中对比又并没有改变。
go-git v5调用git
使用go-git v5进行操作:
仓库地址:https://github.com/go-git/go-git
开启go module后引入:
import "github.com/go-git/go-git/v5" // with go modules enabled (GO111MODULE=on or outside GOPATH)
然后执行go mod tidy就可以自动下载最新版的go-git
给出简单使用方法:
func main() {
	// 克隆仓库
	cloneURL := "https://github.com/example_user/example_repo.git"
	destinationPath := "/path/to/clone/destination"

	_, err := git.PlainClone(destinationPath, false, &git.CloneOptions{
		URL: cloneURL,
	})

	if err != nil {
		fmt.Println("Clone failed:", err)
		return
	}

	// 在仓库中添加文件
	repo, err := git.PlainOpen(destinationPath)
	if err != nil {
		fmt.Println("Open repository failed:", err)
		return
	}

	wt, err := repo.Worktree()
	if err != nil {
		fmt.Println("Worktree failed:", err)
		return
	}

	// 创建一个新文件
	file, err := os.Create(destinationPath + "/new_file.txt")
	if err != nil {
		fmt.Println("Create file failed:", err)
		return
	}
	file.Close()

	// 将新文件添加到暂存区
	_, err = wt.Add("new_file.txt")
	if err != nil {
		fmt.Println("Add failed:", err)
		return
	}

	// 提交到本地仓库
	commit, err := wt.Commit("Initial commit", &git.CommitOptions{
		Author: &object.Signature{
			Name:  "Your Name",
			Email: "your.email@example.com",
			When:  object.TimeNow(),
		},
	})
	if err != nil {
		fmt.Println("Commit failed:", err)
		return
	}

	fmt.Println("Commit Hash:", commit)

	// 推送到远程仓库
	remoteName := "origin"
	remoteURL := "https://github.com/example_user/example_repo.git"
	auth := &http.BasicAuth{
		Username: "your_username",
		Password: "your_password",
	}

	err = repo.Push(&git.PushOptions{
		RemoteName: remoteName,
		Auth:       auth,
	})
	if err != nil {
		fmt.Println("Push failed:", err)
		return
	}

	fmt.Println("Push successful")
}
另外,如果要使用ssh链接进行操作,需要添加ssh的key, go-git定义了一个public key结构体进行存储,但实际上要传入的是私钥,而不是公钥。
实例
监控某个仓库的更新状态
为了能够获取github上的项目的更新时间,我们需要调用github的一个API(参考:https://docs.github.com/zh/rest/repos/repos?apiVersion=2022-11-28#get-a-repository):
https://api.github.com/repos/拥有者/仓库名
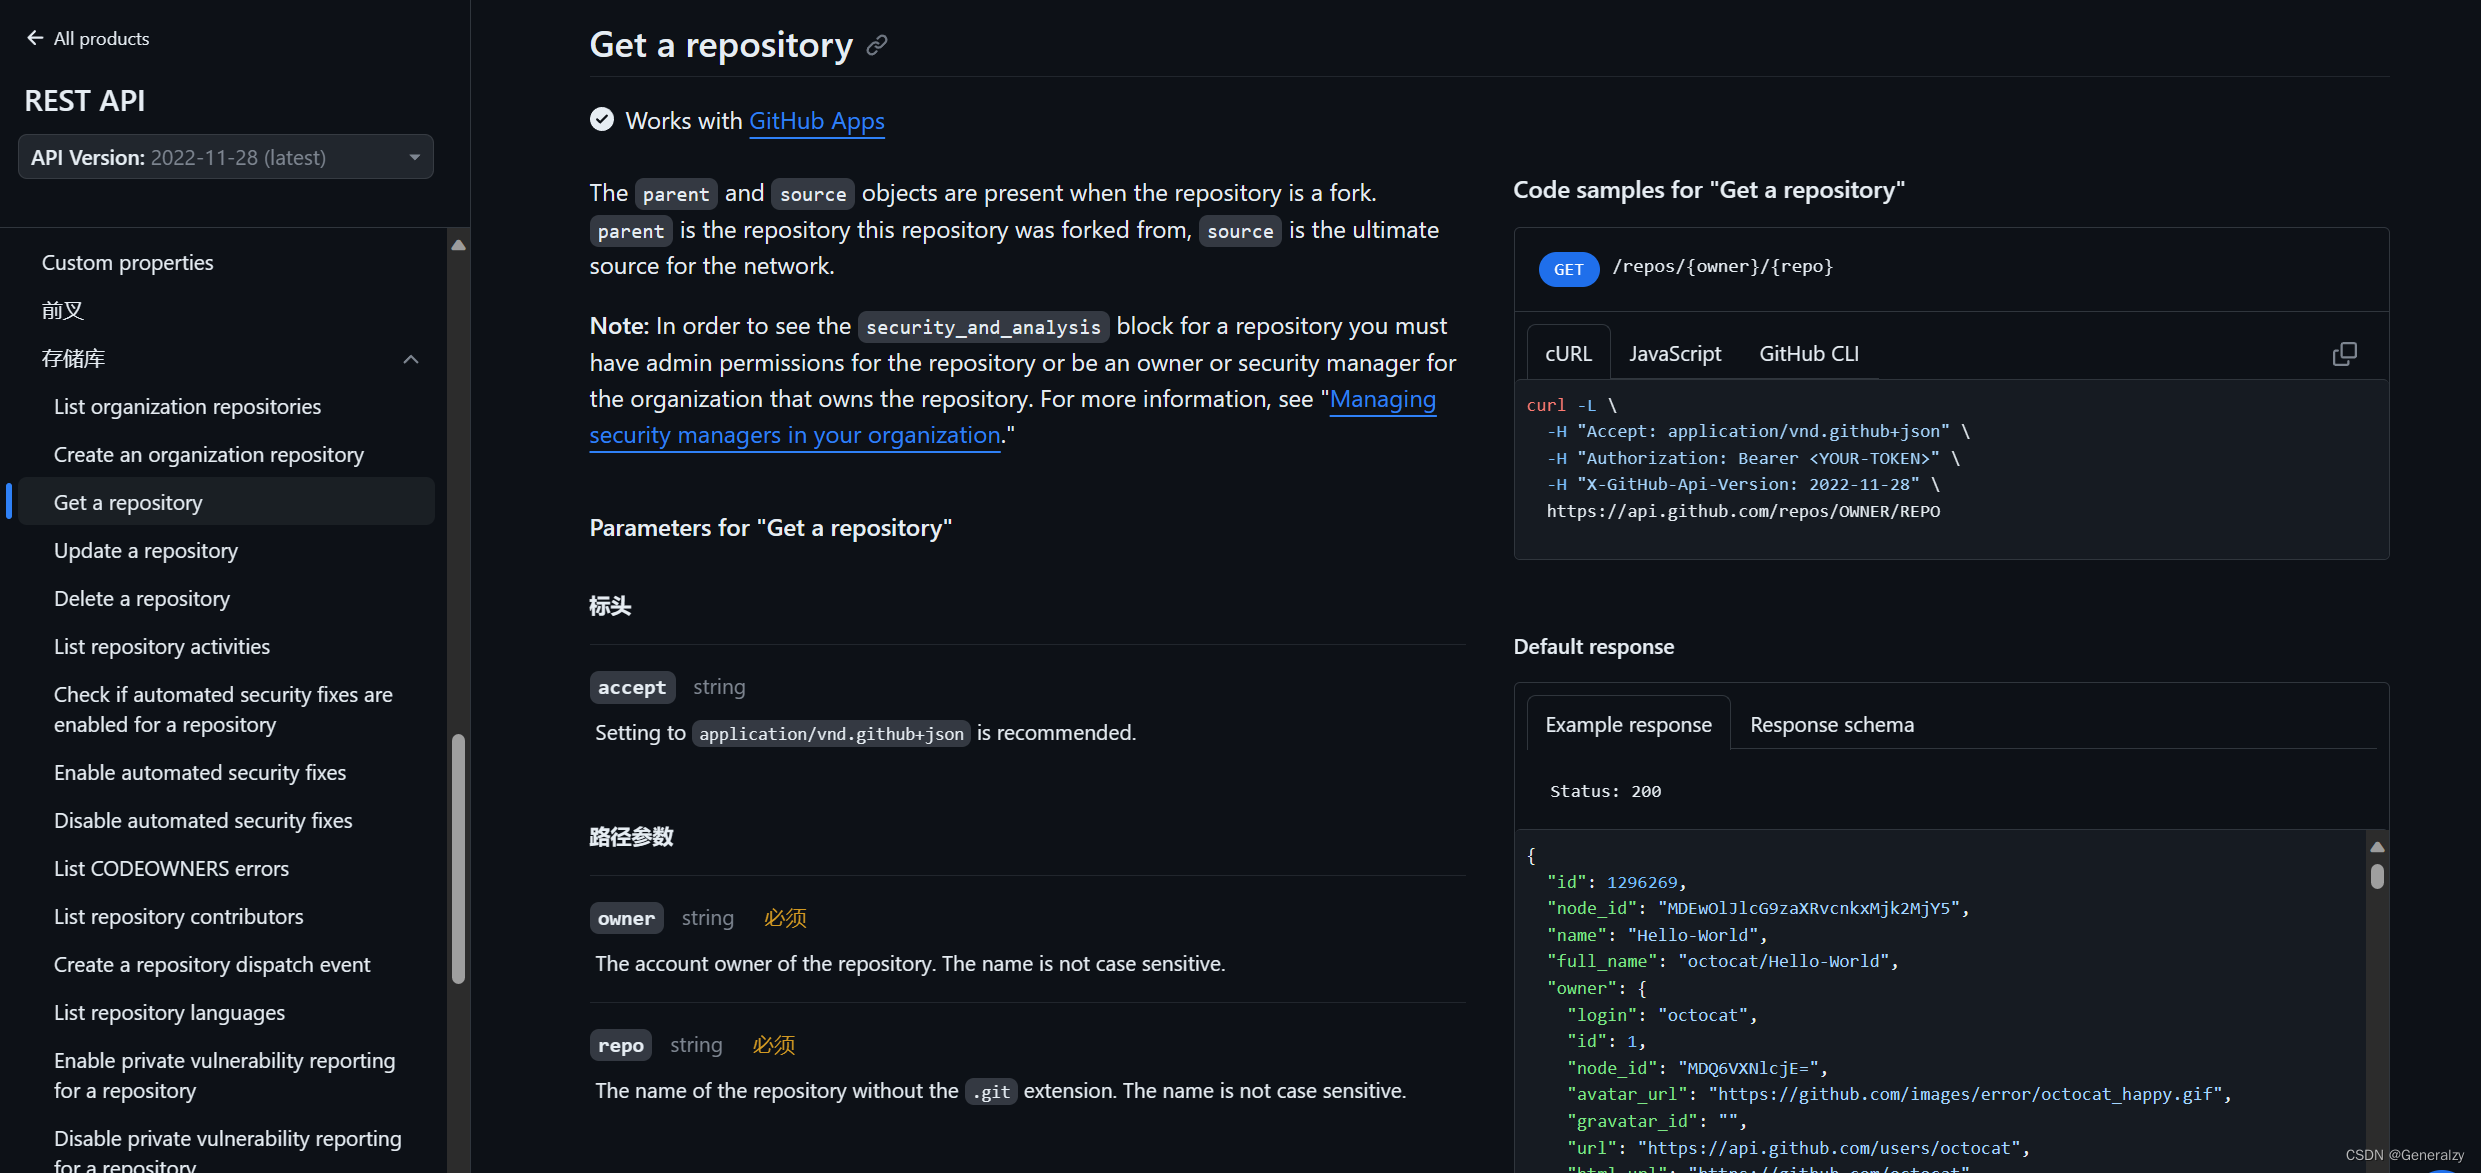
比如调用我的一个仓库:https://github.com/Generalzy/go-csv,API就是:https://api.github.com/repos/Generalzy/go-csv
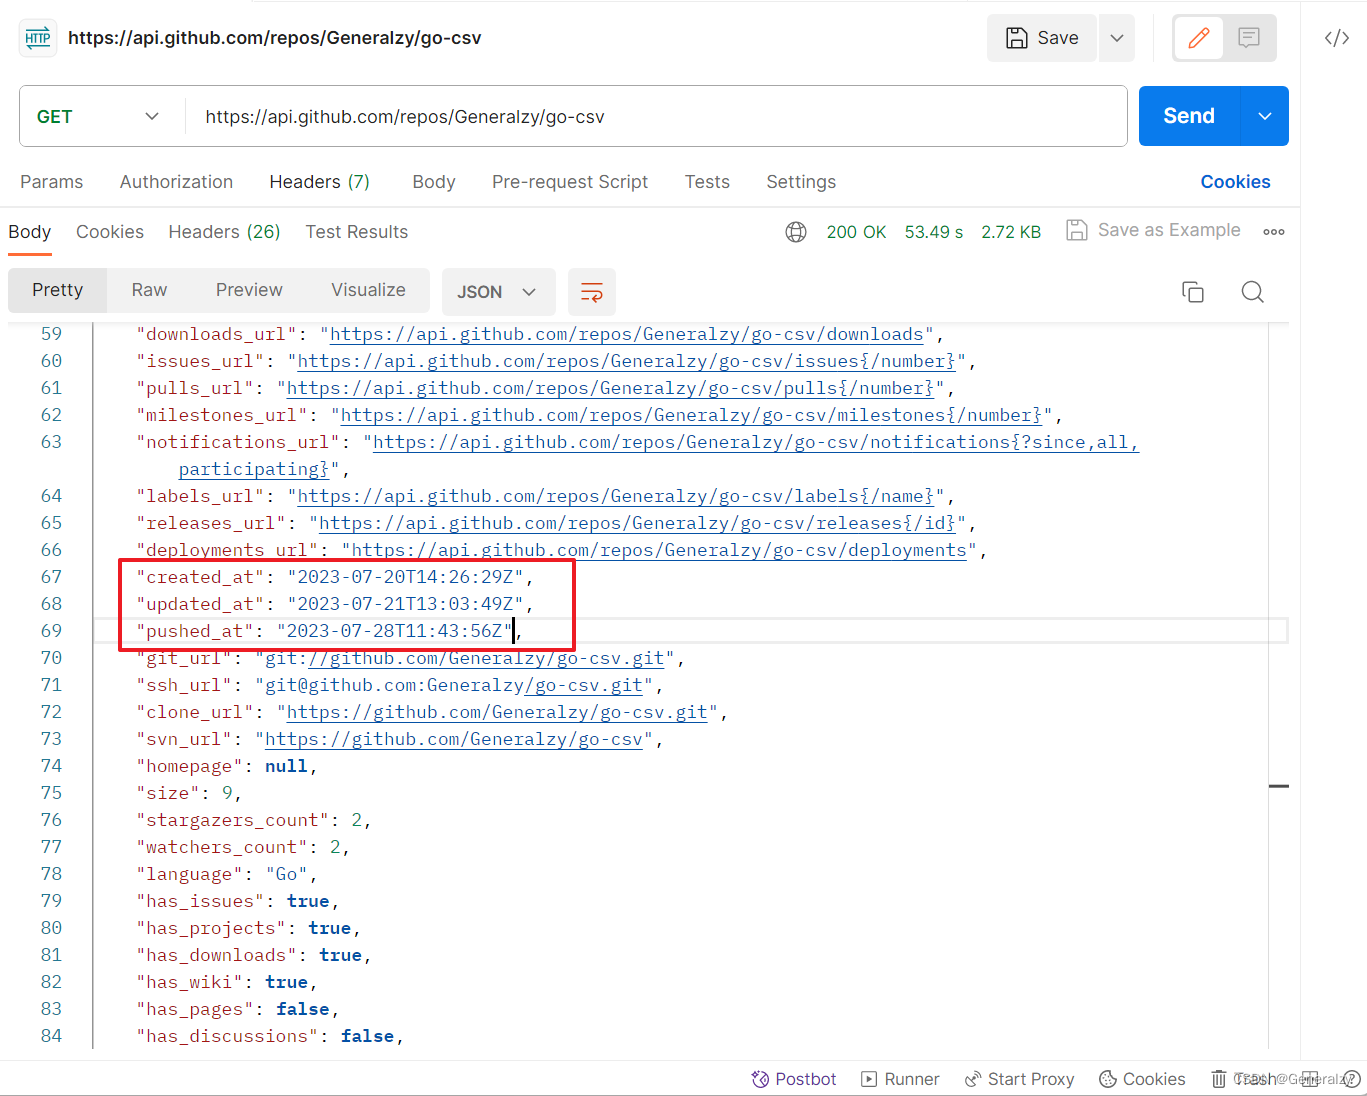
与Github线上项目对比更新时间,将其格式化为10位时间戳,这样对比起来非常方便,最后返回的时候只需要返回是否需要更新即可。
如果有需要更新的项目,让其自动下载:
比如下载zip包:https://github.com/{仓库}/archive/master.zip
import requests

with open("./master.zip","wb") as writer:
	response = requests.get("https://github.com/{仓库}/archive/master.zip",stream=True)
	for chunk in response.iter_content(1024):
		writer.write(chunk)

# 全部解压
with zipfile.Zipfile("master.zip") as XDD:
	XDD.extractall()
或者也可以访问:/repos/{owner}/{repo}/activity
列出存储库更改的详细历史记录,例如推送、合并、强制推送和分支更改,并将这些更改与提交和用户相关联。
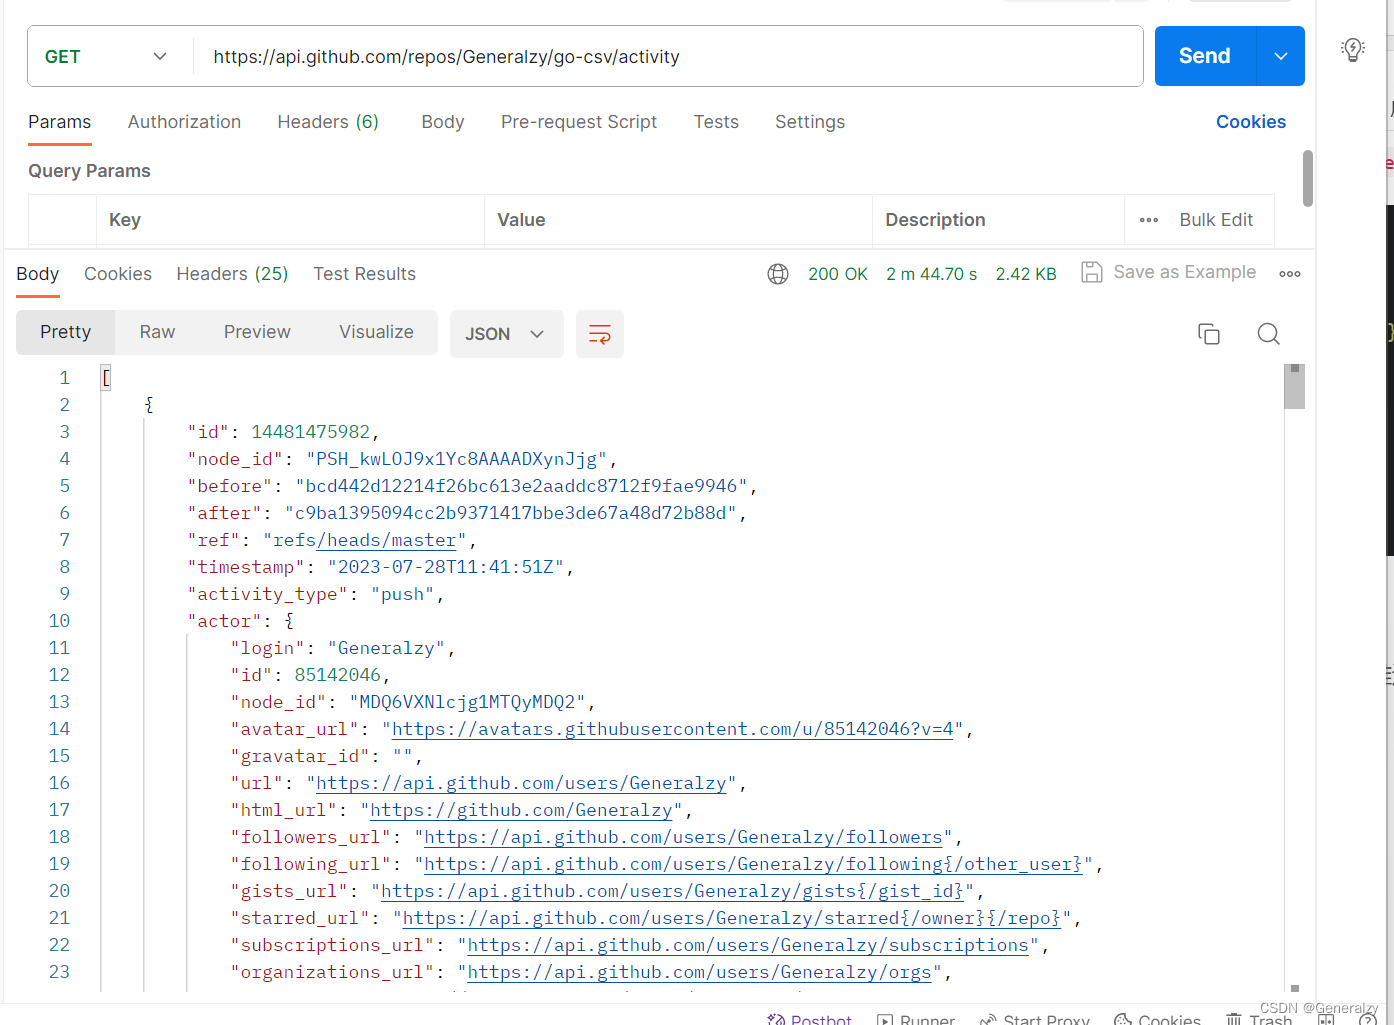
index = 0的记录就是当前仓库最后一条更新的记录。
以某EXP/POC仓库为例,给出源码:
import os
import re
import sys
import ujson
import urllib3
import requests
from git import Repo
from dateutil.parser import parse

urllib3.disable_warnings()

# 存放zip包和json文件的位置
LOCAL_REPOS_DIR = "."

TYPE_POC = "poc"
TYPE_EXP = "exp"

# https://api.github.com/repos/用户名/库名
GITHUB_API_PREFIX = "https://api.github.com/repos"
GITHUB_WEB_PREFIX = "https://github.com"
GITHUB_DOWNLOAD_SUFFIX = "/archive/master.zip"

# CVE/CNVD/CNNVD的正则
CNVD_REGEXP = r"CNVD-\d{4}-\d{4,5}"
CNNVD_REGEXP = r"CNNVD-\d{4}-\d{4,5}"
CVE_REGEXP = r"CVE-\d{4}-\d{4,}"

src = {
    "url": "https://github.com/RhinoSecurityLabs/CVEs",
    "name": "CVEs",
    "type": "exp"
}


def walk(path: str):
    paths = []

    for file in os.walk(path):
        left, mid, right = file

        for filename in right:
            paths.append(os.path.join(left, filename))

    return paths


def dump(obj, fp):
    ujson.dump(obj, fp, ensure_ascii=False, indent=4)


def scan_cve(line: str) -> str:
    result = re.search(CVE_REGEXP, line, re.I | re.M | re.DOTALL)
    return result.group() if result else ""


def scan_cnvd(line: str) -> str:
    result = re.search(CNVD_REGEXP, line, re.I | re.M | re.DOTALL)
    return result.group() if result else ""


def scan_cnnvd(line: str) -> str:
    result = re.search(CNNVD_REGEXP, line, re.I | re.M | re.DOTALL)
    return result.group() if result else ""


def disclosure_parse(path: str, url: str, name: str, type_: str, dst: str):
    """
    CVEs特征:
        1. CVE编号作文件夹
        2. README.md第一行可以作为title
    """
    pass


def compare_and_swap(repo_url: str, repo_name: str):
    # 比较远程和本地的更新时间
    # 如果远程新就更新
    api_url = repo_url.replace(GITHUB_WEB_PREFIX, GITHUB_API_PREFIX)
    response = requests.get(api_url, verify=False)
    if response.status_code == 200:
        data = response.json()

        update_time = data["updated_at"]
        update_time = parse(update_time)
        # 对比本地仓库最后更新时间
        filepath = os.path.join(LOCAL_REPOS_DIR, repo_name)
        if not os.path.exists(filepath):
            # ssh克隆
            clone_url = data["clone_url"]
            # 使用 gitpython 来克隆远程仓库
            Repo.clone_from(clone_url, filepath)
            # 返回更新
            return True

        info = os.stat(filepath)

        local_mtime = int(info.st_mtime)
        remote_mtime = int(update_time.timestamp())
        print(f"remote:{remote_mtime},local:{local_mtime}, remote>local? {remote_mtime > local_mtime}")
        if local_mtime < remote_mtime:
            # 打开本地仓库
            repo = Repo(filepath)
            # 获取远程仓库对象
            origin = repo.remotes.origin
            # 执行拉取操作
            origin.pull()
            return True
        else:
            return False
    else:
        return False


def handler(url: str, name: str, type_: str, dst: str):
    swap = compare_and_swap(url, name)
    if swap:
        filepath = os.path.join(LOCAL_REPOS_DIR, name)
        # 解析仓库
        disclosure_parse(filepath, url, name, type_, dst)


if __name__ == '__main__':
    assert len(sys.argv) > 1, "Hey bro? Do you forget to input json filepath?"

    dst = sys.argv[-1]
    handler(url=src["url"], name=src["name"], type_=src["type"], dst=dst)
不管是结合linux的cron还是k8s的cronjob,都可以监控到这个仓库的变化并且拉取最新代码,并且监控Github仓库可以做成一套类似的模板,只有解析器需要自己自定义,其他代码均可以一键生成。
并且,在此基础上还可以扩展一些通知接口,比如仓库更新后发送邮件给监听者,发送微信或短信消息给监听者…


 被折叠的 条评论
为什么被折叠?
被折叠的 条评论
为什么被折叠?
 到【灌水乐园】发言


