


记录一下根据《Spring实战(第五版)》(人民邮电出版社)所学习的过程
目录
项目初始化
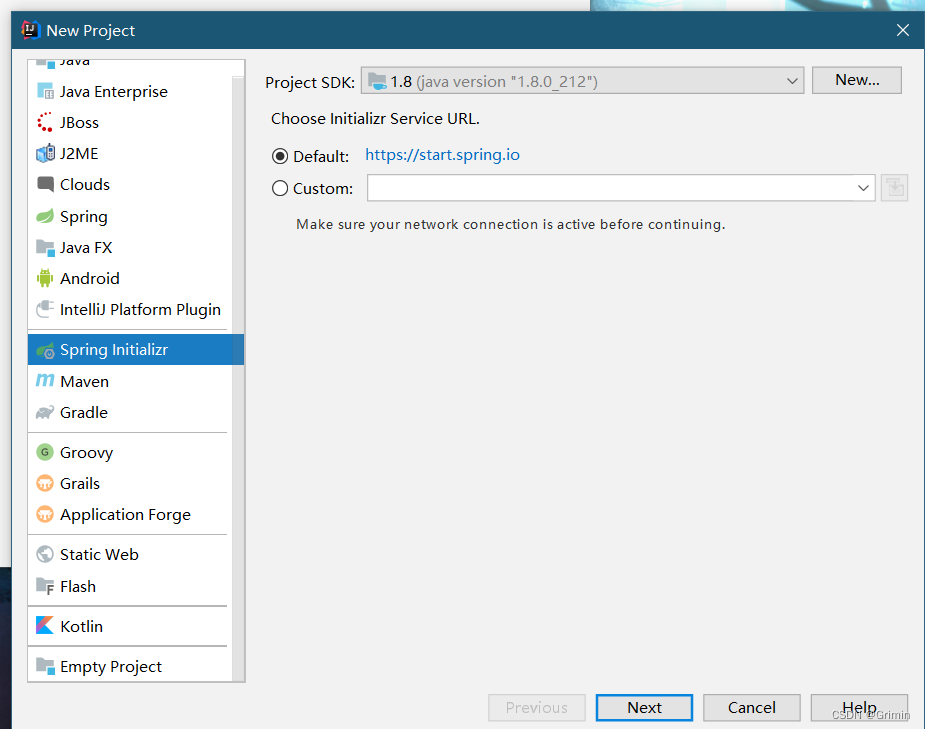
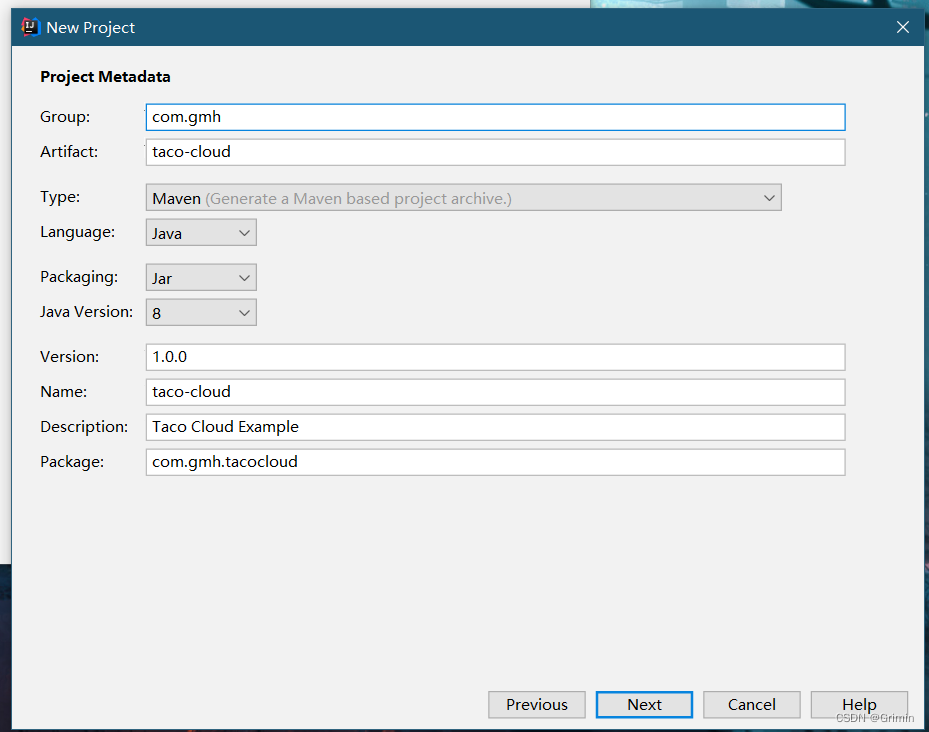
New一个Project,选择Spring Initializr(Spring Initializr提供了生成JVM平台项目代码的类库)
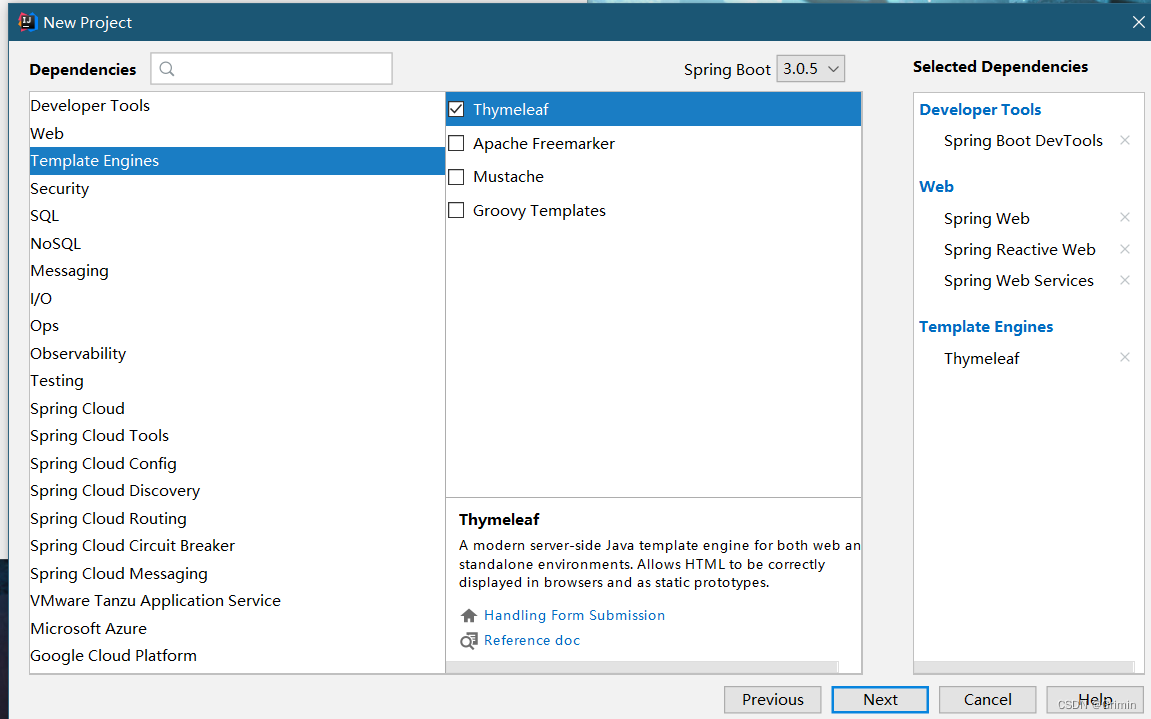
下图为项目依赖页,已选择的依赖将在最左侧
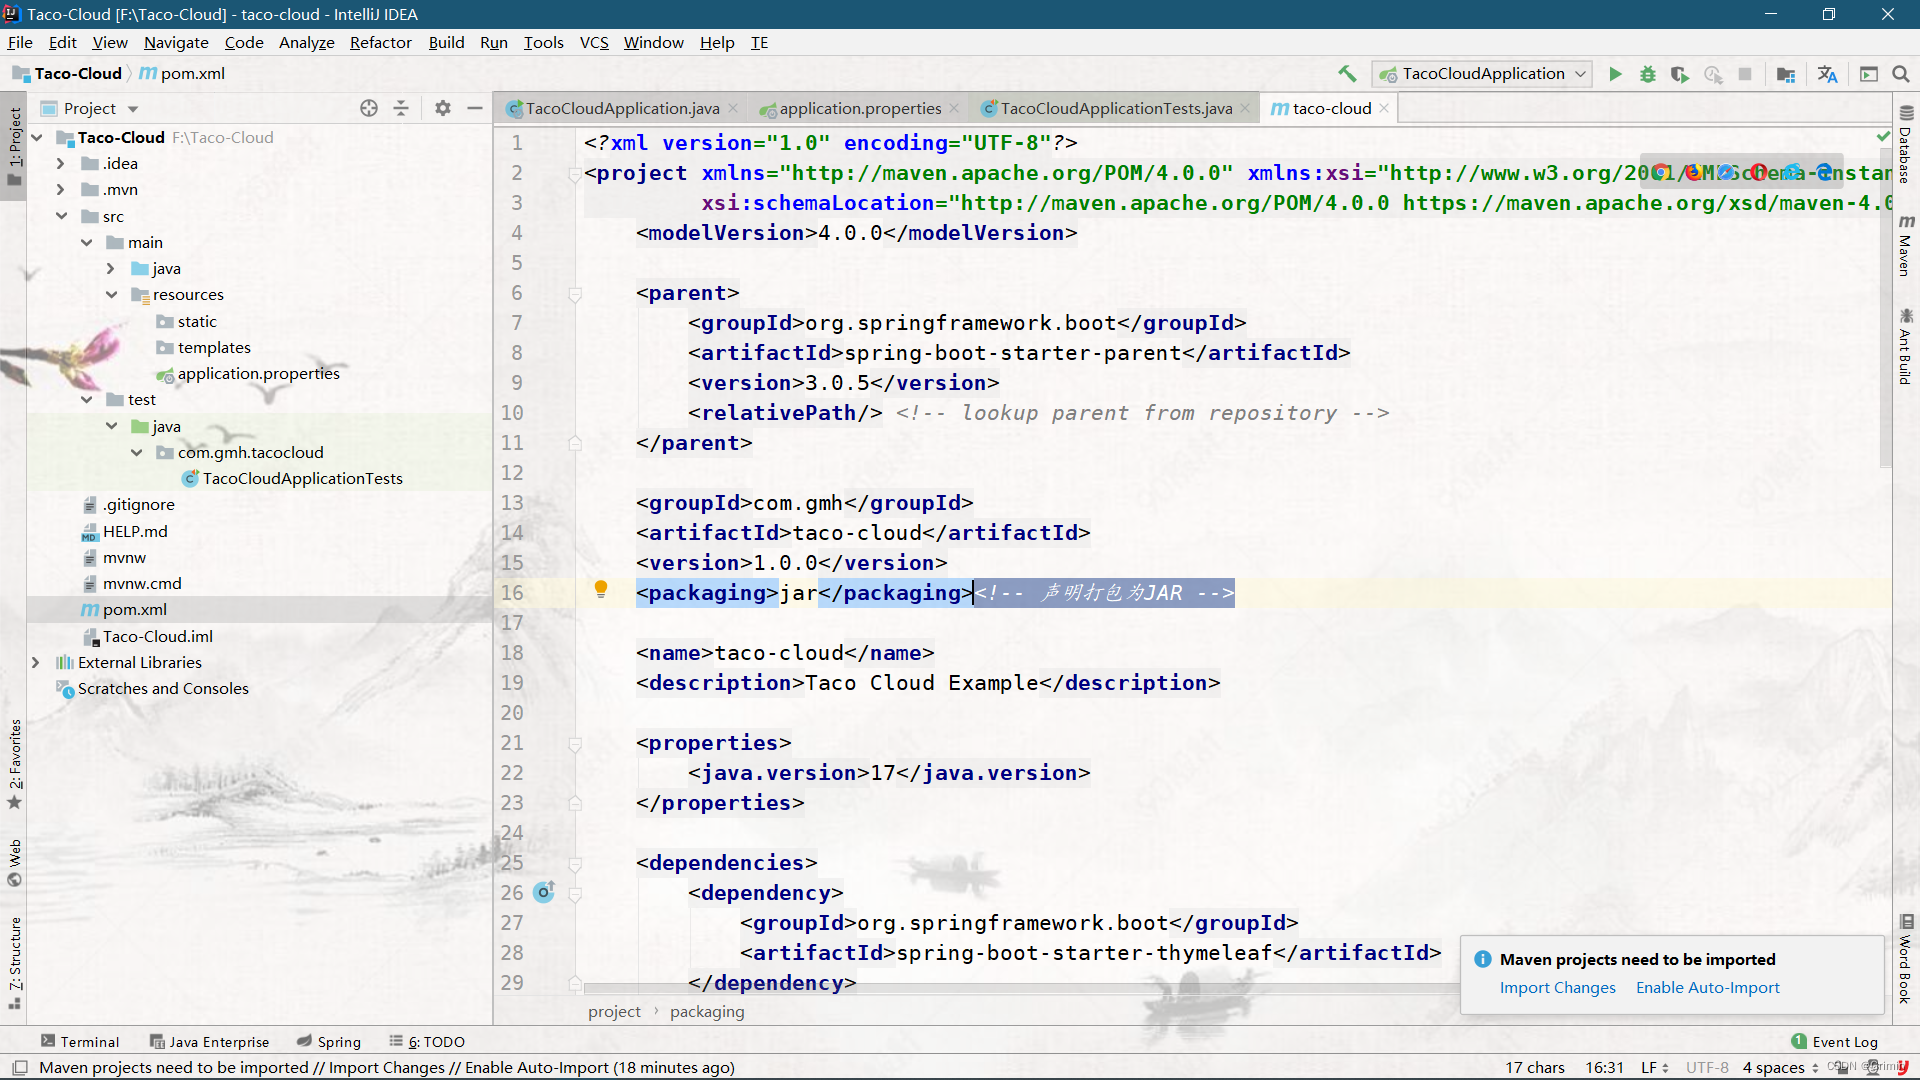
由于声明项目时已使用Maven来进行构建,因此Spring Initislizr所生成的pom.xml文件包含了我们所选择的依赖
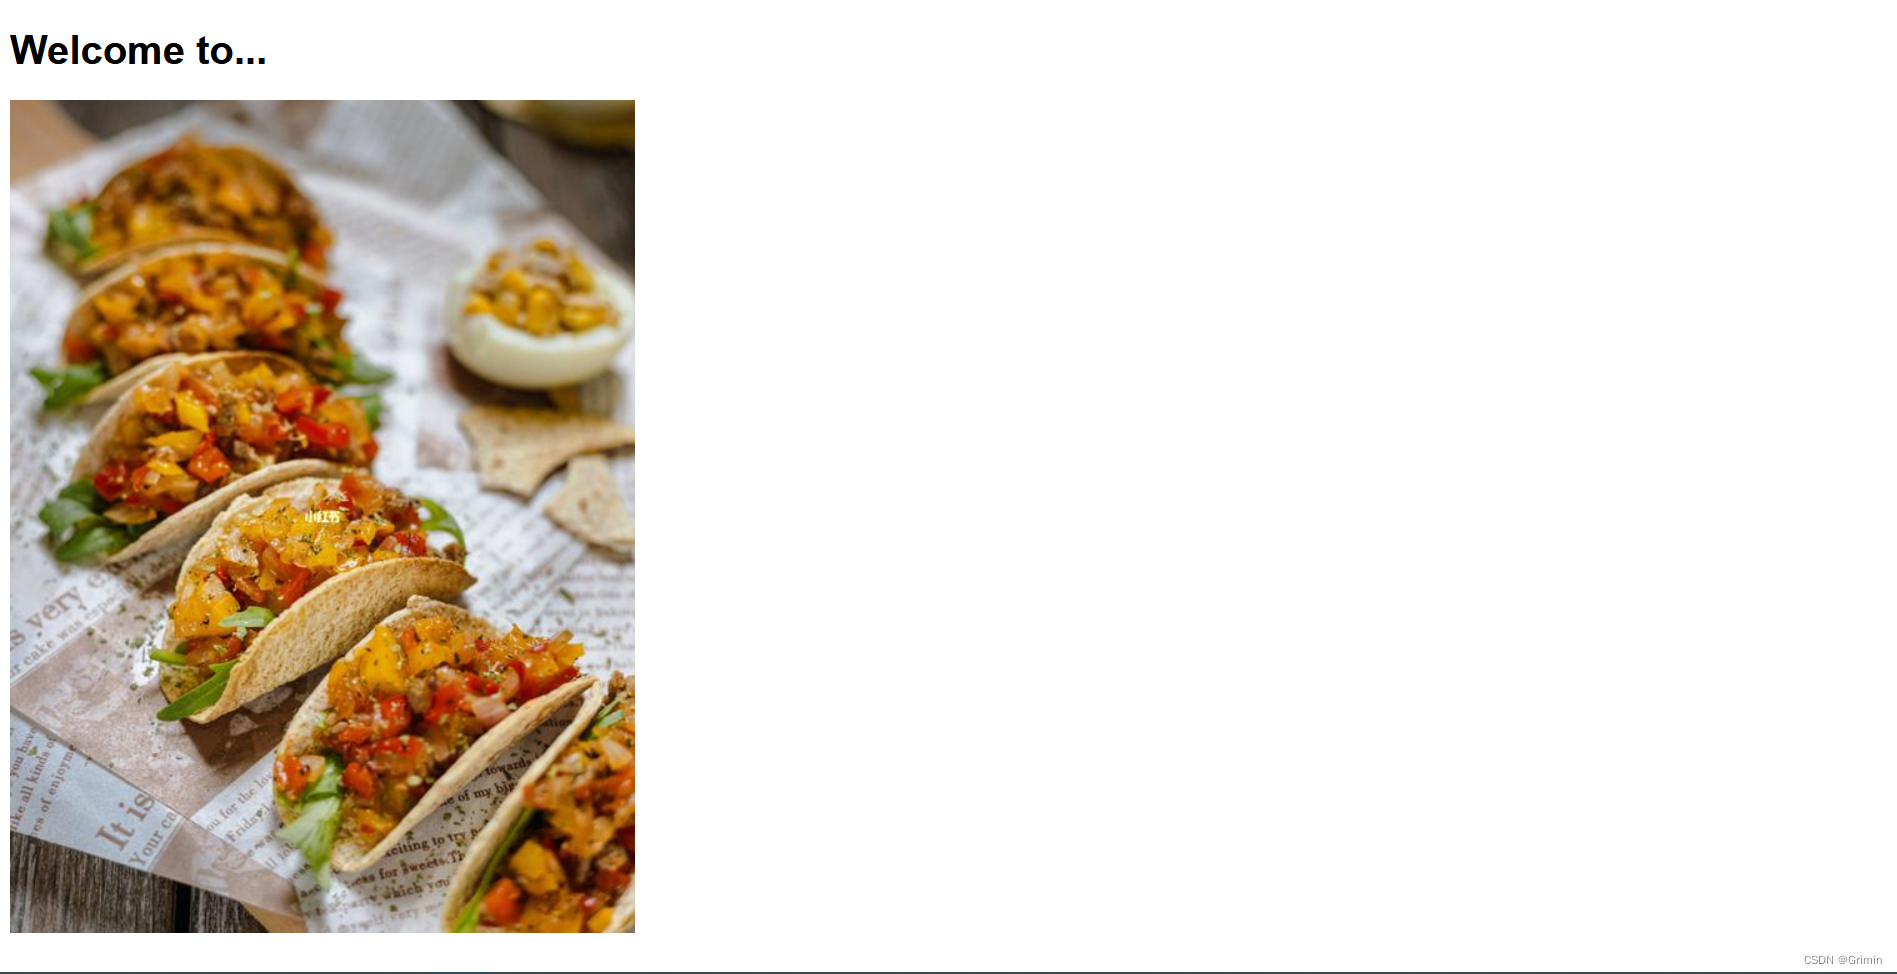
先编写一个名为home.html的thymrlraf视图模板渲染主页(图片资源在resources/static/images目录下;resources目录中static用来存放静态资源,templates用来存放渲染到浏览器的模板资源)
<!DOCTYPE html>
<html xmlns="http://www.w3.org/1999/xhtml"
      xmlns:th="http://www.thymeleaf.org">
<head>
    <meta charset="UTF-8">
    <title>Taco Cloud</title>
</head>
<body>
    <h1>Welcome to...</h1>
    <img th:src="@{/images/hello.jpg}"/>
</body>
</html>
并配套一个HomeController控制器处理主页请求
package com.gmh.tacocloud;

import org.springframework.stereotype.Controller;
import org.springframework.web.bind.annotation.GetMapping;

@Controller//控制器
public class HomeController {
    @GetMapping("/")//处理对根路径"/"的请求
    public String home(){
        return "home";//返回视图名
    }
}
一个HomeControllerTest测试用例(这个测试用例折磨我很久,总是提示无法访问org.springframework.boot.SpringApplication,后来发现是因为我创建时选择了springboot3.0.5版本太高,降了版本到2.7.5就可以了)
package com.gmh.tacocloud;


import org.junit.jupiter.api.Test;
import org.springframework.beans.factory.annotation.Autowired;
import org.springframework.boot.test.autoconfigure.web.servlet.WebMvcTest;
import org.springframework.test.context.junit4.SpringRunner;
import org.springframework.test.web.servlet.MockMvc;

import static org.hamcrest.core.StringContains.containsString;
import static org.springframework.test.web.servlet.request.MockMvcRequestBuilders.get;
import static org.springframework.test.web.servlet.result.MockMvcResultMatchers.*;

@WebMvcTest(HomeController.class)//针对HomeController的Web测试
public class HomeControllerTest {
    @SuppressWarnings("SpringJavaInjectionPointsAutowiringInspection")//由于注入MockMvc时一直提示找不到类型为MockMvc类型的变量,使用该注解可以屏蔽错误警告
    @Autowired
    private MockMvc mockMvc;//注入MockMvc实现了对Http请求的模拟,能够直接使用网络的形式,转换到Controller的调用,这样可以使得测试速度快、不依赖网络环境,而且提供了一套验证的工具,这样可以使得请求的验证统一而且很方便
    @Test
    public void testhome() throws Exception{
        mockMvc.perform(get("/"))//使用MockMvc对象对“/”(根路径)发起Http GET请求
                .andExpect(status().isOk())//预期响应状态为Http200(OK)状态
                .andExpect(view().name("home"))//预期获得视图的逻辑名称为home
                .andExpect(content().string(containsString("Welcome to...")));//预取渲染后的视图应该包含文本“Welcome to...”
                //以上预期若能匹配成功则测试通过,否则不然
    }
}
若想看见浏览器页面也可以,但由于Spring Initializr默认会使用JAR的打包方式(JAR文件相比WAR便于在云平台上运行)所以我们可在IDEA下方一栏Terminal中使用命令行输入mvn spring-boot:run运行项目
在命令行按ctrl+c可终止运行
开发WEB应用
为了让可以给顾客提供可定制的taco,现需要将数据库中可用的配料(ingredient)传递到页面中展现给顾客(因为本节主要搭建Spring的WEB框架因此只通过控制器传递配料信息,暂时不连接数据库后续再做改进)
package com.gmh.tacocloud;

import lombok.Data;
import lombok.RequiredArgsConstructor;


@Data//为了方便生成类构造器和基本方法在pom中导入了Lombok

@RequiredArgsConstructor//所有未初始化的 final 字段都获得一个参数,也可用于Spring依赖注入

public class Ingredient {//构建一个领域类定义taco配料表
    private final String id;
    private final String name;
    private final Type type;

    public static enum Type{
        WRAP/*包装*/,PROTEIN/*蛋白质*/,VEGGIES/*蔬菜*/,CHEESE/*奶酪*/,SAUCE/*酱汁*/
    }
}
创建一个DesignTacoController控制器(需要先创建一个Taco实体类,先不用初始化后面处理post请求再进行修改)
package com.gmh.tacocloud.web;

import com.gmh.tacocloud.Ingredient;
import com.gmh.tacocloud.Taco;
import lombok.extern.slf4j.Slf4j;
import org.springframework.stereotype.Controller;
import org.springframework.ui.Model;
import org.springframework.web.bind.annotation.GetMapping;
import org.springframework.web.bind.annotation.ModelAttribute;
import org.springframework.web.bind.annotation.RequestMapping;

import java.util.Arrays;
import java.util.List;
import java.util.stream.Collectors;

@Slf4j//用作日志输出,添加了该注释之后,就可以在代码中直接使用log.info( )打印日志了
@Controller
@RequestMapping("/design")//处理路径为“/design”的HTTP GET请求
public class DesignTacoController {
    @ModelAttribute
    public void addIngredientsToModel(Model model){
        List<Ingredient> ingredients = Arrays.asList(
                new Ingredient("FLTO","Flour Tortilla 面粉薄烙饼", Ingredient.Type.WRAP),
                new Ingredient("COTO","Corn Tortilla 玉米粉薄烙饼", Ingredient.Type.WRAP),
                new Ingredient("GRBF","Ground Beef 碎牛肉", Ingredient.Type.PROTEIN),
                new Ingredient("CARN","Carnitas 猪肉馅", Ingredient.Type.PROTEIN),
                new Ingredient("TMTO","Diced Tomatoes 蕃茄丁", Ingredient.Type.VEGGIES),
                new Ingredient("LETC","Lettuce 生菜", Ingredient.Type.VEGGIES),
                new Ingredient("CHED","Cheddar 切达干酪", Ingredient.Type.CHEESE),
                new Ingredient("JACK","Monterrey Jack 蒙德勒杰克奶酪", Ingredient.Type.CHEESE),
                new Ingredient("SLSA","Salsa 辣番茄酱", Ingredient.Type.SAUCE),
                new Ingredient("SRCR","Sour Cream 酸奶油", Ingredient.Type.SAUCE)
        );

                Ingredient.Type[] types = Ingredient.Type.values();
        for (Ingredient.Type type :types) {
            System.out.println(type.toString().toLowerCase());
            System.out.println(filterByType(ingredients,type));
            model.addAttribute(type.toString().toLowerCase(),filterByType(ingredients,type));
        }
    }

    @GetMapping
    public String showDesignForm(Model model){
        model.addAttribute("taco",new Taco());
        addIngredientsToModel(model);
        return "design";
    }

    private Iterable<Ingredient> filterByType(List<Ingredient> ingredients, Ingredient.Type type){
        return ingredients.stream().filter(x -> x.getType().equals(type)).collect(Collectors.toList());
    }
}
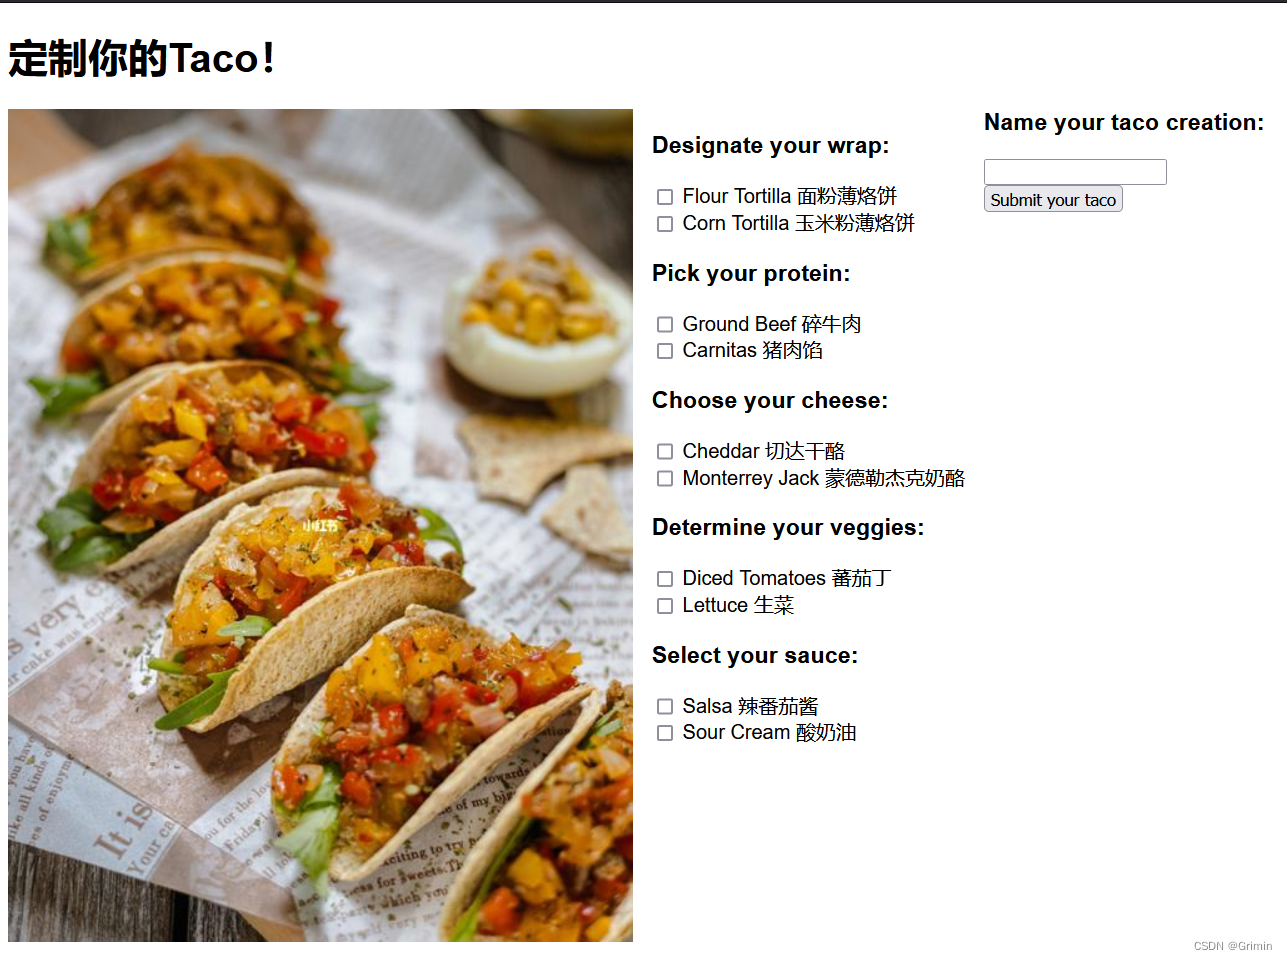
创建design视图展现给用户(给自己taco命名的那个input框书上用的是th:field="*{name}",不知道为什么我用会报错,改成th:name="name" th:id="name"就可以,两者是等价的)
<!DOCTYPE html>
<html xmlns="http://www.w3.org/1999/xhtml"
      xmlns:th="http://www.thymeleaf.org">
<head>
    <meta charset="UTF-8">
    <title>Taco Cloud</title>
    <style>
        .grid{
            float:left;
            width: auto;
            padding-right: 15px;
            padding-left: 15px;
        }
    </style>
</head>
<body>
<h1>定制你的Taco!</h1>
<img style="float: left" th:src="@{/images/taco.jpg}">
<form method="POST" th:object="${design}">
    <div class="grid">
        <div class="ingredient-group" id="wraps">
            <h3>Designate your wrap:</h3>
            <div th:each="ingredient : ${wrap}">
                <input name="ingredients" type="checkbox" th:value="${ingredient.id}">
                <span th:text="${ingredient.name}">INGREDIENT</span><br/>
            </div>
        </div>

        <div class="ingredient-group" id="proteins">
            <h3>Pick your protein:</h3>
            <div th:each="ingredient : ${protein}">
                <input name="ingredients" type="checkbox" th:value="${ingredient.id}">
                <span th:text="${ingredient.name}">INGREDIENT</span><br/>
            </div>
        </div>

        <div class="ingredient-group" id="cheeses">
            <h3>Choose your cheese:</h3>
            <div th:each="ingredient : ${cheese}">
                <input name="ingredients" type="checkbox" th:value="${ingredient.id}">
                <span th:text="${ingredient.name}">INGREDIENT</span><br/>
            </div>
        </div>

        <div class="ingredient-group" id="veggies">
            <h3>Determine your veggies:</h3>
            <div th:each="ingredient : ${veggies}">
                <input name="ingredients" type="checkbox" th:value="${ingredient.id}">
                <span th:text="${ingredient.name}">INGREDIENT</span><br/>
            </div>
        </div>

        <div class="ingredient-group" id="sauces">
            <h3>Select your sauce:</h3>
            <div th:each="ingredient : ${sauce}">
                <input name="ingredients" type="checkbox" th:value="${ingredient.id}">
                <span th:text="${ingredient.name}">INGREDIENT</span><br/>
            </div>
        </div>
    </div>

    <div>
        <h3>Name your taco creation:</h3>
        <input type="text" th:name="name" th:id="name"/>
        <br/>

        <button>Submit your taco</button>
    </div>
</form>
</body>
</html>
启动项目成功后可看到如下效果:
为了处理taco设计的表单提交,回到DesignTacoController使用@PostMapping来处理POST请求
@PostMapping
    public String processDesign(Taco design){
        log.info("Processing design(设计过程): "+design);
        return "redirect:/orders/current";
    }
上面方法重定向到了一个订单页面,因此现在需要个新的处理taco订单的控制器
package com.gmh.tacocloud.web;

import com.gmh.tacocloud.Order;
import lombok.extern.slf4j.Slf4j;
import org.springframework.stereotype.Controller;
import org.springframework.ui.Model;
import org.springframework.web.bind.annotation.GetMapping;
import org.springframework.web.bind.annotation.RequestMapping;

@Slf4j
@Controller
@RequestMapping("/orders")
public class OrderController {
    @GetMapping("/current")
    public String orderForm(Model model){
        model.addAttribute("order",new Order());
        return "orderForm";
    }
}
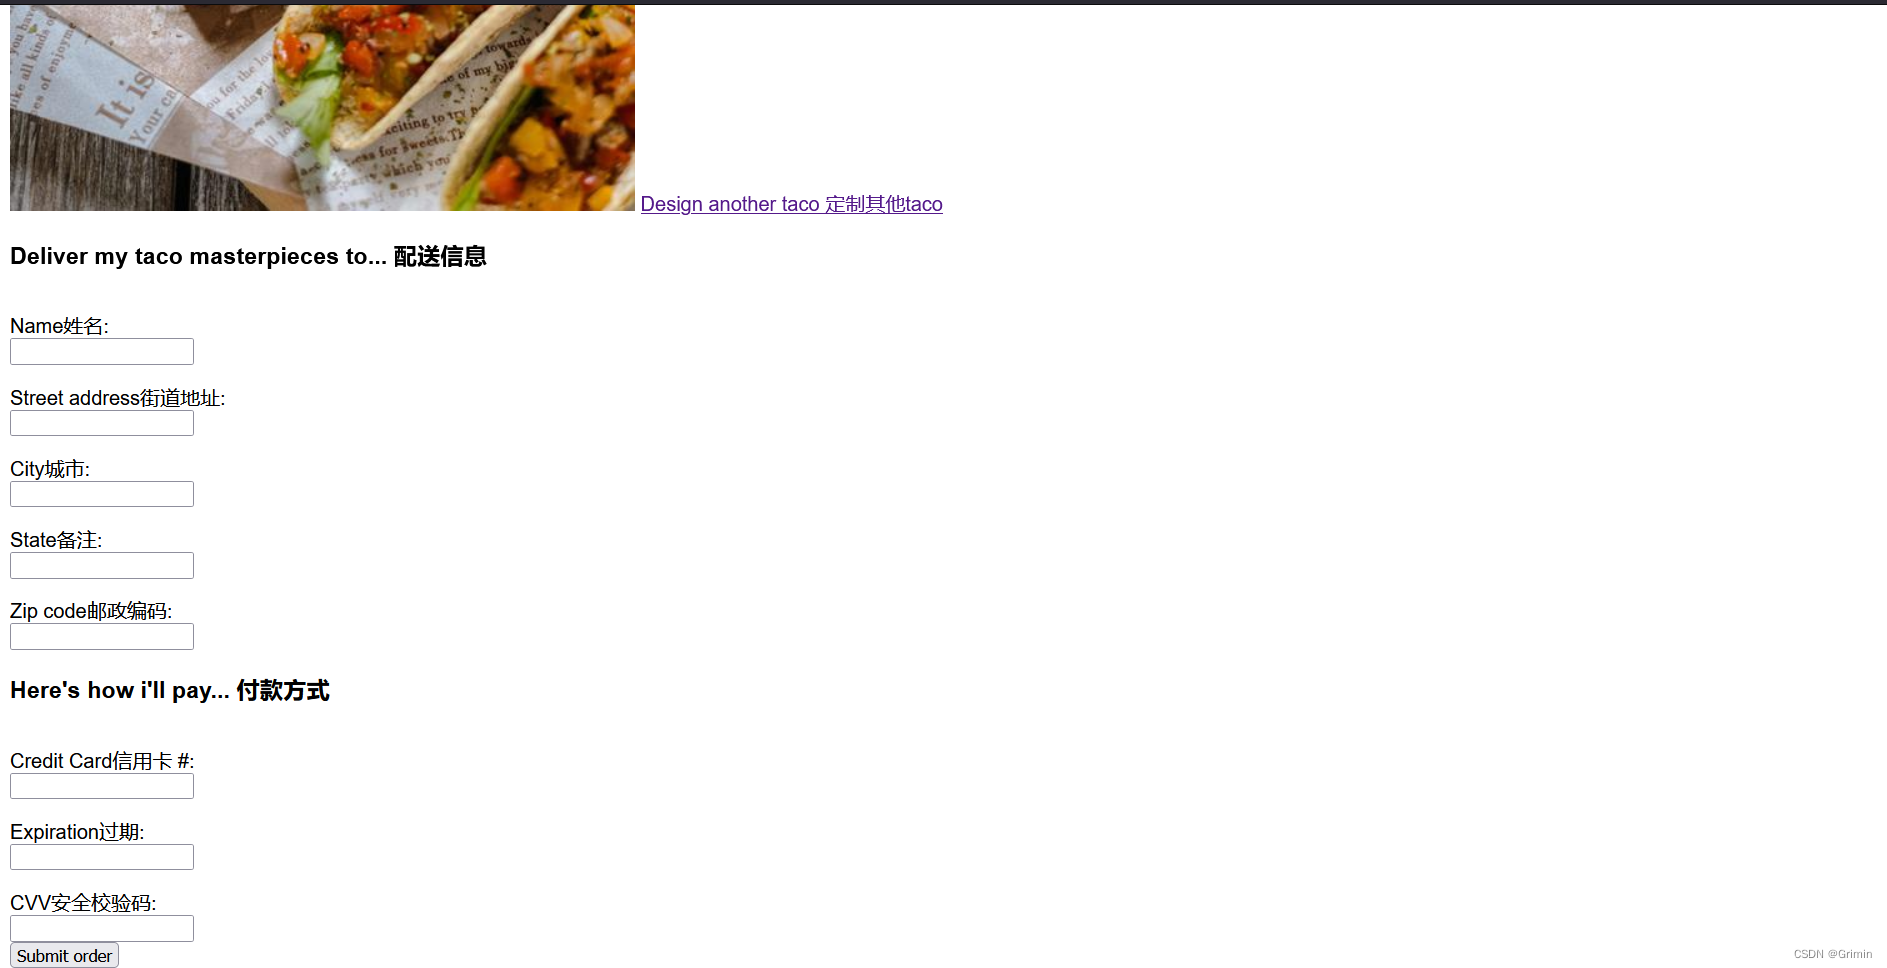
创建一个taco订单的视图页面
<!DOCTYPE html>
<html xmlns="http://www.w3.org/1999/xhtml" xmlns:th="http://www.thymeleaf.org">
<head>
    <meta charset="UTF-8">
    <title>Taco Cloud</title>
    <style>
        label{
            display: block;
            width: 200px;
            padding-top: 15px;
        }
        form{}
    </style>
</head>

<body>
    <form method="post" th:action="@{/orders}" th:object="${order}">
        <h1>Order your taco creations!订购您的墨西哥玉米卷!</h1>
        <img th:src="@{/images/taco.jpg}">
        <a th:href="@{/design}" id="another">Design another taco 定制其他taco</a><br>

        <div th:if="${#fields.hasErrors()}">
            <span class="validationError">
                Please correct the problems below and resubmit 请改正以下问题并重新提交
            </span>
        </div>
        <h3>Deliver my taco masterpieces to... 配送信息</h3>
        <label for="name">Name姓名: </label><input type="text" th:name="name" th:id="name">
        <br>

        <label for="street">Street address街道地址: </label><input type="text" th:name="street" th:id="street">
        <br>

        <label for="city">City城市: </label><input type="text" th:name="city" th:id="city">
        <br>

        <label for="state">State备注: </label><input type="text" th:name="state" th:id="state">
        <br>

        <label for="zip">Zip code邮政编码: </label><input type="text" th:name="zip" th:id="zip">
        <br/>

        <h3>Here's how i'll pay... 付款方式</h3>
        <label for="ccNumber">Credit Card信用卡 #: </label><input type="text" th:name="ccNumber" th:id="ccNumber">
        <br/>

        <label for="ccExpiration">Expiration过期: </label><input type="text" th:name="ccExpiration" th:id="ccExpiration">
        <br/>

        <label for="ccCVV">CVV安全校验码: </label><input type="text" th:name="ccCVV" th:id="ccCVV">
        <br/>

        <input type="submit" value="Submit order">
    </form>

</body>
</html>
回到OrderController中添加一个方法用于处理“/orders”的POST请求
   @PostMapping
    public String processOrder(Order order){
        log.info("Order submitted: "+order);
        return "redirect:/";
    }
创建Order实体类用于接收、传递订单信息
package com.gmh.tacocloud;

public class Order {
    private String name;
    private String street;
    private String city;
    private String state;
    private String zip;
    private String ccNumber;
    private String ccExpiration;
    private String ccCVV;
}
完成后启动项目:
订单页面虽然实现了,但是是不完善的,用户可以随意甚至不填写信息就直接提交,因此需要对表单添加校验功能,接下来将在Taco、Order类上声明校验规则,我们希望Taco的name不为空或null并且希望选中的配料表中至少包含一项,因此使用@NotNull和@Size(注意:SpringBoot2.3开始移除了validation,高版本的SpringBoot需要自己引入validation相关依赖)
package com.gmh.tacocloud;
import lombok.Data;

import javax.validation.constraints.NotNull;
import javax.validation.constraints.Size;
import java.util.List;
@Data
public class Taco {

    @NotNull//不能为 null,但可以为 empty,一般用在 Integer 类型的基本数据类型的非空校验上,而且被其标注的字段可以使用 @size、@Max、@Min 对字段数值进行大小的控制
    @Size(min=3,message = "名称长度必须至少为三个字符")
    private String name;
    @Size(min=1,message = "至少选择一个配料")
    private List<String> ingredients;
}
在Order类上我们只希望用户没有提交空白字段因此可以使用@NotBlank注解,而关于支付字段的验证条件比较复杂需要一些其他的注解来实现
package com.gmh.tacocloud;

import org.hibernate.validator.constraints.CreditCardNumber;

import javax.validation.constraints.Digits;
import javax.validation.constraints.NotBlank;
import javax.validation.constraints.Pattern;

public class Order {
    @NotBlank(message = "必填")//只能作用在接收的 String 类型上,注意是只能,不能为 null,而且调用 trim() 后,长度必须大于 0即:必须有实际字符
    private String name;
    @NotBlank(message = "必填")
    private String street;
    @NotBlank(message = "必填")
    private String city;
    @NotBlank(message = "必填")
    private String state;
    @NotBlank(message = "必填")
    private String zip;
    @CreditCardNumber(message = "不是有效的信用卡号")//信用卡验证
    private String ccNumber;
    @Pattern(regexp = "^(0[1-9]|1[0-2])([1-9][0-9])$",message = "必须遵守MM/YY格式")//做正则表达式验证
    private String ccExpiration;
    @Digits(integer = 3,fraction = 0,message = "无效cvv,必须为三位数")//验证字符串是否是符合指定格式的数字(interger指定整数精度,fraction指定小数精度)
    private String ccCVV;
}
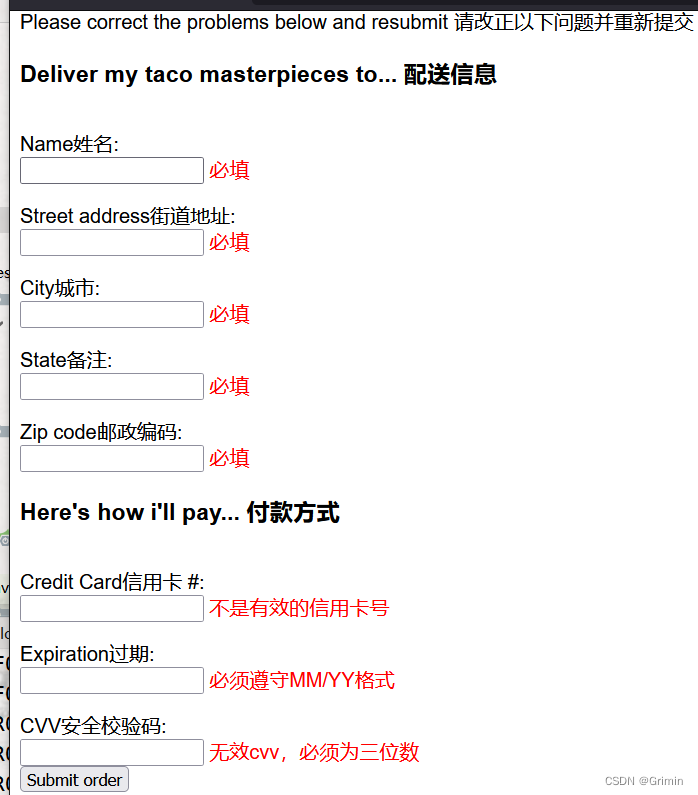
声明完校验规则后还需要在对应控制器的提交方法上添加@Valid对提交的对象进行校验
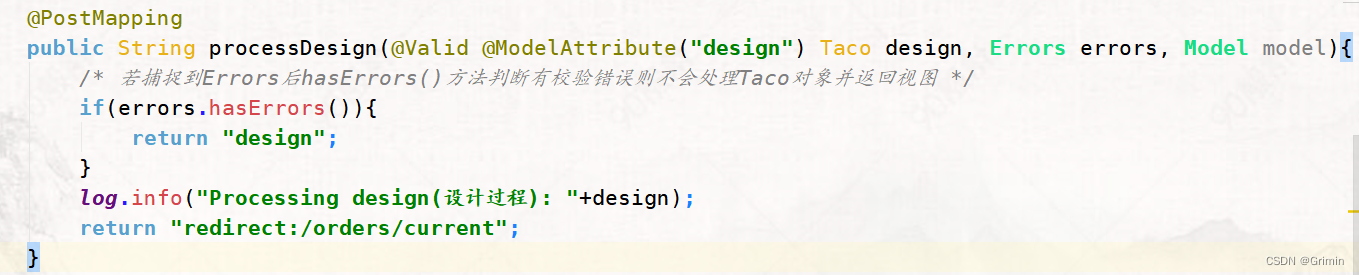
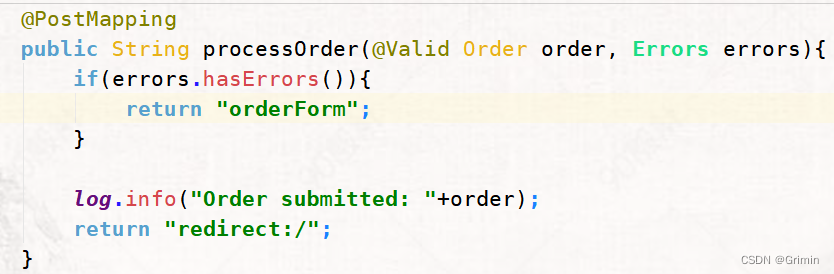
后端校验后若有错误必需向用户提示展现出来,Thymeleaf提供了可以访问Errors对象的方法


运行后效果图如下:
使用数据库
为Taco Cloud应用添加对数据持久化的支持
将对象持久化到数据库通常需要一个字段作为对象的唯一标识,因此现在需要调整对象以适应持久化
接下来尝试一下书本所用的JdbcTemplate实现数据库的读取和写入
在开始使用JdbcTemplate之前,需要将SpringBoot的JDBC starter依赖添加到pom.xml文件中
接下来添加一个存储数据的数据库,书中使用的是H2嵌入式数据库,需要添加以下依赖 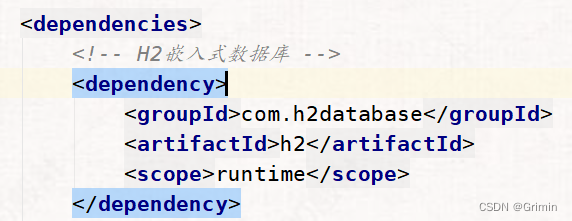
编写一个用于获取和保存Ingredient数据的repository
package com.gmh.tacocloud.JDBCrepository;

import com.gmh.tacocloud.Ingredient;

public interface IngredientRepository {
    Iterable<Ingredient> findAll();//查询所有配料信息,将它们放到一个Ingredient对象集合中
    Ingredient finOne(String id);//根据id查询单个Ingredient
    Ingredient save(Ingredient ingredient);//保存Ingredient对象
}
实现该接口
package com.gmh.tacocloud.data;

import com.gmh.tacocloud.Ingredient;
import com.gmh.tacocloud.jDBCrepository.IngredientRepository;
import org.springframework.beans.factory.annotation.Autowired;
import org.springframework.jdbc.core.JdbcTemplate;
import org.springframework.stereotype.Repository;

import java.sql.ResultSet;
import java.sql.SQLException;

@Repository//添加该注解Spring扫描会自动发现该类并将其初始化为Spring应用上下文中的bean
public class JdbcIngredientRepository implements IngredientRepository {
    private JdbcTemplate jdbc;

    @Autowired
    public JdbcIngredientRepository(JdbcTemplate jdbc){
        this.jdbc=jdbc;
    }
    @Override
    public Iterable<Ingredient> findAll() {
        return jdbc.query("select id,name,type from Ingredient",this::mapRowToIngredient);
    }

    @Override
    public Ingredient finOne(String id) {
        return jdbc.queryForObject("select id,name,type from Ingredient where id=?",this::mapRowToIngredient,id);
    }

    private Ingredient mapRowToIngredient(ResultSet rs,int rowNum) throws SQLException{
        return new Ingredient(rs.getString("id"),rs.getString("name"),Ingredient.Type.valueOf(rs.getString("type")));
    }
    @Override
    public Ingredient save(Ingredient ingredient) {
        jdbc.update("insert into Ingredient(id,name,type) values (?,?,?)",
                ingredient.getId(),ingredient.getName(),ingredient.getType().toString());
        return ingredient;
    }

}
接下来注入到DesignTacoController中代替原来的硬编码方式
package com.gmh.tacocloud.web;

import com.gmh.tacocloud.Ingredient;
import com.gmh.tacocloud.Taco;
import com.gmh.tacocloud.data.JdbcIngredientRepository;
import com.gmh.tacocloud.jDBCrepository.IngredientRepository;
import lombok.extern.slf4j.Slf4j;
import org.springframework.beans.factory.annotation.Autowired;
import org.springframework.context.annotation.Configuration;
import org.springframework.jdbc.core.JdbcTemplate;
import org.springframework.stereotype.Controller;
import org.springframework.ui.Model;
import org.springframework.validation.Errors;
import org.springframework.web.bind.annotation.*;
import com.gmh.tacocloud.Ingredient.Type;
import javax.validation.Valid;
import java.util.ArrayList;
import java.util.Arrays;
import java.util.List;
import java.util.stream.Collectors;

@Slf4j//用作日志输出,添加了该注释之后,就可以在代码中直接使用log.info( )打印日志了
@Controller
@RequestMapping(value = "/design")//处理路径为“/design”的HTTP GET请求
@SessionAttributes("order")
@Configuration
public class DesignTacoController{

    private final IngredientRepository ingredientRepo;


    @Autowired
    public DesignTacoController(IngredientRepository ingredientRepo){
        this.ingredientRepo = ingredientRepo;
    }

   /* @ModelAttribute
    public void addIngredientsToModel(Model model){
        List<Ingredient> ingredients = Arrays.asList(
                new Ingredient("FLTO","Flour Tortilla 面粉薄烙饼", Ingredient.Type.WRAP),
                new Ingredient("COTO","Corn Tortilla 玉米粉薄烙饼", Ingredient.Type.WRAP),
                new Ingredient("GRBF","Ground Beef 碎牛肉", Ingredient.Type.PROTEIN),
                new Ingredient("CARN","Carnitas 猪肉馅", Ingredient.Type.PROTEIN),
                new Ingredient("TMTO","Diced Tomatoes 蕃茄丁", Ingredient.Type.VEGGIES),
                new Ingredient("LETC","Lettuce 生菜", Ingredient.Type.VEGGIES),
                new Ingredient("CHED","Cheddar 切达干酪", Ingredient.Type.CHEESE),
                new Ingredient("JACK","Monterrey Jack 蒙德勒杰克奶酪", Ingredient.Type.CHEESE),
                new Ingredient("SLSA","Salsa 辣番茄酱", Ingredient.Type.SAUCE),
                new Ingredient("SRCR","Sour Cream 酸奶油", Ingredient.Type.SAUCE)
        );

                Ingredient.Type[] types = Ingredient.Type.values();
        for (Ingredient.Type type :types) {
            model.addAttribute(type.toString().toLowerCase(),filterByType(ingredients,type));
        }
    }*/

    @GetMapping
    public String showDesignForm(Model model){
        List<Ingredient> ingredients = new ArrayList<>();
        ingredientRepo.findAll().forEach(i -> ingredients.add(i));
        Type types[] = Ingredient.Type.values();
        for (Type t : types) {
            model.addAttribute(t.toString().toLowerCase(),filterByType(ingredients,t));
            System.out.println(t.toString().toLowerCase());
            System.out.println(filterByType(ingredients,t));
        }
        return "design";
    }

    private Iterable<Ingredient> filterByType(List<Ingredient> ingredients, Ingredient.Type type){
        return ingredients.stream().filter(x -> x.getType().equals(type)).collect(Collectors.toList());
    }

    @PostMapping
    public String processDesign(@ModelAttribute("taco") @Valid Taco design, Errors errors, Model model){
        /* 若捕捉到Errors后hasErrors()方法判断有校验错误则不会处理Taco对象并返回视图 */
        if(errors.hasErrors()){
            return "design";
        }
        log.info("Processing design(设计过程): "+design);
        return "redirect:/orders/current";
    }
}
Spring Boot应用启动时会基于数据库执行根类路径下名为schema.sql 的文件,还会执行名为data.sql 的文件对数据库进行预处理,下面是schema.sql 的代码:
create table if not exists Ingredient(
    id varchar(4) not null primary key,
    name varchar(250) not null,
    type varchar(10) not null
);

create table if not exists Taco(
    id BIGINT AUTO_INCREMENT NOT NULL PRIMARY KEY,
    name varchar(50) not null,
    createdAt timestamp not null
);

create table if not exists Taco_Ingredients(
    taco bigint not null,
    ingredient varchar(4) not null
);

alter table Taco_Ingredients add foreign key (taco) references Taco(id);
alter table Taco_Ingredients add foreign key (ingredient) references Ingredient(id);

create table if not exists Taco_Order(
    id BIGINT AUTO_INCREMENT NOT NULL PRIMARY KEY,
    deliveryName varchar(50) not null,
    deliveryStreet varchar(50) not null,
    deliveryCity varchar(50) not null,
    deliveryState varchar(2) not null,
    deliveryZip varchar(10) not null,
    ccNumber varchar(16) not null,
    ccExpiration varchar(5) not null,
    ccCVV varchar(3) not null,
    placedAt timestamp not null
);

create table if not exists Taco_Order_Tacos(
    tacoOrder bigint not null,
    taco bigint not null
);

alter table Taco_Order_Tacos add foreign key (tacoOrder) references Taco_Order(id);
alter table Taco_Order_Tacos add foreign key (taco) references Taco(id);
下面是data.sql 的代码:
delete from Taco_Order_Tacos;
delete from Taco_Ingredients;
delete from Taco;
delete from Taco_Order;
delete from Ingredient;

insert into Ingredient(id,name,type) values ('FLTO','Flour Tortilla 面粉薄烙饼', 'WRAP');
insert into Ingredient(id,name,type) values ('COTO','Corn Tortilla 玉米粉薄烙饼', 'WRAP');
insert into Ingredient(id,name,type) values ('GRBF','Ground Beef 碎牛肉', 'PROTEIN');
insert into Ingredient(id,name,type) values ('CARN','Carnitas 猪肉馅', 'PROTEIN');
insert into Ingredient(id,name,type) values ('TMTO','Diced Tomatoes 蕃茄丁', 'VEGGIES');
insert into Ingredient(id,name,type) values ('LETC','Lettuce 生菜', 'VEGGIES');
insert into Ingredient(id,name,type) values ('CHED','Cheddar 切达干酪', 'CHEESE');
insert into Ingredient(id,name,type) values ('JACK','Monterrey Jack 蒙德勒杰克奶酪', 'CHEESE');
insert into Ingredient(id,name,type) values ('SLSA','Salsa 辣番茄酱', 'SAUCE');
insert into Ingredient(id,name,type) values ('SRCR','Sour Cream 酸奶油', 'SAUCE');
上述内容存在一个问题:启动项目加载data.sql 对数据库进行预处理的时候插入到数据库的中文会直接乱码,尝试解决了一天,试了许多种方法该编码集,修改配置文件...结果都没能解决,如果有知道怎么解决的朋友麻烦告诉我一下,谢谢!
之后实在没办法,尝试手动在控制类中插入到数据库,结果发现手动插入的中文不会乱码,于是就将data.sql 中的插入语句全部删除,并在DesignTacoController类的构造方法中进行插入,问题得以解决,修改后DesignTacoController类的构造方法如下:
  private JdbcTemplate jdb;
    private final IngredientRepository ingredientRepo;


    @Autowired
    public DesignTacoController(IngredientRepository ingredientRepo,JdbcTemplate jdb){
        this.ingredientRepo = ingredientRepo;
        this.jdb=jdb;
        jdb.update("insert into Ingredient(id,name,type) values (?,?,?)",
                "FLTO","Flour Tortilla 面粉薄烙饼", "WRAP");
        jdb.update("insert into Ingredient(id,name,type) values (?,?,?)",
                "COTO","Corn Tortilla 玉米粉薄烙饼", "WRAP");

        jdb.update("insert into Ingredient(id,name,type) values (?,?,?)",
                "GRBF","Ground Beef 碎牛肉", "PROTEIN");
        jdb.update("insert into Ingredient(id,name,type) values (?,?,?)",
                "CARN","Carnitas 猪肉馅", "PROTEIN");

        jdb.update("insert into Ingredient(id,name,type) values (?,?,?)",
                "TMTO","Diced Tomatoes 蕃茄丁", "VEGGIES");
        jdb.update("insert into Ingredient(id,name,type) values (?,?,?)",
                "LETC","Lettuce 生菜", "VEGGIES");

        jdb.update("insert into Ingredient(id,name,type) values (?,?,?)",
                "CHED","Cheddar 切达干酪", "CHEESE");
        jdb.update("insert into Ingredient(id,name,type) values (?,?,?)",
                "JACK","Monterrey Jack 蒙德勒杰克奶酪", "CHEESE");

        jdb.update("insert into Ingredient(id,name,type) values (?,?,?)",
                "SLSA","Salsa 辣番茄酱", "SAUCE");
        jdb.update("insert into Ingredient(id,name,type) values (?,?,?)",
                "SRCR","Sour Cream 酸奶油", "SAUCE");
    }
此方法一定要将data.sql插入语句全部清除或注释,否则会报主键冲突的错误
接下来像创建IngredientRepository一样创建taco和order的repository接口,由于这两个接口只需要保存对应的对象,因此他们分别都只需要声明一个save()方法即可:
package com.gmh.tacocloud.jDBCrepository;

import com.gmh.tacocloud.Taco;

public interface TacoRepository {
    Taco save(Taco designedTaco);
}
package com.gmh.tacocloud.jDBCrepository;

import com.gmh.tacocloud.Order;

public interface OrderRepository {
    Order save(Order order);
}
现在实现这两个接口,但是要注意保存taco的同时要将与该taco关联的配料保存到Taco_Ingredients表中,与之类似,保存order时需要同时将与该订单关联的taco保存到Taco_Order_Tacos表中。
接下来是对TacoRepository的实现JdbcTacoRepository(在实现的时候发现前面Taco类中ingredients的集合类型打错了,不是String而是Ingredient才对):
package com.gmh.tacocloud.data;

import com.gmh.tacocloud.Ingredient;
import com.gmh.tacocloud.Taco;
import com.gmh.tacocloud.jDBCrepository.TacoRepository;
import org.springframework.beans.factory.annotation.Autowired;
import org.springframework.jdbc.core.JdbcTemplate;
import org.springframework.jdbc.core.PreparedStatementCreator;
import org.springframework.jdbc.core.PreparedStatementCreatorFactory;
import org.springframework.jdbc.support.GeneratedKeyHolder;
import org.springframework.jdbc.support.KeyHolder;
import org.springframework.stereotype.Repository;

import java.sql.Timestamp;
import java.sql.Types;
import java.util.Arrays;
import java.util.Date;

@Repository
public class JdbcTacoRepository implements TacoRepository {
    private JdbcTemplate jdbc;

    @Autowired
    public JdbcTacoRepository(JdbcTemplate jdbc) {
        this.jdbc = jdbc;
    }

    @Override
    public Taco save(Taco designedTaco) {
        long tacoId = saveTacoInfo(designedTaco);
        designedTaco.setId(tacoId);
        for (Ingredient ingredient:designedTaco.getIngredients()) {
            saveIngredientToTaco(ingredient,tacoId);
        }
        return designedTaco;
    }

    private long saveTacoInfo(Taco taco){
        taco.setTcreatedAt(new Date());
        PreparedStatementCreator psc = new PreparedStatementCreatorFactory(
                "insert into Taco (name,createdAt) values (?,?)", Types.VARCHAR,Types.TIMESTAMP
        ).newPreparedStatementCreator(Arrays.asList(
                taco.getName(),new Timestamp(taco.getTcreatedAt().getTime())));
        KeyHolder keyHolder = new GeneratedKeyHolder();//返回新增记录时的自增长主键值,提供生成的tacoID
        jdbc.update(psc,keyHolder);
        return keyHolder.getKey().longValue();//返回taco的ID
    }

    private void saveIngredientToTaco(Ingredient ingredient,long tacoId){
        jdbc.update("insert into Taco_Ingredients (taco,ingredient)"+"values (?,?)",tacoId,ingredient.getId());
    }
}
注入并使用TacoRepository
package com.gmh.tacocloud.web;

import com.gmh.tacocloud.Ingredient;
import com.gmh.tacocloud.Order;
import com.gmh.tacocloud.Taco;
import com.gmh.tacocloud.data.JdbcIngredientRepository;
import com.gmh.tacocloud.jDBCrepository.IngredientRepository;
import com.gmh.tacocloud.jDBCrepository.TacoRepository;
import lombok.extern.slf4j.Slf4j;
import org.springframework.beans.factory.annotation.Autowired;
import org.springframework.context.annotation.Configuration;
import org.springframework.jdbc.core.JdbcTemplate;
import org.springframework.stereotype.Controller;
import org.springframework.ui.Model;
import org.springframework.validation.Errors;
import org.springframework.web.bind.annotation.*;
import com.gmh.tacocloud.Ingredient.Type;
import javax.validation.Valid;
import java.util.ArrayList;
import java.util.Arrays;
import java.util.List;
import java.util.stream.Collectors;

@Slf4j//用作日志输出,添加了该注释之后,就可以在代码中直接使用log.info( )打印日志了
@Controller
@RequestMapping(value = "/design")//处理路径为“/design”的HTTP GET请求
@SessionAttributes("order")//指定模型对象保存在session中,实现跨请求调用
@Configuration
public class DesignTacoController{

    private JdbcTemplate jdb;
    private final IngredientRepository ingredientRepo;
    private TacoRepository tacoRepo;


    @Autowired
    public DesignTacoController(IngredientRepository ingredientRepo,JdbcTemplate jdb,TacoRepository tacoRepo){
        this.ingredientRepo = ingredientRepo;
        this.tacoRepo = tacoRepo;
        this.jdb=jdb;

        jdb.update("insert into Ingredient(id,name,type) values (?,?,?)",
                "FLTO","Flour Tortilla 面粉薄烙饼", "WRAP");
        jdb.update("insert into Ingredient(id,name,type) values (?,?,?)",
                "COTO","Corn Tortilla 玉米粉薄烙饼", "WRAP");

        jdb.update("insert into Ingredient(id,name,type) values (?,?,?)",
                "GRBF","Ground Beef 碎牛肉", "PROTEIN");
        jdb.update("insert into Ingredient(id,name,type) values (?,?,?)",
                "CARN","Carnitas 猪肉馅", "PROTEIN");

        jdb.update("insert into Ingredient(id,name,type) values (?,?,?)",
                "TMTO","Diced Tomatoes 蕃茄丁", "VEGGIES");
        jdb.update("insert into Ingredient(id,name,type) values (?,?,?)",
                "LETC","Lettuce 生菜", "VEGGIES");

        jdb.update("insert into Ingredient(id,name,type) values (?,?,?)",
                "CHED","Cheddar 切达干酪", "CHEESE");
        jdb.update("insert into Ingredient(id,name,type) values (?,?,?)",
                "JACK","Monterrey Jack 蒙德勒杰克奶酪", "CHEESE");

        jdb.update("insert into Ingredient(id,name,type) values (?,?,?)",
                "SLSA","Salsa 辣番茄酱", "SAUCE");
        jdb.update("insert into Ingredient(id,name,type) values (?,?,?)",
                "SRCR","Sour Cream 酸奶油", "SAUCE");
    }

    @ModelAttribute(name = "order")
    public Order order(){
        return new Order();
    }

    @ModelAttribute(name = "taco")
    public Taco taco(){
        return new Taco();
    }

   /* @ModelAttribute
    public void addIngredientsToModel(Model model){
        List<Ingredient> ingredients = Arrays.asList(
                new Ingredient("FLTO","Flour Tortilla 面粉薄烙饼", Ingredient.Type.WRAP),
                new Ingredient("COTO","Corn Tortilla 玉米粉薄烙饼", Ingredient.Type.WRAP),
                new Ingredient("GRBF","Ground Beef 碎牛肉", Ingredient.Type.PROTEIN),
                new Ingredient("CARN","Carnitas 猪肉馅", Ingredient.Type.PROTEIN),
                new Ingredient("TMTO","Diced Tomatoes 蕃茄丁", Ingredient.Type.VEGGIES),
                new Ingredient("LETC","Lettuce 生菜", Ingredient.Type.VEGGIES),
                new Ingredient("CHED","Cheddar 切达干酪", Ingredient.Type.CHEESE),
                new Ingredient("JACK","Monterrey Jack 蒙德勒杰克奶酪", Ingredient.Type.CHEESE),
                new Ingredient("SLSA","Salsa 辣番茄酱", Ingredient.Type.SAUCE),
                new Ingredient("SRCR","Sour Cream 酸奶油", Ingredient.Type.SAUCE)
        );

                Ingredient.Type[] types = Ingredient.Type.values();
        for (Ingredient.Type type :types) {
            model.addAttribute(type.toString().toLowerCase(),filterByType(ingredients,type));
        }
    }*/

    @GetMapping
    public String showDesignForm(Model model){
        List<Ingredient> ingredients = new ArrayList<>();
        ingredientRepo.findAll().forEach(i -> ingredients.add(i));
        Type types[] = Ingredient.Type.values();
        for (Type t : types) {
            model.addAttribute(t.toString().toLowerCase(),filterByType(ingredients,t));
            System.out.println(t.toString().toLowerCase());
            System.out.println(filterByType(ingredients,t));
        }
        return "design";
    }

    private Iterable<Ingredient> filterByType(List<Ingredient> ingredients, Ingredient.Type type){
        return ingredients.stream().filter(x -> x.getType().equals(type)).collect(Collectors.toList());
    }

    @PostMapping
    public String processDesign(@Valid Taco design, Errors errors, @ModelAttribute/*该注解表明此order的值来自模型,保证请求参数不会绑定到他上面*/ Order order){
        /* 若捕捉到Errors后hasErrors()方法判断有校验错误则不会处理Taco对象并返回视图 */
        if(errors.hasErrors()){
            return "design";
        }
        log.info("Processing design(设计过程):"+design);
        Taco savedtaco = tacoRepo.save(design);
        order.addDesign(savedtaco);
        return "redirect:/orders/current";
    }
}
以上代码在用户完成操作并提交订单表单之前Order对象会一直保存在session中,并没有保存到数据库,需要在OrderController中调用相关方法保存。
接下来不再使用PreparedStatementCreator而是引入更为简便的SimpleJdbcInsert,这个对象对JdbcTemplate进行包装,使其更容易地将数据插入到表中
在JdbcOrderRepository(此为OrderRepository的实现)的构造器中创建两个SimpleJdbcInsert实例,分别用于把值插入到Taco_Order和Taco_Order_Tacos表中:
package com.gmh.tacocloud.data;

import com.fasterxml.jackson.databind.ObjectMapper;
import com.gmh.tacocloud.Order;
import com.gmh.tacocloud.Taco;
import com.gmh.tacocloud.jDBCrepository.OrderRepository;
import org.springframework.beans.factory.annotation.Autowired;
import org.springframework.jdbc.core.JdbcTemplate;
import org.springframework.jdbc.core.simple.SimpleJdbcInsert;
import org.springframework.stereotype.Repository;

import java.util.Date;
import java.util.HashMap;
import java.util.List;
import java.util.Map;

@Repository
public class JdbcOrderRepository implements OrderRepository {
    private SimpleJdbcInsert orderInserter;
    private SimpleJdbcInsert orderTacoInserter;
    private ObjectMapper objectMapper;

    @Autowired
    public JdbcOrderRepository(JdbcTemplate jdbc) {
        this.orderInserter = new SimpleJdbcInsert(jdbc).withTableName("Taco_Order").usingGeneratedKeyColumns("id");
        this.orderTacoInserter = new SimpleJdbcInsert(jdbc).withTableName("Taco_Order_Tacos");
        this.objectMapper = new ObjectMapper();//Jackson(Jackson 是最流行的 json 解析器之一)中的ObjectMapper供程序员“定制化控制”序列化、反序列化的过程
    }

    @Override
    public Order save(Order order) {
        order.setOcreatedAt(new Date());
        long orderId = saveOrderDetails(order);
        order.setId(orderId);
        List<Taco> tacos = order.getTacos();
        for (Taco taco:tacos) {
            saveTacoToOrder(taco,orderId);
        }
        return order;
    }

    private long saveOrderDetails(Order order){
        @SuppressWarnings("unchecked")//告诉编译器忽略 unchecked 警告信息,如使用List,ArrayList等未进行参数化产生的警告信息。
        Map<String,Object> values = objectMapper.convertValue(order,Map.class);//用jackson将bean转换为map
        values.put("placedAt",order.getPlaceAt());
        long orderId = orderInserter.executeAndReturnKey(values).longValue();
        return orderId;
    }

    private void saveTacoToOrder(Taco taco,long orderId){
        Map<String,Object> values = new HashMap<>();
        values.put("tacoOrder",orderId);
        values.put("taco",taco.getId());
        orderTacoInserter.execute(values);
    }
}
以上代码中的save()方法中没有直接对数据内容进行保存,实际的持久化任务委托给saveOrderDetails ()和saveTacoToOrder()。
SimpleJdbcInsert有两个非常有用的方法来执行数据插入操作:execute()和executeAndReturnKey()。他们都接受Map<String,Object>作为参数,其中Map的key对应表中要插入数据的列名,而Map中的value对应要插入到列中的实际值
接下来将OrderRepository注入到OrderController中,代码如下:
package com.gmh.tacocloud.web;

import com.gmh.tacocloud.Order;
import com.gmh.tacocloud.jDBCrepository.OrderRepository;
import lombok.extern.slf4j.Slf4j;
import org.springframework.beans.factory.annotation.Autowired;
import org.springframework.stereotype.Controller;
import org.springframework.ui.Model;
import org.springframework.validation.Errors;
import org.springframework.web.bind.annotation.GetMapping;
import org.springframework.web.bind.annotation.PostMapping;
import org.springframework.web.bind.annotation.RequestMapping;
import org.springframework.web.bind.annotation.SessionAttributes;
import org.springframework.web.bind.support.SessionStatus;

import javax.validation.Valid;

@Slf4j
@Controller
@RequestMapping("/orders")
@SessionAttributes("order")
public class OrderController {
    private OrderRepository orderRepository;

    @Autowired
    public OrderController(OrderRepository orderRepository) {
        this.orderRepository = orderRepository;
    }

    @GetMapping("/current")
    public String orderForm(/*Model model*/){
//        model.addAttribute("order",new Order());
        return "orderForm";
    }

    @PostMapping
    public String processOrder(@Valid Order order, Errors errors, SessionStatus sessionStatus){
        if(errors.hasErrors()){
            return "orderForm";
        }

        orderRepository.save(order);
        sessionStatus.setComplete();
        log.info("Order submitted: "+order);
        return "redirect:/";
    }
}
使用Spring Data JPA进行持久化数据
Spring Data是一个巨大的伞形项目,有多个子项目构成,其中Spring Data JPA由于基于关系型数据库进行JPA持久化。接下来我们基于前文将JDBC的repository替换为使用SpringDataJPA的repository。
首先,添加依赖:
        <!-- 通过JPA starter依赖传递添加Spring Data JPA ,同时Hibernate也会作为JPA实现引入 -->
        <dependency>
            <groupId>org.springframework.boot</groupId>
            <artifactId>spring-boot-starter-data-jpa</artifactId>
        </dependency>
将领域对象中添加注解,标注为实体:
Ingredient类:
package com.gmh.tacocloud;

import lombok.AccessLevel;
import lombok.Data;
import lombok.NoArgsConstructor;
import lombok.RequiredArgsConstructor;

import javax.persistence.Entity;
import javax.persistence.GeneratedValue;
import javax.persistence.GenerationType;
import javax.persistence.Id;


@Data//为了方便生成类构造器和基本方法在pom中导入了Lombok
@RequiredArgsConstructor//所有未初始化的 final 字段都获得一个参数,也可用于Spring依赖注入
@NoArgsConstructor(access = AccessLevel.PRIVATE,force = true)//添加一个私有的无参构造器
@Entity//表明是一个实体类
public class Ingredient/*(成分,原料)*/ {//构建一个领域类定义taco配料表
    @Id//指定为数据库唯一标识(主键)
    private final String id;
    private final String name;
    private final Type type;

    public static enum Type{
        WRAP/*饼皮*/,PROTEIN/*蛋白质*/,VEGGIES/*蔬菜*/,CHEESE/*奶酪*/,SAUCE/*酱汁*/
    }
}
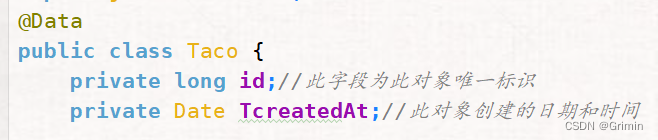
Taco类:
package com.gmh.tacocloud;
import com.fasterxml.jackson.databind.DatabindException;
import lombok.Data;
import org.springframework.boot.autoconfigure.domain.EntityScan;

import javax.persistence.*;
import javax.validation.constraints.NotNull;
import javax.validation.constraints.Size;
import java.util.Date;
import java.util.List;
@Data
@Entity
public class Taco {
    @Id
    @GeneratedValue(strategy = GenerationType.AUTO)//数据库自动生成ID策略
    private long id;//此字段为此对象唯一标识
    private Date TcreatedAt;//此对象创建的日期和时间

    @NotNull//不能为 null,但可以为 empty,一般用在 Integer 类型的基本数据类型的非空校验上,而且被其标注的字段可以使用 @size、@Max、@Min 对字段数值进行大小的控制
    @Size(min=3,message = "名称长度必须至少为三个字符")
    private String name;
    @ManyToMany(targetEntity = Ingredient.class)//声明与Ingredient是多对多关系
    @NotNull
    @Size(min=1,message = "至少选择一个配料")
    private List<Ingredient> ingredients;
    @PrePersist//为持久化对象前执行,比如设置创建时间,设置对象删除状态等等
    void createAt(){
        this.TcreatedAt = new Date();
    }
}
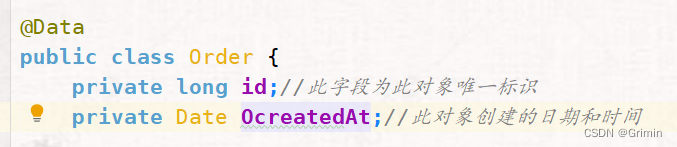
Oreder类:
package com.gmh.tacocloud;

import lombok.Data;
import org.hibernate.validator.constraints.CreditCardNumber;

import javax.persistence.*;
import javax.validation.constraints.Digits;
import javax.validation.constraints.NotBlank;
import javax.validation.constraints.Pattern;
import java.io.Serializable;
import java.util.ArrayList;
import java.util.Date;
import java.util.List;

@Data
@Entity
@Table(name = "Taco_Order")//表明实体应持久化到数据库中名为Taco_Order的表中
public class Order implements Serializable {
    private static final long serialVersionUID = 1L;

    @Id
    @GeneratedValue(strategy = GenerationType.AUTO)
    private long id;//此字段为此对象唯一标识
    private Date OcreatedAt;//此对象创建的日期和时间

    @NotBlank(message = "必填")//只能作用在接收的 String 类型上,注意是只能,不能为 null,而且调用 trim() 后,长度必须大于 0即:必须有实际字符
    private String name;
    @NotBlank(message = "必填")
    private String street;
    @NotBlank(message = "必填")
    private String city;
    @NotBlank(message = "必填")
    private String state;
    @NotBlank(message = "必填")
    private String zip;
    @CreditCardNumber(message = "不是有效的信用卡号")//信用卡验证
    private String ccNumber;
    @Pattern(regexp = "^(0[1-9]|1[0-2])([1-9][0-9])$", message = "必须遵守MM/YY格式")//做正则表达式验证
    private String ccExpiration;
    @Digits(integer = 3, fraction = 0, message = "无效cvv,必须为三位数")//验证字符串是否是符合指定格式的数字(interger指定整数精度,fraction指定小数精度)
    private String ccCVV;
    @ManyToMany(targetEntity = Taco.class)
    private List<Taco> tacos = new ArrayList<>();

    public void addDesign(Taco design) {
        this.tacos.add(design);
    }

    @PrePersist
    void placedAt() {
        this.OcreatedAt = new Date();
    }
}
标注完实体类后编写repository
Spring Data JPA的repository不需要编写实现类,他会在运行期自动生成实现类,只需要扩展CrudRepository接口,该接口第一个参数为要持久化的实体类,第二个参数为实体类ID属性的类型,具体实现如下:
新的IngredientRepository接口:
package com.gmh.tacocloud.jDBCrepository;

import com.gmh.tacocloud.Ingredient;
import org.springframework.data.repository.CrudRepository;

public interface IngredientRepository extends CrudRepository<Ingredient,String> {
/*    Iterable<Ingredient> findAll();//查询所有配料信息,将它们放到一个Ingredient对象集合中
    Ingredient finOne(String id);//根据id查询单个Ingredient
    Ingredient save(Ingredient ingredient);//保存Ingredient对象*/
}
新的TacoRepository接口:
package com.gmh.tacocloud.jDBCrepository;

import com.gmh.tacocloud.Taco;
import org.springframework.data.repository.CrudRepository;

public interface TacoRepository extends CrudRepository<Taco,Long> {
/*    Taco save(Taco designedTaco);*/
}
新的OrderRepository接口:
package com.gmh.tacocloud.jDBCrepository;

import com.gmh.tacocloud.Order;
import org.springframework.data.repository.CrudRepository;

public interface OrderRepository extends CrudRepository<Order,Long> {
//    Order save(Order order);
}
这是data包中的类会全部报错,先把他们注释掉
此时直接运行会报错 SQL [insert into Ingredient(id,name,type) values (?,?,?)]; Data conversion error converting "'WRAP' (INGREDIENT: ""TYPE"" INTEGER)";因为枚举类型的本质上是int,所以自动生成的插入类会试图将枚举中String类型的值转换为int类型插入到数据库中
为了解决这个问题在百度找了好久,最后问的ChatGPT以及参考此文章@Enumerated的使用_Hello姜先森的博客-CSDN博客
在Ingredient实体类中的Type属性上方加上此注解@Enumerated(EnumType.STRING)//Java的枚举类型的常量本质上是int值因此需要此标注声明存储的实体类的值为String类型
最终得以解决
运行成功后提交taco信息后浏览器访问localhost:8080/h2-console进入数据库查询相关表可以看见刚刚插入的数据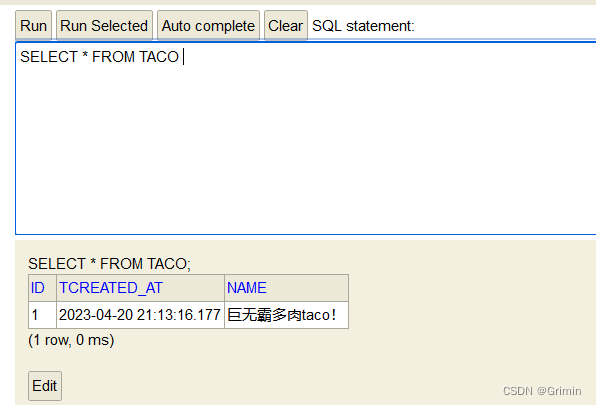
使用Spring Security保护Spring
作为软件开发人员我们必须采取某种措施增加自己开发的应用程序的安全性,保护应用中的数据与信息。接下来将使用Spring Security对Taco Cloud进行保护
首先需要将依赖导入到项目中:
<!-- 通过JPA starter依赖传递添加Spring Security -->
        <dependency>
            <groupId>org.springframework.boot</groupId>
            <artifactId>spring-boot-starter-security</artifactId>
        </dependency>
现在启动项目访问任何界面都会弹出一个HTTP basic认证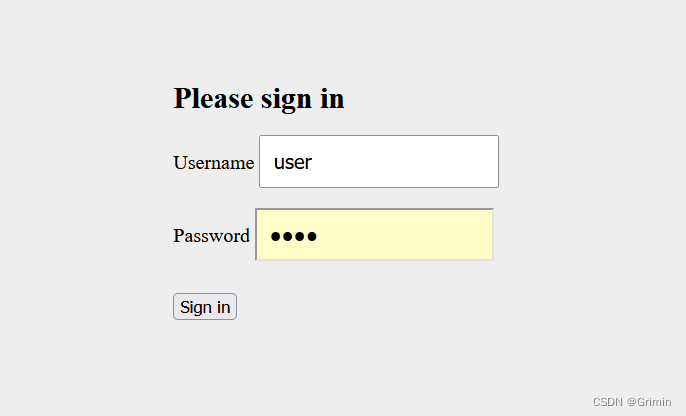
这个认证默认的用户名为user,密码是随机生成的,可以通过日志查看
通过将 security starter 添加到项目的构建文件中,我们得到了如下的安全特性:
- 所有的HTTP请求路径都需要认证
- 不需要特定的角色和权限
- 没有登录页面
- 认证过程是通过 HTTP basic 认证对话框实现的
- 系统只有一个用户,用户名为 user
如果想确保 Taco Cloud 应用的安全性,我们还有很多的工作要做。我们至少要配置Spring Security 实现如下功能:
- 通过登录页而来提示用户进行认证,而不是使用HTTP basic 对话框
- 提供多个用户,并提供一个注册页面,这样Taco Cloud 的新用户能够注册进来
- 对不同的请求路径,执行不同的安全规则。举例来说,主页和注册页面根本不需要进行认证
为了满足 Taco Cloud 的安全需求,我们需要编写一些显式的配置,覆盖掉自动配置为我们提供的功能。我们首先配置一个合适的用户存储,这样就能有多个用户了
创建一个security包,放入Spring Security的基础配置类
package com.gmh.tacocloud.security;

import org.springframework.context.annotation.Configuration;
import org.springframework.security.config.annotation.web.configuration.EnableWebSecurity;
import org.springframework.security.config.annotation.web.configuration.WebSecurityConfigurerAdapter;

@Configuration
@EnableWebSecurity
public class SecurityConfig extends WebSecurityConfigurerAdapter {
}
Spring Security为配置用户存储提供了多个可选方案,包括:
- 基于内存的用户存储
- 基于JDBC的用户存储
- 以LDAP作为后端的用户存储
- 自定义用户详情服务
无论使用哪种都需要通过重写configure()方法来进行配置,由于Taco Cloud应用需要一些特殊的功能,前三种开箱即用的用户存储无法满足需求,因此我们需要使用第四种:配置自定义的用户详情服务
自定义用户验证
顾客注册应用时提供的信息应该是隐秘的,需要被保护的。为了获取顾客提供的信息我们需要创建一个User实体类:
package com.gmh.tacocloud;

import lombok.AccessLevel;
import lombok.Data;
import lombok.NoArgsConstructor;
import lombok.RequiredArgsConstructor;
import org.springframework.security.core.GrantedAuthority;
import org.springframework.security.core.authority.SimpleGrantedAuthority;
import org.springframework.security.core.userdetails.UserDetails;

import javax.persistence.Entity;
import javax.persistence.GeneratedValue;
import javax.persistence.GenerationType;
import javax.persistence.Id;
import java.util.Arrays;
import java.util.Collection;

@Entity
@Data
@NoArgsConstructor(access = AccessLevel.PRIVATE,force = true)
@RequiredArgsConstructor
public class User implements UserDetails {
    private static  final long seriaVersionUID = 1L;

    @Id
    @GeneratedValue(strategy = GenerationType.AUTO)
    private Long id;

    private final String username;
    private final String password;
    private final String fullname;
    private final String street;
    private final String city;
    private final String state;
    private final String zip;
    private final String phoneNumber;

    @Override
    public Collection<? extends GrantedAuthority> getAuthorities() {// 此方法返回用户被授权的一个集合
        return Arrays.asList(new SimpleGrantedAuthority("ROLE_USER"));//表明所有用户都被授予ROLE_USER权限
    }

    //下面各种is..Expired()方法返回一个boolean值表明用户的账号是否可用或过期
    @Override
    public boolean isAccountNonExpired() {
        return true;
    }

    @Override
    public boolean isAccountNonLocked() {
        return true;
    }

    @Override
    public boolean isCredentialsNonExpired() {
        return true;
    }

    @Override
    public boolean isEnabled() {
        return true;
    }
}
通过实现UserDetails接口我们能提供更多信息给框架
User实体定义完后之后,我们就可以定义repository接口了:
package com.gmh.tacocloud.jDBCrepository;

import com.gmh.tacocloud.User;
import org.springframework.data.repository.CrudRepository;

public interface UserRepository extends CrudRepository<User,Long> {
    User findByUsername(String username);//便于后续根据用户名查找User
}
创建完上面接口后即可开始实现用户详情服务了
Spring Sercurity的UserDetailsService接口的实现会得到一个用户的用户名,并且要么返回查找到的UserDetails对象,要么根据用户名无法得到结果的情况下抛出UsernameNotFoundException的异常信息
package com.gmh.tacocloud.security;

import com.gmh.tacocloud.User;
import com.gmh.tacocloud.jDBCrepository.UserRepository;
import org.springframework.beans.factory.annotation.Autowired;
import org.springframework.security.core.userdetails.UserDetails;
import org.springframework.security.core.userdetails.UserDetailsService;
import org.springframework.security.core.userdetails.UsernameNotFoundException;
import org.springframework.stereotype.Service;

@Service//表明这个类要包含到Spring的组件扫描中,Spring将会自动发现它并将其初始化为一个bean
public class UserRepositoryUserDetailsService implements UserDetailsService {
    private UserRepository userRepo;

    @Autowired
    public UserRepositoryUserDetailsService(UserRepository userRepo){
        this.userRepo = userRepo;
    }

    @Override
    public UserDetails loadUserByUsername(String username) throws UsernameNotFoundException {
        User user = userRepo.findByUsername(username);
        if(user != null){
            return user;
        }
        throw new UsernameNotFoundException("User '"+username+"'not found");
    }
}
接下来回到SecurityConfig中与自定义的用户详情服务配置到一起
package com.gmh.tacocloud.security;

import org.springframework.beans.factory.annotation.Autowired;
import org.springframework.context.annotation.Bean;
import org.springframework.context.annotation.Configuration;
import org.springframework.security.config.annotation.authentication.builders.AuthenticationManagerBuilder;
import org.springframework.security.config.annotation.web.configuration.EnableWebSecurity;
import org.springframework.security.config.annotation.web.configuration.WebSecurityConfigurerAdapter;
import org.springframework.security.core.userdetails.UserDetailsService;
import org.springframework.security.crypto.password.PasswordEncoder;
import org.springframework.security.crypto.password.StandardPasswordEncoder;

@Configuration
@EnableWebSecurity
public class SecurityConfig extends WebSecurityConfigurerAdapter {
    @Autowired
    private UserDetailsService userDetailsService;

    @Bean
    public PasswordEncoder encoder(){
        return new StandardPasswordEncoder("53cr3t");
    }

    @Override
    protected void configure(AuthenticationManagerBuilder auth) throws Exception {
        auth.userDetailsService(userDetailsService).passwordEncoder(encoder());
    }
}
接下来需要将用户的信息进行保存存储到数据库中,因此需要创建一个注册页面供用户注册:
package com.gmh.tacocloud.web;

import com.gmh.tacocloud.jDBCrepository.UserRepository;
import org.springframework.security.crypto.password.PasswordEncoder;
import org.springframework.stereotype.Controller;
import org.springframework.web.bind.annotation.GetMapping;
import org.springframework.web.bind.annotation.PostMapping;
import org.springframework.web.bind.annotation.RequestMapping;

@Controller
@RequestMapping("/register")
public class RegistrationController {
    private UserRepository userReq;
    private PasswordEncoder passwordEncoder;

    public RegistrationController(UserRepository userReq, PasswordEncoder passwordEncoder) {
        this.userReq = userReq;
        this.passwordEncoder = passwordEncoder;
    }

    @GetMapping
    public String registerForm(){
        return "registration";
    }

    @PostMapping
    public String processRegistration(RegistrationForm form){
        userReq.save(form.toUser(passwordEncoder));
        return "redirect:/login";
    }
}
RegistrationForm对象绑定请求的数据,该类代码如下:
package com.gmh.tacocloud;

import lombok.Data;
import org.springframework.security.crypto.password.PasswordEncoder;

@Data
public class RegistrationForm {
    private String username;
    private String password;
    private String fullname;
    private String street;
    private String city;
    private String state;
    private String zip;
    private String phone;

    public User toUser(PasswordEncoder passwordEncoder){
        return new User(
                username,passwordEncoder.encode(password),
                fullname,street,city,state,zip,phone);
    }
}
前端registration视图模板代码:
<!DOCTYPE html>
<html xmlns="http://www.w3.org/1999/xhtml"
      xmlns:th="http://www.thymeleaf.org">
<head>
    <meta charset="UTF-8">
    <title>Taco Cloud</title>
</head>
<body>
<h1>Register</h1>
<img th:src="@{../static/images/taco.jpg}"/>

<form method="post" th:action="@{/register}" id="registerForm">
    <label for="username">Username:</label>
    <input type="text" name="username"><br/>

    <label for="password">Password:</label>
    <input type="password" name="password"><br/>

    <label for="confirm">Confirm password:</label>
    <input type="password" name="confirm"><br/>

    <label for="fullname">Full name:</label>
    <input type="text" name="fullname"><br/>

    <label for="street">Street:</label>
    <input type="text" name="street"><br/>

    <label for="city">City:</label>
    <input type="text" name="city"><br/>

    <label for="state">State:</label>
    <input type="text" name="state"><br/>

    <label for="zip">Zip:</label>
    <input type="text" name="zip"><br/>

    <label for="phone">Phone:</label>
    <input type="text" name="phone"><br/>

    <input type="submit" value="注册">
</form>
</body>
</html>
现在Taco Cloud应用已经有了完整的用户注册和认证功能,但是现在启动应用我们是无法进入注册页面的,因为在默认情况下所有的请求都需要认证。为了解决此问题,接下来了解一下Web请求的拦截和保护
我们希望安全性需求是用户在设计taco和提交订单时必须经过认证,但是在主页、登录页和注册页应该对用户开放。为了配置这些安全性规制,需要介绍一下 WebSecurityConfigurerAdapter 的其他configure()方法接受一个 HttpSecurity 对象,能够用来配置在 Web 级别该如何处理安全性。我们可以使用HttpSecurity 配置的功能包括:
- 在为某个请求提供服务之前,需要预先满足特定的条件;
- 配置自定义的登录页;
- 支持用户退出应用;
- 预防跨站请求伪造。
配置 HttpSecurity常见的需求就是拦截请求以确保用户具备适当的权限。接下来,我们会确保Taco Cloud 的顾客能够满足这些需求。
在SecurityConfig类中添加:
    @Override
    protected void configure(HttpSecurity http) throws Exception {
        http.authorizeRequests().antMatchers("/design","/orders")
                .access("hasRole('ROLE_USER')").antMatchers("/","/**").access("permitAll");
    }
我们还可以使用SpEL实现各种各样的安全限制,除此我们还需要更改登录页的外观
为了达成此目的我们需要先告诉Spring Security自定义的登录页路径是什么:
  @Override
    protected void configure(HttpSecurity http) throws Exception {
        http.authorizeRequests().antMatchers("/design","/orders")
                .access("hasRole('ROLE_USER')").antMatchers("/","/**").access("permitAll")
        .and().formLogin().loginPage("/login");//告诉登录页界面的路径
    }
接下来需要一个控制器处理该请求,在启动类实现WebMvcConfigurer接口,在映射到“/”的主页控制器基础上如下addViewControllers()方法声明登录页面的视图控制器:
package com.gmh.tacocloud;

import org.springframework.boot.SpringApplication;
import org.springframework.boot.autoconfigure.SpringBootApplication;
import org.springframework.web.servlet.config.annotation.ViewControllerRegistry;
import org.springframework.web.servlet.config.annotation.WebMvcConfigurer;

@SpringBootApplication
public class TacoCloudApplication implements WebMvcConfigurer {

    public static void main(String[] args) {
        SpringApplication.run(TacoCloudApplication.class, args);
    }

    @Override
    public void addViewControllers(ViewControllerRegistry registry) {
        registry.addViewController("/").setViewName("home");
        registry.addViewController("/login");
    }
}
然后我们可以自定义自己的login页面了
<!DOCTYPE html>
<html lang="en" xmlns="http://www.w3.org/1999/xhtml"
                xmlns:th="http://www.thymeleaf.org">
<head>
    <meta charset="UTF-8">
    <title>Taco Cloud</title>
</head>
<body>
    <h1>Login</h1>
    <img th:src="@{../static/images/taco.jpg}"/>

    <div th:if="${error}">
        Unable to login. Check your username and password.
    </div>

    <p>New here?Click <a th:href="@{/register}">here</a> to register.</p>

    <form method="POST" th:action="@{/login}" id="loginForm">

    <label for="username">Username:</label>
    <input type="text" name="username" id="username"/><br/>
    <label for="password">Password:</label>
    <input type="password" name="password" id="password"/><br/>

        <input type="submit" value="Login"/>
    </form>

    <form method="post" th:action="@{/logout}">
        <input type="submit" value="Logout"/>
    </form>
</body>
</html>
在configure方法定义登录和退出功能
@Override
    protected void configure(HttpSecurity http) throws Exception {
        http.authorizeRequests().antMatchers("/design","/orders")
                .access("hasRole('ROLE_USER')").antMatchers("/","/**").access("permitAll")
        .and().formLogin().loginPage("/login")//告诉登录页界面的路径
        .defaultSuccessUrl("/design",true)//配置成功登录后强制重定向到'/design'
        .and().logout().logoutSuccessUrl("/");//启用退出功能,清楚用户session并导航到指定页面(此处为跳转到主页)
    }
防止跨站请求伪造跨站请求伪造 (Cross-Sile Request Forgery,CSRF)是一种常见的安全攻击。它让用户在一个恶意的 Web 页面上填写信息,然后自动(通常是秘密的 )将表单以攻击害者的身份提交到另外一个应用上。例如,用户看到一个来自攻击者的 Web 站点的表这个站点会自动将数据 POST到用户银行 Web 站点的 URL上 (这个站点可能设计得糟糕,无法防御这种类型的攻击),实现转账的操作。用户可能根本不知道发生了攻击直到他们发现账号上的钱已经不翼而飞。
为了防止这种类型的攻击,应用可以在展现表单的时候生成一个 CSRF token,并放到隐藏域中,然后将其临时存储起来,以便后续在服务器上使用。在提交表单的时候,token 将和其他的表单数据一起发送至服务器端。请求会被服务器拦截,并与最初生成的token 进行对比。如果 token 匹配,那么请求将会允许处理;否则,表单肯定是由严意网站渲染的,因为它不知道服务器所生成的 token。
比较幸运的是,Spring Security 提供了内置的 CSRF 保护。更幸运的是,默认它就是启用的,我们不需要显式配置它。我们唯一需要做的就是确保应用中的每个表单都要有一个名为“csrf”的字段,它会持有 CSRF token。
Spring Security甚至进一步简化了将 token 放到请求的“_csrf”属性中这一任务。在Thymeleaf模板中,我们可以按照如下的方式在隐藏域中渲染CSRF token:
<input type="hidden" name=" csrf" th:value="$(_csrf.token]"/>
如果你使用SpringMVC的JSP标签库或者 Spring Security 的Thymeleaf方言,那么甚至都不用明确包含这个隐藏域(这个隐藏域会自动生成)。
在Thymeleaf中我们只需要确保<form>的某个属性带有 Thymeleaf 属性前缀即可。通常这并不是什么问题,因为我们一般会使用Thymeleaf渲染相对于上下文的路径。例如,为了让 Thymeleaf渲染隐藏域,我们只需要使用 th:action 属性就可以了。
<form method="POST" th:action="@{/login}" id="loginForm">
我们还可以禁用 Spring Security对 CSRF 的支持,如果你坚持要禁用,那么可以通过调用 disable()来实现:
.and().csrf0.disable()
再次强调,不要禁用 CSRF 防护,对于生产环境的应用来说更是如此TacoCloud 应用所有 Web 层的安全性都已经配置好了。除此之外,我们还有了一个自定义的登录页并且能够通过基于JPA 的用户 repository 来认证用户。接下来,我们看下如何获取已登录用户的信息
首先为Order类添加一个User属性
   @ManyToOne
    private User user;
在OrderController中的processOrder方法中添加并使用Authentication对象调用getPrincipal()
 @PostMapping
    public String processOrder(@Valid Order order, Errors errors, SessionStatus sessionStatus, @AuthenticationPrincipal/*使用此注解可直接获取principal对象,并且不用进行类型转换*/ User user){
        if(errors.hasErrors()){
            return "orderForm";
        }

        order.setUser(user);//添加到Order对象中
        orderRepository.save(order);
        sessionStatus.setComplete();
        log.info("Order submitted: "+order);
        return "redirect:/";
}运行应用后会发现许多问题:h2数据库访问被拦截,订单页面被拦截等等一堆问题,在对SecurityConfig做出如下配置的修改后才得以解决
package com.gmh.tacocloud.security;

import org.springframework.beans.factory.annotation.Autowired;
import org.springframework.context.annotation.Bean;
import org.springframework.context.annotation.Configuration;
import org.springframework.security.config.annotation.authentication.builders.AuthenticationManagerBuilder;
import org.springframework.security.config.annotation.web.builders.HttpSecurity;
import org.springframework.security.config.annotation.web.builders.WebSecurity;
import org.springframework.security.config.annotation.web.configuration.EnableWebSecurity;
import org.springframework.security.config.annotation.web.configuration.WebSecurityConfigurerAdapter;
import org.springframework.security.core.userdetails.UserDetailsService;
import org.springframework.security.crypto.password.PasswordEncoder;
import org.springframework.security.crypto.password.StandardPasswordEncoder;
import org.springframework.security.web.util.matcher.RequestMatcher;

import javax.servlet.http.HttpServletRequest;

@Configuration
@EnableWebSecurity
public class SecurityConfig extends WebSecurityConfigurerAdapter {
    @Autowired
    private UserDetailsService userDetailsService;

    @Bean
    public PasswordEncoder encoder() {
        return new StandardPasswordEncoder("53cr3t");
    }

    @Override
    protected void configure(AuthenticationManagerBuilder auth) throws Exception {
        auth.userDetailsService(userDetailsService).passwordEncoder(encoder());
    }

    /*  @Override
      protected void configure(HttpSecurity http) throws Exception {
          http.csrf()
                  .disable().authorizeRequests().antMatchers("/design", "/orders")
                  .access("hasRole('ROLE_USER')").antMatchers("/", "/**").access("permitAll")
                  .and().formLogin().loginPage("/login")//告诉登录页界面的路径
                  .defaultSuccessUrl("/design", true)//配置成功登录后强制重定向到'/design'
                  .and().logout().logoutSuccessUrl("/");//启用退出功能,清楚用户session并导航到指定页面(此处为跳转到主页)
      }*/
    @Override
    protected void configure(HttpSecurity http) throws Exception {
        http.authorizeRequests()/*.antMatchers("/design", "/orders")
                .access("hasRole('ROLE_USER')")*/
                .antMatchers("/", "/**", "/h2-console/**").access("permitAll")
                .and().formLogin().loginPage("/login")//告诉登录页界面的路径
                .defaultSuccessUrl("/design", true)//配置成功登录后强制重定向到'/design'
                .and().logout().logoutSuccessUrl("/")//启用退出功能,清楚用户session并导航到指定页面(此处为跳转到主页)
        .and()
                .csrf().ignoringAntMatchers("/h2-console/**").disable()
                .headers()
                .frameOptions()
                .sameOrigin();
//        http.authorizeRequests()
//                .antMatchers("/", "/**", "/h2-console/**")
//                .access("permitAll").
//                and()
//                .formLogin()
//                .loginPage("/login")
//                .defaultSuccessUrl("/design", true).and()
//                .logout()
//                .logoutSuccessUrl("/").and()
//                .csrf()
//                .ignoringAntMatchers("/h2-console/**").and()
//                .headers()
//                .frameOptions()
//                .sameOrigin().disable();
    }
}
还有就是数据库的问题,schema.sql文件需要添加、修改数据字段才能适应代码的需求
create table if not exists Ingredient(
    id varchar(4) not null primary key,
    name varchar(250) not null,
    type varchar(20) not null
);

create table if not exists Taco(
    id BIGINT AUTO_INCREMENT NOT NULL PRIMARY KEY,
    name varchar(50) not null,
    createdAt timestamp not null
);

create table if not exists Taco_Ingredients(
    taco bigint not null,
    ingredient varchar(10) not null
);

create table if not exists Users(
    id BIGINT AUTO_INCREMENT NOT NULL PRIMARY KEY,
    username varchar(50) not null,
    password varchar(50) not null,
    fullname varchar(50) not null,
    street varchar(50) not null,
    city varchar(50) not null,
    state varchar(50) not null,
    zip varchar(50) not null,
    phoneNumber varchar(50) not null
);

alter table Taco_Ingredients add foreign key (taco) references Taco(id);
alter table Taco_Ingredients add foreign key (ingredient) references Ingredient(id);

create table if not exists Taco_Order(
    id BIGINT AUTO_INCREMENT NOT NULL PRIMARY KEY,
    deliveryName varchar(50) not null,
    deliveryStreet varchar(50) not null,
    deliveryCity varchar(50) not null,
    deliveryState varchar(20) not null,
    deliveryZip varchar(10) not null,
    ccNumber varchar(16) not null,
    ccExpiration varchar(10) not null,
    ccCVV varchar(10) not null,
    placedAt timestamp not null,
    user_id bigint
);

create table if not exists Taco_Order_Tacos(
    tacoOrder bigint not null,
    taco bigint not null
);

create table if not exists User_Orders(
    tacoOrder bigint not null,
    userOrder bigint not null
);

alter table Taco_Order_Tacos add foreign key (tacoOrder) references Taco_Order(id);
alter table Taco_Order_Tacos add foreign key (taco) references Taco(id);
alter table Taco_Order add foreign key (user_id) references Users(id);
/*alter table User_Orders add foreign key (userOrder) references users(id);
alter table User_Orders add foreign key (userOrder) references Taco_Order(id);*/
至此,使用Spring Security实现了Spring安全的需求
创建REST服务
rest服务是一种Web服务架构,其目标是为了创建具有良好扩展性的分布式系统。
rest应该具备以下条件:
- 使用客户/服务器模型(简称C/S结构,是一种网络架构,它把客户端 (Client) 与服务器(Server) 区分开来。 每一个客户端软件的实例都可以向一个服务器或应用程序服务器发出请求。)例如前后端分离,页面和服务不在同一服务器上运行。
- 层次化的系统----------例如一个父系统下有多个子模块,每个模块都是独立的服务。
- 无状态-------------服务端并不会保存有关客户的任何状态,也就是说要服务后端服务,就要带token过去。
- 可缓存------------例如服务端通过token缓存已登录过的用户信息,客户端请求会带一个token过来,后台服务通过带过来的token在缓存中取出用户信息,提高效率。
- 统一的接口----------例如,一个项目的所有模块都整合到一起,all-in-one,打成一个包,多个服务,整合到一个端口下。
如果一个系统满足了上面所列出的五条约束,那么该系统就被称为是RESTful的(一种软件架构风格、设计风格,而不是标准,只是提供了一组设计原则和约束条件。它主要用于客户端和服务器交互类的软件。基于这个风格设计的软件可以更简洁,更有层次,更易于实现缓存等机制。)


 232
232


 被折叠的 条评论
为什么被折叠?
被折叠的 条评论
为什么被折叠?
 到【灌水乐园】发言


