


Xcode6使用storyboard拖拖约束很快就搭建出来项目,针对有些不能拖的,还是需要手动实现约束的。
稍微研究了下NSLayoutContraint,使用起来也还算是方便。
+ (NSArray *)constraintsWithVisualFormat:(NSString *)format options:(NSLayoutFormatOptions)opts metrics:(NSDictionary *)metrics views:(NSDictionary *)views;
看了下API被搞晕了,直接说了个format,然后就没有然后了。。
上网查了下,总结了几点:
/*
( V: ) 表示在竖直方向, ex: V:[button(100)] -> 竖直方向button长100,也就是button.frame.size.height = 100
( H: ) 表示在水平方向, ex: H:[button(100)] -> 水平方向button长100,也就是button.frame.size.width = 100
( someview(tmp) ) 在当前方向someview的长度是tmp , 竖直方向就是height,水平方向就是width
( | ) 表示相对父视图, ex: V:|-(10)-[button(100)] -> button距离他的父视图顶部为10,也就是button.frame.origin.y = 10
( - ) 表示距离, ex: V:|-(10)-[button(100)] -> button距离他的父视图顶部为10,也就是button.frame.origin.y = 10
*/
看的可能比较晕,还是动手实践下比较好
- (void)viewDidLoad {
    [super viewDidLoad];
    self.view.backgroundColor = [UIColor whiteColor];
    self.myView = [[UIView alloc] initWithFrame:CGRectZero];
    [self.myView setBackgroundColor:[UIColor orangeColor]];
    [self.view addSubview:self.myView];

    self.button = [UIButton buttonWithType:UIButtonTypeCustom];
    self.button.frame = CGRectZero;
    self.button.backgroundColor = [UIColor blueColor];
    [self.view addSubview:self.button];


//    self.view.translatesAutoresizingMaskIntoConstraints = NO;
    self.myView.translatesAutoresizingMaskIntoConstraints = NO;
    self.button.translatesAutoresizingMaskIntoConstraints = NO;


    NSMutableArray* contraintsArray = [NSMutableArray array];

    [contraintsArray addObjectsFromArray:[NSLayoutConstraint constraintsWithVisualFormat:@"H:|-[_myView]-20-[_button(_myView)]-|"
                                                                                 options:NSLayoutFormatAlignAllTop
                                                                                 metrics:nil
                                                                                   views:NSDictionaryOfVariableBindings(_myView,_button)]];


    [contraintsArray addObjectsFromArray:[NSLayoutConstraint constraintsWithVisualFormat:@"V:|-100-[_myView(_button)]-100-|"
                                                                                 options:0
                                                                                 metrics:nil
                                                                                   views:NSDictionaryOfVariableBindings(_myView,_button)]];


    [self.view addConstraints:contraintsArray];
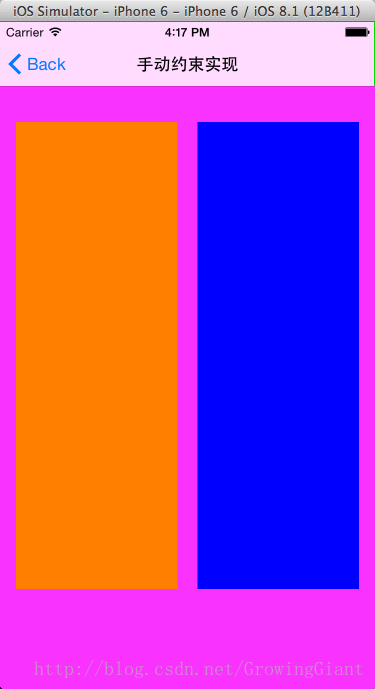
上述约束实现了一个左右间距各20,上下各100,等高等宽的约束。
需要说明下是 H:|-[_myView]-20-[_button(_myView)]-| == H:|-20-[_myView]-20-[_button(_myView)]-20-|
效果图:


 52
52


 被折叠的 条评论
为什么被折叠?
被折叠的 条评论
为什么被折叠?
 到【灌水乐园】发言


