


 本文介绍了如何在Vue项目中使用vue-img-cutter插件处理已有图片的裁剪,包括安装依赖、修改模板代码以支持直接预览和裁剪现有图片,以及与父组件的事件通信和裁剪后操作。
很多博主都写了vue-img-cutter这个插件怎么用,并且官网也有案例,但都是从上传图片开始的。我想要的是本来就有图片不用用户重新上传或者先删掉当前的图片再上传裁剪,重点就是:已经有图片了。
接下来说说实现代码吧
1.首先下载、安装vue-img-cutter依赖
npm install vue-img-cutter --save-dev
或者
yarn add vue-img-cutter --save-dev
2.创建CutterImg.vue文件
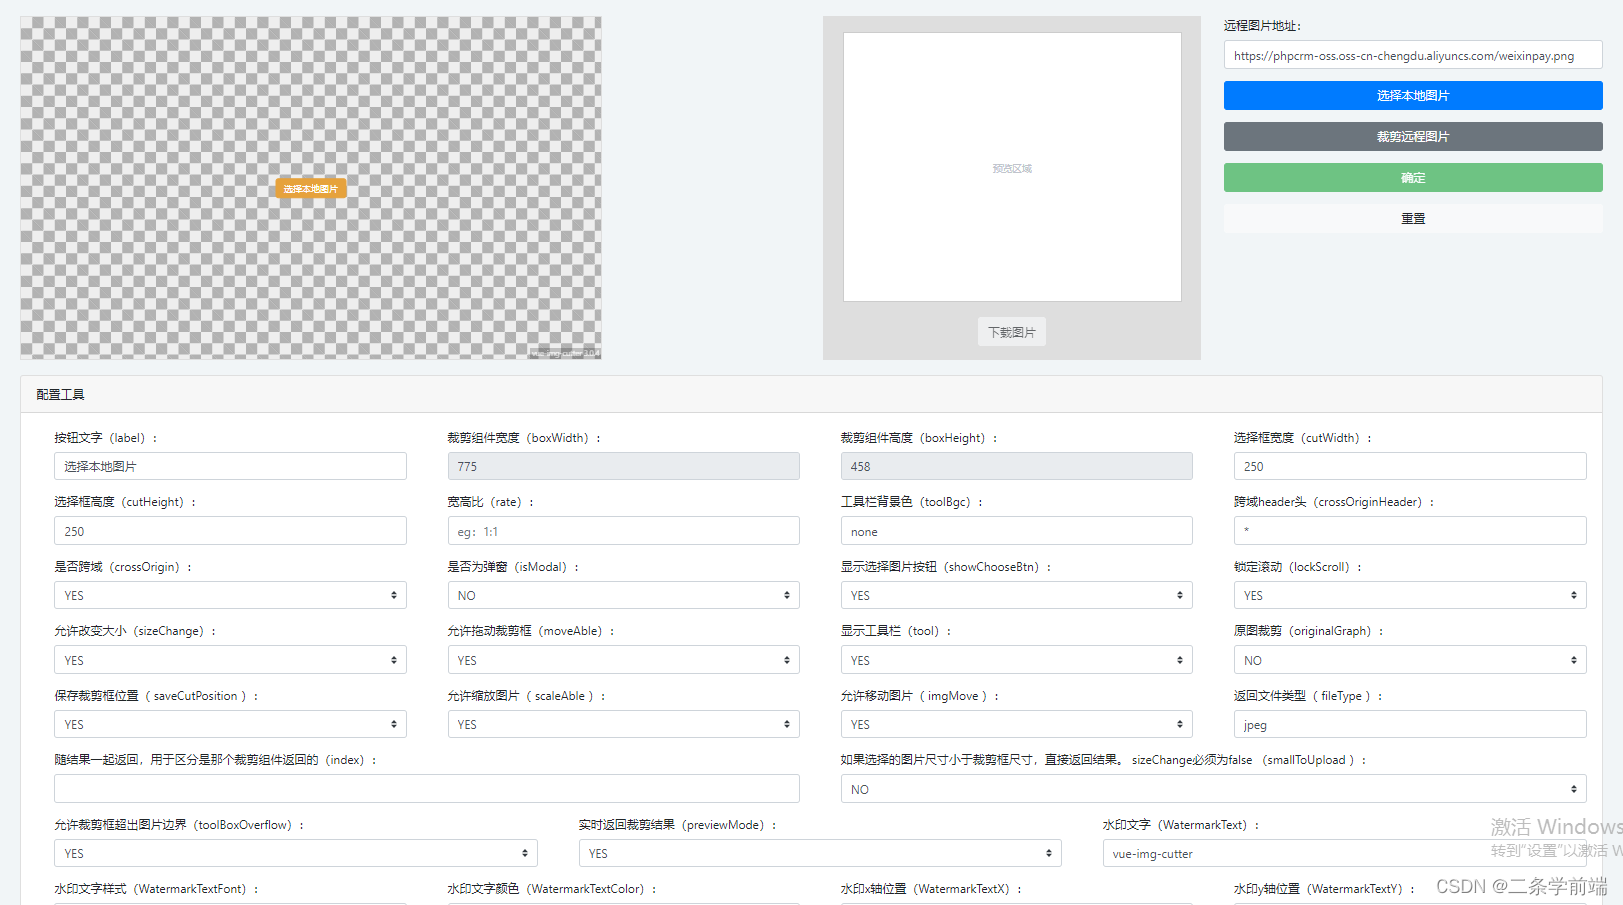
先在官网上选择配置,生成案例代码,然后扒拉下来,进行修改(官网:vue-img-cutter),官网上就是从开始上传图片开始的,如果需要官网的效果直接复制官网的代码修改即可。

3.接下来是根据我自己的需求修改的代码:
<template>
    <div>
      <div style="display: flex; flex-direction: row">
        <ImgCutter
          ref="imgCutterModal"
          v-on:cutDown="cutDownImg"
          :WatermarkText="''"
          :is-modal="false"
          :tool="false"
          :sizeChange="false"
          :boxWidth="700"
          :boxHeight="458"
          :cutWidth="470"
          :cutHeight="270"
          @onPrintImg="cutterPrintImg"
          :originalGraph="true"
          style="padding: 10px"
        >
          <template #cancel>
            <div></div>
          </template>
        </ImgCutter>
        <div style="margin-left: 10px; padding: 10px">
          <div
            style="
              margin-left: 10px;
              padding-bottom: 20px;
              font-size: 18px;
              font-weight: bold;
            "
          >
            图像预览
          </div>
          <div style="width: 470px;height: 270px; border: 1px solid #e8e8e8; background-color: rgba(0, 0, 0, 0.1)">
            <img :src="temImgPath" style="width: 100%" />
          </div>
        </div>
      </div>
    </div>
  </template>
<script setup>
import ImgCutter from "vue-img-cutter";//引入vue-img-cutter
import { ref, watch, onMounted} from "vue";
const emit = defineEmits(["getCoverImage"]);//与父组件事件通信
const props = defineProps({
imgUrl: String,
});
const temImgPath = ref("");
const imgCutterModal=ref();
watch(
() => props.imgUrl,
(val, o) => {
temImgPath.value = props.imgUrl;
imgCutterModal.value.handleOpen({
name:"封面图片",
src:props.imgUrl
});
}
);
//实时更新预览效果
function cutterPrintImg(obj) {
temImgPath.value = obj.dataURL;
}
// 图片裁剪点击确认后触发
function cutDownImg(option) {
//向后端发送请求等
//请求成功时,emit("getCoverImage"),让父组件再次获取刚修改的新图片
}
</script><style lang="less" scoped>
.remove-btn-wrap {
position: absolute;
left: 0;
bottom: 0;
right: 0;
top: 0;
text-align: center;
display: none;
align-items: center;
justify-content: center;
background: rgba(0, 0, 0, 0.5);
}
.ant-upload:hover .remove-btn-wrap {
display: flex;
}
:deep(.ant-upload) {
img {
width: 100%;
height: 100%;
object-fit: cover;
border-radius: 2px;
}
}
:deep(.copyright a[data-v-391393b9]){
display: none !important;
}
</style>父组件:也就是你想要用到图片剪裁的组件
<template>
<CutterImg :imgUrl="imgData.propsURL" @getCoverImage="getCoverImage"></CutterImg>
</template>

<script setup>
import CutterImg from "@/components/CutterImg.vue";

//获取封面图片
const getCoverImage = () => {
  //发送请求
}
</script>
imgData.propsURL是来自于后端请求获取到的目前页面显示的图片地址。请自行替换。
4.修改之后的效果如下:
4.1页面显示当前的图片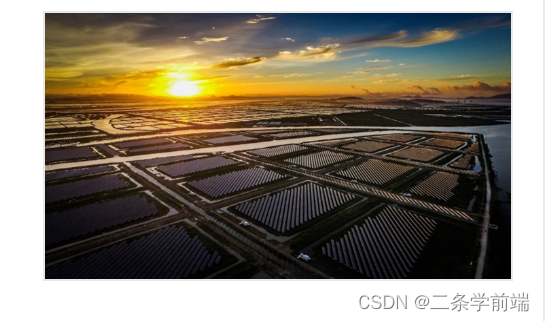
4.2点击图片出现弹窗,以上代码没有加弹窗的代码是因为每个人使用的UI组件库不同,如果需要自己添加弹窗的代码即可。
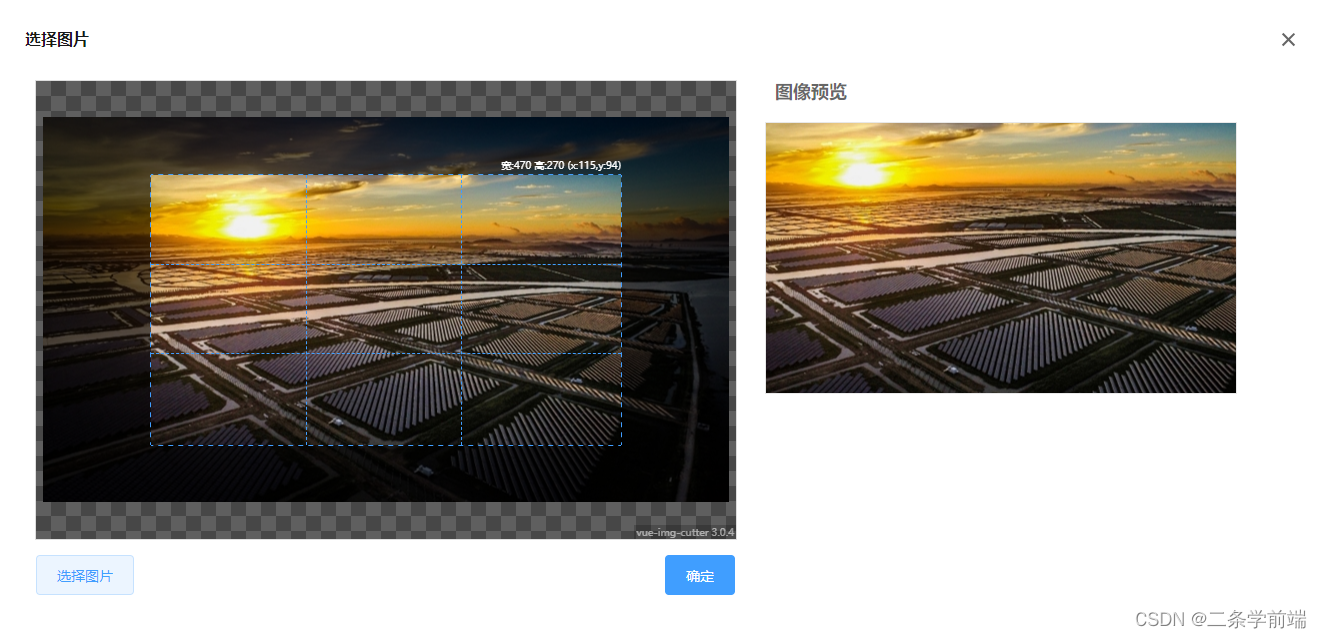
4.3可以看到裁剪区域显示的是当前图片,图像预览区域显示的是当前图片剪裁后的效果。
4.4图片剪裁区域可以鼠标放大缩小和拖动剪裁框,右侧的图像预览区域会实时变化。
4.5可以点击【选择图片】按钮,上传其他的图片。最后点击确定将图片信息传递给后端。


 2990
2990


 被折叠的 条评论
为什么被折叠?
被折叠的 条评论
为什么被折叠?
 到【灌水乐园】发言


